There’s a specific kind of frustration that comes from spending twenty minutes dialing in the tone of a photo, getting the shadows exactly right, nailing the contrast, and then realizing you also need to reset just the clarity and texture sliders because you went a little heavy-handed. The Reset button in Lightroom wipes everything. You’re starting over. For a long time, I was clicking through my History panel like it was a time machine, trying to claw back a specific moment in the edit. Turns out I was doing it the hard way.
In this Matt Kloskowski tutorial, he walks through a handful of Alt/Option key behaviors inside Lightroom that most people never discover because nothing on the interface tells you they exist. These aren’t buried menu options. They’re modifier key tricks that change what sliders, buttons, and panels actually do when you hold the key down. I watched it once, immediately opened Lightroom, and used three of these within the first ten minutes. Watch the full tutorial on YouTube if you want to see Matt demonstrate these in real time. Otherwise, here’s how to use every technique he covers.
Quick note for anyone who gets confused by the naming: Alt on a PC and Option on a Mac are the same key functionally. Everything below works identically on both systems.
Step 1: Reset Only the Panel Section You Actually Want to Reset
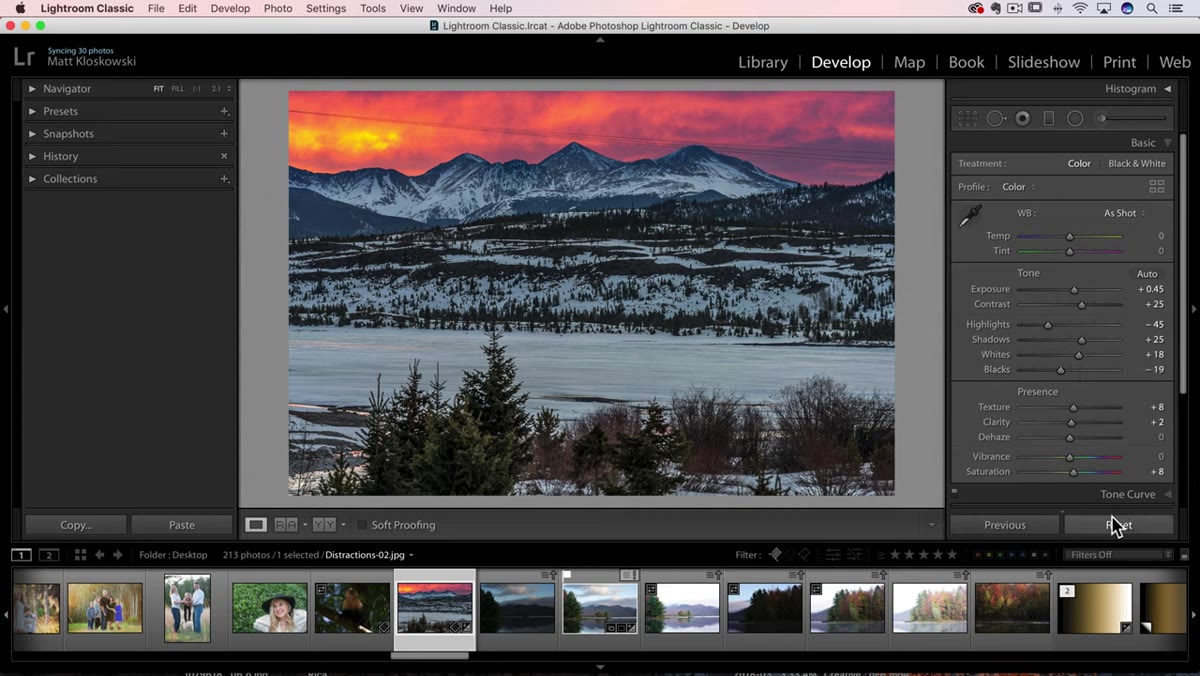 Basic panel with Alt key held, showing section-specific reset labels
When you hold down Alt/Option and hover over the Reset button in the Develop module’s Basic panel, the interface changes. Instead of a single Reset button that clears everything, the label updates to show you what section you can reset based on where your cursor is. You can reset only the Tone section, or only the Presence section (which includes Texture, Clarity, and Dehaze), without touching anything else. Click while holding the modifier key and only that section snaps back to zero. Your highlights, shadows, and exposure stay exactly where you put them.
Basic panel with Alt key held, showing section-specific reset labels
When you hold down Alt/Option and hover over the Reset button in the Develop module’s Basic panel, the interface changes. Instead of a single Reset button that clears everything, the label updates to show you what section you can reset based on where your cursor is. You can reset only the Tone section, or only the Presence section (which includes Texture, Clarity, and Dehaze), without touching anything else. Click while holding the modifier key and only that section snaps back to zero. Your highlights, shadows, and exposure stay exactly where you put them.
This one alone is worth memorizing. I probably would have saved hours across the past year if I had known this existed.
Step 2: See Exactly Where Your Whites and Blacks Are Clipping
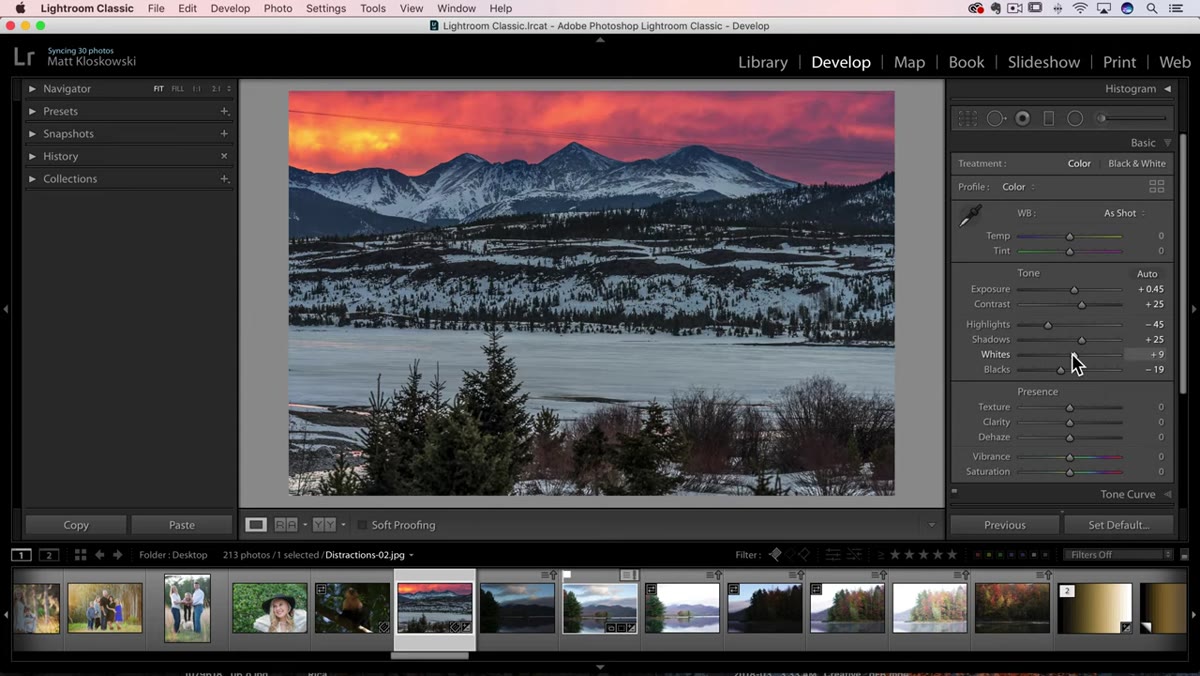 Whites slider dragged with Alt held, showing black canvas with white clipping areas
Hold down Alt/Option while dragging the Whites slider and the preview canvas goes entirely black. As you push the slider to the right, bright colors start appearing against that black background. Those colors show you what’s clipping and in which channel. Pure white means all three channels are blown out. A single color, like red or blue, means only that channel is clipping. The goal for most edits is to pull the Whites slider back until the canvas is almost entirely black, with just a tiny amount of specular highlight peeking through if you want it.
Whites slider dragged with Alt held, showing black canvas with white clipping areas
Hold down Alt/Option while dragging the Whites slider and the preview canvas goes entirely black. As you push the slider to the right, bright colors start appearing against that black background. Those colors show you what’s clipping and in which channel. Pure white means all three channels are blown out. A single color, like red or blue, means only that channel is clipping. The goal for most edits is to pull the Whites slider back until the canvas is almost entirely black, with just a tiny amount of specular highlight peeking through if you want it.
The same behavior works in reverse on the Blacks slider. Hold Alt/Option and the canvas goes white. As you drag left, dark patches appear showing you where you’re crushing the shadows. This also works on the Exposure slider and on Dehaze. It does not work on Contrast, but given how blunt that slider already is, that’s probably fine.
Step 3: Use the Black-and-White Sharpening Preview in the Detail Panel
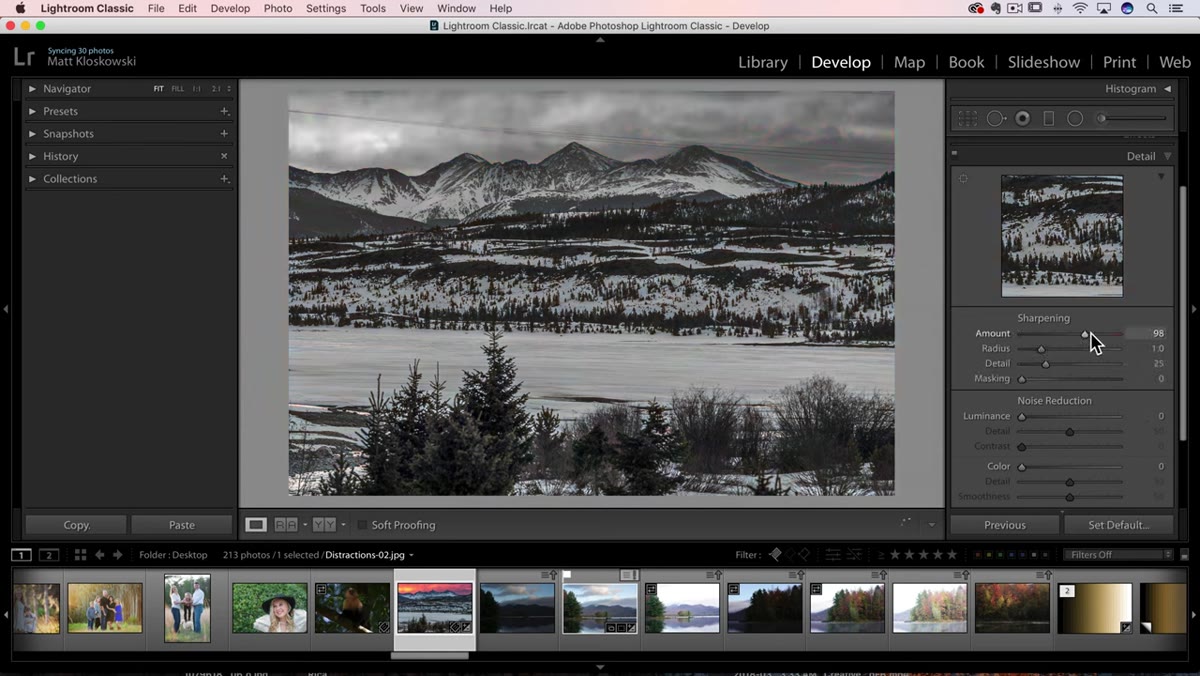 Detail panel open, Masking slider being dragged with Alt held, black and white mask visible
Jump into the Detail panel and hold Alt/Option while dragging any of the sharpening sliders. Lightroom switches the preview to a grayscale view so you can evaluate the sharpening effect completely separate from the color information in the image. This is genuinely useful for the Radius and Detail sliders because you can see how the edge rendering changes without the color distracting your eye.
Detail panel open, Masking slider being dragged with Alt held, black and white mask visible
Jump into the Detail panel and hold Alt/Option while dragging any of the sharpening sliders. Lightroom switches the preview to a grayscale view so you can evaluate the sharpening effect completely separate from the color information in the image. This is genuinely useful for the Radius and Detail sliders because you can see how the edge rendering changes without the color distracting your eye.
The most powerful use of this is the Masking slider. Without the modifier key, Masking is basically a blind adjustment. You move it right and hope it’s doing the right thing. Hold Alt/Option and drag it, and you get a black-and-white mask overlay where white areas are receiving sharpening and black areas are not. Smooth surfaces like skin or sky go black quickly as you increase masking, meaning sharpening is being hidden from those areas. Edges, hair, and texture stay white. You can precisely control where sharpening lands instead of just guessing.
Step 4: Preview Split Toning Hues at Full Saturation Temporarily
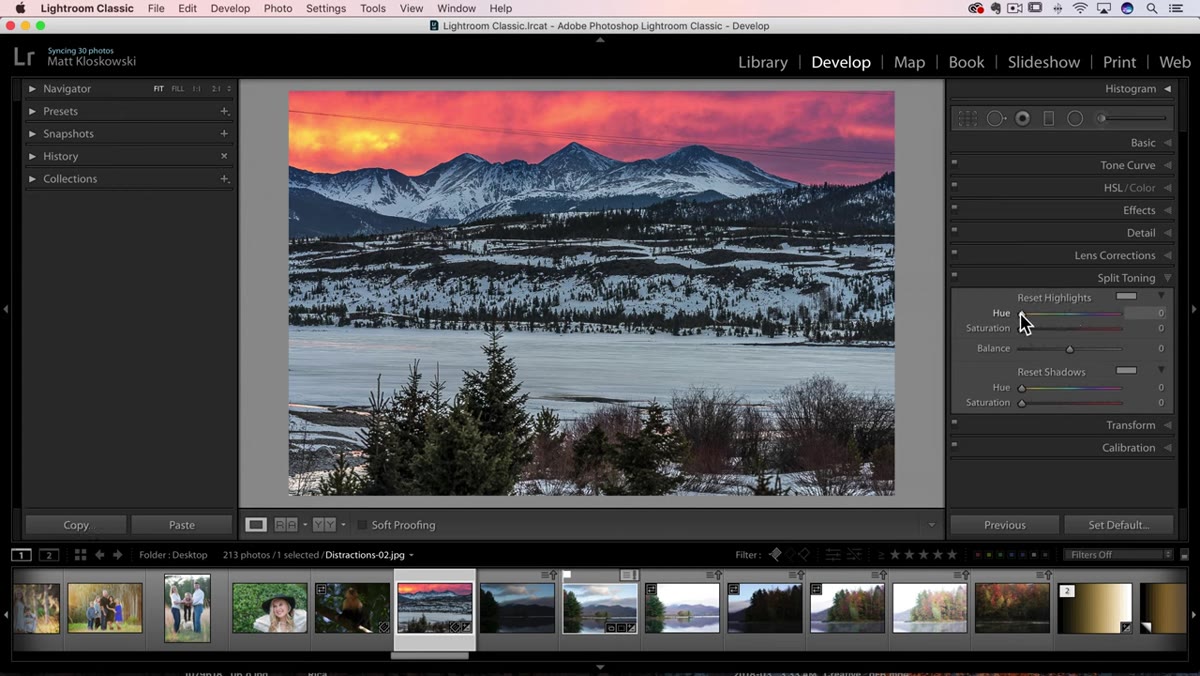 Split Toning panel with Hue slider being dragged, Alt key held showing vivid color tones
Split toning (called Color Grading in newer versions of Lightroom) has always had a usability problem. If your Saturation slider is sitting at zero, dragging the Hue slider does literally nothing visible. So most people crank the Saturation up to see the color, pick a hue, then bring the Saturation back down to something subtle. That’s three steps when it should be one.
Split Toning panel with Hue slider being dragged, Alt key held showing vivid color tones
Split toning (called Color Grading in newer versions of Lightroom) has always had a usability problem. If your Saturation slider is sitting at zero, dragging the Hue slider does literally nothing visible. So most people crank the Saturation up to see the color, pick a hue, then bring the Saturation back down to something subtle. That’s three steps when it should be one.
Hold Alt/Option and drag the Hue slider directly. Lightroom temporarily maxes out the Saturation so you can see the full color shift across the entire spectrum as you drag. Pick the hue that looks right for your image, release the mouse, and the saturation returns to whatever it was. Then you adjust Saturation incrementally from there. For most color grades you’re going to land somewhere between 10 and 30 on Saturation anyway. Starting from a visually accurate preview of the hue makes that final saturation decision much more intentional.
My Own Addition: Combine These With Auto Settings for a Faster Starting Point
I’ve started using the section-specific reset trick in combination with Lightroom’s Auto button in the Tone section. I’ll let Auto take a first pass at exposure, highlights, and shadows, then manually adjust anything that looks off, and then use Alt/Option + Reset to wipe just the Presence section clean if Auto did something weird to the Clarity or Dehaze. It creates a faster edit loop, especially when I’m moving through a large set of similar shots.
The clipping preview on Whites and Blacks also changed how I calibrate my presets. Most of mine are named after songs because of a habit I developed early on, and every time I update one I now run the Alt/Option clipping check before saving. It caught a clipping issue in a preset I’d been using for almost two years that I had never noticed at normal zoom levels. Small detail, genuinely embarrassing, now fixed.
The single biggest takeaway here is that Lightroom has a layer of functionality sitting right underneath the surface that the interface never telegraphs. Alt/Option is the unlock key for a more precise, more visual editing experience, and most of it has been there the whole time. The sharpening mask preview alone will change how you approach the Detail panel permanently.
Watch the full tutorial on YouTube to see Matt walk through each of these with live examples. His demos make the visual feedback on things like the clipping preview much easier to internalize than reading about it.
Comments (3)
Shared this with my photography group. Everyone loved it.
Been doing this wrong for years apparently. Thanks for the wake-up call.
This is the kind of content that keeps me coming back.
Leave a Comment