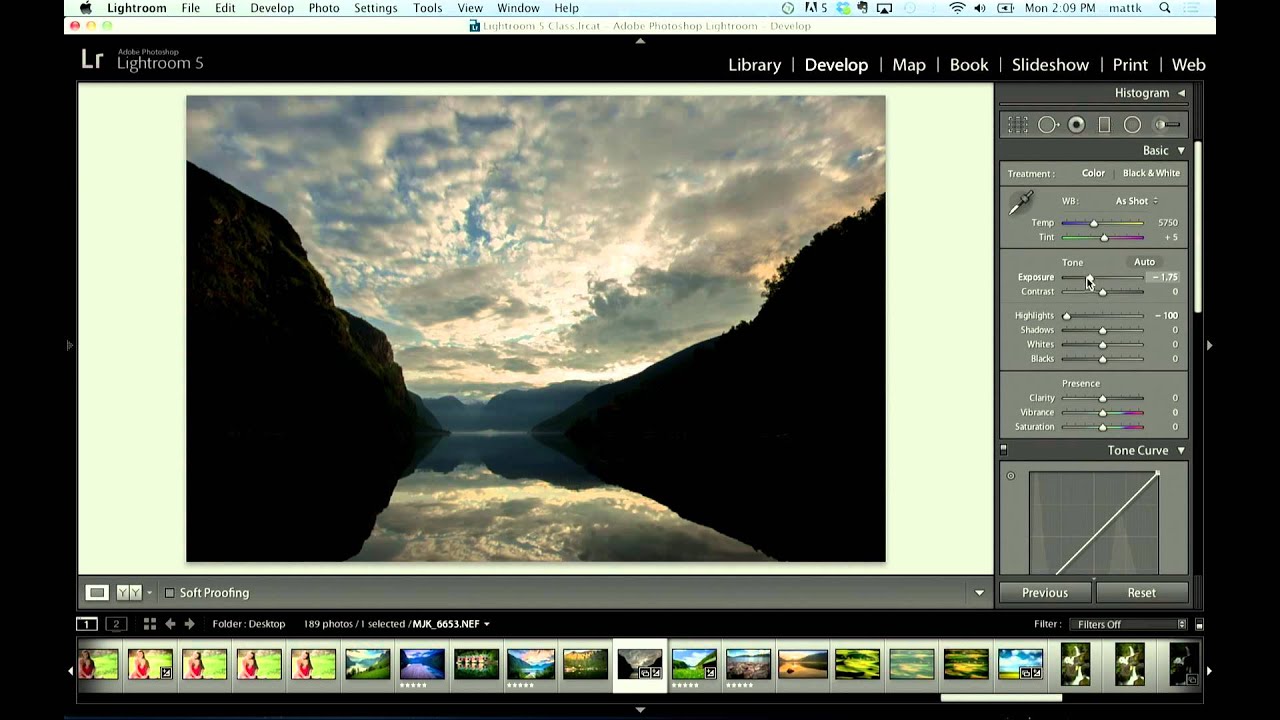
Every few months I get a version of the same message: “What happened to the Fill Light slider?” Usually it comes from someone who learned Lightroom years ago, took a break, came back, and found the panel rearranged like someone moved the furniture while they were away. I’ve sent the same explanation so many times I practically have it memorized. So when I came across this KelbyOne tutorial from Matt Kloskowski covering exactly this topic, I felt both seen and a little relieved that someone had put it on camera so I could stop typing it out. Watch the full tutorial on YouTube
The short answer is that Fill Light got replaced by the Shadows slider back in Lightroom 4. The longer answer – and the more useful one – is that the old slider isn’t actually gone. It’s just buried one level deeper than most people ever dig. Kloskowski walks through exactly how to surface it, and the difference in behavior is dramatic enough that if you’ve been frustrated by how “gentle” the modern Shadows slider feels, this will genuinely change your workflow.
Here’s the full walkthrough, step by step.
Step 1: Understand Why the Shadows Slider Feels Different
 Shadow slider at full blast showing limited shadow recovery
Before you change anything, it helps to know what you’re actually dealing with. The Shadows slider in Lightroom 4 and later was designed with restraint built in. Adobe made it gentler on purpose, because the old Fill Light slider had a tendency to make images look blown out and plasticky if you pushed it too hard. That’s not a bug in the current version – it’s a deliberate ceiling. The problem is, that ceiling is lower than a lot of photographers want it to be, especially if you’re shooting in darker environments or you want that gritty, pushed-shadow look.
Shadow slider at full blast showing limited shadow recovery
Before you change anything, it helps to know what you’re actually dealing with. The Shadows slider in Lightroom 4 and later was designed with restraint built in. Adobe made it gentler on purpose, because the old Fill Light slider had a tendency to make images look blown out and plasticky if you pushed it too hard. That’s not a bug in the current version – it’s a deliberate ceiling. The problem is, that ceiling is lower than a lot of photographers want it to be, especially if you’re shooting in darker environments or you want that gritty, pushed-shadow look.
Start by pulling your Exposure down to around minus two stops on a test image so you can see the slider’s actual range. Then drag Shadows all the way to 100. Take note of how much detail you recover in the darkest areas. That’s your baseline for comparison.
Step 2: Locate the Camera Calibration Panel
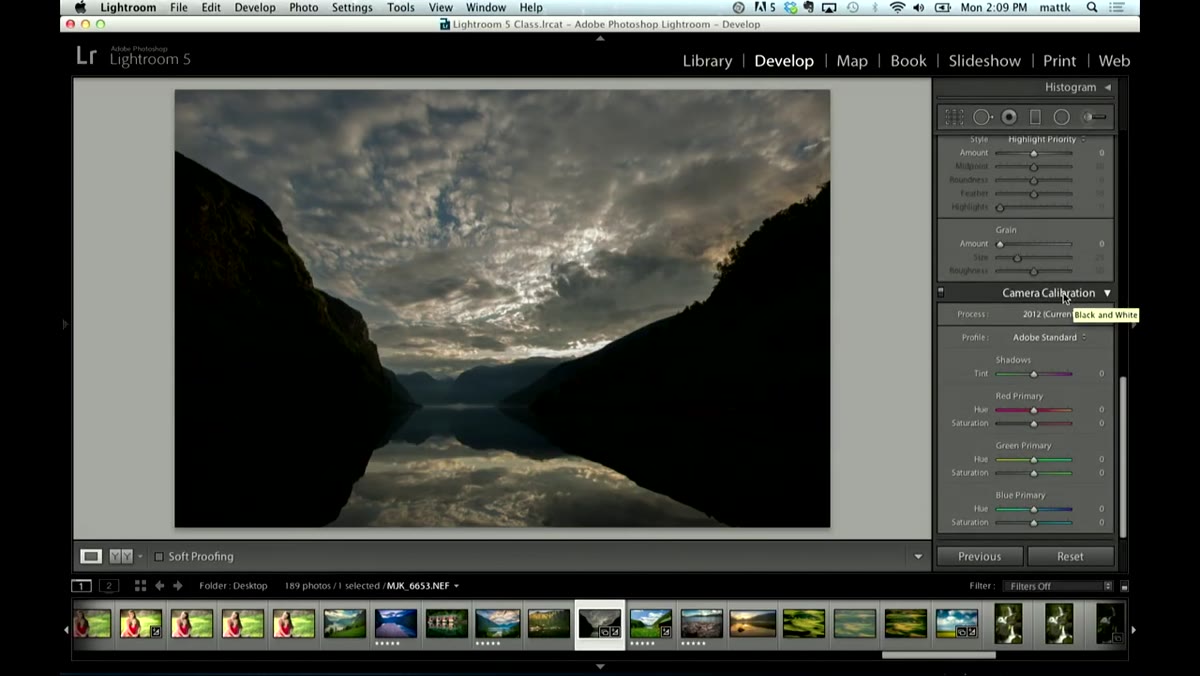 Camera Calibration panel open showing Process dropdown
This is the step most people miss entirely, because the Camera Calibration panel sits at the very bottom of the Develop module’s right-hand panel stack. If you’ve never had a reason to go down there, it’s easy to forget it exists. Scroll past Lens Corrections and you’ll find it. Click to expand it.
Camera Calibration panel open showing Process dropdown
This is the step most people miss entirely, because the Camera Calibration panel sits at the very bottom of the Develop module’s right-hand panel stack. If you’ve never had a reason to go down there, it’s easy to forget it exists. Scroll past Lens Corrections and you’ll find it. Click to expand it.
Inside, you’ll see a dropdown labeled “Process.” By default it’s set to the current rendering engine. That’s what controls which version of Lightroom’s math is running under the hood of every slider you touch.
Step 3: Switch the Process Version to 2010
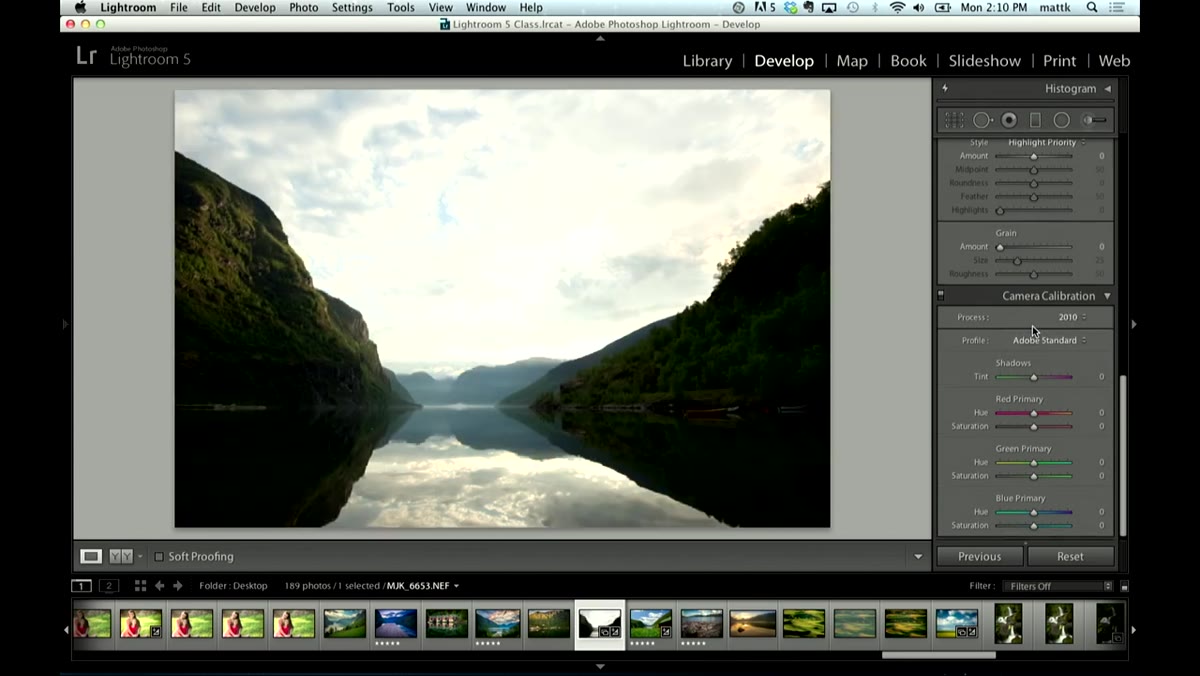 Process dropdown being changed to 2010
Click that Process dropdown and select 2010. This is the key move. What you’re doing is telling Lightroom to use the older processing engine – the same one that powered Lightroom 1, 2, and 3. The moment you make this change, your Basic panel updates. The Shadows slider becomes the Fill Light slider again, with its original behavior and its original ceiling, which is considerably higher.
Process dropdown being changed to 2010
Click that Process dropdown and select 2010. This is the key move. What you’re doing is telling Lightroom to use the older processing engine – the same one that powered Lightroom 1, 2, and 3. The moment you make this change, your Basic panel updates. The Shadows slider becomes the Fill Light slider again, with its original behavior and its original ceiling, which is considerably higher.
This isn’t a destructive change to your image data. You’re just switching which set of rendering instructions Lightroom applies. You can flip back to the current process version anytime, and your original settings will be waiting for you.
Step 4: Push the Fill Light Slider and Compare
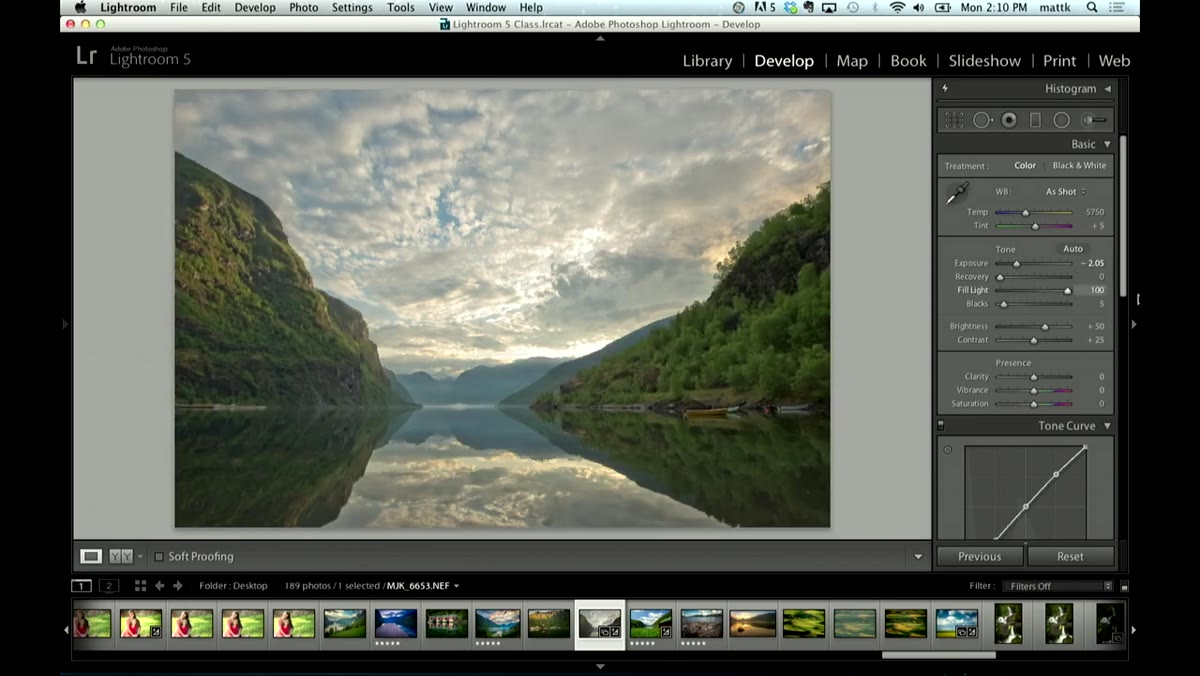 Fill Light slider at maximum showing dramatic shadow recovery
Now do the same test you did in Step 1. Pull Exposure down to minus two stops, then drag Fill Light all the way up. The difference is immediately obvious – you’re pulling detail out of shadows that the modern Shadows slider couldn’t touch. Areas that looked like solid black start showing texture, depth, and color information that was always in the raw file but couldn’t be surfaced with the current engine.
Fill Light slider at maximum showing dramatic shadow recovery
Now do the same test you did in Step 1. Pull Exposure down to minus two stops, then drag Fill Light all the way up. The difference is immediately obvious – you’re pulling detail out of shadows that the modern Shadows slider couldn’t touch. Areas that looked like solid black start showing texture, depth, and color information that was always in the raw file but couldn’t be surfaced with the current engine.
This is why longtime Lightroom users remember Fill Light so fondly. It was heavy-handed, yes, but “heavy-handed” and “useful” can be the same thing depending on what you’re going for.
Step 5: Use Fill Light for Stylized Effects (Fake HDR and Beyond)
 Fill Light combined with Clarity and Blacks for HDR look
Once you’re in 2010 process mode, you also get access to the Recovery slider, which handled highlight control before the Highlights slider existed. Kloskowski points out that Recovery doesn’t work as well as the modern Highlights slider – and I’d agree with that. For highlights, stay on the current process version if you can. But for shadows and creative stylization, 2010 is worth revisiting.
Fill Light combined with Clarity and Blacks for HDR look
Once you’re in 2010 process mode, you also get access to the Recovery slider, which handled highlight control before the Highlights slider existed. Kloskowski points out that Recovery doesn’t work as well as the modern Highlights slider – and I’d agree with that. For highlights, stay on the current process version if you can. But for shadows and creative stylization, 2010 is worth revisiting.
One specific use case Kloskowski mentions is fake HDR. Crank Fill Light, pull the Blacks down, push Clarity, and dial in Recovery. The result is that tone-mapped, hyper-detailed look that was everywhere around 2010 to 2012. It’s not subtle, but for certain genres – landscape, architectural, urban – it can still read as intentional and editorial rather than dated.
What I’d Add From My Own Workflow
The technique Kloskowski demonstrates is real and it works exactly as described. But there’s one thing worth flagging before you start switching process versions on files you actually care about. If you apply the 2010 process to an image that was originally developed in the current version, Lightroom will try to translate your existing slider positions. The translation isn’t always clean. Exposure, Contrast, and Tone Curve settings can shift in ways that require re-dialing.
My recommendation: use this on fresh imports or on a duplicate virtual copy. In Lightroom, right-click any image, go to Create Virtual Copy, and then change the process version on the copy. That way you can compare the two interpretations side by side without touching your original edit. I’ve used this approach to create “atmospheric shadow” versions of portrait and concert shots where the primary export is clean and the alternate has that pushed, moody Fill Light treatment. Clients occasionally want both.
The single most important thing to take away from this tutorial is that Lightroom’s process version setting isn’t just a technical footnote – it’s a creative tool. Switching to 2010 mode doesn’t mean using worse software. It means choosing a different set of trade-offs, ones that happen to suit certain images and styles better than what the current engine offers. Kloskowski makes that distinction clearly, and it’s the kind of contextual knowledge that separates people who use Lightroom from people who understand it.
If you want to see the before and after comparison in motion, Watch the full tutorial on YouTube – the visual difference when he switches process versions is the kind of thing that’s easier to see than to describe.
Comments
Leave a Comment