Every photographer I know has felt that gut-punch moment. You nail a shot in the field, the preview on the back of your camera looks incredible, and then you open the RAW file in Lightroom and it looks like it was taken through a dirty window. Flat. Lifeless. The colors you were so excited about have gone somewhere and they didn’t leave a note.
For a long time I assumed this was just the tax you paid for shooting RAW. You’d get that detail and dynamic range, but you’d have to earn the color back one slider at a time. Turns out there’s a faster path, and it lives in a panel most people scroll right past. In this KelbyOne tutorial, photographer and educator Scott Kelby walks through a quick but genuinely useful setting inside the Camera Calibration panel that can bring your RAW files much closer to what you saw in-camera, before you touch a single Tone Curve or HSL slider. Watch the full tutorial on YouTube
The fix is elegant in the way the best Lightroom tricks are. It doesn’t require a complicated preset stack or any third-party plugins. It just requires knowing where to look.
Step 1: Understand Why Your RAW File Looks Flat
 Lightroom showing a flat, muted RAW file on import
When you shoot RAW, your camera is capturing pure sensor data. The vibrant, punchy preview you see on your camera’s LCD is actually a small JPEG the camera generates on the fly, and it has your chosen Picture Style or Picture Control baked right into it. Things like “Vivid,” “Landscape,” or “Portrait” picture modes all add contrast and saturation that look great in that tiny preview. But Lightroom doesn’t read those in-camera settings. It opens the RAW file at a neutral baseline and waits for you to do the work. That’s why there’s a gap between expectation and reality every single time you import.
Understanding this gap is the first step, because it reframes the problem. Your photo isn’t broken. Lightroom is just showing you the unvarnished truth of your sensor data. The good news is you can tell Lightroom to simulate those in-camera looks pretty easily.
Step 2: Navigate to the Camera Calibration Panel
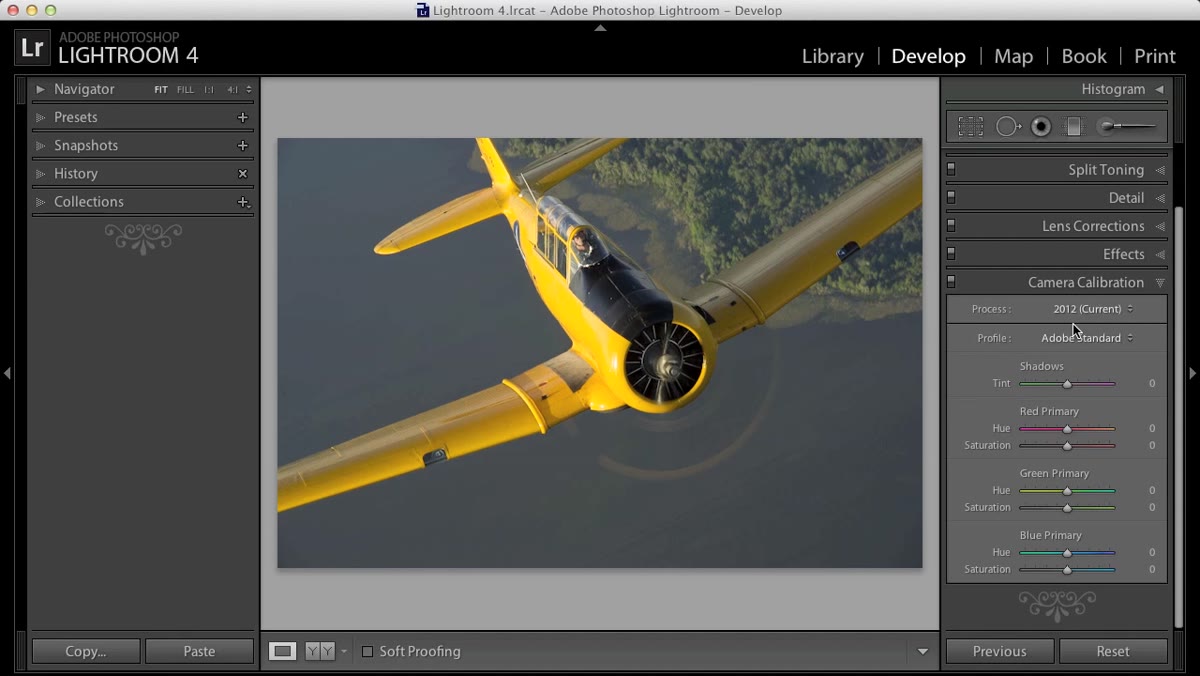 Camera Calibration panel open in Lightroom’s Develop module
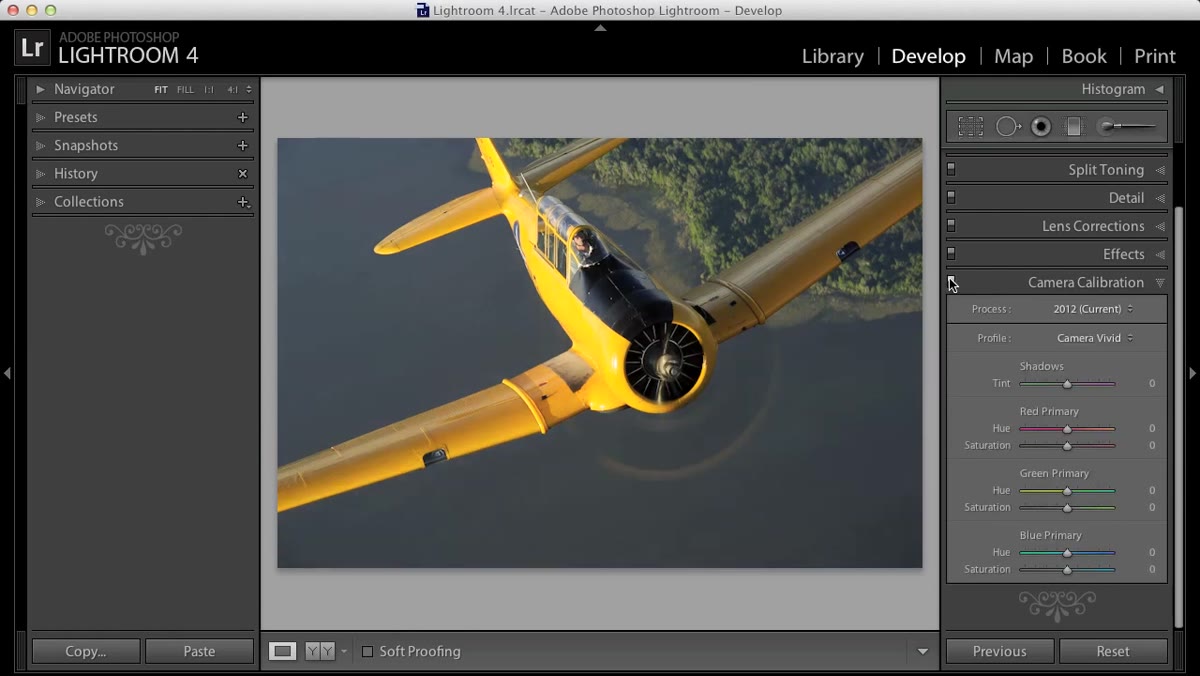
In Lightroom’s Develop module, scroll all the way to the bottom of the right-hand panel stack. Below Lens Corrections and Transform, you’ll find Camera Calibration. It’s the panel that most tutorials skip entirely, which is a shame because the top section alone is worth knowing about. Open it up and look for the “Profile” dropdown at the top of the panel.
One important note before you go further: this only works on RAW files. If you’ve imported a JPEG, the Profile dropdown will simply say “Embedded” and you won’t be able to change it. This is a RAW-only tool, which is a solid reason to shoot RAW if you needed another one.
Step 3: Explore the Camera Profile Options
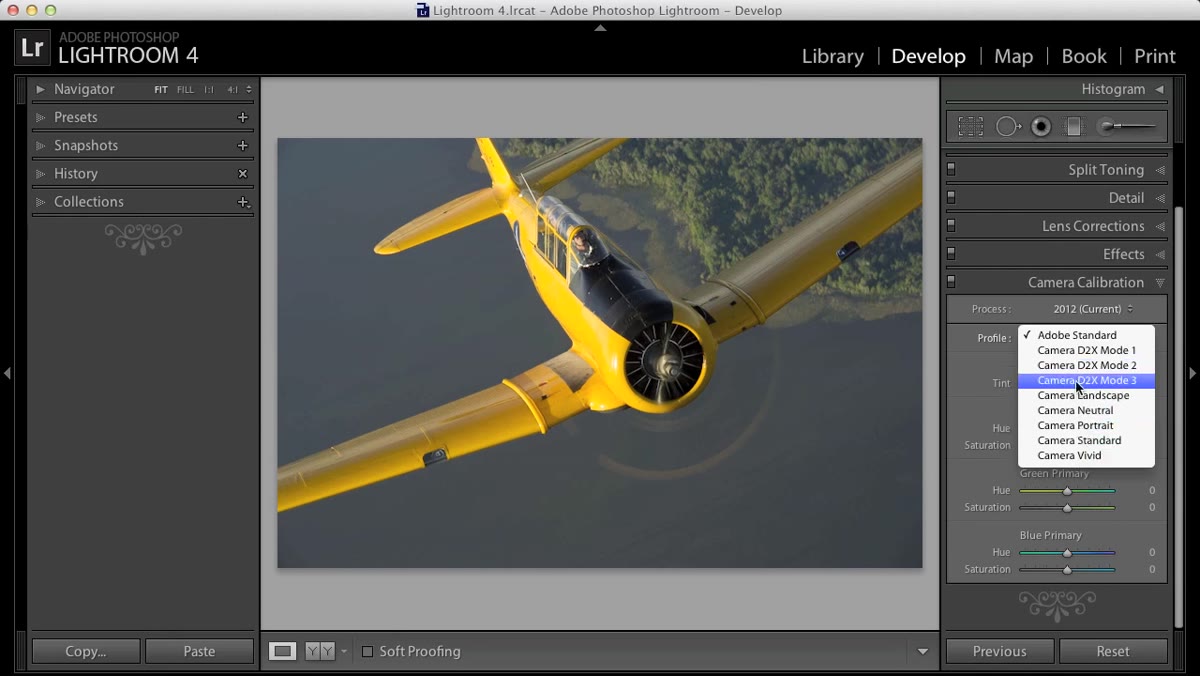 Profile dropdown open showing Camera Vivid, Camera Landscape, and other options
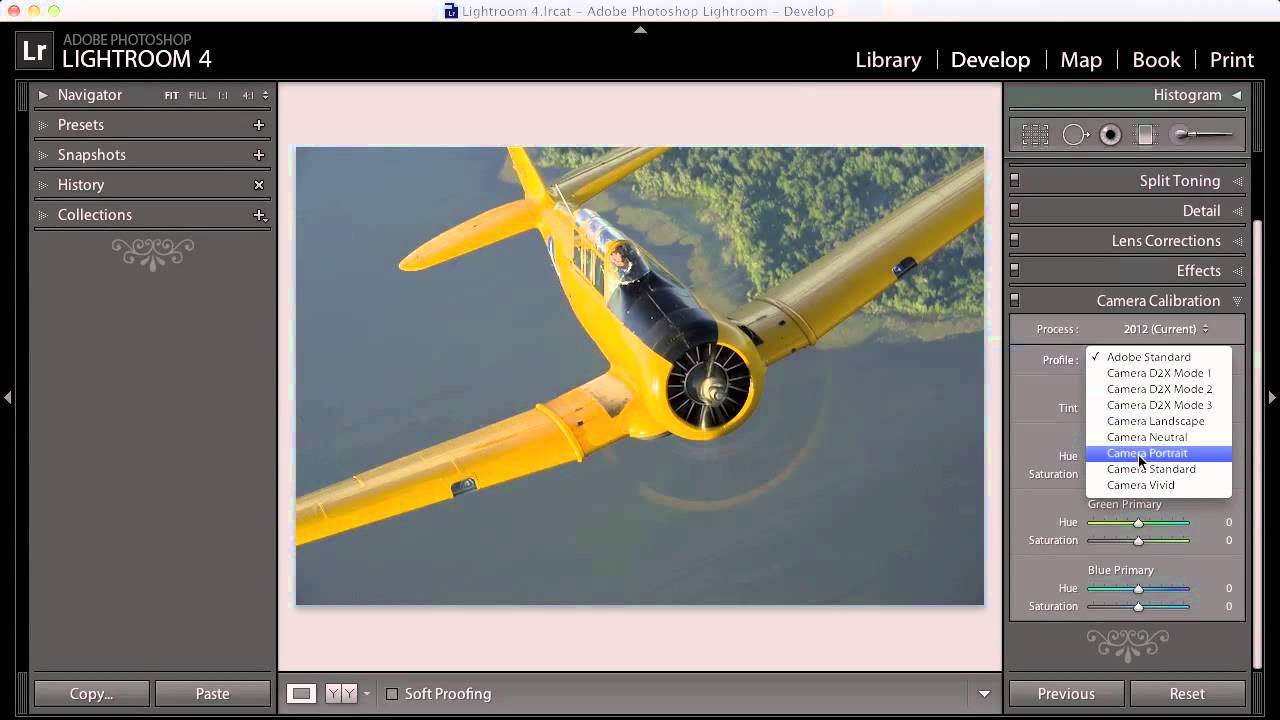
Click the Profile dropdown and you’ll see a list of options that mirror the Picture Styles or Picture Controls available in your camera. The exact names will vary depending on your camera brand, but you’ll typically see things like Camera Standard, Camera Vivid, Camera Landscape, Camera Portrait, and Camera Neutral. These are Lightroom’s simulations of your camera manufacturer’s built-in profiles.
Try a few. Click Camera Vivid and watch what happens to your image. The greens get richer, the saturation comes up, the contrast tightens. It’s not a dramatic transformation but it’s immediate and real. Camera Landscape will push things in a slightly different direction, emphasizing certain tones for outdoor scenes. The key insight here is that none of these profiles are “wrong.” They’re different starting points, and the right one depends on your subject and your taste.
Step 4: Do a Before/After Comparison
 Before/after view showing flat image versus Camera Vivid applied
Once you’ve selected a profile, do a quick before/after check. In Lightroom, you can tap the backslash key to toggle between your edited state and the original. If you’ve only changed the profile and nothing else, this gives you a clean, honest comparison. You’re not looking for a finished edit here. You’re just asking one question: does this starting point feel closer to what I saw when I took the shot?
The profiles won’t fix a bad exposure and they won’t save a photo that needs serious tonal work. What they do is get you to a better baseline so that when you do start pulling sliders, you’re refining rather than rebuilding from scratch. That shift in the workflow feels small but it saves real time across a full editing session.
Step 5: Set Your Preferred Profile as the Default for That Camera
 Set Default button highlighted after holding Option/Alt key
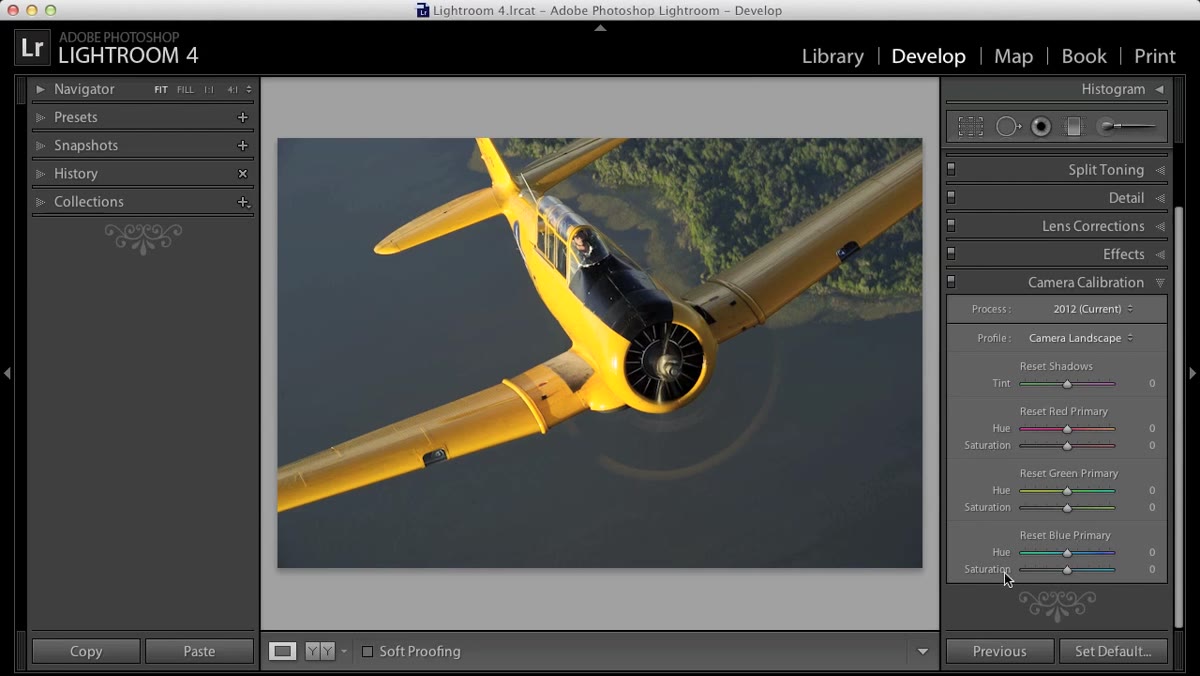
Here’s where the tutorial gets genuinely useful for anyone who shoots with a consistent style. If you find a profile you like, say Camera Landscape for your outdoor work, you can tell Lightroom to apply it automatically every time you import a photo taken with that specific camera body.
First, hit the Reset button at the bottom of the Develop module to make sure you’re starting clean. Then change only the Profile setting to your preferred option. Next, hold Option on a Mac or Alt on a PC and look at the Reset button. It will change to read “Set Default.” Click it. Lightroom will confirm that it’s updating the default settings for photos taken with that camera. From that point on, every new import from that body will start with your chosen profile already applied. It’s a small automation that compounds nicely over time.
A Note From My Own Workflow
I’d add one thing Kelby doesn’t cover in this particular video, and it’s something I stumbled onto while editing a live music shoot in a rush. Camera profiles pair really well with a subtle Tone Curve adjustment as a combined preset. I have one I made called “Open Chord” that applies Camera Vivid plus a gentle S-curve and a slight warm lift in the shadows. It’s not a finished look, it’s a smarter starting point. If you’re going to set camera-specific defaults anyway, consider building a simple preset that handles the profile change alongside one or two other baseline moves you make on almost every photo. Stack the automation where you can.
The other thing worth knowing is that these profiles will look slightly different depending on your camera brand. Canon shooters and Nikon shooters will see different profile names and the simulations won’t be identical. Test them on your own gear and trust your eyes over any default recommendation, including mine.
The single most useful thing this tutorial surfaces is that Lightroom’s flat RAW import isn’t a failure of your camera or your eye. It’s a gap between what your camera’s JPEG engine does automatically and what Lightroom does by default. Closing that gap with a camera profile takes about five seconds and costs nothing. If you’re not already using this panel, it’s worth adding to your standard import routine starting today.
Watch the full tutorial on YouTube to see Scott Kelby walk through the before/after comparison live. Watching the color shift happen in real time is genuinely satisfying.
Comments
Leave a Comment