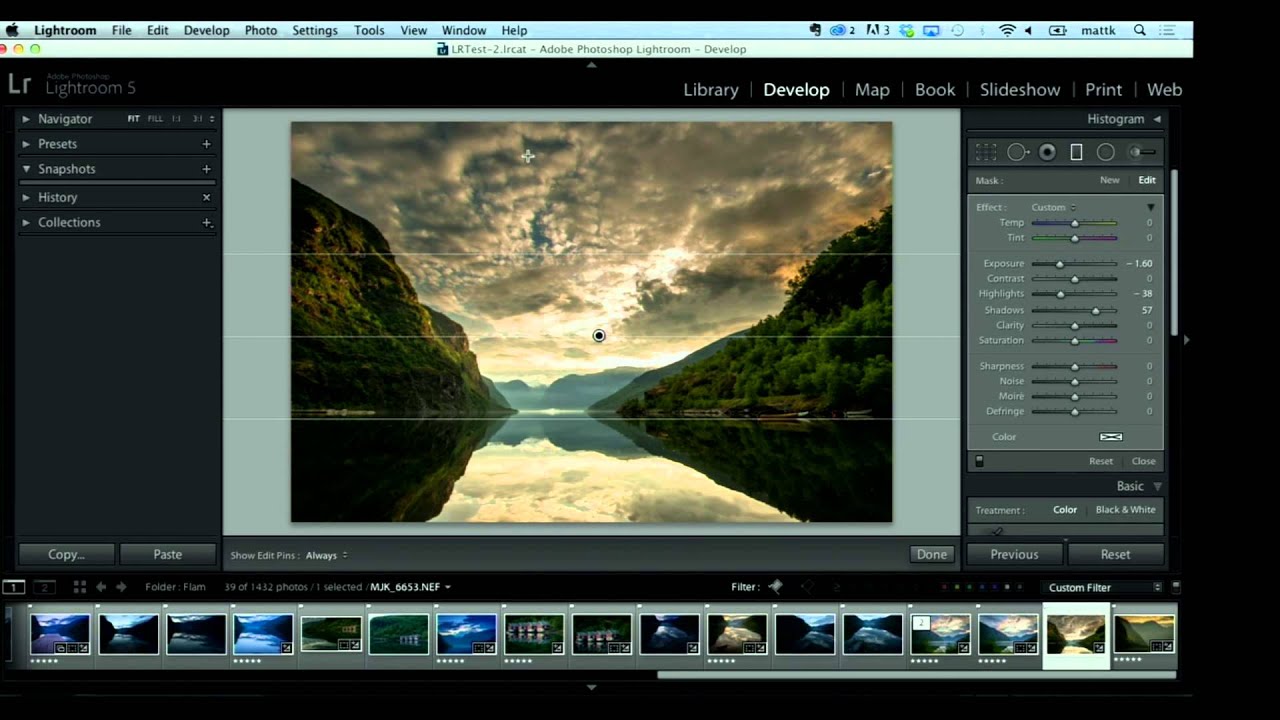
Every landscape photographer I’ve ever talked to hits the same wall. You nail the sky. The clouds have texture, the light has drama, the whole thing looks like a National Geographic cover. Then you look at the foreground and it’s a muddy underexposed mess. Or you expose for the foreground and the sky blows out into a featureless white blob. It’s the fundamental tension of shooting outdoors with a single frame, and no amount of “get it right in camera” advice fully solves it.
That’s exactly the problem at the center of this KelbyOne tutorial with Matt Kloskowski, and it’s worth your time even if you’ve been editing landscapes for years. Watch the full tutorial on YouTube – but I’ve broken down the core technique here so you can follow along step by step in either Lightroom’s Develop module or Photoshop’s Camera Raw. The panels are identical between the two, so the instructions apply either way.
What I appreciate about Matt’s approach is that he doesn’t treat these edits as a checklist. He explains why he’s reaching for each slider, which is the difference between a tutorial you remember and one you forget by tomorrow morning.
Step 1: Set the Temperature for the Mood, Not Just Accuracy
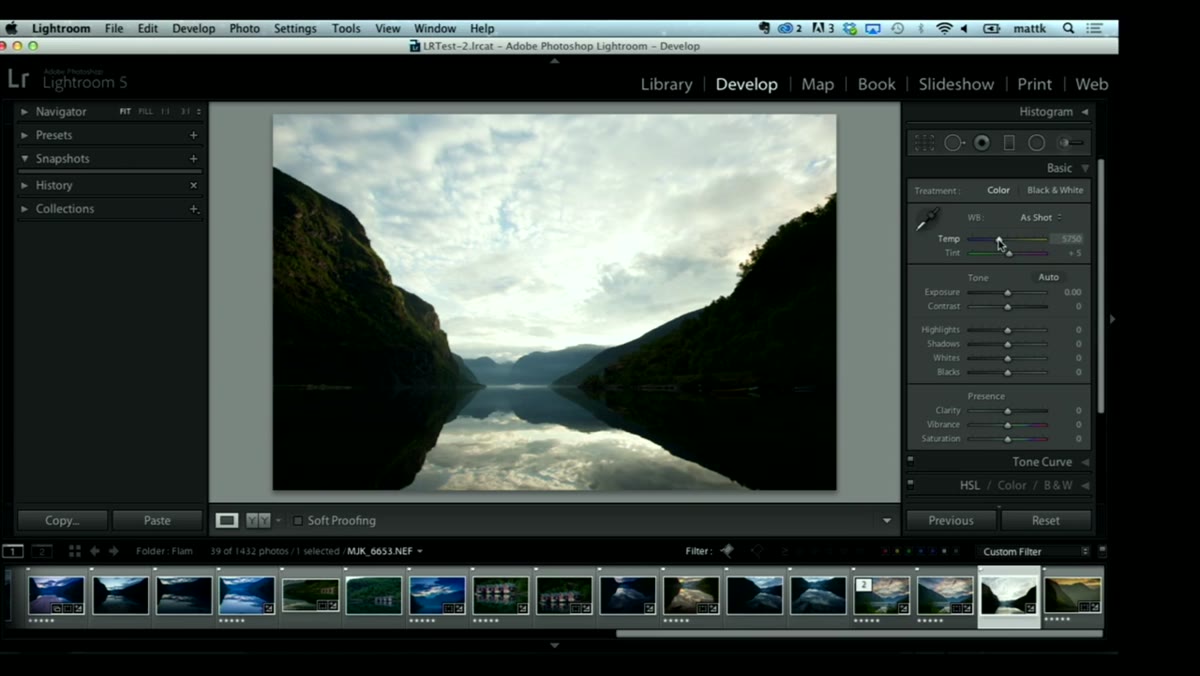 White balance temperature slider being dragged right in Basic panel
Before touching exposure, Matt goes straight to the Temperature slider in the Basic panel and pulls it slightly to the right toward warmer tones. This isn’t about correcting a color cast – it’s a creative choice. Landscape photos shot in morning or golden hour light already carry warmth, and nudging the temperature reinforces that feeling instead of neutralizing it.
Don’t overthink the value here. Even a small move – say, pushing from a neutral 5500K up toward 6000-6500K – can shift a photo from feeling clinical to feeling alive. If you’re working with a midday shot that lacks golden light, this trick can fake a little of that warmth back in. Try it before you do anything else, because temperature affects how you perceive every other adjustment you make afterward.
Step 2: Pull Down Exposure to Recover the Sky
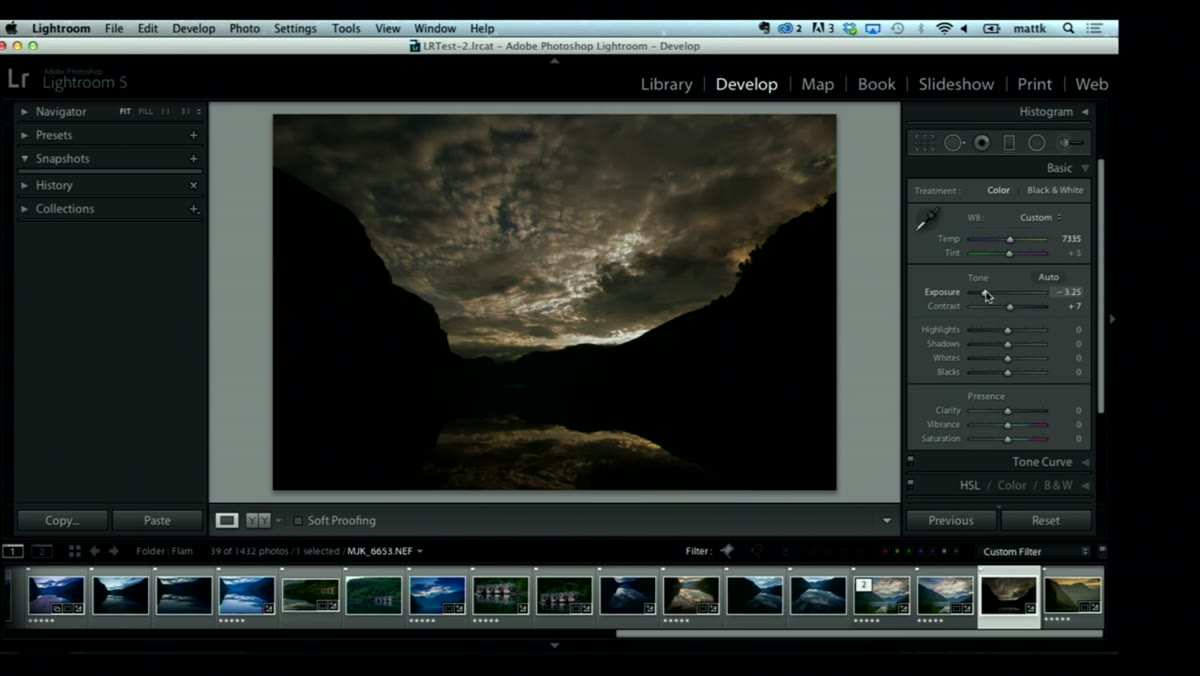 Exposure slider dragged left, revealing cloud detail in bright sky
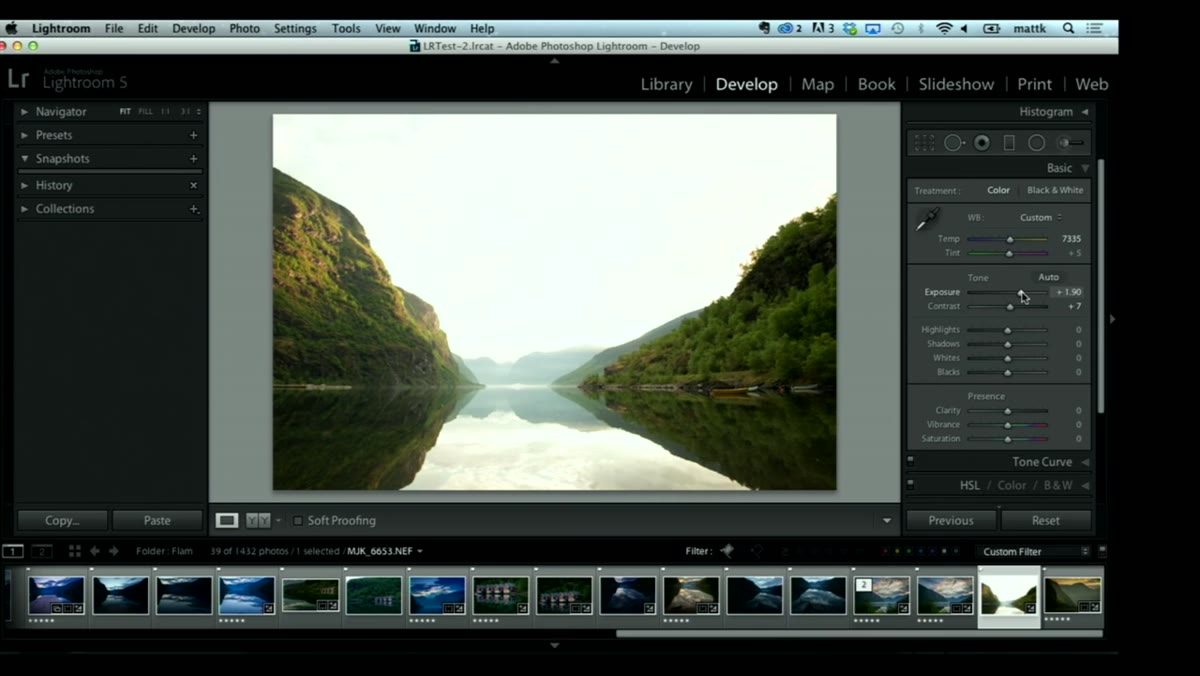
Here’s where Matt makes a move that surprises a lot of beginners. He drops the overall Exposure slider down to reveal the detail hiding in the sky. If your RAW file has that information – and it almost always does if you didn’t blow the highlights completely – dragging exposure down brings it back dramatically.
The catch is obvious: now your foreground goes dark. Matt’s point is that this lower exposure represents what the RAW file was actually capturing in the highlights. The fact that there’s rich sky detail waiting there is the whole reason you shoot RAW in the first place. Think of this step as taking inventory before you start spending. You’re not done here – you’re just figuring out what you have to work with.
Step 3: Use the Highlights and Shadows Sliders as a Pair
 Highlights and Shadows sliders adjusted in opposite directions in Basic panel
Once you’ve seen what’s in the sky, the Highlights slider becomes your precision tool for bringing that detail back without darkening the whole image. Pull Highlights left (toward -60 or -80 depending on the shot) and watch the sky respond. Clouds get definition. Bright gradients get depth.
At the same time, push the Shadows slider right to open up the foreground. These two sliders working in opposite directions are doing a rough version of what a graduated ND filter does in the field – compressing the dynamic range of the scene into something a screen can display. It’s not a perfect substitute for shooting with filters or bracketing exposures, but for a single RAW file it’s remarkably effective. Most of the time I’ll push Shadows somewhere between +40 and +80 for a landscape, then dial back if the image starts to look flat.
Step 4: Add Contrast Strategically
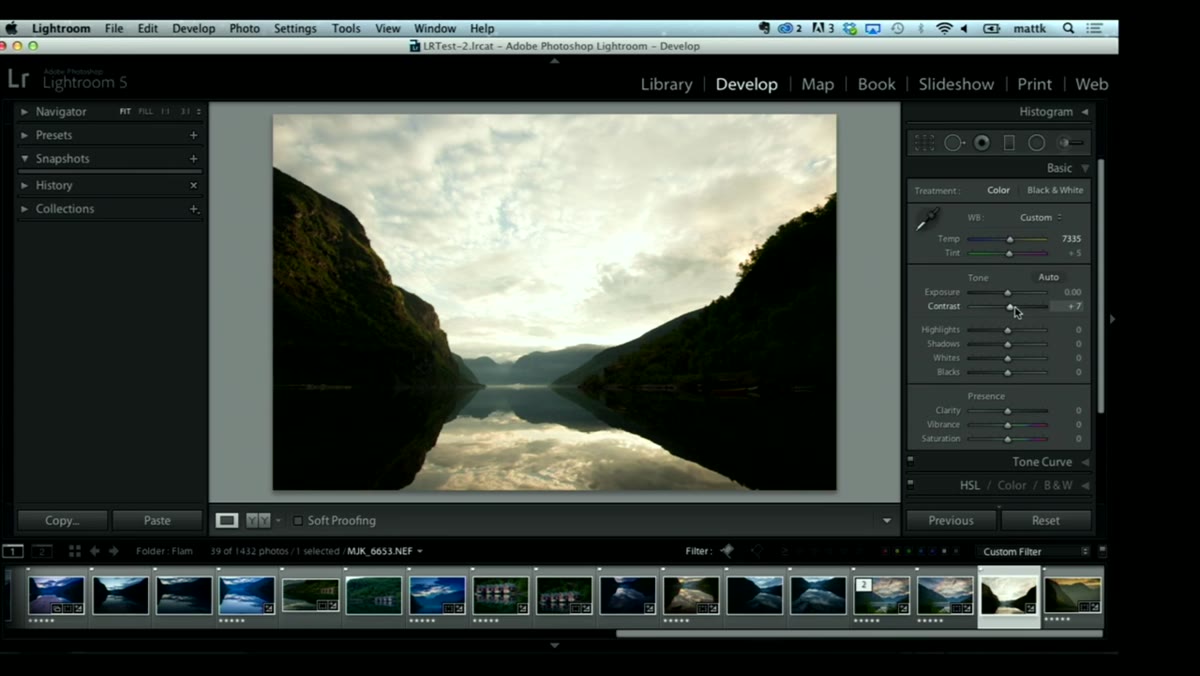 Contrast slider being adjusted in Basic panel
After you’ve pushed Shadows up and Highlights down, the image can start to feel soft – like someone stretched the tonal range a bit too thin. A moderate contrast boost brings the punch back. Matt adds a little here through the Contrast slider in the Basic panel, though you can also do this more surgically through the Tone Curve if you want to control exactly which tones get affected.
For landscapes specifically, I’d recommend bumping Contrast and then checking your midtones. Sometimes lifting Shadows and adding Contrast in combination makes the land feel heavy. If that happens, a small negative Blacks adjustment can add depth back without making the foreground muddy again.
Step 5: Recognize When a Single Frame Isn’t Enough
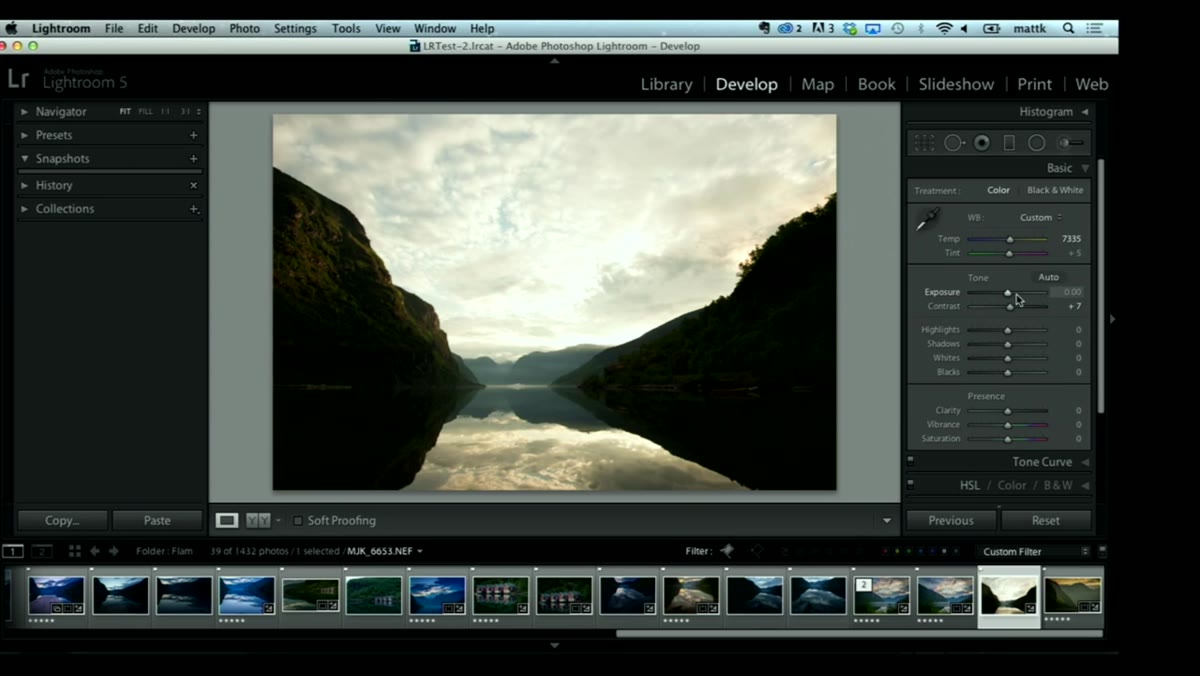 Split foreground and sky tonal problem visible in preview
Matt is refreshingly honest about this moment in the tutorial. Even after all those slider adjustments, you’re often still looking at a photo where the sky looks great but the foreground doesn’t, or vice versa. And his point is that this is a structural problem – not an editing one.
This is the moment where you either reach for a local adjustment (a gradient filter or brush in Lightroom to treat sky and foreground separately) or you consider going into Photoshop to blend multiple exposures. The technique of identifying what your single RAW file contains, then deciding whether the problem is solvable there or needs a different approach, is genuinely one of the more useful mental frameworks in landscape editing.
What I Do Differently After Watching This
Matt’s workflow reinforced something I’ve been doing but couldn’t articulate cleanly: I always start a landscape edit by temporarily crushing the exposure to see what’s in the highlights before I do anything else. It takes about three seconds and it immediately tells me whether I’m working with a file that has sky detail or whether I’m going to need a different strategy entirely.
The thing I’d add is this – after the Basic panel work is done, I almost always go to the HSL panel and selectively pull the luminance on blues down a few notches. It deepens skies in a way that feels more natural than just hammering the Highlights slider, and it doesn’t affect the warm tones in the land. If you’re not already using HSL adjustments as part of your landscape workflow, that’s where I’d point you next.
The single most important idea in this tutorial is that RAW files hold more than what you see at default exposure, and your job in the Develop module is to decide how to redistribute that information across the frame. Everything Matt demonstrates – the warmth, the contrast, the highlights-shadows pairing – is in service of that one goal.
Watch the full tutorial on YouTube to see the before-and-after in motion. Some things are easier to understand when you watch the sliders move in real time.
Comments
Leave a Comment