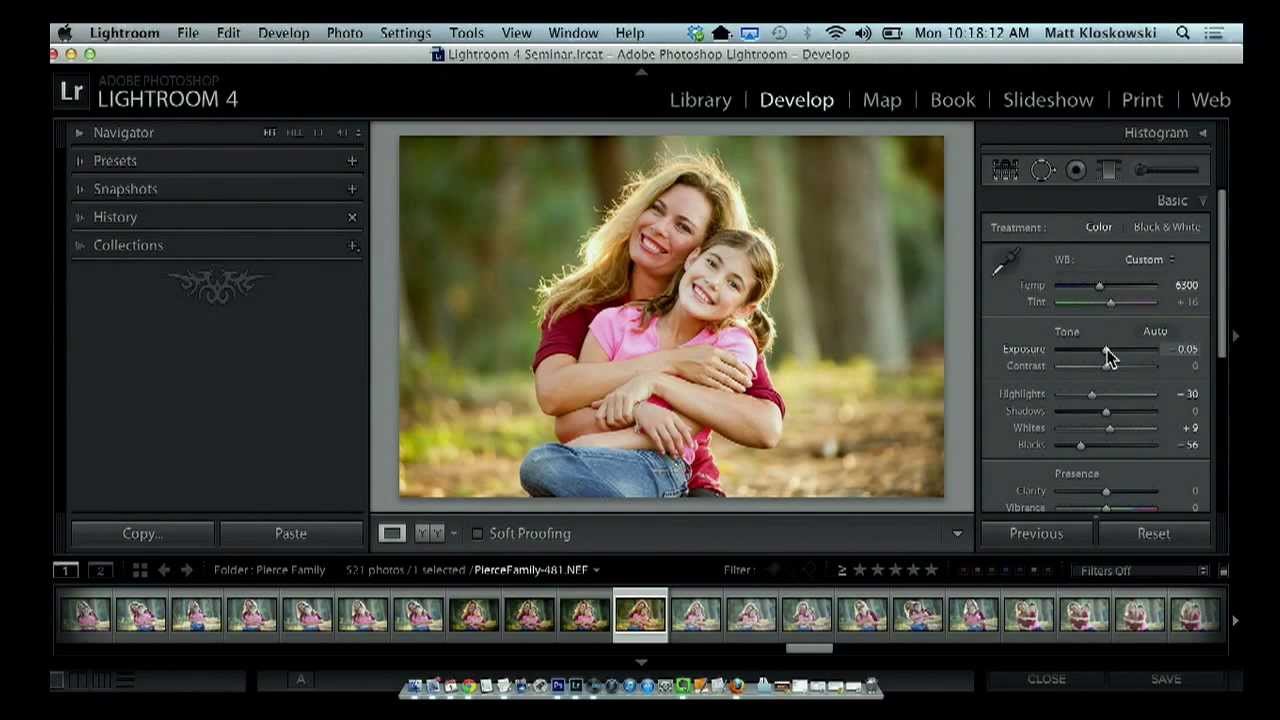
There’s a certain rhythm to editing a session of photos. You dial in the first image, get it exactly right, and then you look at the next 47 frames from the same shoot with the same light and the same subjects and quietly accept your fate. That used to be my Friday nights. Not anymore. In this Matt Kloskowski tutorial, he walks through one of the most criminally underused buttons in Lightroom’s Develop module, and it’s the kind of tip that makes you feel like you’ve been carrying groceries up four flights of stairs when there was an elevator the whole time. Watch the full tutorial on YouTube
The button is called Previous, and it lives at the bottom of the Develop module. It does exactly what it sounds like: it takes every setting from the last photo you edited and stamps them onto the photo you’re looking at right now. No syncing panels, no copy-paste, no presets. Just one click. The gotcha is real though, and Kloskowski makes sure to flag it, so I will too. But first, the full walkthrough.
Step 1: Edit Your First Photo Completely
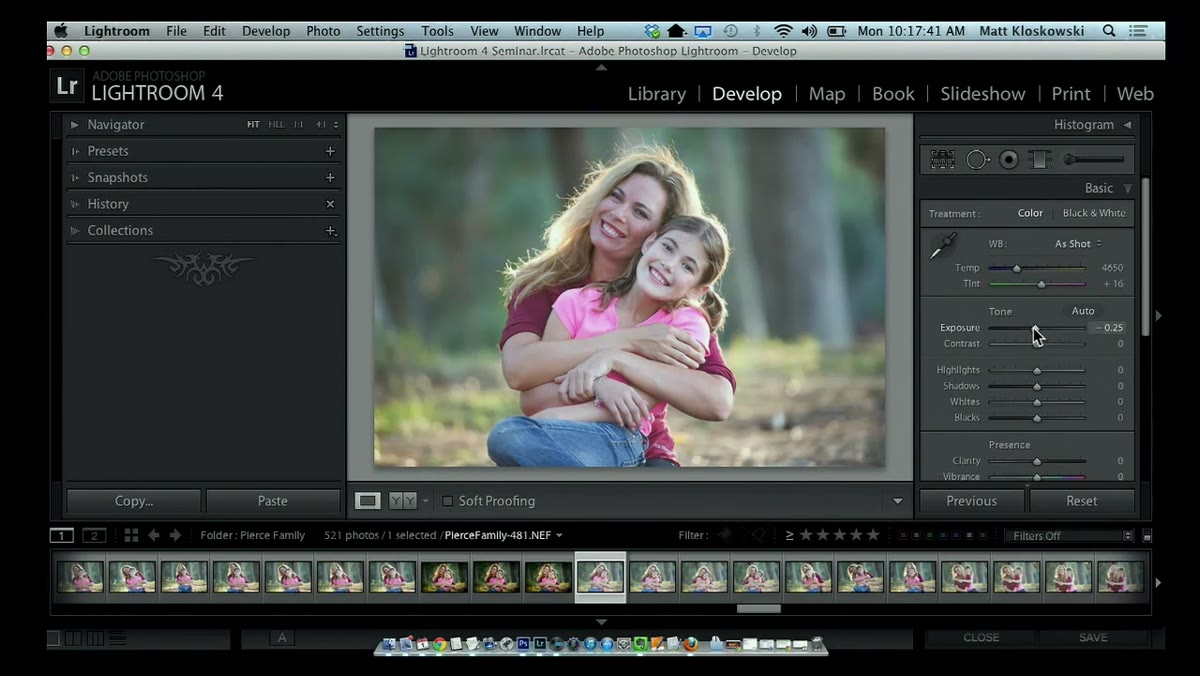 Matt adjusting exposure and highlight sliders on first photo
Start with the image you want to use as your edit reference. This is the photo you’ll spend real time on, so be thorough. Kloskowski begins by pulling down the Exposure slider to tame a slightly bright scene, then reins in the Highlights to recover detail in the brighter areas. Shadows get left mostly alone if they’re already sitting in a good place.
Matt adjusting exposure and highlight sliders on first photo
Start with the image you want to use as your edit reference. This is the photo you’ll spend real time on, so be thorough. Kloskowski begins by pulling down the Exposure slider to tame a slightly bright scene, then reins in the Highlights to recover detail in the brighter areas. Shadows get left mostly alone if they’re already sitting in a good place.
The goal here isn’t speed. It’s getting this one image exactly right, because everything you do here will travel to the next photo.
Step 2: Set Your White and Black Points With Alt/Option Clicking
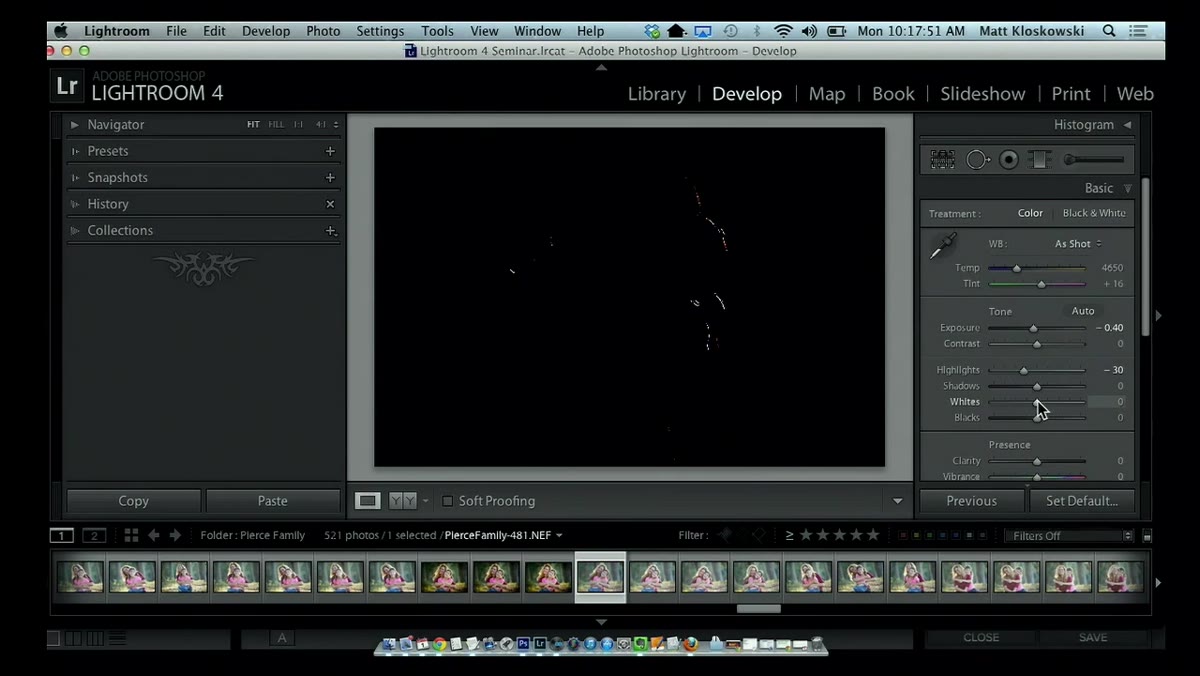 Alt-click on Whites slider revealing clipping overlay
This is one of those techniques that separates people who edit by feel from people who edit by information. Hold Alt (Windows) or Option (Mac) and drag the Whites slider to the right. The screen will go black, and white patches will appear where clipping begins. Pull the slider just to the point where those patches start showing up, then back off a hair.
Alt-click on Whites slider revealing clipping overlay
This is one of those techniques that separates people who edit by feel from people who edit by information. Hold Alt (Windows) or Option (Mac) and drag the Whites slider to the right. The screen will go black, and white patches will appear where clipping begins. Pull the slider just to the point where those patches start showing up, then back off a hair.
Do the same thing with the Blacks slider, dragging left while holding Alt/Option. This time the screen goes white, and colored specks appear when you’ve hit a solid black point. A few specks is fine. This gives your image a proper tonal range without guessing.
Step 3: Warm the Image and Boost Vibrance
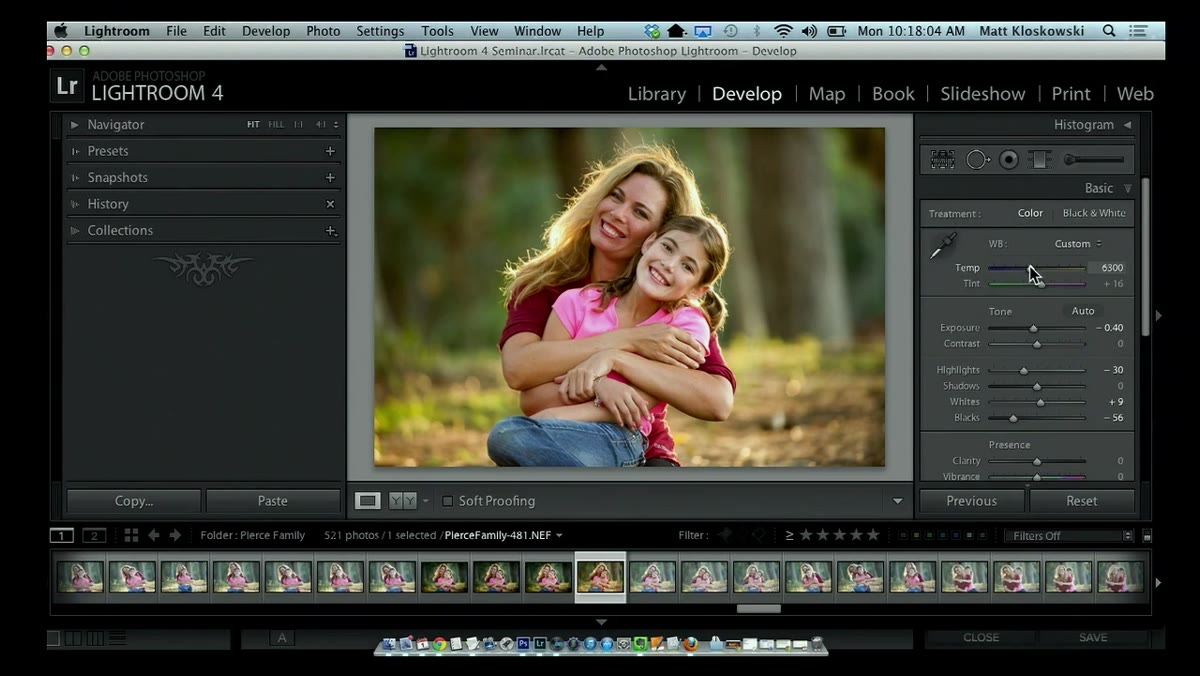 Temperature slider being pushed right toward warm tones
After locking in the tonal range, Kloskowski moves up to the White Balance section and nudges the Temperature slider toward the warmer end of the scale. How far you go depends entirely on your image. For a portrait in natural light, even a small push toward warmth reads as more flattering and natural on skin tones.
Temperature slider being pushed right toward warm tones
After locking in the tonal range, Kloskowski moves up to the White Balance section and nudges the Temperature slider toward the warmer end of the scale. How far you go depends entirely on your image. For a portrait in natural light, even a small push toward warmth reads as more flattering and natural on skin tones.
Then at the bottom of the Basic panel, add a touch of Vibrance. Vibrance is smarter than Saturation because it boosts the muted colors while leaving already-saturated tones alone. For portraits especially, it tends to pop the environment without making skin look like a traffic cone.
Step 4: Add a Post-Crop Vignette
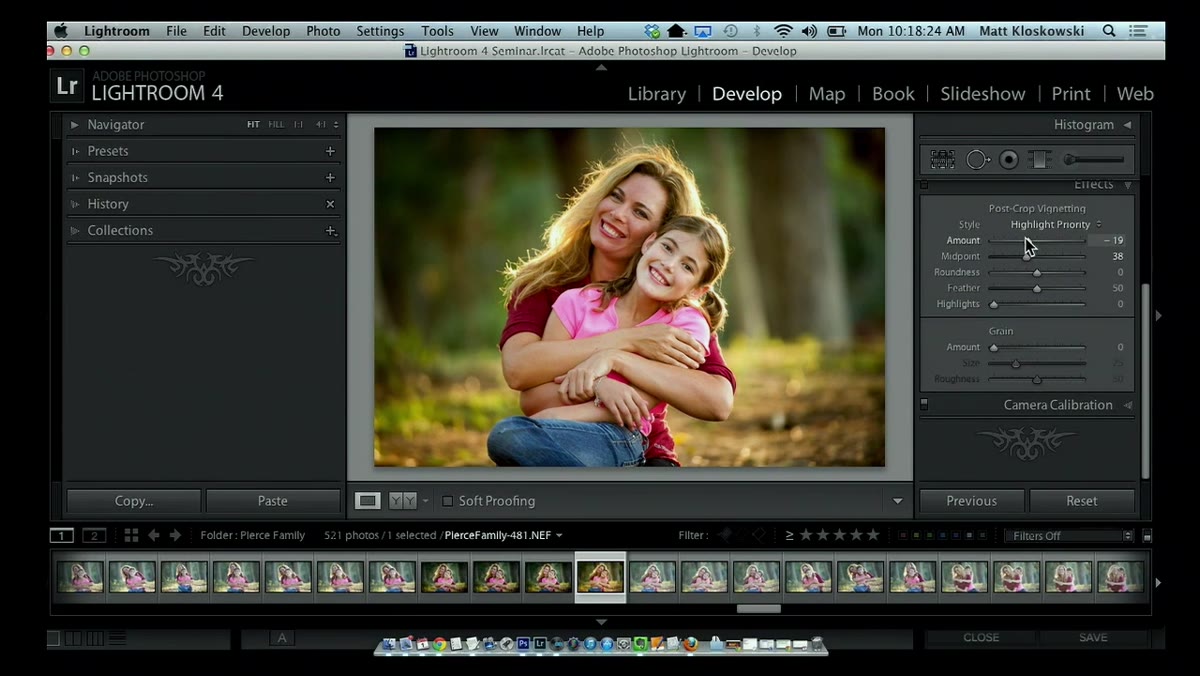 Post-crop vignette slider being adjusted in Effects panel
Scroll down to the Effects panel and apply a subtle Post-Crop Vignette by dragging the Amount slider slightly to the left. The vignette draws the viewer’s eye toward the center of the frame and away from the edges, which is almost always where your subject lives. Keep it subtle. If someone looks at your photo and their first thought is “nice vignette,” you went too far.
Post-crop vignette slider being adjusted in Effects panel
Scroll down to the Effects panel and apply a subtle Post-Crop Vignette by dragging the Amount slider slightly to the left. The vignette draws the viewer’s eye toward the center of the frame and away from the edges, which is almost always where your subject lives. Keep it subtle. If someone looks at your photo and their first thought is “nice vignette,” you went too far.
Press the backslash key at any point to toggle between your before and after, which is Kloskowski’s preferred way to gut-check whether the edit is actually an improvement or just change for its own sake.
Step 5: Use the Adjustment Brush for Selective Fixes
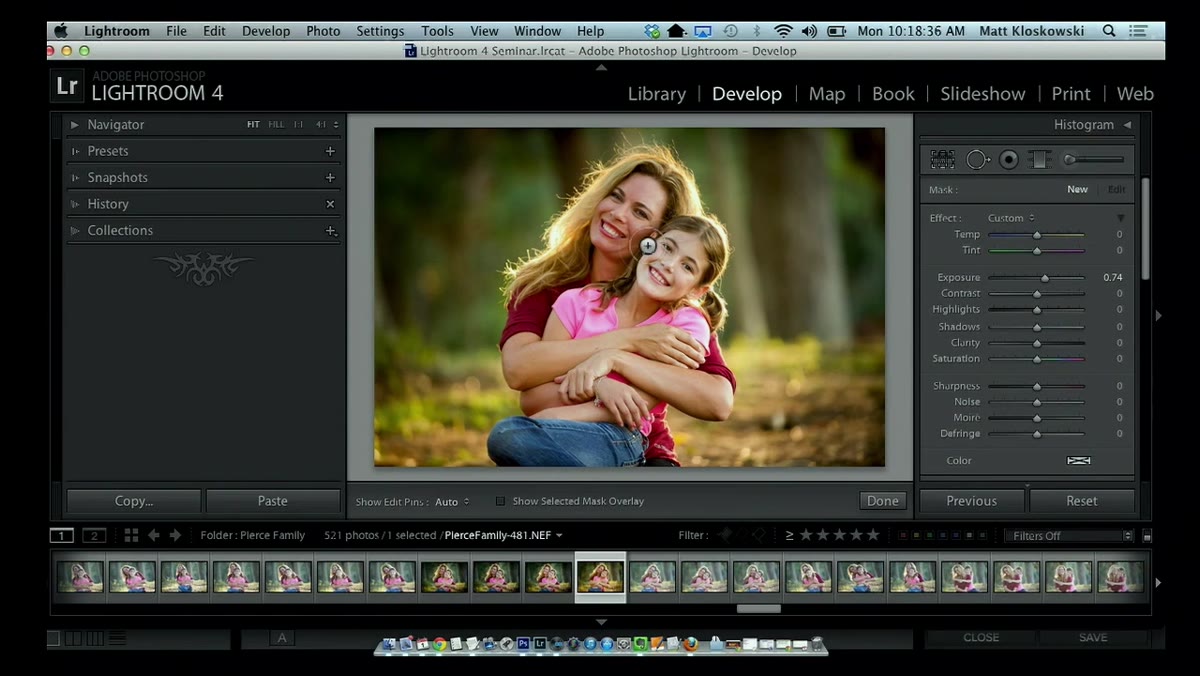 Adjustment brush being painted over subject’s face
The Adjustment Brush (keyboard shortcut: K) lets you apply localized exposure changes to specific parts of the image. In the tutorial, one subject’s face is slightly darker than the other, so Kloskowski paints over that area and nudges the Exposure slider up just enough to even things out. The key word is “just enough.” This is a correction, not a spotlight.
Adjustment brush being painted over subject’s face
The Adjustment Brush (keyboard shortcut: K) lets you apply localized exposure changes to specific parts of the image. In the tutorial, one subject’s face is slightly darker than the other, so Kloskowski paints over that area and nudges the Exposure slider up just enough to even things out. The key word is “just enough.” This is a correction, not a spotlight.
Pay attention to this step specifically, because it becomes important in the next one.
Step 6: Move to the Next Photo and Hit Previous
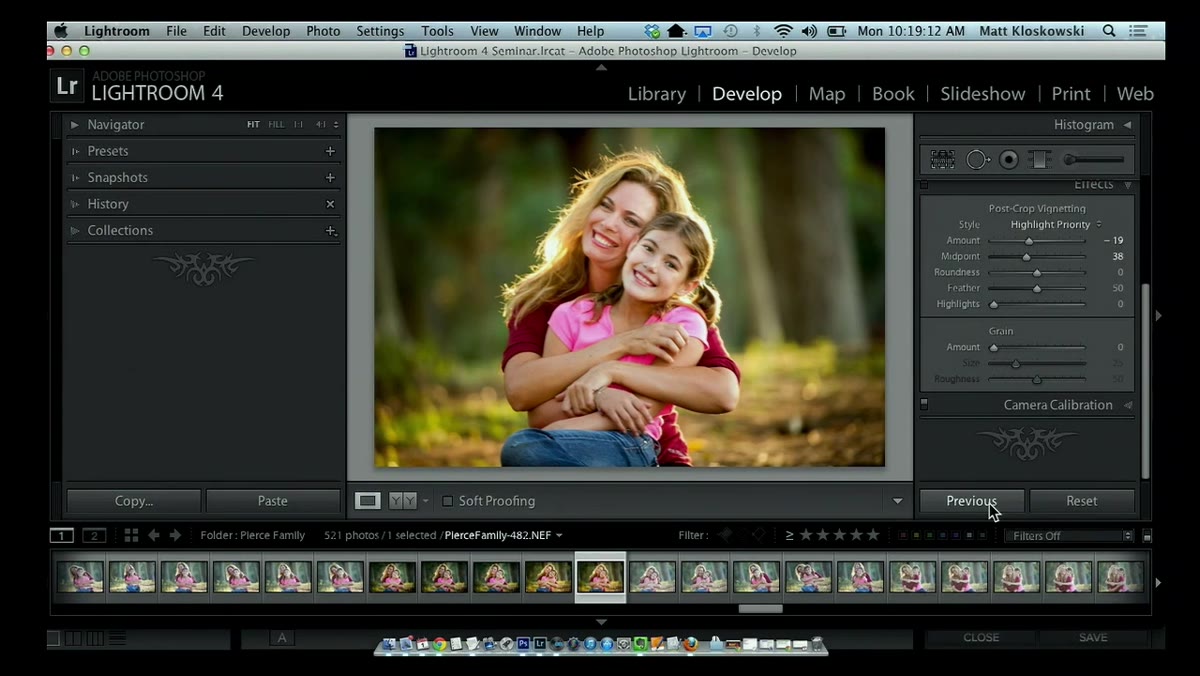 Previous button highlighted at the bottom of Develop module
Select your next image. In Lightroom’s Develop module, look at the row of buttons in the very bottom-right corner of the screen. You’ll see Previous sitting there, probably ignored until this exact moment. Click it.
Previous button highlighted at the bottom of Develop module
Select your next image. In Lightroom’s Develop module, look at the row of buttons in the very bottom-right corner of the screen. You’ll see Previous sitting there, probably ignored until this exact moment. Click it.
Lightroom will immediately apply every setting from your last edited photo to this one: exposure, white balance, vignette, vibrance, all of it. It does not require the photos to be adjacent in the filmstrip. You could jump three images down and hit Previous and it still pulls from the last photo you actually edited. That’s the part that surprises most people.
Step 7: Check and Correct Any Localized Adjustments
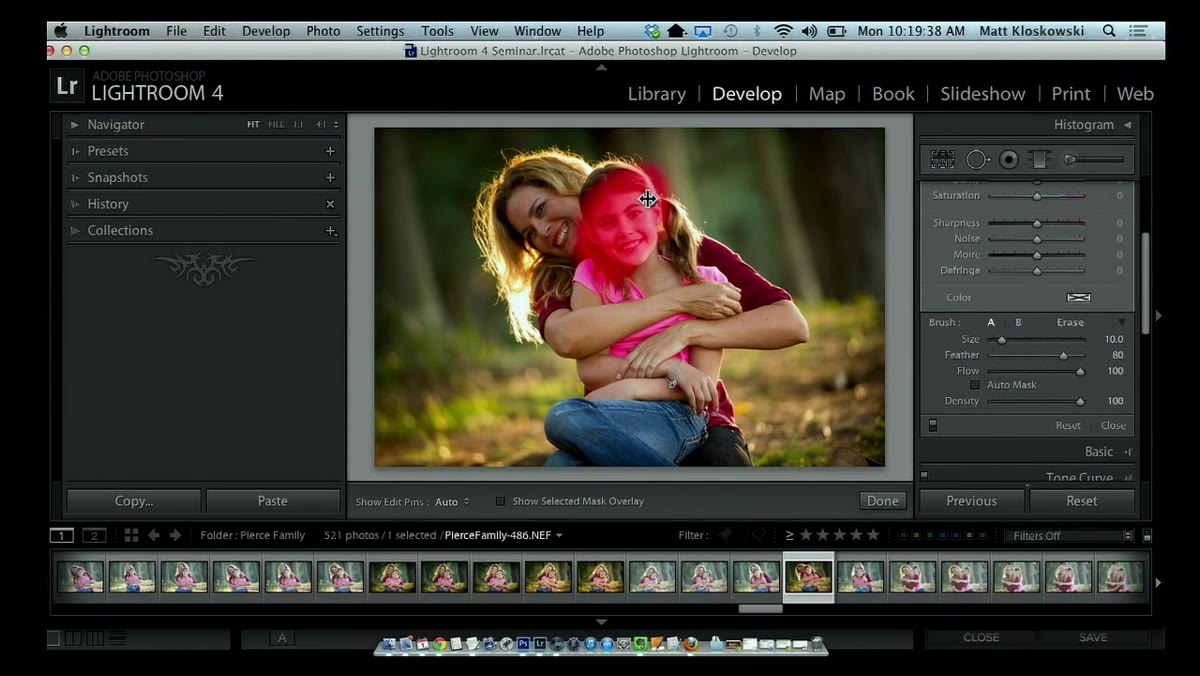 Adjustment brush pins visible on new photo with misplaced mask
Here is the caveat Kloskowski is clear about: Previous copies everything, and that means everything. Adjustment brushes, graduated filters, radial filters, and crop settings all come along for the ride. If you painted a brightening brush over a face in the previous photo and the subjects have moved in the next frame, that brush mask is now sitting in the wrong place on the wrong face.
Adjustment brush pins visible on new photo with misplaced mask
Here is the caveat Kloskowski is clear about: Previous copies everything, and that means everything. Adjustment brushes, graduated filters, radial filters, and crop settings all come along for the ride. If you painted a brightening brush over a face in the previous photo and the subjects have moved in the next frame, that brush mask is now sitting in the wrong place on the wrong face.
Click the Adjustment Brush tool and check whether any pins are sitting somewhere they shouldn’t be. You can either move the mask manually or delete it and repaint. This takes about ten seconds. It is still dramatically faster than rebuilding the entire edit from scratch.
One Thing I’d Add From My Own Workflow
Before I hit Previous on a batch of images, I’ve started building the cleanest possible “base edit” on the most representative photo in the set, specifically avoiding any localized adjustments. I’ll do the global stuff, confirm it looks right, then use Previous across the batch. After that’s done, I go back and do the Adjustment Brush work image by image. It’s a two-pass approach, but it sidesteps the mask placement issue almost entirely and keeps the workflow predictable.
If you’re editing sessions where the light is consistent but faces or subjects shift frame to frame, this separation makes the Previous button feel completely clean to use. No gotchas, no cleanup.
The single most important thing to take away from this tutorial: stop rebuilding edits from zero when the light hasn’t changed. The Previous button exists specifically for those situations, and if you haven’t been using it, you’ve been working harder than you need to. It’s not a workaround or a lazy shortcut. It’s the tool Lightroom built for exactly this problem.
Watch the full tutorial on YouTube and see Matt Kloskowski walk through the whole thing in real time. Worth four minutes of your Friday.
Comments
Leave a Comment