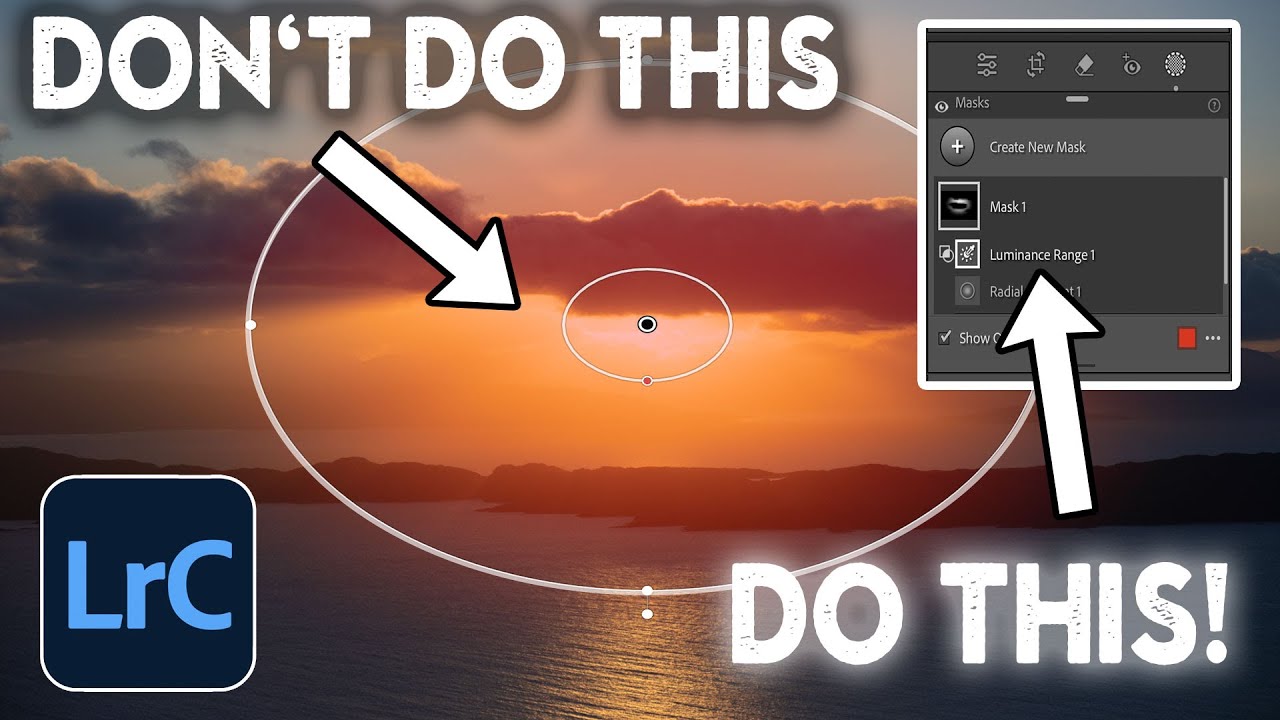
There’s a version of me from about four years ago who used the radial gradient exactly once, decided it was “just for vignettes,” and moved on. I was wrong, and I’ve been quietly making up for it ever since. The radial gradient - or radial filter, depending on which version of Lightroom you’re running - is one of those tools that looks simple on the surface and then turns out to have serious depth the moment someone who actually knows what they’re doing walks you through it.
That someone, in this case, is Nigel Danson. Watch the full tutorial on YouTube before or after reading this. His landscape work is the kind that makes you want to book a flight somewhere cold and dramatic, and his editing tutorials are just as considered as the images themselves. In this one, he walks through three different scenarios where the radial gradient does work that no other mask handles as cleanly.
I’ve broken down his process below into steps you can follow in Lightroom right now, with my own notes layered in where the technique connects to problems I run into regularly. If you shoot anything with a light source, a sky, or a foreground-to-background depth challenge, this is going to matter to you.
Step 1: Set Up Your Radial Gradient Over the Sun
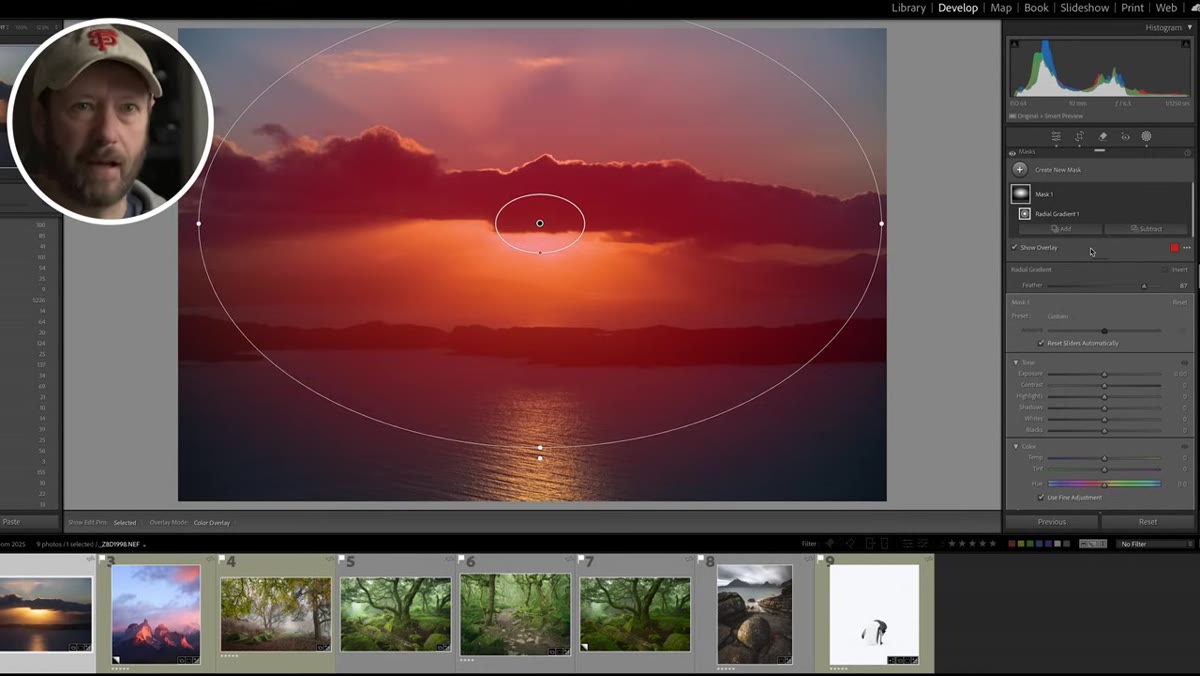
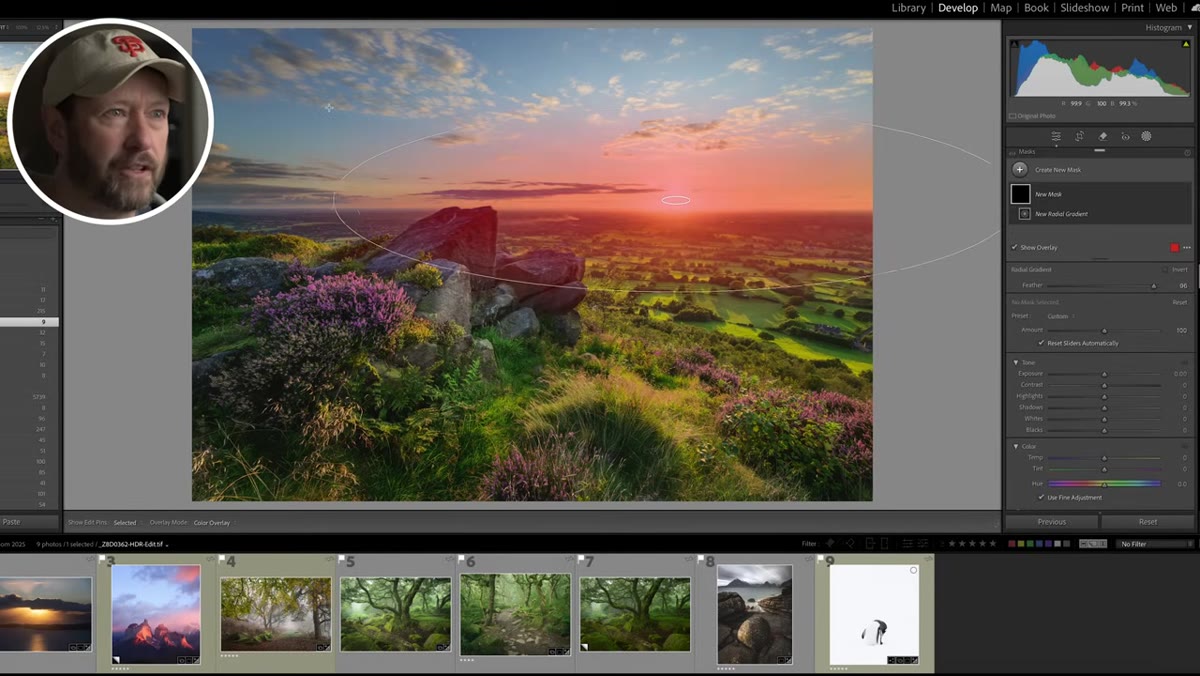 Radial gradient being drawn over sun in landscape photo
Start by drawing your radial gradient centered on the sun or bright light source. The shape doesn’t need to be perfectly precise - you’re going to lean on feathering to do the blending work. Danson pulls his feather slider up high, much higher than most people would intuitively set it. Think of this as painting with a very soft brush rather than making a selection. The goal is a smooth, wide transition zone, not a hard edge.
Radial gradient being drawn over sun in landscape photo
Start by drawing your radial gradient centered on the sun or bright light source. The shape doesn’t need to be perfectly precise - you’re going to lean on feathering to do the blending work. Danson pulls his feather slider up high, much higher than most people would intuitively set it. Think of this as painting with a very soft brush rather than making a selection. The goal is a smooth, wide transition zone, not a hard edge.
Make your gradient large enough that it bleeds well into the surrounding sky. Danson notes you can always scale it back, so start bigger than you think you need. This is the kind of advice I’ve had to relearn on every single project - starting too small and then fighting the edge is always more work.
Step 2: Soften the Sun With Dehaze and Clarity
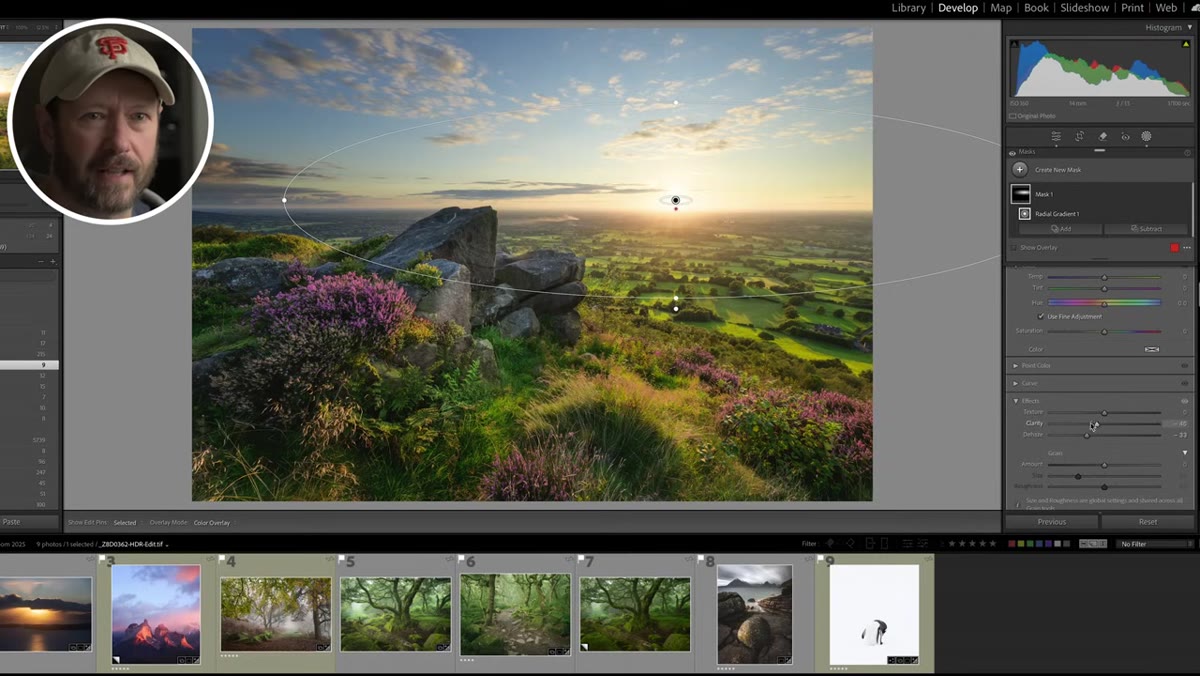 Dehaze and clarity sliders being reduced inside the mask
Once the mask is placed, drop the Dehaze slider into negative values and pull Clarity down significantly. This combination softens the harsh blown-out quality that suns often carry straight out of camera or after a basic exposure correction. The effect mimics the way light actually looks when it’s overwhelming the atmosphere around it - slightly hazy, slightly diffused, less like a coin stuck to the sky.
Dehaze and clarity sliders being reduced inside the mask
Once the mask is placed, drop the Dehaze slider into negative values and pull Clarity down significantly. This combination softens the harsh blown-out quality that suns often carry straight out of camera or after a basic exposure correction. The effect mimics the way light actually looks when it’s overwhelming the atmosphere around it - slightly hazy, slightly diffused, less like a coin stuck to the sky.
The tradeoff is that reducing clarity tends to flatten saturation and warmth in the masked area. Danson compensates by nudging Temperature up and adding a small bump to Saturation inside the mask. That warmth recovery is something I now do automatically. Without it, the sun area can look washed out in a way that reads as a mistake rather than a stylistic choice.
Step 3: Duplicate and Invert the Mask for the Surrounding Area
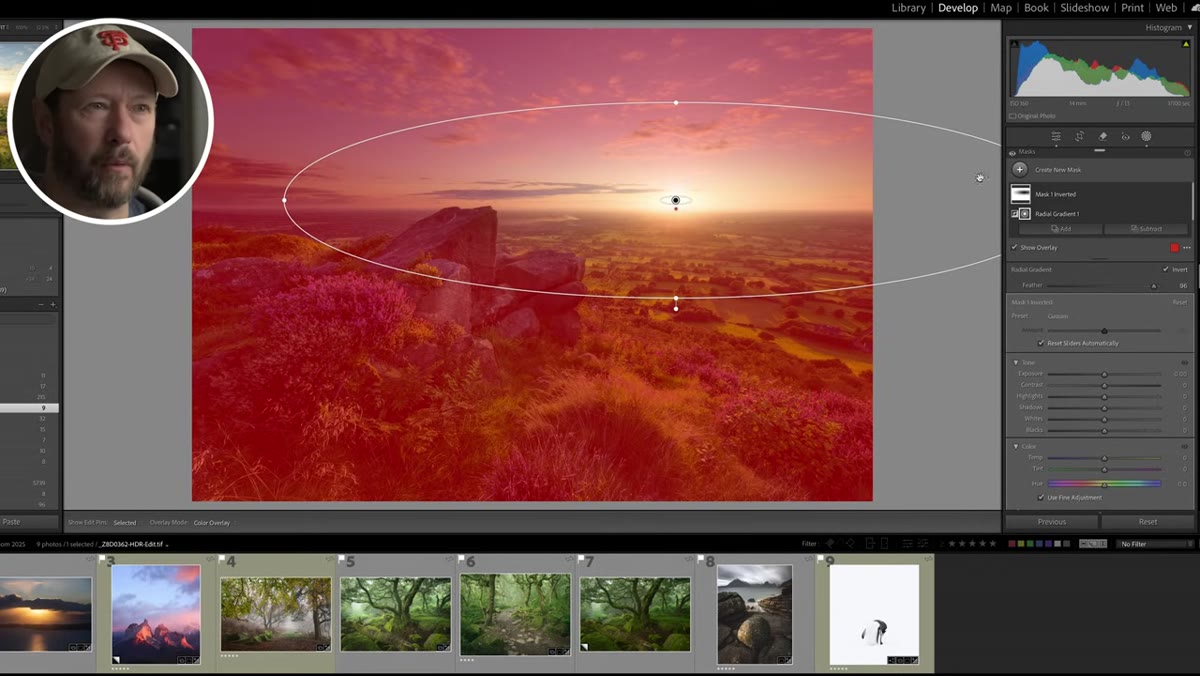 Duplicate and invert option shown in mask panel
Here’s the move that I think makes this whole approach efficient: once you have the sun mask dialed in, duplicate it and invert the copy. You now have a mask that covers everything outside the radial gradient - the sky, clouds, and any foreground that bleeds into the frame’s upper half. This becomes your environmental adjustment layer without any additional drawing or selection work.
Duplicate and invert option shown in mask panel
Here’s the move that I think makes this whole approach efficient: once you have the sun mask dialed in, duplicate it and invert the copy. You now have a mask that covers everything outside the radial gradient - the sky, clouds, and any foreground that bleeds into the frame’s upper half. This becomes your environmental adjustment layer without any additional drawing or selection work.
On this inverted mask, Danson brings up exposure slightly and adds contrast. The logic is sound: the area around a bright sun often underexposes relative to how your eye read the scene, and pushing contrast there helps the surrounding sky feel more dimensional. It also creates a natural sense of depth because you’re treating the light source and the scene around it as two separate things with different properties.
Step 4: Add a Luminance Range Intersection to Protect the Clouds
 Luminance range mask being subtracted from radial gradient
This is where the technique gets more sophisticated, and it’s the step most tutorials skip. When you apply a radial gradient over a scene with clouds near the sun, the gradient affects the front face of the clouds the same way it affects the glow behind them. That’s a problem. The front of a cloud is lit, not glowing, and softening it the same way makes the whole image look foggy rather than luminous.
Luminance range mask being subtracted from radial gradient
This is where the technique gets more sophisticated, and it’s the step most tutorials skip. When you apply a radial gradient over a scene with clouds near the sun, the gradient affects the front face of the clouds the same way it affects the glow behind them. That’s a problem. The front of a cloud is lit, not glowing, and softening it the same way makes the whole image look foggy rather than luminous.
Danson’s fix is to intersect the radial gradient with a luminance range mask. Click the cloud, let Lightroom generate a luminance selection, then adjust the range to isolate only the darker tonal areas - the shadow side of the cloud and the areas where the glow is actually coming from. This subtracts the bright cloud face from the mask and leaves the atmospheric glow intact. The before-and-after on this is noticeable. It’s the difference between a haze effect and an actual light effect.
Step 5: Simulate Directional Light With an Off-Center Gradient
 Radial gradient placed off-frame right to simulate sunlight direction
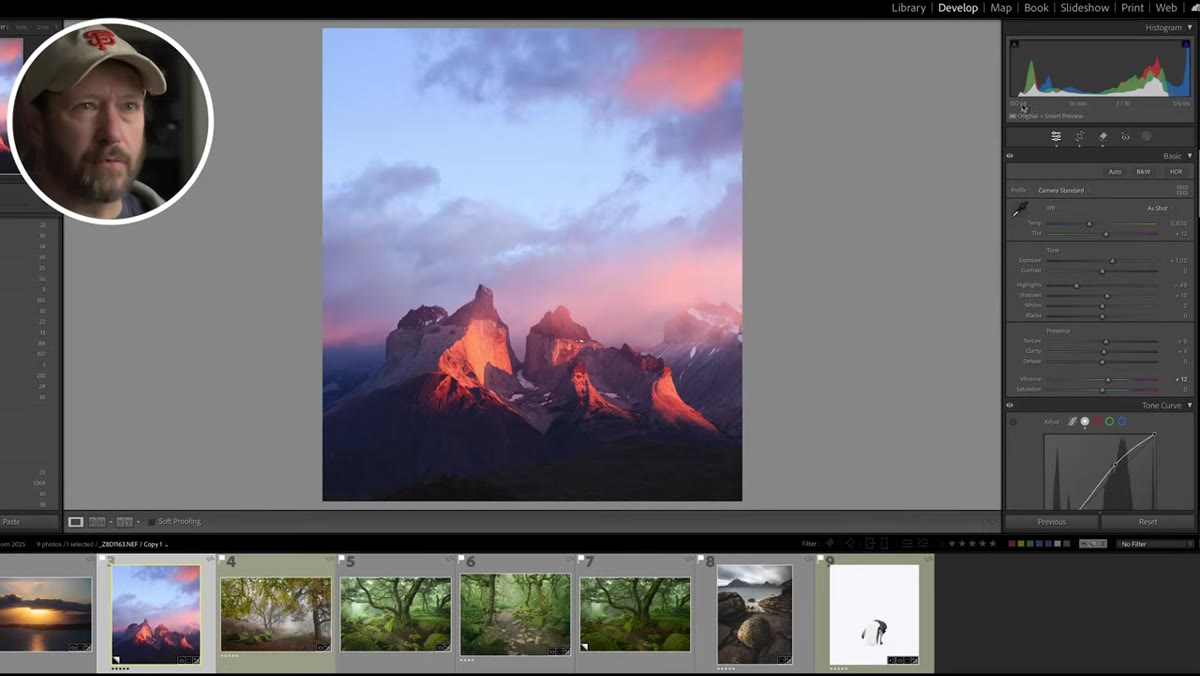
The third scenario Danson demonstrates is one I use constantly on golden hour shots where the sun is out of frame. You place the radial gradient off to one side of the image - partly or fully outside the frame border - to create the impression of light coming from that direction. The feathering does the work of making it believable.
Radial gradient placed off-frame right to simulate sunlight direction
The third scenario Danson demonstrates is one I use constantly on golden hour shots where the sun is out of frame. You place the radial gradient off to one side of the image - partly or fully outside the frame border - to create the impression of light coming from that direction. The feathering does the work of making it believable.
This is less about masking a specific object and more about painting mood into the image. It’s close to what a colorist would do in a grading suite when they want to push a scene toward a particular feeling. Positioned off-frame right, a warm radial gradient with negative dehaze creates a completely convincing late-afternoon quality that wasn’t fully there in the original capture.
My Caveat: Watch Your Feather Values on Different Monitors
One thing Danson doesn’t get into, probably because it’s more of a workflow note than a technique note - feather values look different depending on your display. A feather setting that blends invisibly on a calibrated monitor can show a visible edge on an uncalibrated laptop screen. I started screenshotting my masked overlays and checking them on my phone as a quick sanity check before I export anything I care about. It’s an extra thirty seconds that has saved me from some embarrassing final files.
Also worth noting: if you name your masks as you build them, your future self will thank you. I name mine after the element I’m targeting - “sun core,” “sky surround,” “cloud glow.” It sounds pedantic until you return to a file six months later.
The single biggest idea from this tutorial is that the radial gradient is not a vignette tool with a different shape. It’s a precision light-shaping tool, and the moment you start combining it with luminance range masks and inversion logic, it becomes something close to a compositing workflow inside a single RAW file. That’s a meaningful shift in what’s possible without ever leaving Lightroom.
Watch the full tutorial on YouTube - Danson’s visual demos show the mask overlays in a way that’s worth seeing in motion, especially the luminance range adjustment in Step 4.
Comments
Leave a Comment