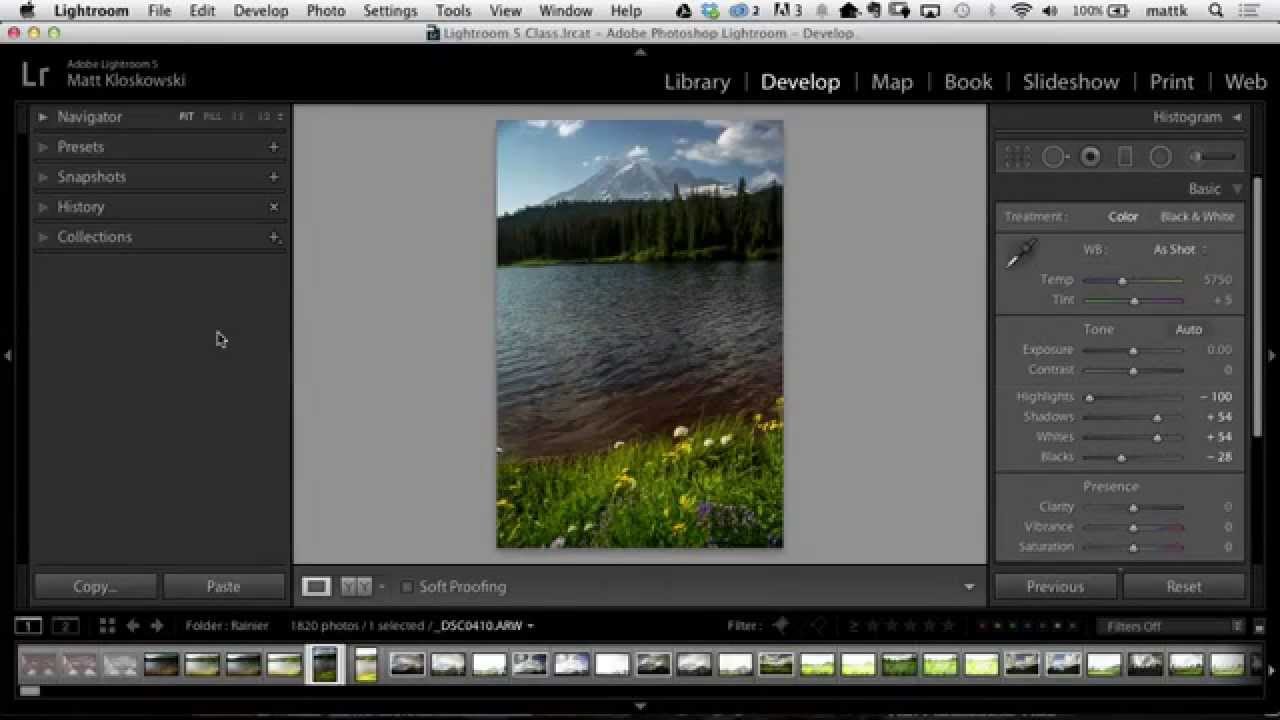
There’s a specific kind of frustration that doesn’t get talked about enough in photography circles. You upload a batch of photos, you’re excited about two or three of them, you jump into the Develop module and start pushing sliders around — the image is coming to life, it’s looking good — and then your phone buzzes, your dog needs to go out, life happens. You close Lightroom without flagging the photo, without adding it to a collection, without doing any of the responsible organizational things you know you should do. Later that night, or two days later, you’re staring at a grid of thumbnails trying to remember which one made you feel something.
That workflow gap is exactly what Watch the full tutorial on YouTube this Matt Kloskowski tutorial addresses. Matt’s original wish — an auto-flag preference that would mark any photo you spent more than 30 seconds editing — probably isn’t coming to Lightroom anytime soon. Features that specific rarely make the roadmap. But the workaround he landed on is honestly better than what he originally asked for, because it’s automatic, it’s persistent, and it doesn’t require Adobe to do anything. It just requires understanding how Smart Collections actually work.
I’ve rebuilt my own culling workflow around this concept after watching it. Here’s exactly how to set it up.
Step 1: Open the Collections Panel and Create a New Smart Collection
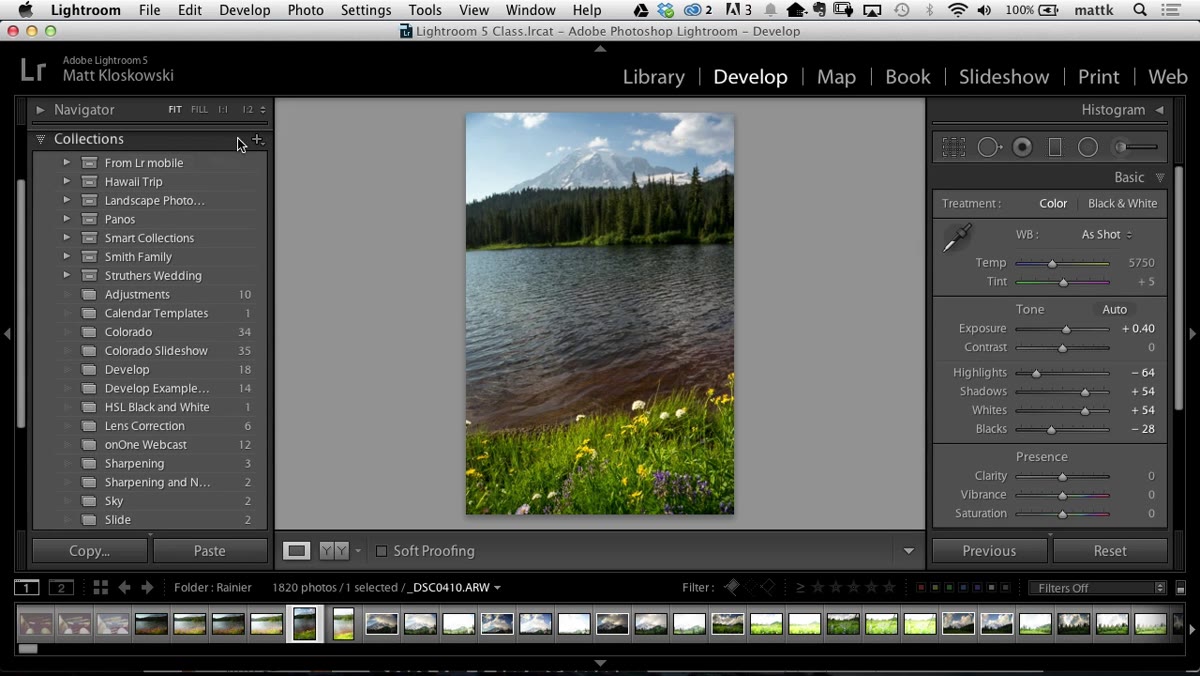 Collections panel with the plus icon highlighted
In the Library module, find the Collections panel on the left side. Click the small plus icon at the top of that panel and choose “Create Smart Collection” from the dropdown. A dialogue box will appear asking you to name it and define its rules. Give it a name that signals purpose over poetry — something like “Recently Edited” or “Untagged Edits” works well. You want the name to be a reminder of the collection’s job, not just a label.
Collections panel with the plus icon highlighted
In the Library module, find the Collections panel on the left side. Click the small plus icon at the top of that panel and choose “Create Smart Collection” from the dropdown. A dialogue box will appear asking you to name it and define its rules. Give it a name that signals purpose over poetry — something like “Recently Edited” or “Untagged Edits” works well. You want the name to be a reminder of the collection’s job, not just a label.
Step 2: Set the Develop Rule to “Has Adjustments is True”
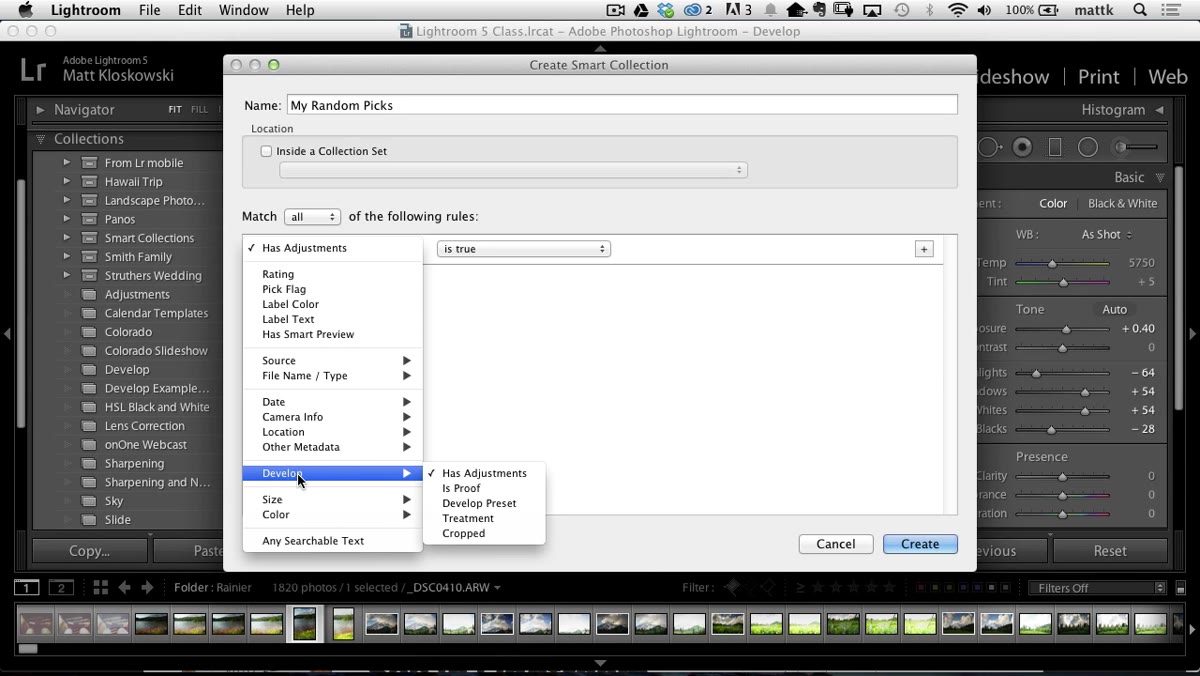 Smart Collection dialogue with Develop adjustments rule selected
Inside the Smart Collection dialogue, you’ll see a dropdown for criteria. Scroll through the options until you reach the “Develop” category. Select “Has Adjustments” from the submenu, then set the condition to “is true.” This is the core rule. The moment you touch any slider in the Develop module on any photo, Lightroom considers that photo to have adjustments, and it will automatically pull it into this collection. No manual flagging. No drag and drop. It just appears.
Smart Collection dialogue with Develop adjustments rule selected
Inside the Smart Collection dialogue, you’ll see a dropdown for criteria. Scroll through the options until you reach the “Develop” category. Select “Has Adjustments” from the submenu, then set the condition to “is true.” This is the core rule. The moment you touch any slider in the Develop module on any photo, Lightroom considers that photo to have adjustments, and it will automatically pull it into this collection. No manual flagging. No drag and drop. It just appears.
Step 3: Save and Watch the Collection Populate
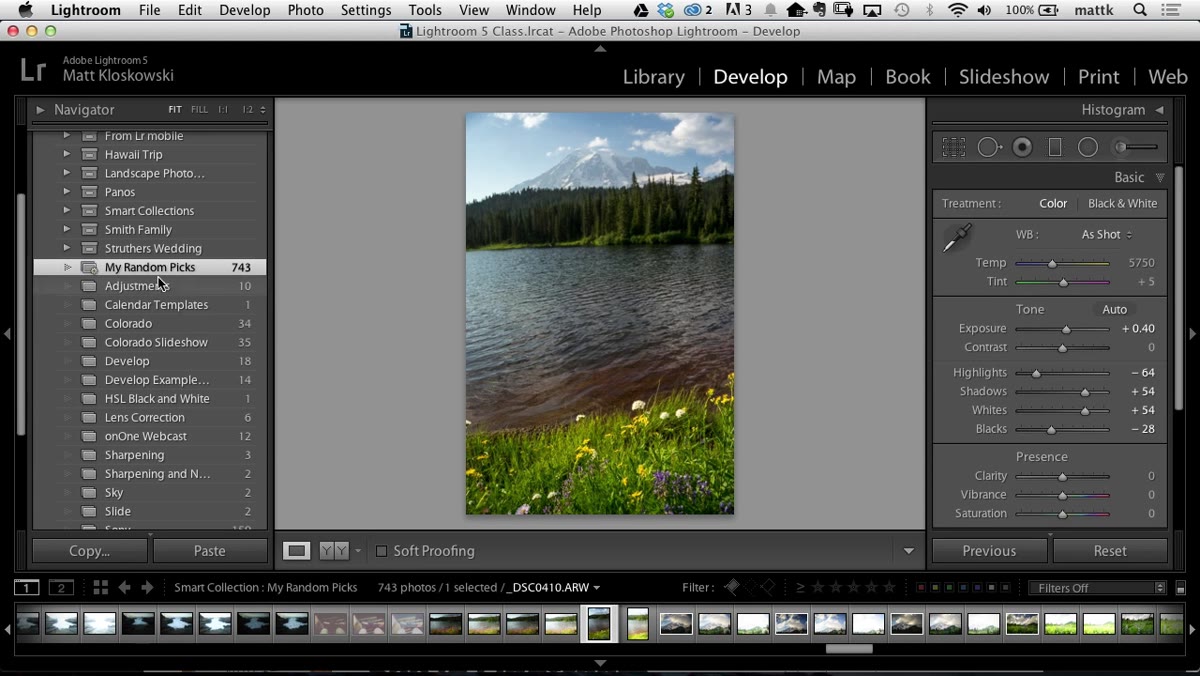 Smart Collection showing 743 photos after saving
Hit Save and prepare for a reality check. If you’ve been using Lightroom for any amount of time and your entire catalog is connected, that collection is going to fill up fast. Matt’s demo showed over 700 photos appearing immediately because the rule applies across every folder in the catalog by default. This isn’t a bug — it’s Lightroom doing exactly what you asked. Every photo you’ve ever edited in the Develop module now lives in one place. The question is whether you want all of them or just the recent ones.
Smart Collection showing 743 photos after saving
Hit Save and prepare for a reality check. If you’ve been using Lightroom for any amount of time and your entire catalog is connected, that collection is going to fill up fast. Matt’s demo showed over 700 photos appearing immediately because the rule applies across every folder in the catalog by default. This isn’t a bug — it’s Lightroom doing exactly what you asked. Every photo you’ve ever edited in the Develop module now lives in one place. The question is whether you want all of them or just the recent ones.
Step 4: Confirm the Rule Works in Real Time
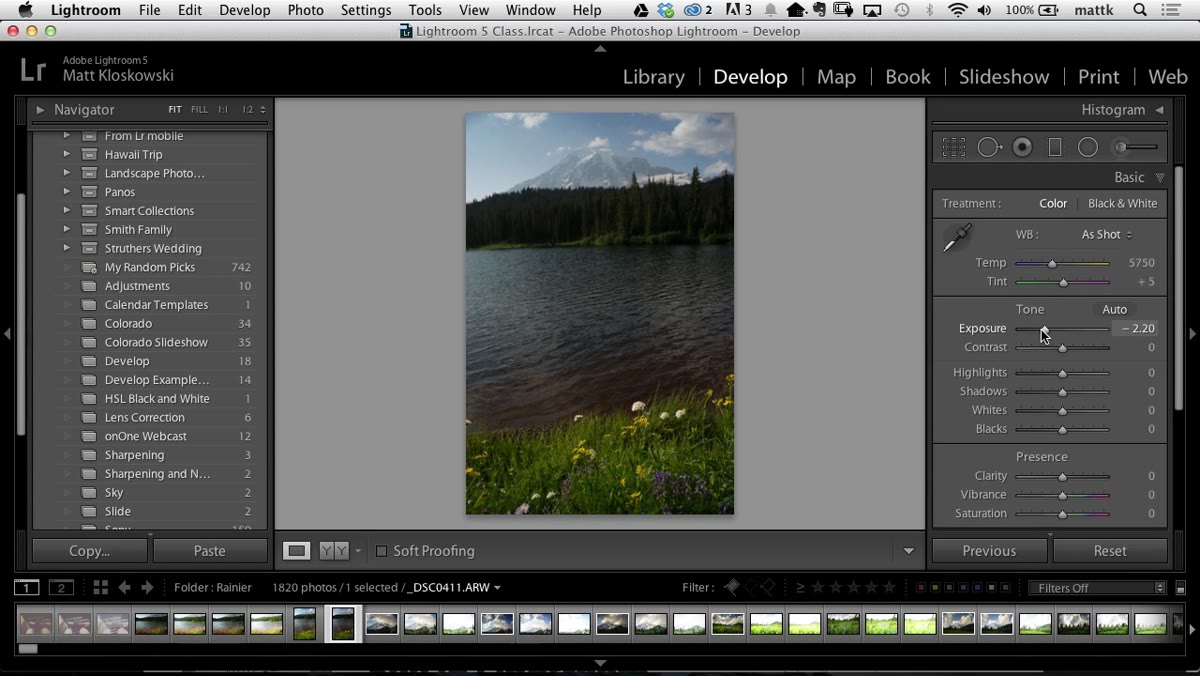 Exposure slider moved, collection count increases by one
Before you start refining the collection, test it. Go to a photo you haven’t edited yet, make one small adjustment in the Develop module — drop the exposure slightly, bump the shadows, anything — and go back to your Smart Collection. The count should increase by one. This real-time behavior is what makes the whole thing useful. Lightroom is quietly keeping a running tab on everything you touch, and now you have a window into that data.
Exposure slider moved, collection count increases by one
Before you start refining the collection, test it. Go to a photo you haven’t edited yet, make one small adjustment in the Develop module — drop the exposure slightly, bump the shadows, anything — and go back to your Smart Collection. The count should increase by one. This real-time behavior is what makes the whole thing useful. Lightroom is quietly keeping a running tab on everything you touch, and now you have a window into that data.
Step 5: Add a Folder Filter to Narrow the Results
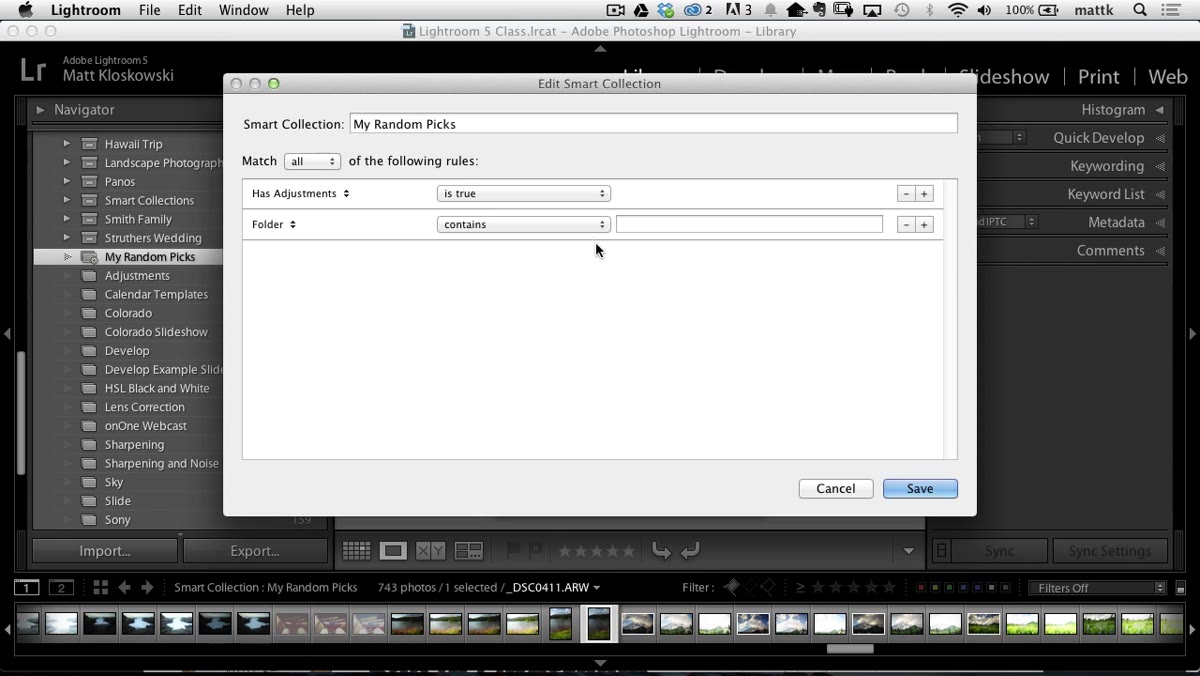 Smart Collection dialogue with Source folder rule added
If you don’t want the collection to reach back through years of catalog history, add a second rule. Back in the Smart Collection settings (double-click the collection name to reopen the dialogue), click the plus icon next to your first rule to add another condition. Set it to “Source Folder” and choose “contains,” then type the name of the folder or shoot you’re currently working on. In Matt’s example, he typed the name of a specific location, and the collection dropped from 700-plus photos down to around 200. Stack this rule on top of the “Has Adjustments” rule and you’ve got a collection scoped to exactly one shoot. Change the folder name each time you start a new project.
Smart Collection dialogue with Source folder rule added
If you don’t want the collection to reach back through years of catalog history, add a second rule. Back in the Smart Collection settings (double-click the collection name to reopen the dialogue), click the plus icon next to your first rule to add another condition. Set it to “Source Folder” and choose “contains,” then type the name of the folder or shoot you’re currently working on. In Matt’s example, he typed the name of a specific location, and the collection dropped from 700-plus photos down to around 200. Stack this rule on top of the “Has Adjustments” rule and you’ve got a collection scoped to exactly one shoot. Change the folder name each time you start a new project.
Step 6: Use the Collection as a Temporary Holding Zone
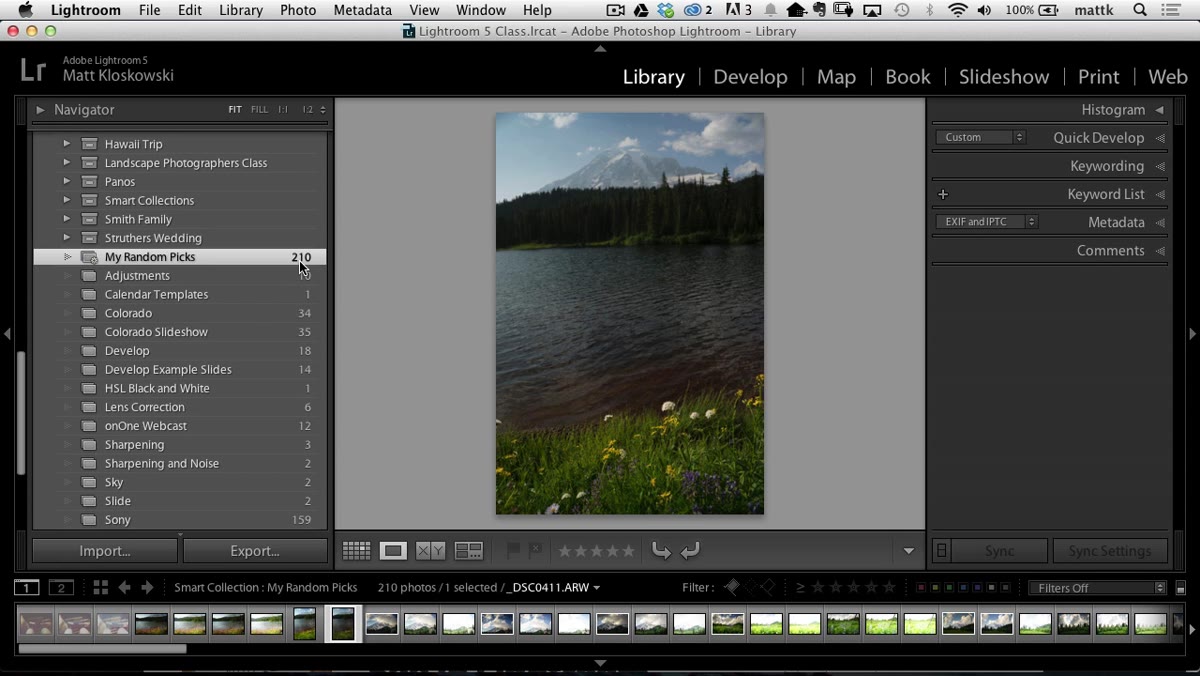 Narrowed Smart Collection showing filtered results
The collection isn’t meant to be permanent storage. Think of it as a smart net that catches whatever you’ve touched. Once you’ve worked through your edit session and you’re ready to do proper organization, open the collection, review what’s inside, and flag or rate the keepers. Then move them to a real destination collection — a client folder, a personal portfolio folder, wherever they belong. The Smart Collection stays behind as the net, ready to catch the next round of photos you forget to organize.
Narrowed Smart Collection showing filtered results
The collection isn’t meant to be permanent storage. Think of it as a smart net that catches whatever you’ve touched. Once you’ve worked through your edit session and you’re ready to do proper organization, open the collection, review what’s inside, and flag or rate the keepers. Then move them to a real destination collection — a client folder, a personal portfolio folder, wherever they belong. The Smart Collection stays behind as the net, ready to catch the next round of photos you forget to organize.
One Caveat Worth Knowing Before You Build This
The “Has Adjustments” flag in Lightroom includes any develop change — which means even a small accidental slider nudge you immediately undid will still register if you save and leave before the sync catches up, depending on your catalog settings. I’ve had a few photos show up in this collection after I was just clicking around exploratorily and didn’t intend to keep any changes. It’s not a frequent problem, but it’s worth doing a quick reset on any photo you open and decide not to edit. In Lightroom Classic, that means hitting the Reset button at the bottom of the Develop panel before you move on. It keeps the collection clean and makes your actual creative decisions easier to find later.
The bigger thing I’ve started doing, especially on shoots where I’m editing late at night while a record is spinning and my attention is split, is setting the folder filter to the current month rather than a specific folder name. That way I don’t have to update the collection rule every time I import new work. It gives me a rolling 30-day view of everything I’ve touched, which is basically the feature Matt was originally wishing existed as a preferences setting. You’re building the logic yourself, but it works.
The single most important thing here is that Lightroom already knows which photos you’ve edited. It’s been tracking that information the whole time. A Smart Collection is just a way to make that data visible and useful instead of buried. If you’re the kind of photographer who edits first and organizes second, this setup stops things from falling through the cracks.
Watch the full tutorial on YouTube to see Matt walk through the exact clicks in real time — it’s under five minutes and worth watching even if you’re already comfortable with Smart Collections.
Comments
Leave a Comment