Portrait work has a specific problem that nobody warns you about when you’re starting out. You shoot in decent light, you nail the focus, and then you open the file in Lightroom and the subject just sits there, flat against the background like they were cut out of a magazine and glued onto a different photo. No separation, no depth, no sense that the camera actually cared more about them than anything else in the frame. I used to think this was a lens problem, something you fixed at the glass level with a faster aperture. Turns out you can do a surprising amount of it in post.
This technique from the Kelvin Designs channel is one I’ve come back to more times than I can count. Watch the full tutorial on YouTube if you want to follow along with the source material. What Calin walks through in this video is a radial filter workflow that simulates depth of field in Lightroom’s Develop module, specifically by softening the background while sharpening and lifting the face. It’s not a complex technique, but it requires a specific layering logic that I want to walk through clearly here.
Step 1: Make a Virtual Copy and Convert to Black and White
 Lightroom Develop module open on portrait photo
Before touching a single slider, right-click the image in your filmstrip and choose “Create Virtual Copy.” This preserves your original file exactly as it is, so your depth edit lives separately. Once you have the copy, flip it to black and white using the HSL/Color panel or the shortcut V. The reason for going black and white first isn’t stylistic, it’s diagnostic. Removing color forces you to look at luminosity and contrast on their own terms, which is exactly what this technique is manipulating.
Lightroom Develop module open on portrait photo
Before touching a single slider, right-click the image in your filmstrip and choose “Create Virtual Copy.” This preserves your original file exactly as it is, so your depth edit lives separately. Once you have the copy, flip it to black and white using the HSL/Color panel or the shortcut V. The reason for going black and white first isn’t stylistic, it’s diagnostic. Removing color forces you to look at luminosity and contrast on their own terms, which is exactly what this technique is manipulating.
Step 2: Add a Large Radial Filter Around the Subject and Kill the Clarity and Sharpness
 Radial filter tool selected, large oval drawn around subject
Grab the Radial Filter tool from the toolbar above your image (or press Shift+M). Draw a large oval that encompasses your subject with room to breathe. The default behavior affects the outside of the oval, which is exactly what you want here. Drag the Feather slider up to around 65-70 to soften the edge of the effect. Now pull Clarity down to -100 and Sharpness (Detail) down to -100. What you’re doing is making everything outside that oval go soft, simulating the look of shallow depth of field without touching the actual optical properties of the shot.
Radial filter tool selected, large oval drawn around subject
Grab the Radial Filter tool from the toolbar above your image (or press Shift+M). Draw a large oval that encompasses your subject with room to breathe. The default behavior affects the outside of the oval, which is exactly what you want here. Drag the Feather slider up to around 65-70 to soften the edge of the effect. Now pull Clarity down to -100 and Sharpness (Detail) down to -100. What you’re doing is making everything outside that oval go soft, simulating the look of shallow depth of field without touching the actual optical properties of the shot.
Step 3: Duplicate the Radial Filter Twice to Intensify the Blur
 Duplicate radial filter pins visible slightly offset from each other
Here’s the thing about Clarity and Sharpness in Lightroom: they max out at -100. If the softening feels weak after your first radial filter, the answer is to stack the effect rather than hunt for a hidden slider. Right-click your radial filter pin and duplicate it. Move the duplicate just slightly so you can distinguish the two pins visually. Duplicate it a second time and do the same. Three stacked filters with identical settings multiply the blur effect significantly. If the edge starts creeping too close to your subject’s face, pull the Feather value down slightly across all three, somewhere in the 60-65 range tends to work well.
Duplicate radial filter pins visible slightly offset from each other
Here’s the thing about Clarity and Sharpness in Lightroom: they max out at -100. If the softening feels weak after your first radial filter, the answer is to stack the effect rather than hunt for a hidden slider. Right-click your radial filter pin and duplicate it. Move the duplicate just slightly so you can distinguish the two pins visually. Duplicate it a second time and do the same. Three stacked filters with identical settings multiply the blur effect significantly. If the edge starts creeping too close to your subject’s face, pull the Feather value down slightly across all three, somewhere in the 60-65 range tends to work well.
Step 4: Add a Second Radial Filter on the Face with the Mask Inverted
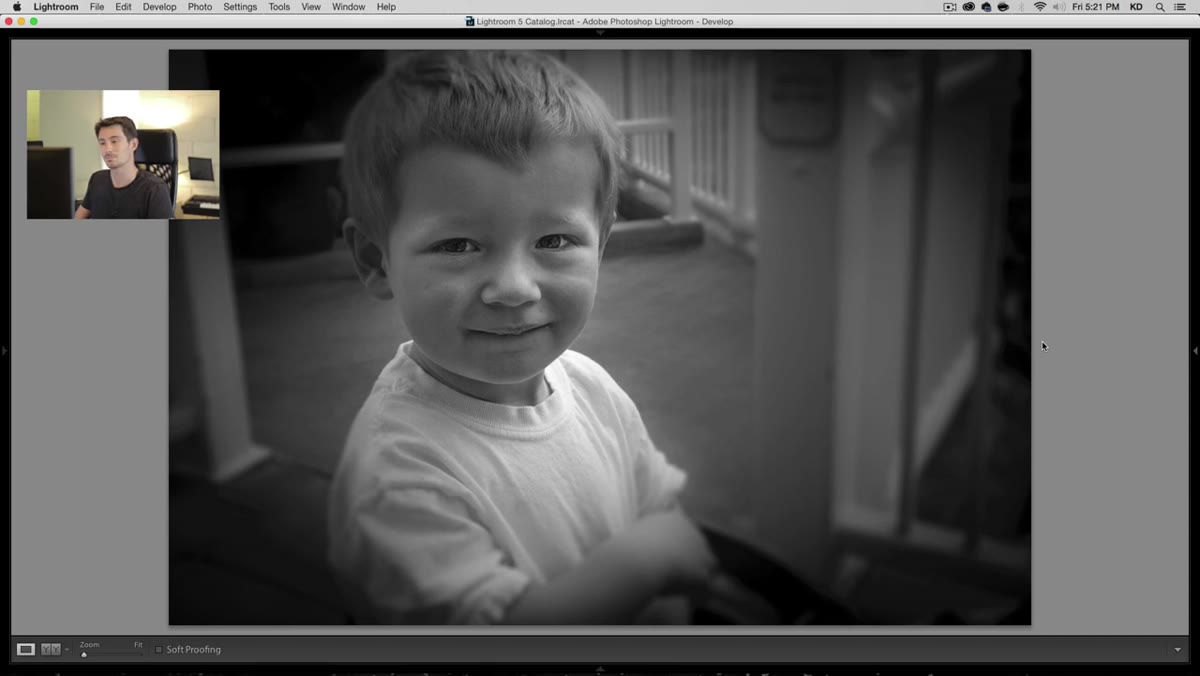 New radial filter drawn tightly around subject’s face, mask inverted
Create a fresh Radial Filter, this time drawing it snugly around just the face. Before adjusting any sliders, check the “Invert Mask” checkbox at the bottom of the panel. This flips the effect to the inside of the oval, meaning every adjustment you make now applies to the face only. From here, lift the Shadows, bring the Highlights down just a touch to keep it from blowing out, and bump Exposure up about half a stop. Add a small amount of Clarity, maybe 15-20, enough to give the skin some texture without making the shadows go muddy. Finish with a gentle bump to Sharpness to reinforce the contrast between the sharp subject and the soft background you built in steps two and three.
New radial filter drawn tightly around subject’s face, mask inverted
Create a fresh Radial Filter, this time drawing it snugly around just the face. Before adjusting any sliders, check the “Invert Mask” checkbox at the bottom of the panel. This flips the effect to the inside of the oval, meaning every adjustment you make now applies to the face only. From here, lift the Shadows, bring the Highlights down just a touch to keep it from blowing out, and bump Exposure up about half a stop. Add a small amount of Clarity, maybe 15-20, enough to give the skin some texture without making the shadows go muddy. Finish with a gentle bump to Sharpness to reinforce the contrast between the sharp subject and the soft background you built in steps two and three.
Step 5: Add a Second Face Filter for Additional Local Lift
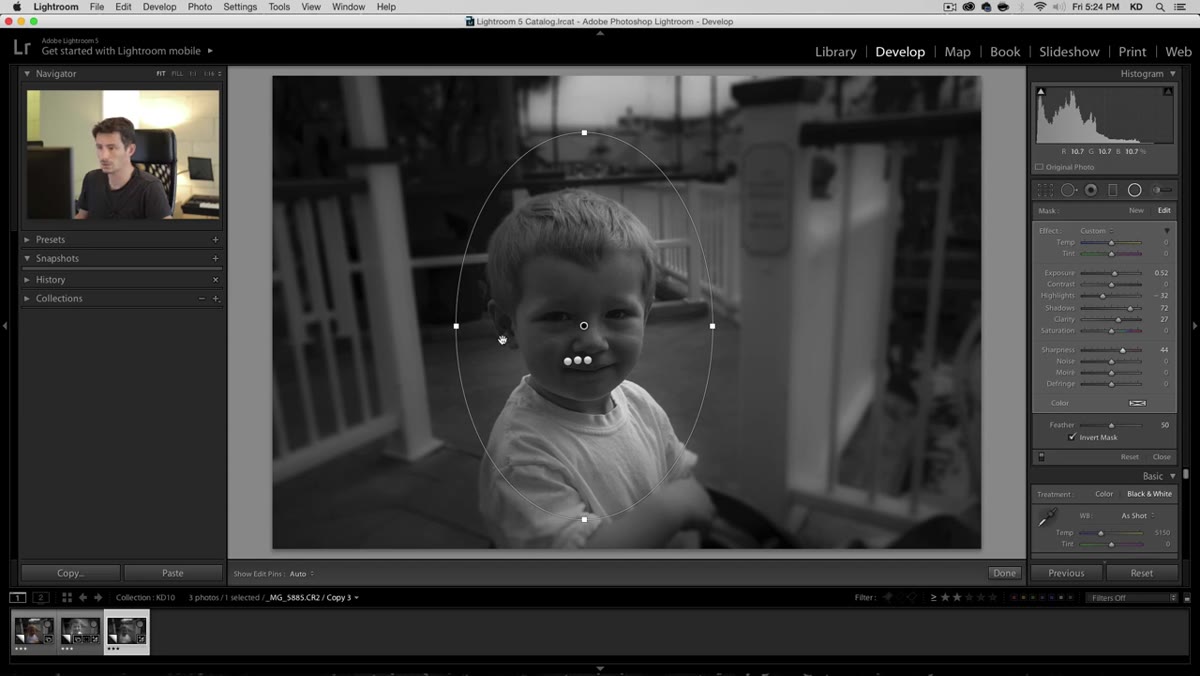 Second inverted radial filter applied over face area with exposure adjustment
This step is subtle but it compounds. Create another inverted radial filter over the face, slightly smaller than the first. Calin describes this as “quick and dirty but effective,” and honestly that’s a fair description. It’s a second pass of exposure lift and clarity, letting you build the brightness gradually rather than pushing one filter too hard and making the skin look washed out. Keep the Feather at 60 or above so the edge of this filter blends naturally with the one underneath. Think of it less as a separate creative decision and more as a way to achieve a smooth luminosity gradient pointing directly at your subject’s face.
Second inverted radial filter applied over face area with exposure adjustment
This step is subtle but it compounds. Create another inverted radial filter over the face, slightly smaller than the first. Calin describes this as “quick and dirty but effective,” and honestly that’s a fair description. It’s a second pass of exposure lift and clarity, letting you build the brightness gradually rather than pushing one filter too hard and making the skin look washed out. Keep the Feather at 60 or above so the edge of this filter blends naturally with the one underneath. Think of it less as a separate creative decision and more as a way to achieve a smooth luminosity gradient pointing directly at your subject’s face.
Step 6: Use a Small Radial Filter on the Eye to Pop the Whites
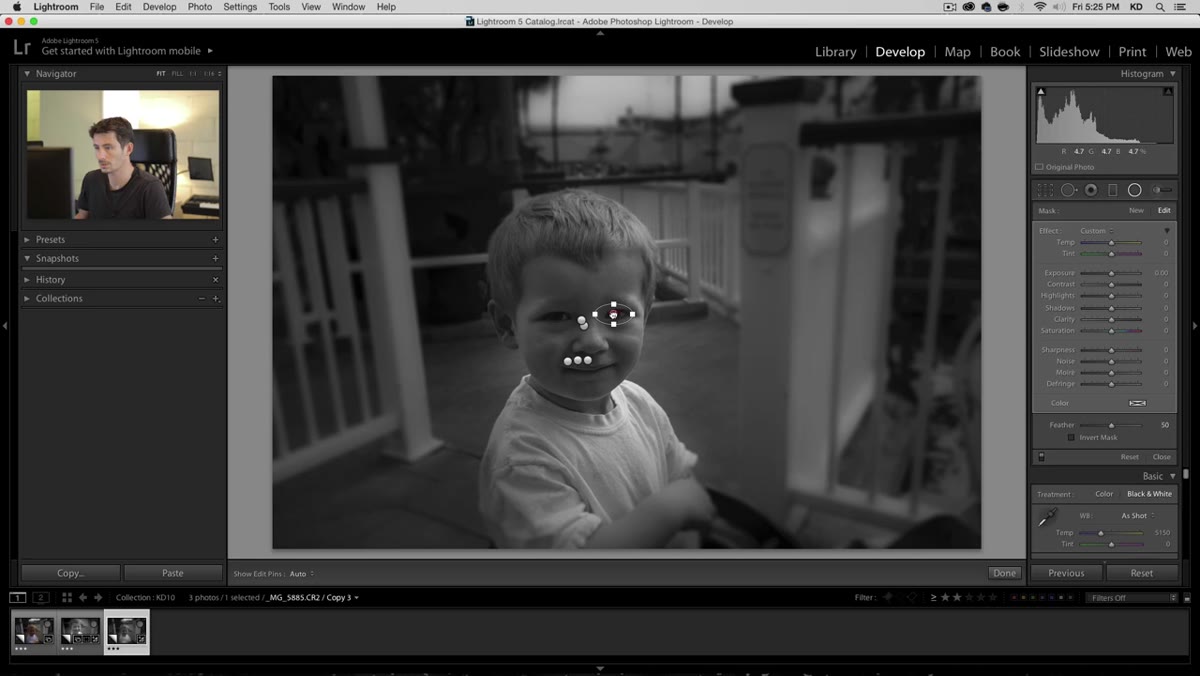 Small radial filter drawn around single eye, feather at 100
This last filter is the one that surprised me when I first watched the tutorial. Draw a tight radial filter around one eye, invert the mask, and pull Exposure up. Yes, it looks like a spotlight aimed directly at someone’s iris and it looks absolutely absurd at first. Then crank Feather all the way to 100. The harshness disappears, and what you’re left with is a very gentle, localized brightness that makes the white of the eye genuinely white rather than the slightly gray tone that portrait shadows usually leave behind. Repeat for the other eye. This detail reads as naturalness to viewers even if they can’t articulate why the image feels more alive.
Small radial filter drawn around single eye, feather at 100
This last filter is the one that surprised me when I first watched the tutorial. Draw a tight radial filter around one eye, invert the mask, and pull Exposure up. Yes, it looks like a spotlight aimed directly at someone’s iris and it looks absolutely absurd at first. Then crank Feather all the way to 100. The harshness disappears, and what you’re left with is a very gentle, localized brightness that makes the white of the eye genuinely white rather than the slightly gray tone that portrait shadows usually leave behind. Repeat for the other eye. This detail reads as naturalness to viewers even if they can’t articulate why the image feels more alive.
My Addition: Try This on Color Portraits Before Committing to Black and White
The workflow above is demonstrated on a black-and-white conversion, but I’ve been using the same radial filter logic on color portraits for a long time. The background blur effect is completely color-agnostic, and the face-lifting filters work just as well on a color file. The only adjustment I make in color is pulling Vibrance down slightly on the outside (background) filters, which mutes the colors in the background just enough to stop them from competing visually with the subject. It adds another layer of separation without requiring any masking or selections. If you’ve got a portrait where the background colors are distracting, this is worth building into your version of the technique.
The core insight from this tutorial is one that I think gets underestimated: depth in a portrait is something you can construct in post, not just capture in camera. Layered radial filters in Lightroom let you direct a viewer’s eye with the same intentionality a cinematographer uses with lighting. The technical execution here is minimal. The visual impact isn’t.
Watch the full tutorial on YouTube to see Calin walk through every slider adjustment in real time. It’s worth the watch even if you’ve read through the whole breakdown here.
Comments (1)
Solid advice. Especially the part about taking your time with it.
Leave a Comment