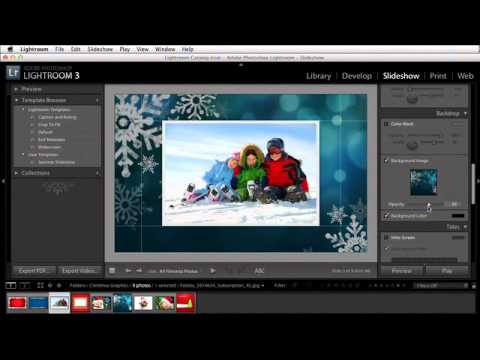
Every December, someone in my family texts me some version of the same message: “Can you put together something with the Christmas photos?” And every year, I used to open Photoshop, spend forty-five minutes making a title card, and wonder why I’d made my own holiday harder. Lightroom has a perfectly capable Slideshow module sitting right there, and I was ignoring it like a dusty record I’d never actually played.
In this KelbyOne tutorial, Matt Kloskowski walks through a genuinely fast method for building a holiday slideshow directly inside Lightroom, complete with a festive background image, opacity control, and a custom text overlay. The whole thing takes maybe ten minutes once you know where to look. Watch the full tutorial on YouTube if you want to follow along with the video, or keep reading for the full breakdown.
The technique works for any occasion where you need to share photos fast and want them to look like you put in more effort than you did. Christmas morning, a birthday party, a rehearsal dinner. The principle is the same: a stock background image does the heavy lifting so your actual photos get a polished frame without a single Photoshop layer.
Step 1: Find and Download a Holiday Background Image
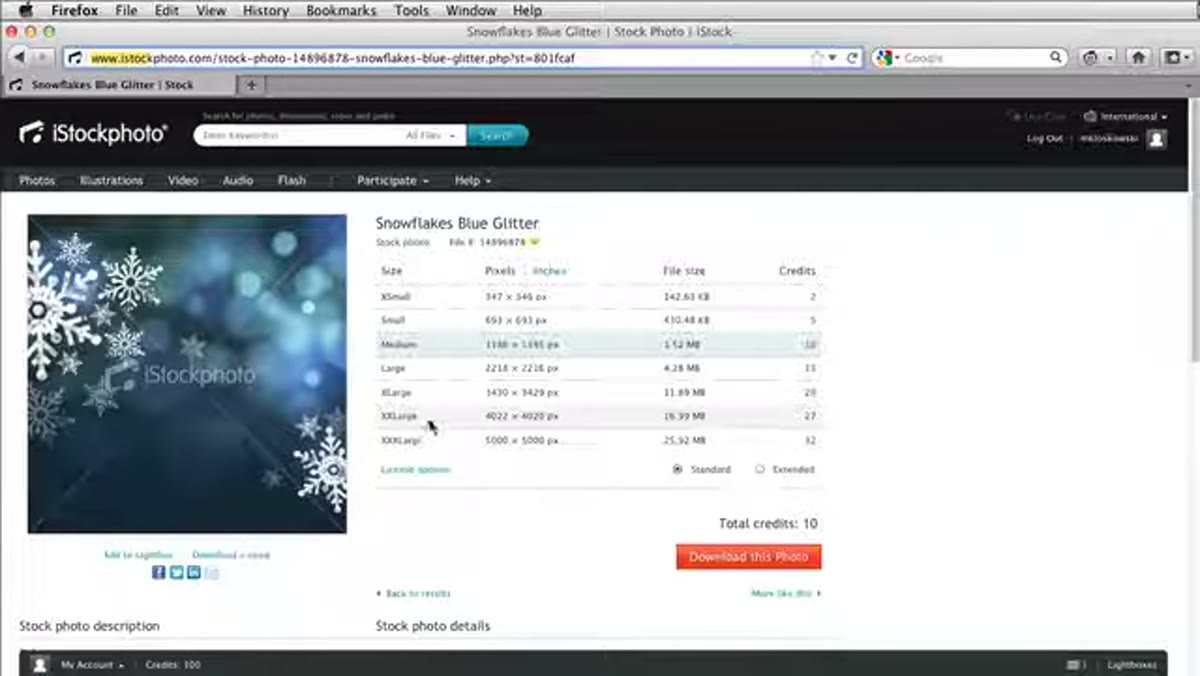 Searching for Christmas background on iStockPhoto
Your starting point is a stock image site. Matt mentions iStockPhoto and Fotolia specifically, but Unsplash and Adobe Stock work just as well depending on what you have access to. Search for something like “Christmas background” or “holiday bokeh” and look for something that complements photos rather than competes with them. A soft bokeh lights image or a subtle snowy texture tends to work better than something loud and busy.
Searching for Christmas background on iStockPhoto
Your starting point is a stock image site. Matt mentions iStockPhoto and Fotolia specifically, but Unsplash and Adobe Stock work just as well depending on what you have access to. Search for something like “Christmas background” or “holiday bokeh” and look for something that complements photos rather than competes with them. A soft bokeh lights image or a subtle snowy texture tends to work better than something loud and busy.
When you find the right image, buy or download the screen-resolution version, not the large print file. You’re using this as a slideshow backdrop on a laptop or TV screen, so the extra megapixels are wasted money. It’ll download as a JPEG, which is exactly what you want.
Step 2: Import the Background Image Into Lightroom
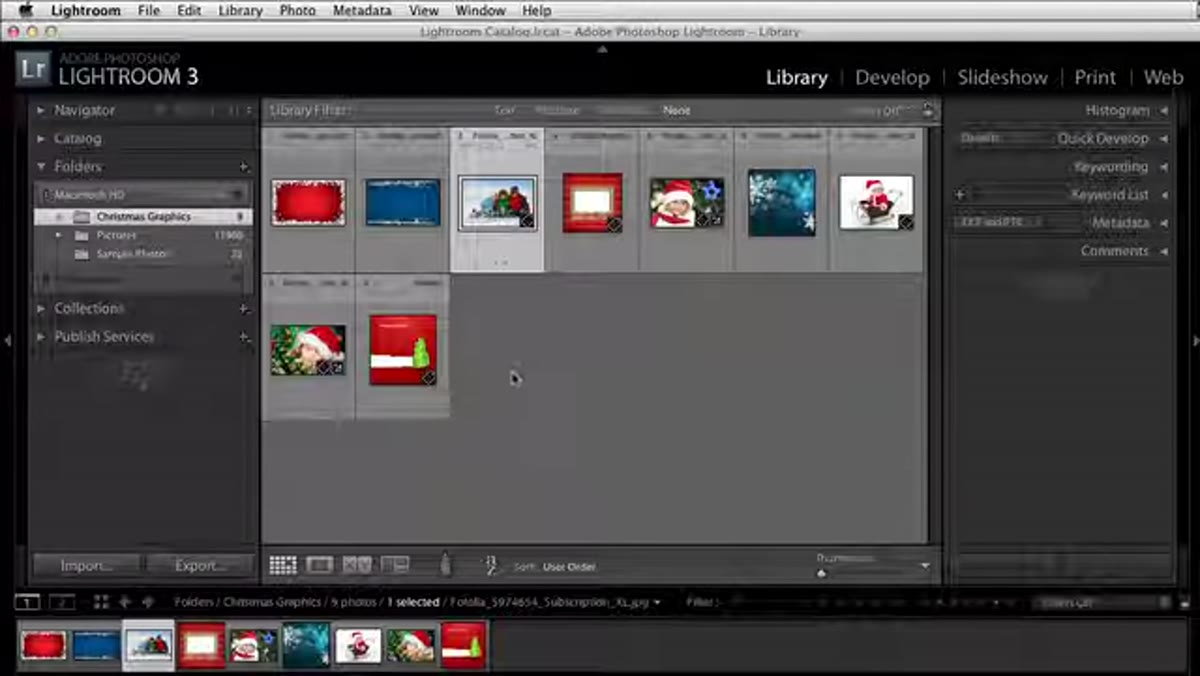 Importing JPEG background image into Lightroom Library
Drag the JPEG into Lightroom just like you would any photo. Lightroom doesn’t care that it came from a stock site rather than your camera. It lands in your Library module like any other image. From there, you can use it anywhere in Lightroom, including the Slideshow module.
Importing JPEG background image into Lightroom Library
Drag the JPEG into Lightroom just like you would any photo. Lightroom doesn’t care that it came from a stock site rather than your camera. It lands in your Library module like any other image. From there, you can use it anywhere in Lightroom, including the Slideshow module.
If you plan to build themed slideshows regularly, this is a good moment to get organized. In your Folders panel, click the small plus icon and create a subfolder specifically for backgrounds and graphic assets. Alternatively, make a dedicated collection called something like “Slideshow Templates.” Either way, keeping these files in one place means you’re not hunting through your library six months from now wondering why there’s a Christmas bokeh image sitting between your summer vacation shots.
Step 3: Select Your Holiday Photos and Open the Slideshow Module
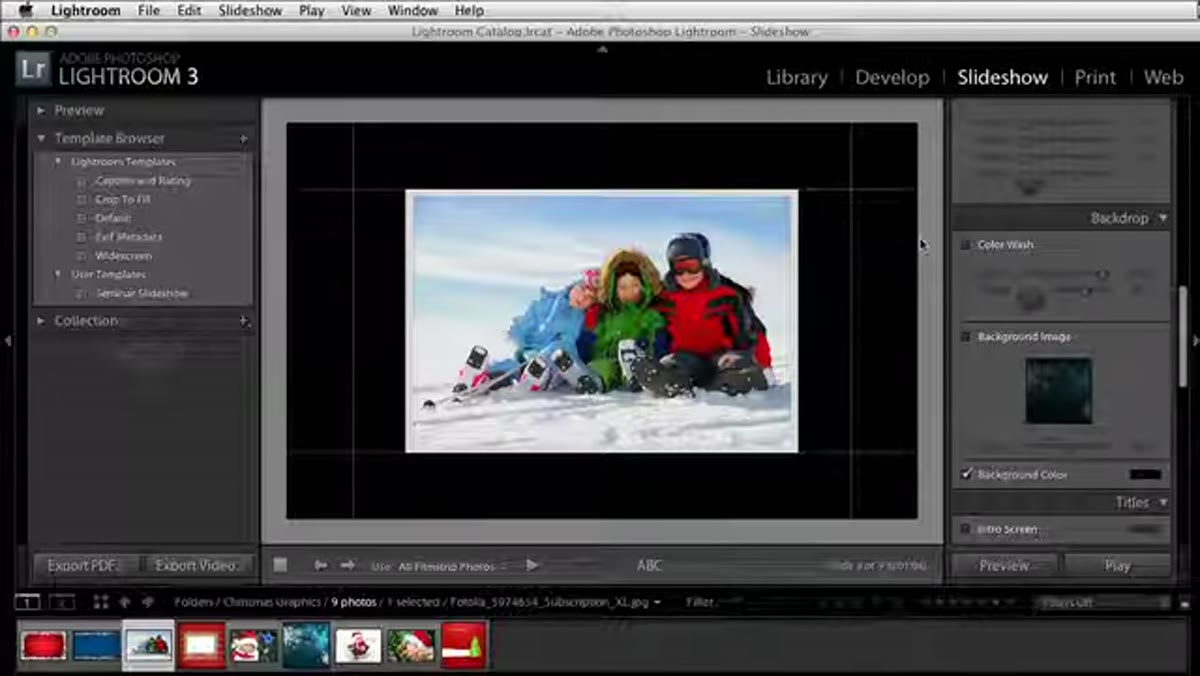 Lightroom Slideshow module open with filmstrip visible
Select the photos you want to include in the slideshow from your Library. You can use a collection, a folder, or just a quick selection. Then navigate to the Slideshow module using the module picker at the top of the screen.
Lightroom Slideshow module open with filmstrip visible
Select the photos you want to include in the slideshow from your Library. You can use a collection, a folder, or just a quick selection. Then navigate to the Slideshow module using the module picker at the top of the screen.
Your selected images will appear in the filmstrip along the bottom. The background image you imported should also be accessible down there. This is important for the next step, because you’re going to drag directly from the filmstrip into a specific panel on the right side.
Step 4: Set Your Background Image in the Backdrop Panel
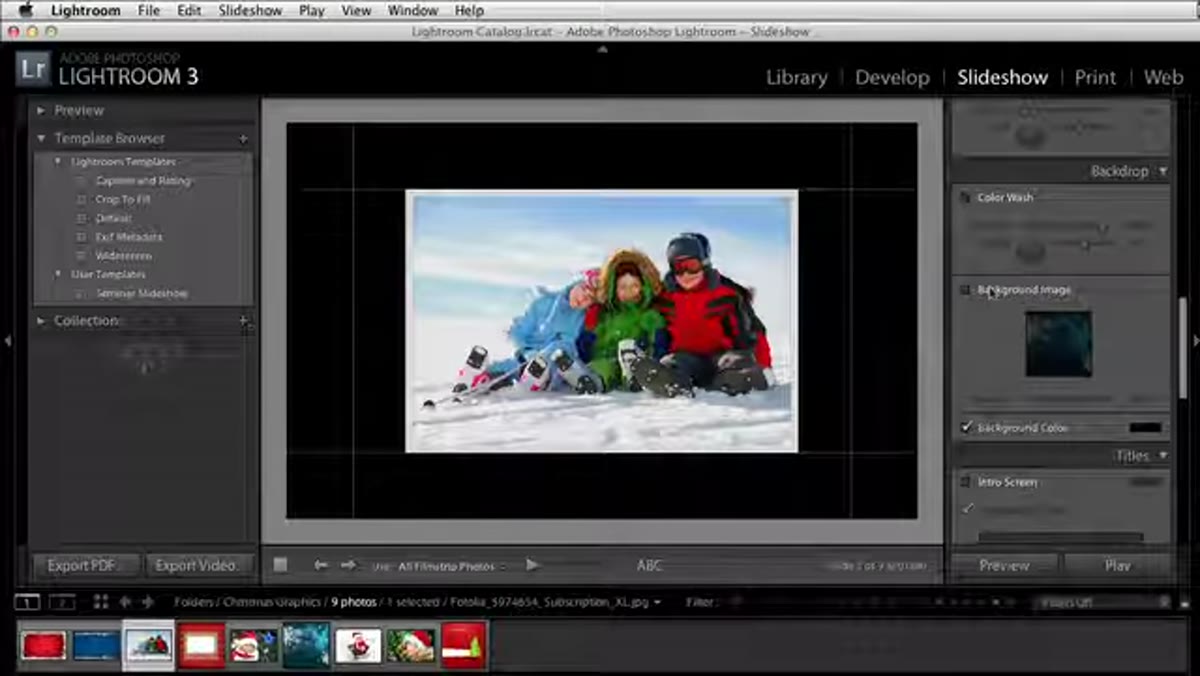 Dragging background image into Background Image box in Backdrop panel
In the right-side panel of the Slideshow module, scroll down until you find the section called “Backdrop.” Inside that section, you’ll see a checkbox and a box labeled “Background Image.” Grab your holiday JPEG from the filmstrip at the bottom of the screen and drag it directly into that background image box.
Dragging background image into Background Image box in Backdrop panel
In the right-side panel of the Slideshow module, scroll down until you find the section called “Backdrop.” Inside that section, you’ll see a checkbox and a box labeled “Background Image.” Grab your holiday JPEG from the filmstrip at the bottom of the screen and drag it directly into that background image box.
Once you drop it in, the background appears behind every slide in your slideshow automatically. You don’t have to apply it per image. One drag, and every photo in the sequence now has that festive backdrop sitting behind it. This is the moment where a basic photo dump starts to look like something you actually planned.
Step 5: Adjust Opacity and Background Color
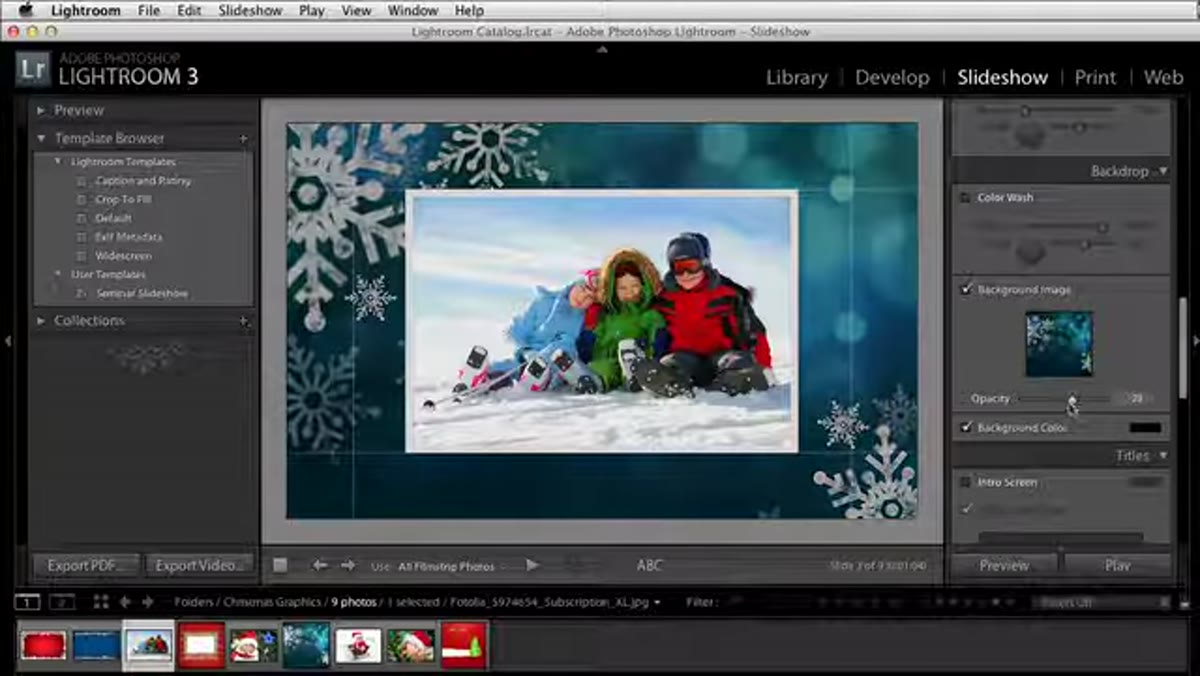 Opacity slider adjusted in Backdrop panel with background color options
Here’s where you get to make real creative decisions. Directly below the Background Image box is an opacity slider. If the background image feels too intense, pull the opacity down. Somewhere in the 50-70% range often hits a nice balance where the texture reads without distracting from the photos themselves.
Opacity slider adjusted in Backdrop panel with background color options
Here’s where you get to make real creative decisions. Directly below the Background Image box is an opacity slider. If the background image feels too intense, pull the opacity down. Somewhere in the 50-70% range often hits a nice balance where the texture reads without distracting from the photos themselves.
The background color setting works in combination with the opacity. If you switch from black to white and then reduce opacity, the background image softens and takes on a completely different feel. It’s almost like mixing two layers in Photoshop, except you’re doing it with two sliders in Lightroom. Try both and see which version matches the mood of your photos. Warmer family snapshots sometimes look better on a lighter background. Moody low-light Christmas Eve shots might want to stay dark.
Step 6: Customize the Stroke Border
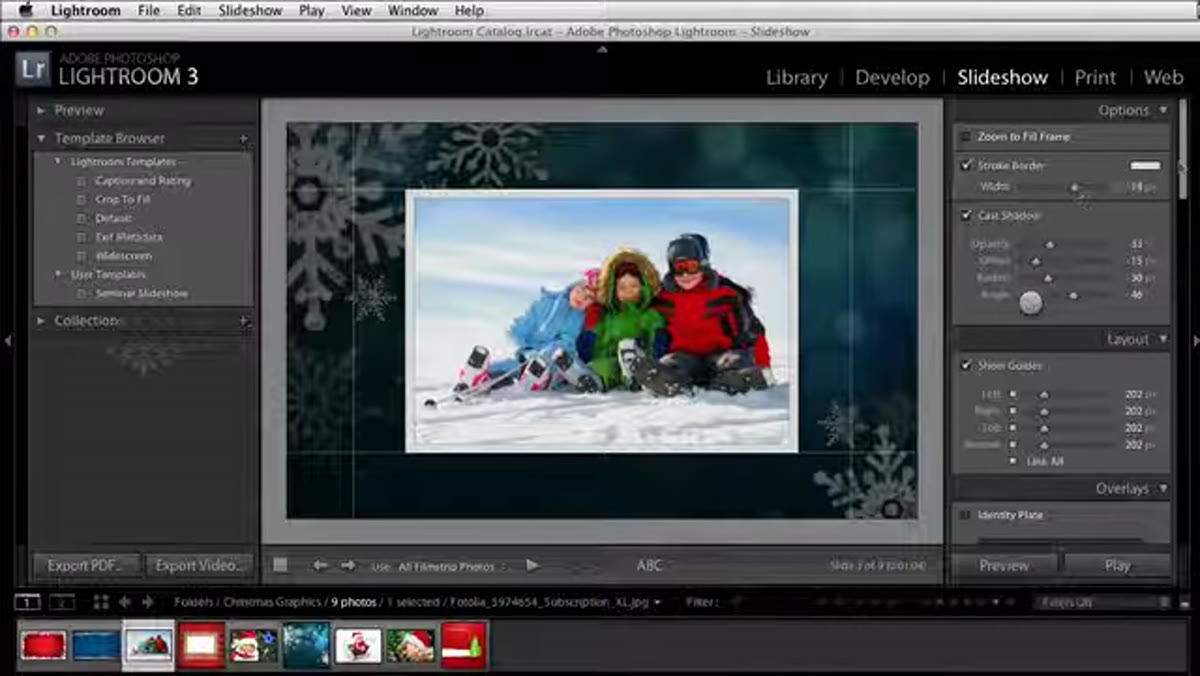 Stroke border setting adjusted around slide image
Still in the Slideshow module panels, look for the Stroke Border option. This adds a thin border around each photo, which can help separate the image from whatever background is behind it. If you’ve gone with a light, faded background, a dark border can give each photo a clean edge and keep it from dissolving into the backdrop.
Stroke border setting adjusted around slide image
Still in the Slideshow module panels, look for the Stroke Border option. This adds a thin border around each photo, which can help separate the image from whatever background is behind it. If you’ve gone with a light, faded background, a dark border can give each photo a clean edge and keep it from dissolving into the backdrop.
The right border color depends on your specific background. If it’s a warm gold and red holiday image, a dark brown or black border usually works. If you’re using a cooler snowy white background, a thin light gray border can look more refined. It’s a small detail, but it’s the kind of thing that makes the difference between “we put this together on Christmas morning” and “did you hire someone?”
Step 7: Add a Text Overlay With the Identity Plate
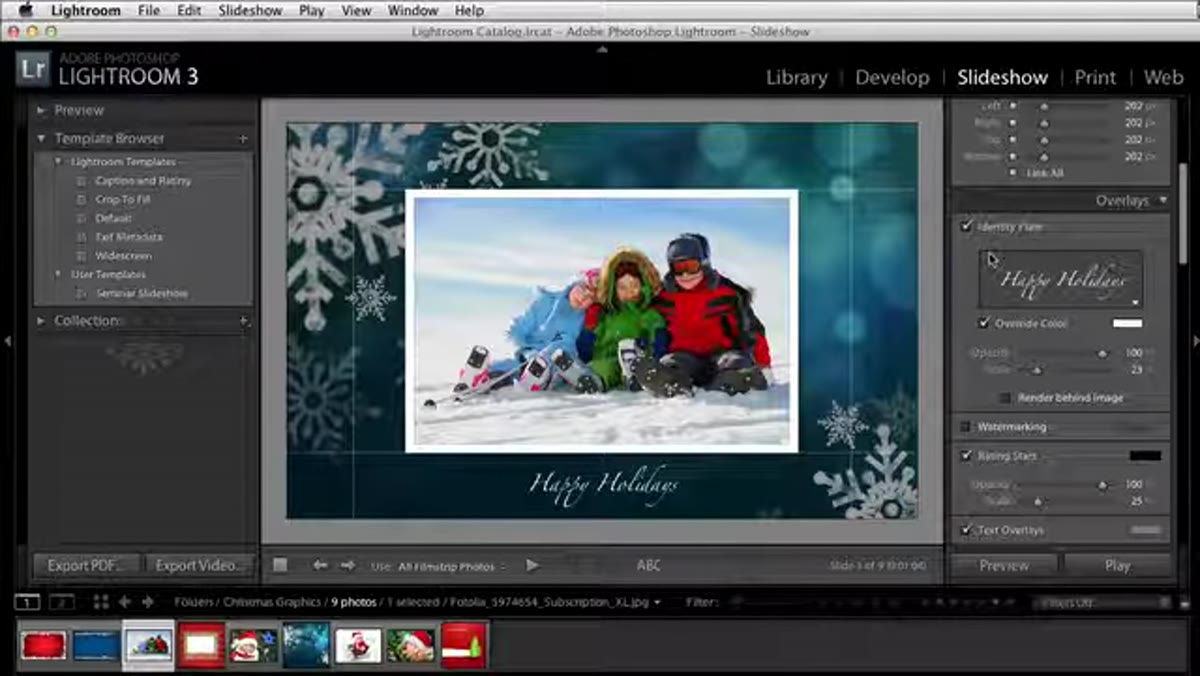 Identity Plate editor open with custom holiday text typed in
The Identity Plate feature in Lightroom is one of those tools that sounds corporate but is actually just a text overlay you can fully customize. In the Slideshow module, find the Identity Plate section near the top of the Layout panel. Enable it, click the preview box, and a small editor opens where you can type whatever you want.
Identity Plate editor open with custom holiday text typed in
The Identity Plate feature in Lightroom is one of those tools that sounds corporate but is actually just a text overlay you can fully customize. In the Slideshow module, find the Identity Plate section near the top of the Layout panel. Enable it, click the preview box, and a small editor opens where you can type whatever you want.
Type something simple. “Christmas 2024” or a family name works fine. Change the font, color, and size to match your background. Light text on a dark background, or dark text on a washed-out lighter one. Position it by dragging it directly on the slide preview. This text appears on every slide, which makes the whole thing feel cohesive instead of like a default settings export.
One Thing I’d Add From My Own Workflow
Matt’s approach is clean and efficient, and I use almost exactly this method now. The one thing I’ve layered on top is creating a saved Lightroom slideshow template after I build my first version. Once you have the backdrop, opacity, border, and text overlay dialed in, save it as a template by clicking the plus icon in the Template Browser panel on the left. Name it something you’ll actually recognize next year.
I name mine after the event, the same way I name my presets after songs. “Christmas Morning 2024” sitting in my template browser means next December I open Lightroom, load the template, swap in new photos, and I’m done in under five minutes. The ten-minute task becomes a two-minute task, which on Christmas morning is the kind of win that matters.
The biggest takeaway here is that Lightroom’s Slideshow module is underused by most people who have it. You don’t need Photoshop, you don’t need After Effects, and you don’t need to spend an hour building something from scratch. A single stock background image and about ten minutes of clicking gets you a slideshow that looks intentional and polished.
Watch the full tutorial on YouTube to see Matt walk through the whole thing in real time. It’s short, practical, and worth bookmarking before the holidays hit.
Comments (5)
This is going in my reference folder. Incredibly useful.
Great breakdown. The step-by-step approach really helps.
Really solid breakdown. This pairs perfectly with the compositing work I've been writing about.
This is going in my reference folder. Incredibly useful.
Great article! I actually covered something related on my site — the landscape angle is really complementary to this.
Leave a Comment