
There’s a particular kind of frustration that hits mid-edit when you’re bouncing between the HSL panel and the Basic panel and Lightroom keeps slamming one shut every time you open the other. I’ve been there more times than I want to admit. Solo mode is supposed to be a feature, not a trap, but when you’re deep in a color grade and need two panels visible at once, it starts to feel like the software is working against you. I hit that wall often enough that I stopped using Solo mode entirely for a while, which created its own mess of endlessly scrolling past open panels I forgot were there.
Then I watched this tutorial from Matt Kloskowski, one of the most methodical Lightroom educators around, and found a two-second fix I’d been missing for years. Watch the full tutorial on YouTube - the tips stack up fast and there are several buried inside each main point that are worth catching on their own.
What follows is a step-by-step walkthrough of the techniques from the video, written so you can follow along in Lightroom Classic without needing to pause and rewind.
Step 1: Enable Solo Mode in the Develop Panel
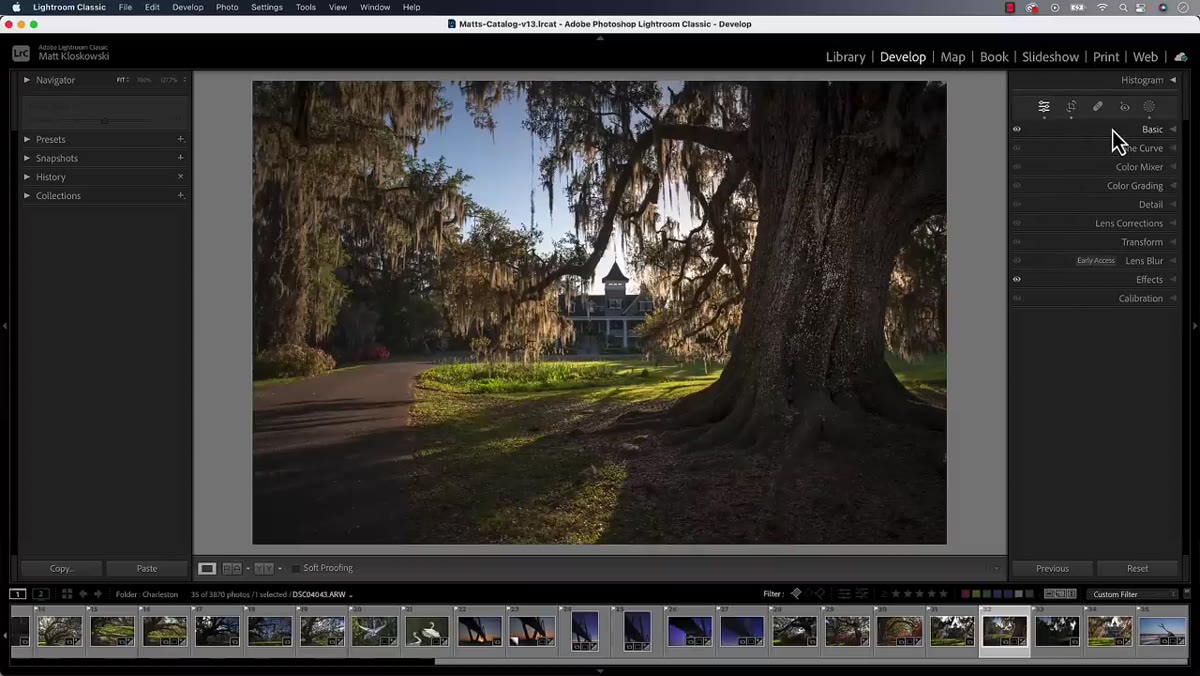 Right-click menu open on Develop panel sidebar
Right-click anywhere in the gray space beside or directly on any panel name in the Develop module’s right-hand sidebar. A small context menu will appear with Solo Mode as an option. Click it to turn it on. From this point forward, opening any panel will automatically collapse whatever was open before, which keeps the sidebar clean and prevents that accordion effect where twelve panels are sprawling open at once.
Right-click menu open on Develop panel sidebar
Right-click anywhere in the gray space beside or directly on any panel name in the Develop module’s right-hand sidebar. A small context menu will appear with Solo Mode as an option. Click it to turn it on. From this point forward, opening any panel will automatically collapse whatever was open before, which keeps the sidebar clean and prevents that accordion effect where twelve panels are sprawling open at once.
This is the baseline. Solo mode is one of those Lightroom settings that gets mentioned in every beginner tutorial, but a surprising number of working photographers never turn it on because they hit its main limitation immediately and give up. That limitation is what Step 2 solves.
Step 2: Hold Shift to Open a Second Panel Without Closing the First
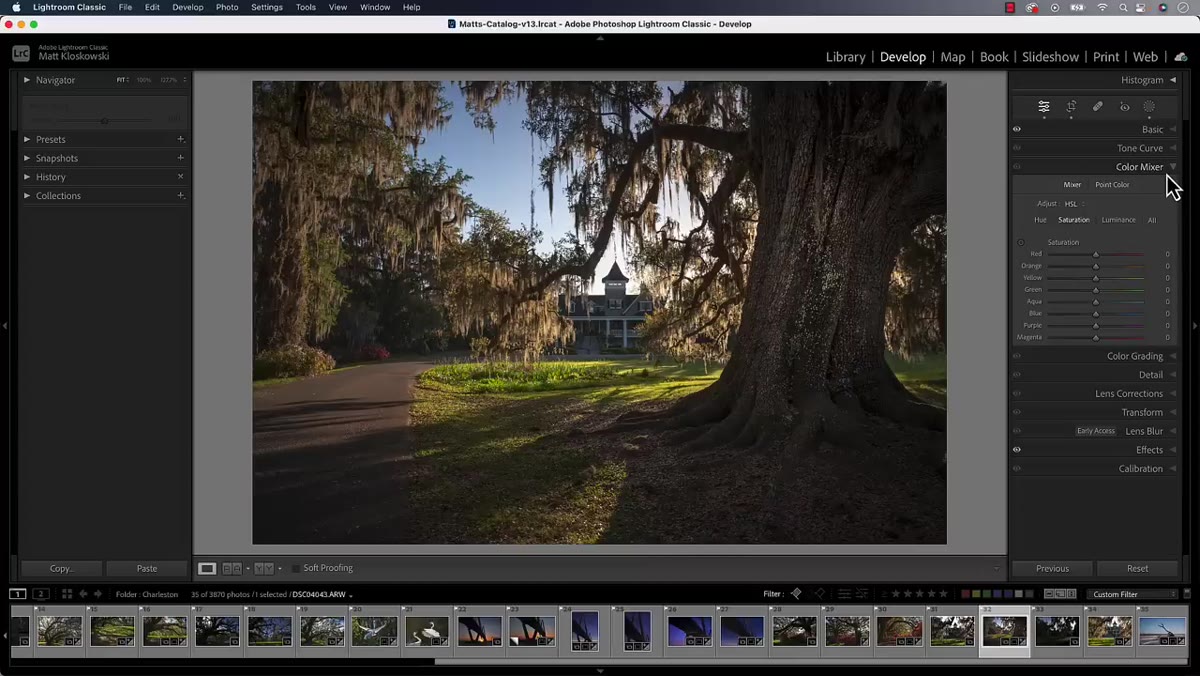 Color Mixer and Basic panels both open simultaneously in Develop
With Solo Mode active, open any panel, say the Color Mixer. Now hold the Shift key and click on the Basic panel header. Instead of swapping one for the other, Lightroom opens both and keeps both visible. You can scroll between them freely without either one collapsing.
Color Mixer and Basic panels both open simultaneously in Develop
With Solo Mode active, open any panel, say the Color Mixer. Now hold the Shift key and click on the Basic panel header. Instead of swapping one for the other, Lightroom opens both and keeps both visible. You can scroll between them freely without either one collapsing.
This is the trick that should be in every Solo Mode explanation but rarely is. It essentially gives you a custom, temporary multi-panel view whenever you need it, without permanently disabling Solo Mode. You’re not choosing between an organized sidebar and a flexible workspace. You’re getting both, on demand.
Step 3: Stack a Third Panel If Your Workflow Needs It
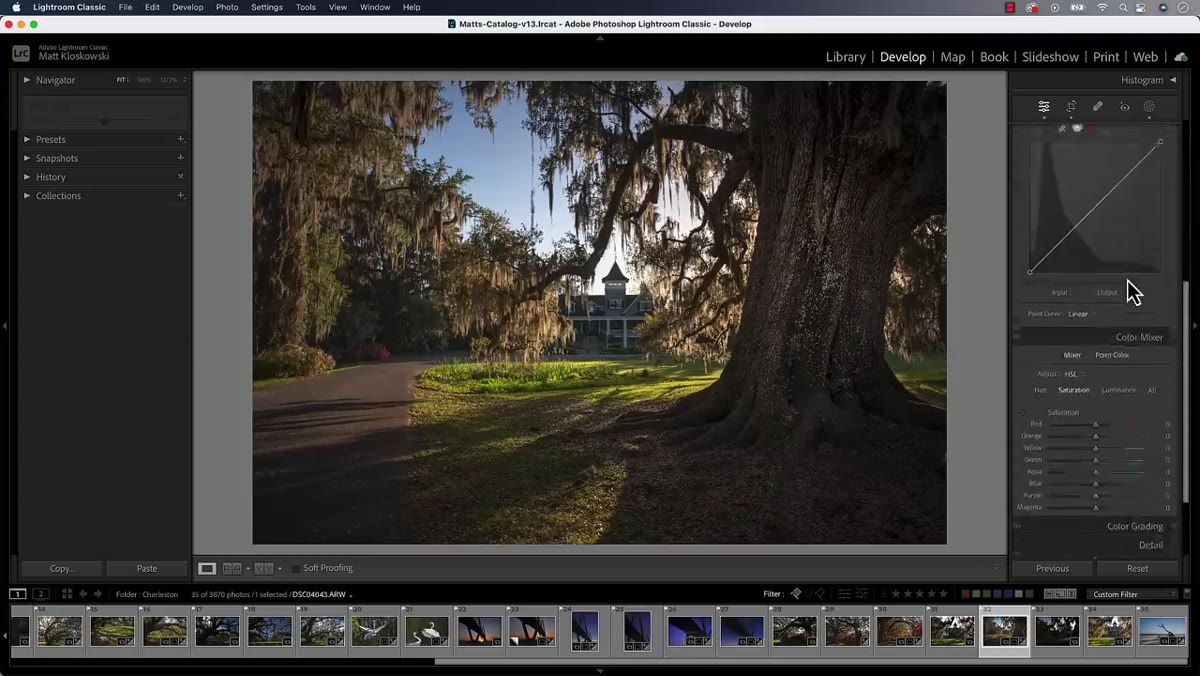 Three Develop panels open at once with Shift-click demonstrated
The Shift-click behavior isn’t limited to two panels. Shift-click a third panel header and it opens alongside the first two. According to Kloskowski, there doesn’t appear to be a hard cap on how many you can stack this way, though opening all of them at once does start to defeat the purpose of Solo Mode in the first place.
Three Develop panels open at once with Shift-click demonstrated
The Shift-click behavior isn’t limited to two panels. Shift-click a third panel header and it opens alongside the first two. According to Kloskowski, there doesn’t appear to be a hard cap on how many you can stack this way, though opening all of them at once does start to defeat the purpose of Solo Mode in the first place.
Where this becomes genuinely useful in practice: I often work between HSL, Color Grading, and the Tone Curve when I’m pulling a film-inspired grade. Having all three open and visible while I cross-reference adjustments cuts my back-and-forth significantly. Shift-click three times and they all stay put until I close them individually.
Step 4: Locate the Eyeball Icons on Each Panel
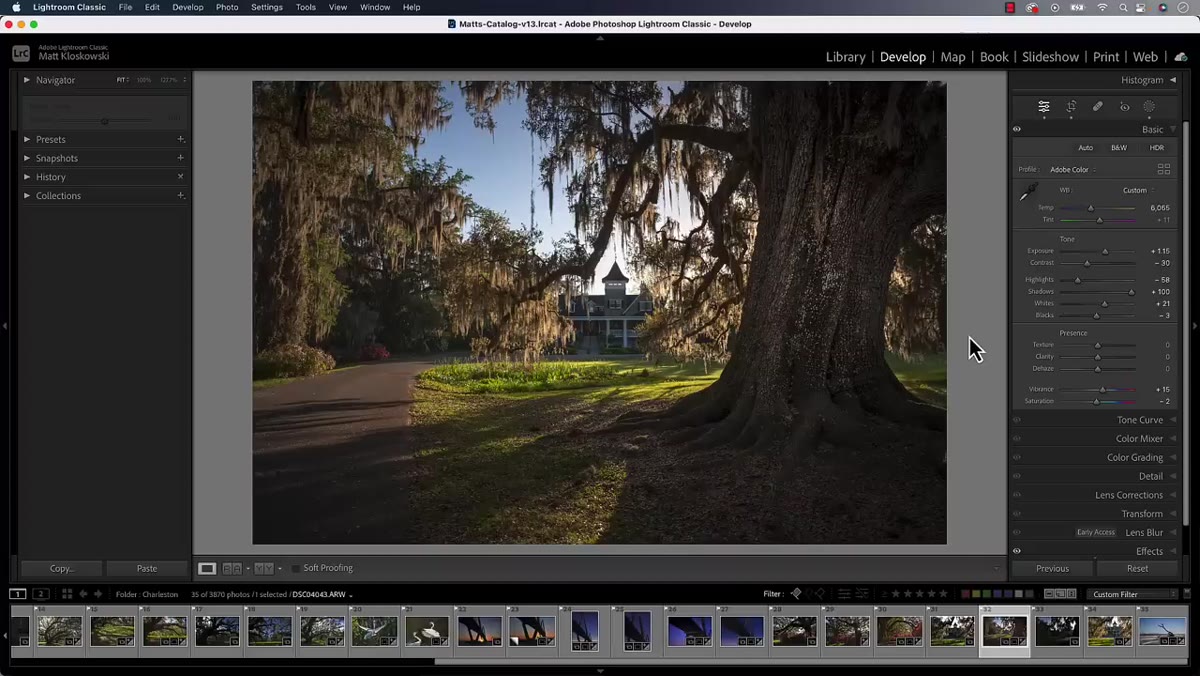 Eyeball visibility icons visible next to Develop panel names
This second tip addresses a feature that Kloskowski notes is relatively recent and easy to miss. Look at the left side of each panel header in the Develop module. You’ll see small eyeball icons sitting beside the panel names. These aren’t decorative. They’re visibility toggles for each panel’s adjustments.
Eyeball visibility icons visible next to Develop panel names
This second tip addresses a feature that Kloskowski notes is relatively recent and easy to miss. Look at the left side of each panel header in the Develop module. You’ll see small eyeball icons sitting beside the panel names. These aren’t decorative. They’re visibility toggles for each panel’s adjustments.
If you’ve used layer visibility in Photoshop, the concept is identical. Each eyeball controls whether that panel’s changes are currently applied to the image. Most people assume the only way to check individual adjustment contributions is to reset sliders or use History, but these icons offer a faster path.
Step 5: Click and Hold the Eyeball to Preview the Panel’s Impact
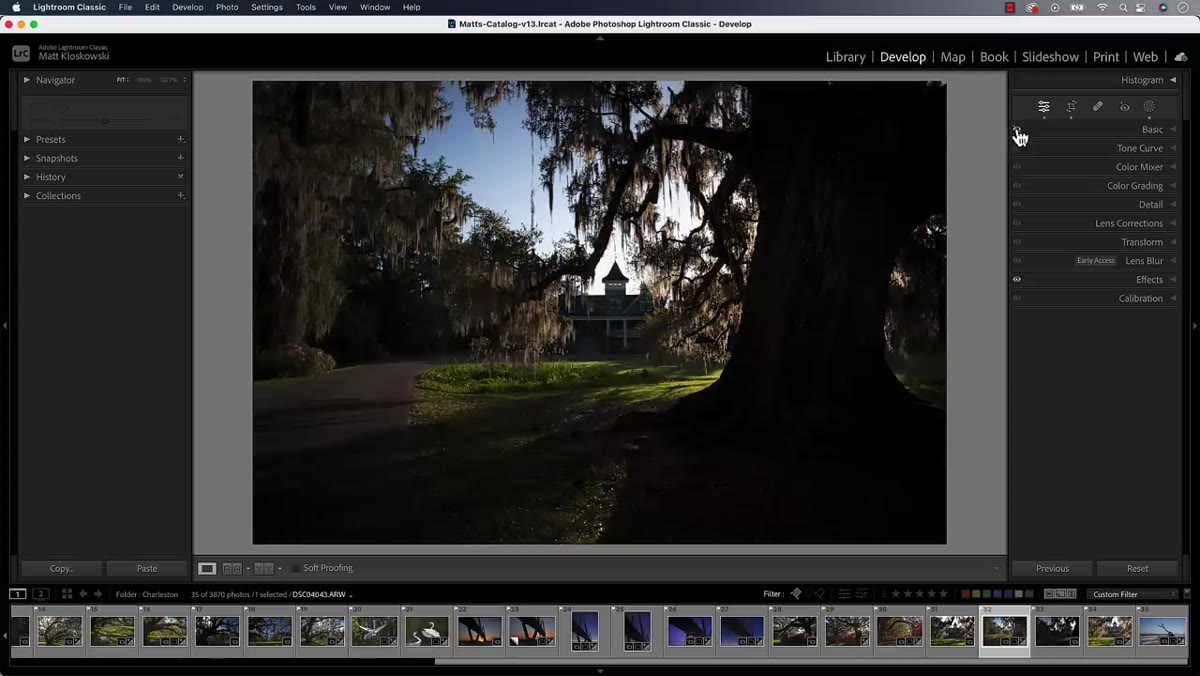 Eyeball icon being clicked to temporarily disable a panel’s adjustments
Click the eyeball icon next to a panel and hold your mouse button down. While you’re holding, Lightroom disables that panel’s adjustments and your image updates in real time to show you what the photo looks like without them. Release the mouse button and the adjustments come back instantly.
Eyeball icon being clicked to temporarily disable a panel’s adjustments
Click the eyeball icon next to a panel and hold your mouse button down. While you’re holding, Lightroom disables that panel’s adjustments and your image updates in real time to show you what the photo looks like without them. Release the mouse button and the adjustments come back instantly.
This is a non-destructive, zero-commitment before/after view scoped specifically to one panel. If you want to know exactly how much your HSL corrections are contributing to a color grade, you don’t have to toggle the whole edit off and on. You just hold the eyeball on the Color Mixer panel and look. It’s the kind of feature that sounds minor until the first time you actually use it during a real editing session, and then you wonder how you worked without it.
How I’ve Adapted These Tricks in My Own Workflow
Solo Mode with Shift-click stacking has become a regular part of how I work through portraits, especially when I’m making skin tone corrections that interact with background colors. I’ll open the Basic panel and the Color Mixer, make a Hue adjustment to a specific range, then immediately scroll up to Basic to see how it’s affecting the overall tone balance. Before I knew about Shift-click, I was either scrolling endlessly or toggling Solo Mode off entirely, which meant hunting through a collapsed mess later.
The eyeball icons have been more of a diagnostic tool for me than an editing one. When a grade starts looking muddy and I can’t immediately identify why, I work through each panel’s eyeball systematically, holding each one and watching what changes. It’s faster than reading slider values and more honest than trusting your memory of what each adjustment was supposed to do.
One thing I’d add that the video doesn’t cover directly: the eyeball icons don’t reset your sliders, they just pause them. This makes them safe to use at any point in an edit. You’re not risking your work. You’re just temporarily looking through a window before you decide whether to adjust further.
The single most important thing to take away from this material is that Lightroom Classic has a lot of power sitting in small, easy-to-miss interface elements. The Shift-click override for Solo Mode alone is worth the time it takes to watch this video, and Kloskowski’s delivery is efficient enough that you won’t be sitting through padding to get to the useful parts.
Watch the full tutorial on YouTube for the complete set of tips, including several additional techniques that aren’t covered in this walkthrough.
Comments
Leave a Comment