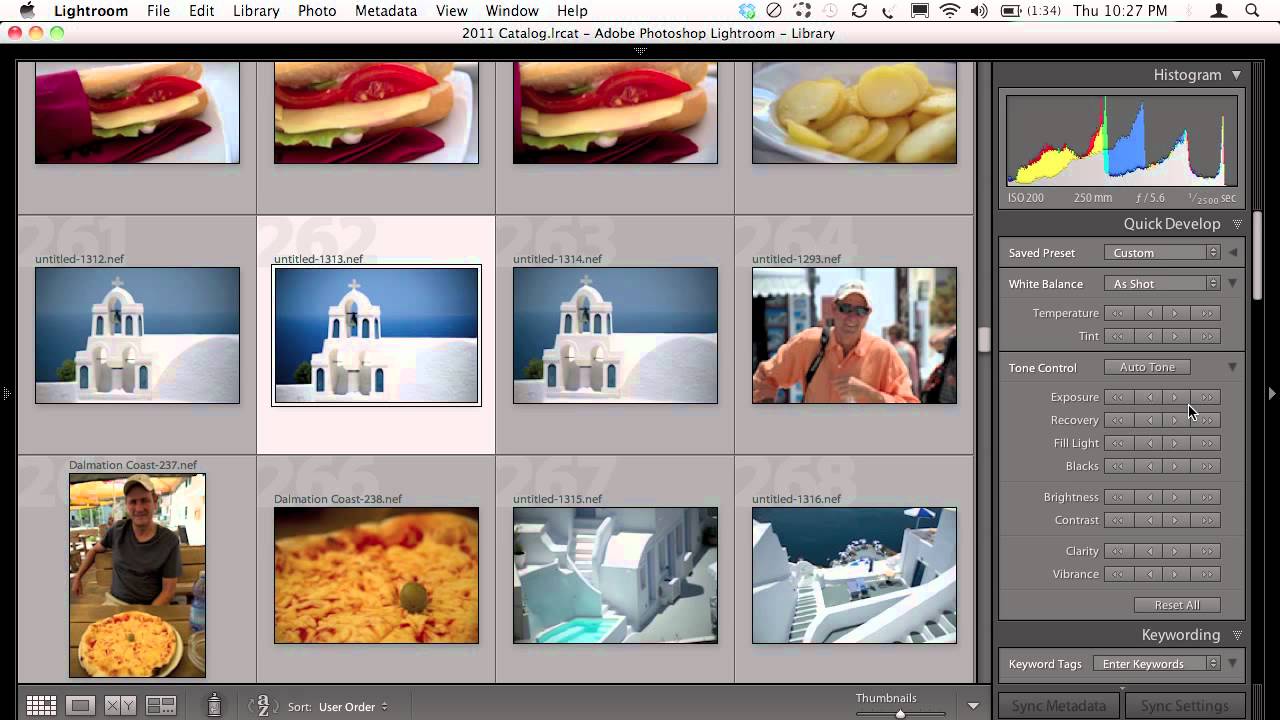
There’s a specific kind of frustration I know well: you shoot in a genuinely beautiful location, the light is doing everything right, and then you open the RAW files and they look like a photocopy of what you actually saw. Flat. Gray. Like the camera just gave up. For years, my fix was to spend 45 minutes per image throwing sliders around until something clicked. It worked, but it wasn’t a workflow. It was guessing with extra steps.
That’s why Scott Kelby’s approach in this tutorial stopped me mid-scroll. In Watch the full tutorial on YouTube, Kelby walks through the exact post-processing he did on photos from a trip to Greece and Croatia, and the answer is almost aggressively simple. Two moves. That’s it. The kind of thing that makes you feel slightly annoyed you didn’t figure it out yourself.
What makes this tutorial worth your time isn’t just the technique itself. It’s the reasoning behind it. Kelby explains why RAW files look flat compared to JPEGs, and once that clicks, the solution stops feeling like a shortcut and starts feeling like the correct tool for the job.
Step 1: Open Your Image in the Develop Module
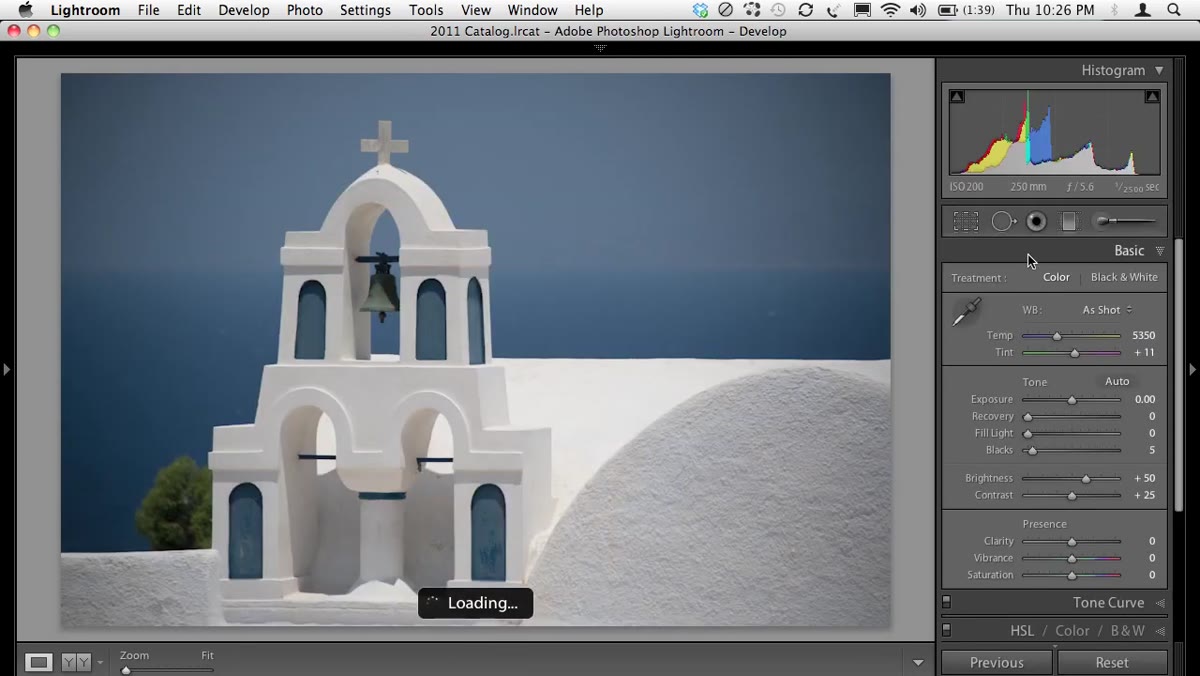 Develop module open with a Greece landscape RAW file
Start in Lightroom’s Develop module. Kelby double-clicks a RAW file from the library and goes straight to Develop, skipping any manual adjustments at the top of the panel. This matters because the order of operations here is intentional. You want the camera profile change to happen first, before any other corrections, so you’re building on an accurate color foundation rather than correcting on top of a bad one.
Develop module open with a Greece landscape RAW file
Start in Lightroom’s Develop module. Kelby double-clicks a RAW file from the library and goes straight to Develop, skipping any manual adjustments at the top of the panel. This matters because the order of operations here is intentional. You want the camera profile change to happen first, before any other corrections, so you’re building on an accurate color foundation rather than correcting on top of a bad one.
If you’re coming from Camera Raw in Photoshop, this workflow is identical. The panels are named the same and live in the same places. There’s no reason to switch tools.
Step 2: Scroll Down to the Camera Calibration Panel
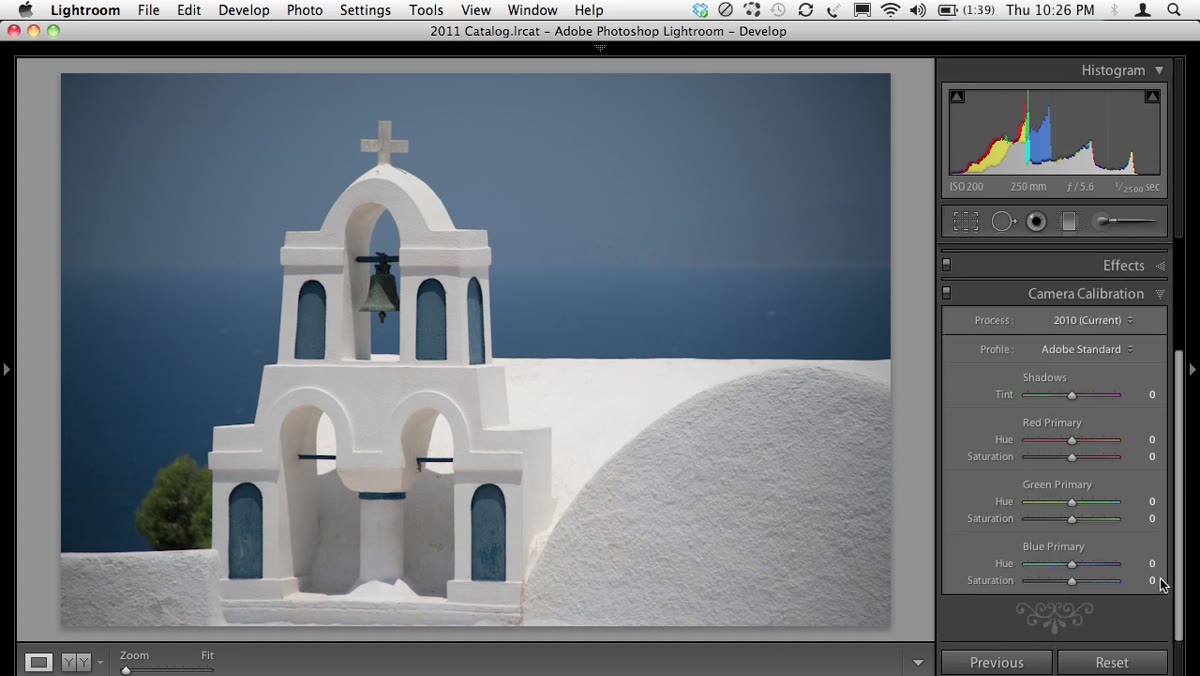 Camera Calibration panel visible at the bottom of the Develop panel list
This is the move most people miss because the Camera Calibration panel lives at the very bottom of the right-side panel stack in Lightroom’s Develop module. Most workflows start at the top with Basic and work down, so a lot of photographers have barely opened this one. Scroll past Lens Corrections and you’ll find it.
Camera Calibration panel visible at the bottom of the Develop panel list
This is the move most people miss because the Camera Calibration panel lives at the very bottom of the right-side panel stack in Lightroom’s Develop module. Most workflows start at the top with Basic and work down, so a lot of photographers have barely opened this one. Scroll past Lens Corrections and you’ll find it.
The panel contains a “Profile” dropdown menu that defaults to “Adobe Standard.” This is Lightroom’s generic interpretation of your RAW data, and it’s deliberately conservative. Adobe Standard isn’t trying to make your photo look good. It’s trying to give you a neutral starting point. The problem is that most photographers never leave that starting point.
Step 3: Change the Profile from Adobe Standard to Camera Landscape
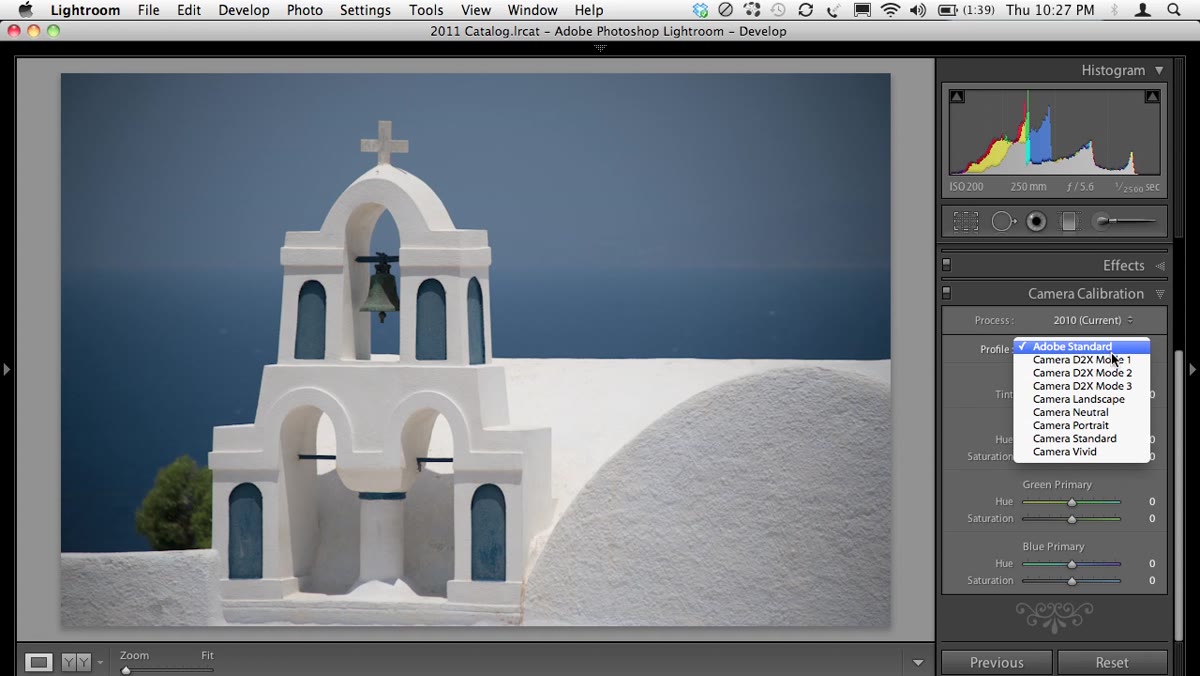 Profile dropdown open, Camera Landscape option highlighted
Click the Profile dropdown and select “Camera Landscape.” Watch what happens to your image. The colors deepen, contrast increases, and the whole scene starts looking the way you remember it, not the way the sensor neutrally recorded it.
Profile dropdown open, Camera Landscape option highlighted
Click the Profile dropdown and select “Camera Landscape.” Watch what happens to your image. The colors deepen, contrast increases, and the whole scene starts looking the way you remember it, not the way the sensor neutrally recorded it.
Kelby’s explanation here is the key insight: when your camera shoots a JPEG, it applies the manufacturer’s own processing pipeline automatically. Sharpening, contrast curves, color boosts. The camera’s “Landscape” picture style is one of those pipelines. When you shoot RAW, all of that gets switched off. The Camera Landscape profile in Lightroom is essentially a reconstruction of what the camera’s own processing would have done. You’re not adding something artificial. You’re restoring something that was always intended to be there.
For travel photography, landscapes, and architecture, Camera Landscape tends to be the right call. If you’re shooting portraits, try Camera Portrait instead. The logic is the same, the color science is tuned differently.
Step 4: Open the Basic Panel and Run Auto Tone
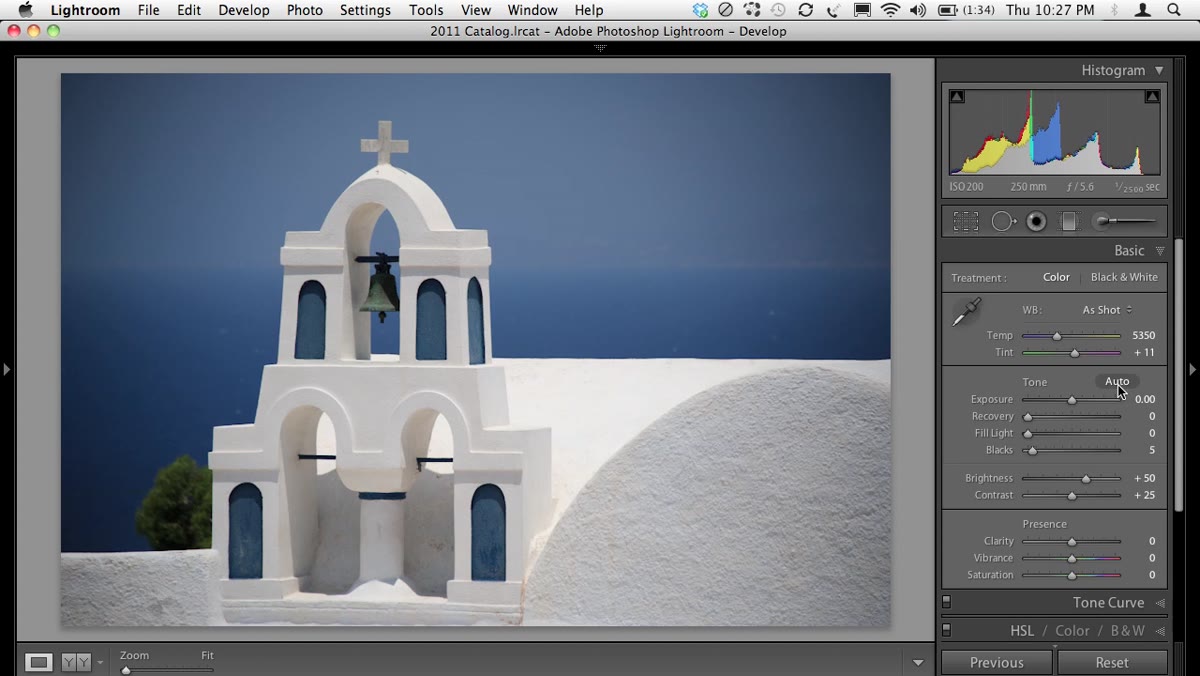 Basic panel open, Auto button visible near the top
After the profile change, Kelby moves up to the Basic panel and clicks “Auto.” That’s the small button that triggers Lightroom’s automatic tone correction, and it adjusts Exposure, Contrast, Highlights, Shadows, Whites, and Blacks simultaneously based on the image content.
Basic panel open, Auto button visible near the top
After the profile change, Kelby moves up to the Basic panel and clicks “Auto.” That’s the small button that triggers Lightroom’s automatic tone correction, and it adjusts Exposure, Contrast, Highlights, Shadows, Whites, and Blacks simultaneously based on the image content.
I know how this sounds. Auto adjustments have a reputation for being the thing you use before you know what you’re doing. But Kelby addresses this directly, and he’s right. When you’ve already applied a camera-matched profile, the image Lightroom is analyzing for Auto is already in a much healthier tonal state. The Auto correction is working from a better baseline, and the results show it. On well-exposed travel shots with good natural light, this combination gets you to 90 percent of a finished edit in about 15 seconds.
The remaining 10 percent is your call. You might pull the Highlights back slightly, or lift the Shadows on a backlit scene. But those are refinements, not rescues.
Step 5: Apply the Same Process Across Your Series
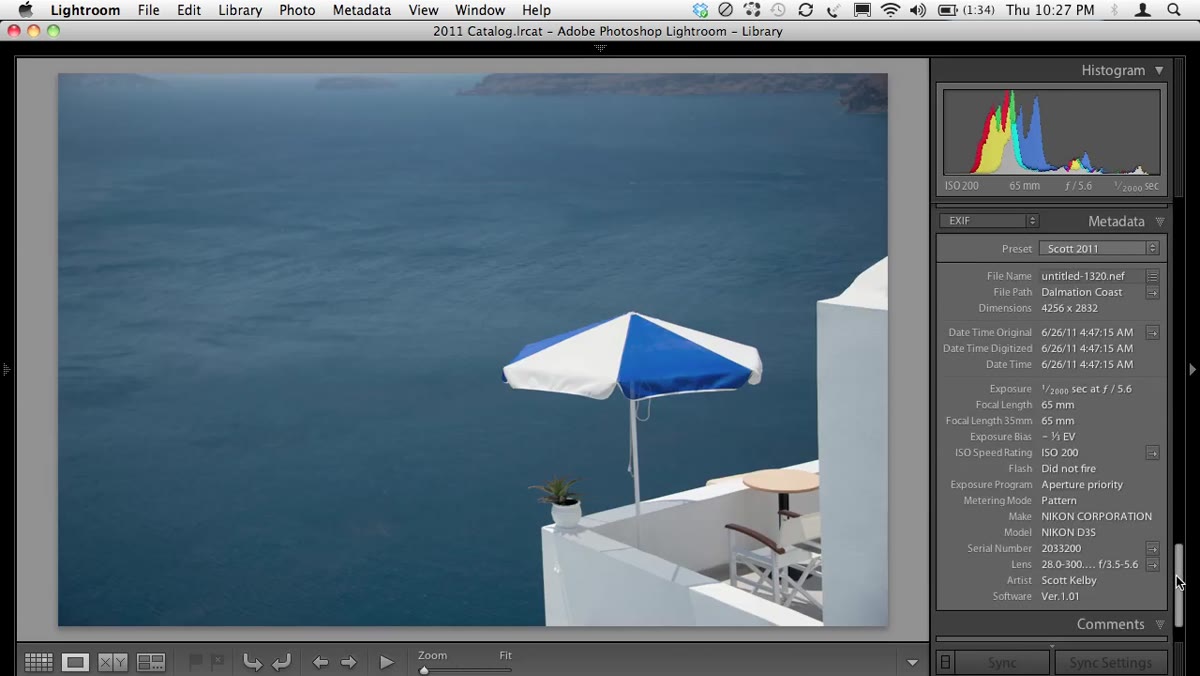 Second landscape image loaded, same Camera Calibration step being repeated
Kelby repeats the same two steps on a second image to demonstrate that this isn’t a one-shot trick. It’s a repeatable workflow. For a trip with hundreds of RAW files, repeatability is everything.
Second landscape image loaded, same Camera Calibration step being repeated
Kelby repeats the same two steps on a second image to demonstrate that this isn’t a one-shot trick. It’s a repeatable workflow. For a trip with hundreds of RAW files, repeatability is everything.
The fastest way to apply this across a batch in Lightroom is to make your two changes on one hero image, then use “Sync Settings” to push the Camera Calibration profile and Basic adjustments to the rest of your selected images. You can also save it as a preset, which is how I handle it for any recurring shooting scenario. (Mine is named after a Big Star track, but that’s a personal system.)
A Caveat from My Own Editing Table
This two-step method is genuinely excellent for high-key travel photography in good natural light, which is exactly the context Kelby shot it in. On overcast days, deep shadows, or indoor scenes with mixed artificial lighting, Camera Landscape can sometimes push the blues and greens too aggressively. In those cases I’ll switch to Camera Faithful or Camera Neutral as the profile instead, and let the Auto correction handle the rest.
The white balance tip Kelby mentions for food photography is also worth pulling out separately. Clicking the white balance eyedropper on a neutral surface, like a white plate, before running Auto Tone gives the algorithm much more accurate color information to work from. On indoor restaurant shots especially, this makes a real difference to skin tones on anyone sitting at the table.
The single most important thing this tutorial taught me is to treat the Camera Calibration profile as step zero, not an afterthought. Every edit I do now starts at the bottom of the panel stack, not the top. That one change in order has done more for consistency across my edits than any preset pack I’ve ever built.
Watch the full tutorial on YouTube to see Kelby’s food photography tips and the full walkthrough of his Greece and Croatia images.
Comments
Leave a Comment