There’s a particular kind of client email I used to dread. The one that comes in two days after delivery asking if you can send “a few black and white versions too, and maybe one with a warmer feel?” Back when I was editing press shots for my band on a budget and no one else was going to do it, I learned fast that re-editing six photos three different ways could eat an entire afternoon. Virtual copies changed that completely. They let you branch off from a single original file and explore completely different edits, without duplicating the raw file on your hard drive or losing your original work.
In this Aaron Nace (PHLEARN) tutorial from his 30 Days of Lightroom series, he walks through exactly how virtual copies work, how to stay organized when you’re managing multiple versions, and how to get them out the door efficiently. Watch the full tutorial on YouTube if you want to follow along. The images Aaron uses are available as a free download linked in his video description, which makes this one easy to practice with right away.
What I like about Aaron’s approach here is that he’s not just teaching a feature, he’s teaching a client workflow. There’s a real professional logic to the order of operations, and once it clicks, you’ll wonder why you weren’t doing this from day one.
Step 1: Create a Virtual Copy from Your Original Image
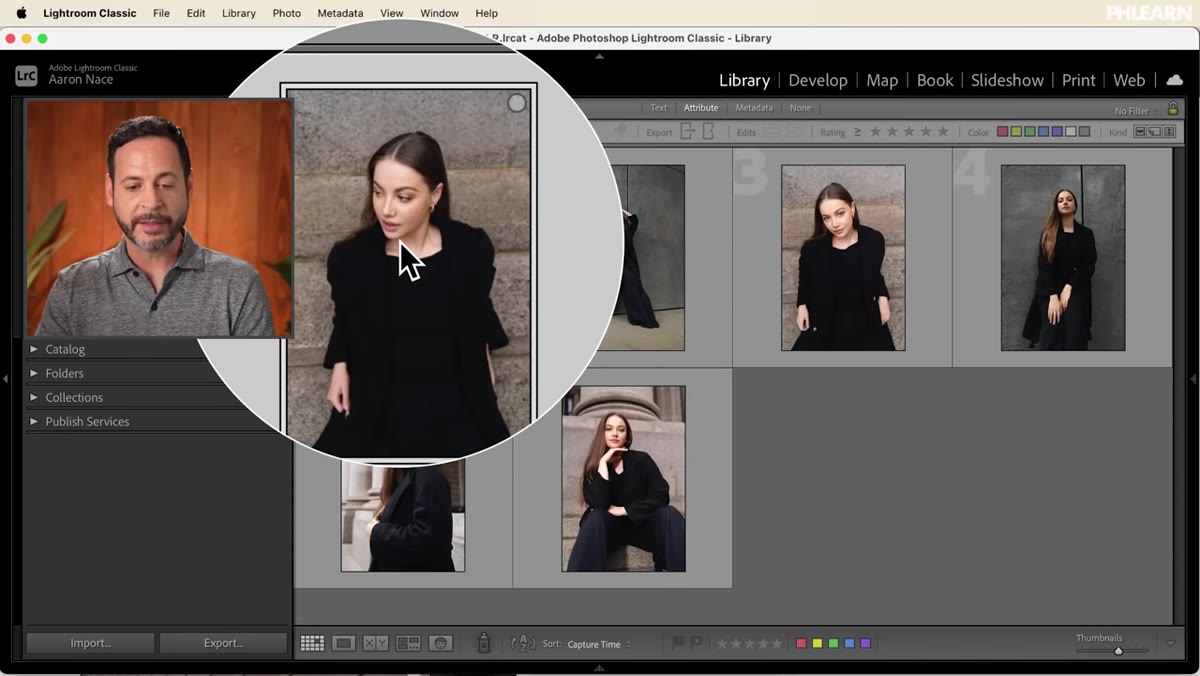 Right-click context menu showing Create Virtual Copy option
Select the image you want to work with in the Library module. Right-click on the thumbnail and choose “Create Virtual Copy” from the context menu. You can also reach the same option through the Photo menu at the top of the screen. Either way, Lightroom instantly generates a second version of that image tied to the same underlying file. No duplicate RAW file, no extra storage hit. Just a second set of instructions pointing at the same original.
Right-click context menu showing Create Virtual Copy option
Select the image you want to work with in the Library module. Right-click on the thumbnail and choose “Create Virtual Copy” from the context menu. You can also reach the same option through the Photo menu at the top of the screen. Either way, Lightroom instantly generates a second version of that image tied to the same underlying file. No duplicate RAW file, no extra storage hit. Just a second set of instructions pointing at the same original.
Your two versions will appear side by side in the filmstrip or grid. The virtual copy gets a small folded corner badge in the lower left of its thumbnail, so you can always tell which is which at a glance.
Step 2: Understand How Stacking Works
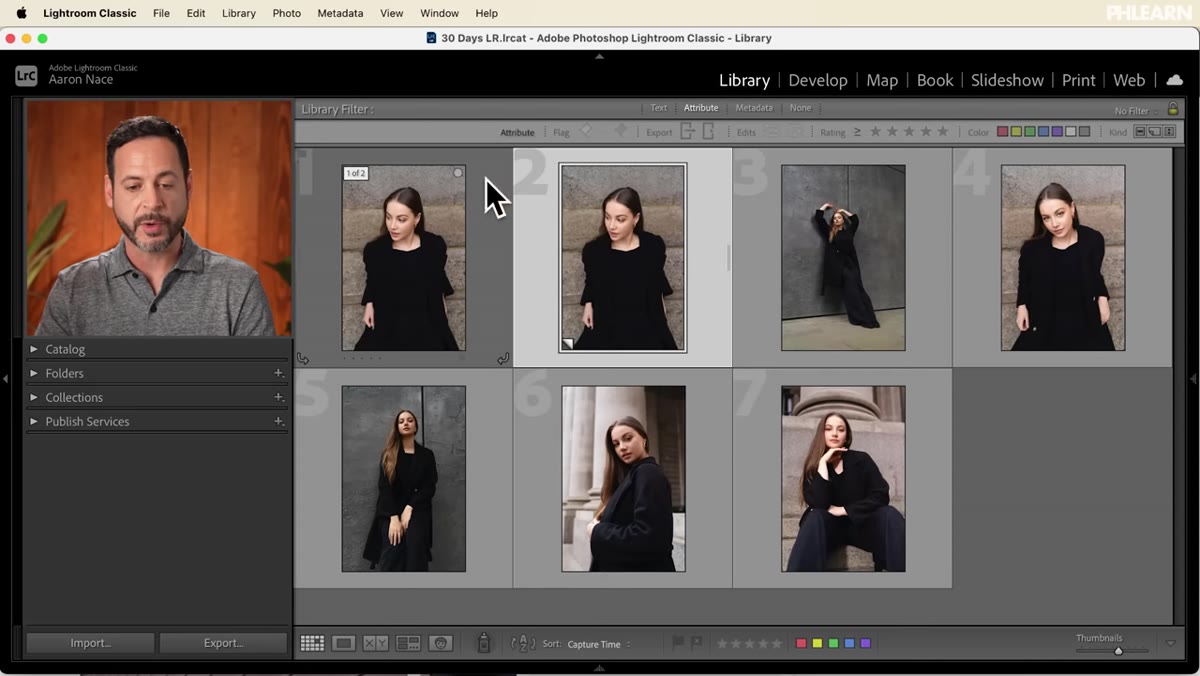 Grid view showing stacked images labeled one of two and two of two
By default, Lightroom stacks virtual copies with their originals. You’ll see a small number in the corner of the thumbnail indicating something like “1 of 2” or “2 of 2.” Clicking that number collapses the stack so both images tuck under a single thumbnail. Clicking again expands them back out.
Grid view showing stacked images labeled one of two and two of two
By default, Lightroom stacks virtual copies with their originals. You’ll see a small number in the corner of the thumbnail indicating something like “1 of 2” or “2 of 2.” Clicking that number collapses the stack so both images tuck under a single thumbnail. Clicking again expands them back out.
This stacking behavior is genuinely useful when you’re managing a large shoot. Instead of your grid doubling in size every time you create a variant, everything stays tidy. If you’ve ever had a folder of 200 photos balloon to 600 because of duplicates, you’ll appreciate this immediately.
Step 3: Filter by Original or Virtual Copy Using the Attribute Bar
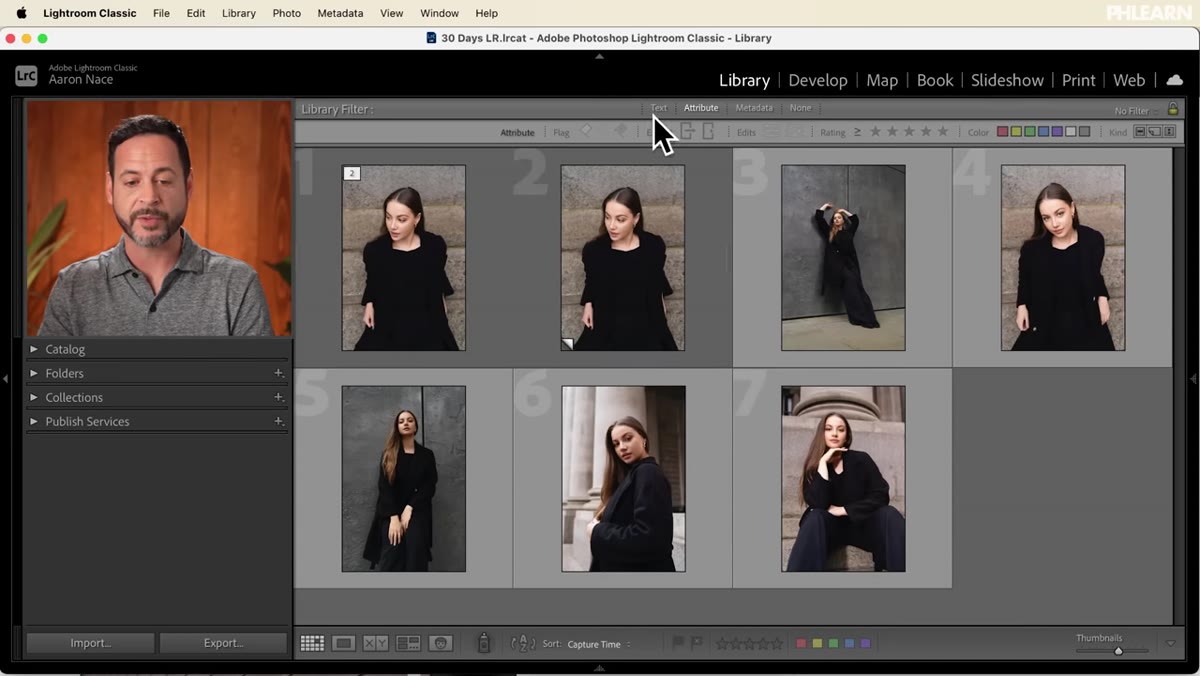 Library filter bar open showing Attribute tab and Kind options
Here’s the organizational piece that most people skip and later regret. In the Library module, look for the Library Filter bar running across the top of the grid. If you don’t see it, go to View and select “Show Filter Bar,” or just tap the forward slash key on your keyboard to toggle it on and off.
Library filter bar open showing Attribute tab and Kind options
Here’s the organizational piece that most people skip and later regret. In the Library module, look for the Library Filter bar running across the top of the grid. If you don’t see it, go to View and select “Show Filter Bar,” or just tap the forward slash key on your keyboard to toggle it on and off.
Click the “Attribute” tab in that filter bar, then look to the far right for the “Kind” section. You’ll see two small icons: one for original photos and one for virtual copies. Clicking virtual copies shows only your edited variants. Clicking both shows everything. Clicking only the original icon hides all the copies so you can focus on your base selects. You can reach these same filters through Library in the top menu, then “Filter by Kind.” Once you’ve got ten or fifteen projects running with multiple versions each, this filter becomes essential.
Step 4: Make Your Edit on the Virtual Copy in the Develop Module
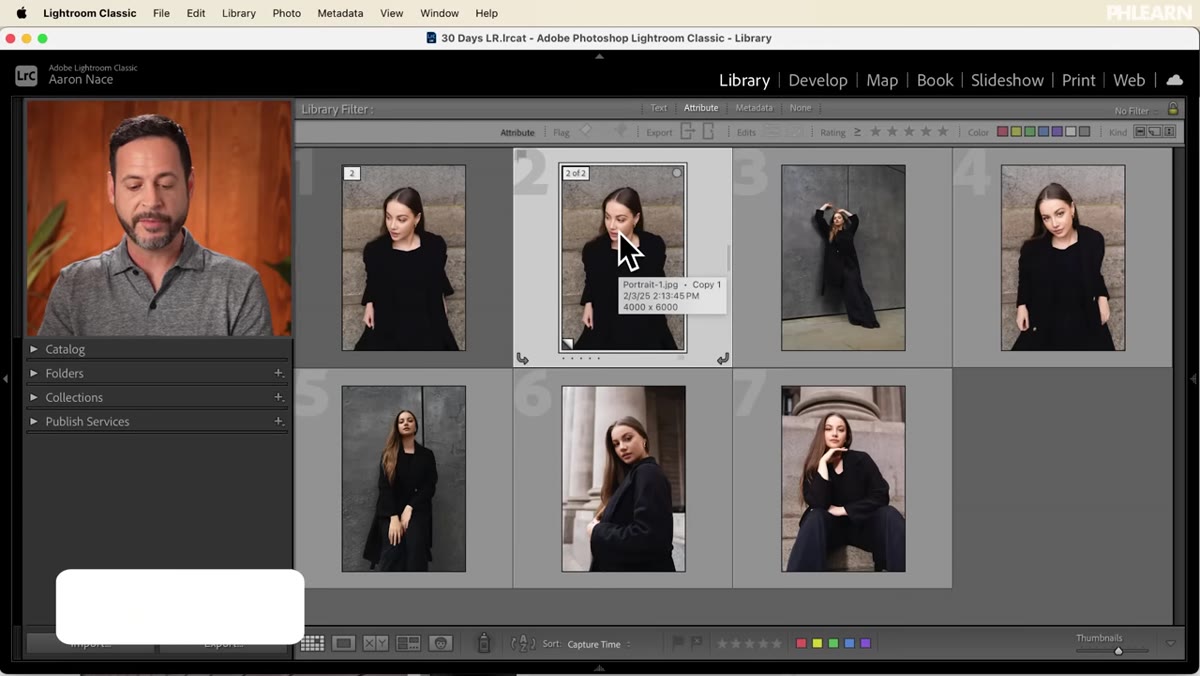 Develop module open with B&W panel active on virtual copy
With your virtual copy selected, hit D to jump into the Develop module. This is where the real power becomes obvious. Aaron demonstrates by converting the virtual copy to black and white using the B&W option inside the Basic panel. The original stays completely untouched in color, while the copy takes on an entirely different look.
Develop module open with B&W panel active on virtual copy
With your virtual copy selected, hit D to jump into the Develop module. This is where the real power becomes obvious. Aaron demonstrates by converting the virtual copy to black and white using the B&W option inside the Basic panel. The original stays completely untouched in color, while the copy takes on an entirely different look.
From there, he opens the Black and White Mix panel and adjusts the individual color channel sliders to control how different tones render in grayscale. Pulling down the blues slightly, nudging the oranges, dialing back overall contrast in the Basic panel. The point isn’t to copy his exact numbers. The point is that you’re making real creative decisions on a version that has zero risk attached to it. Your original is locked in, safe, untouched.
Step 5: Return to the Library Module and Confirm Your Stack
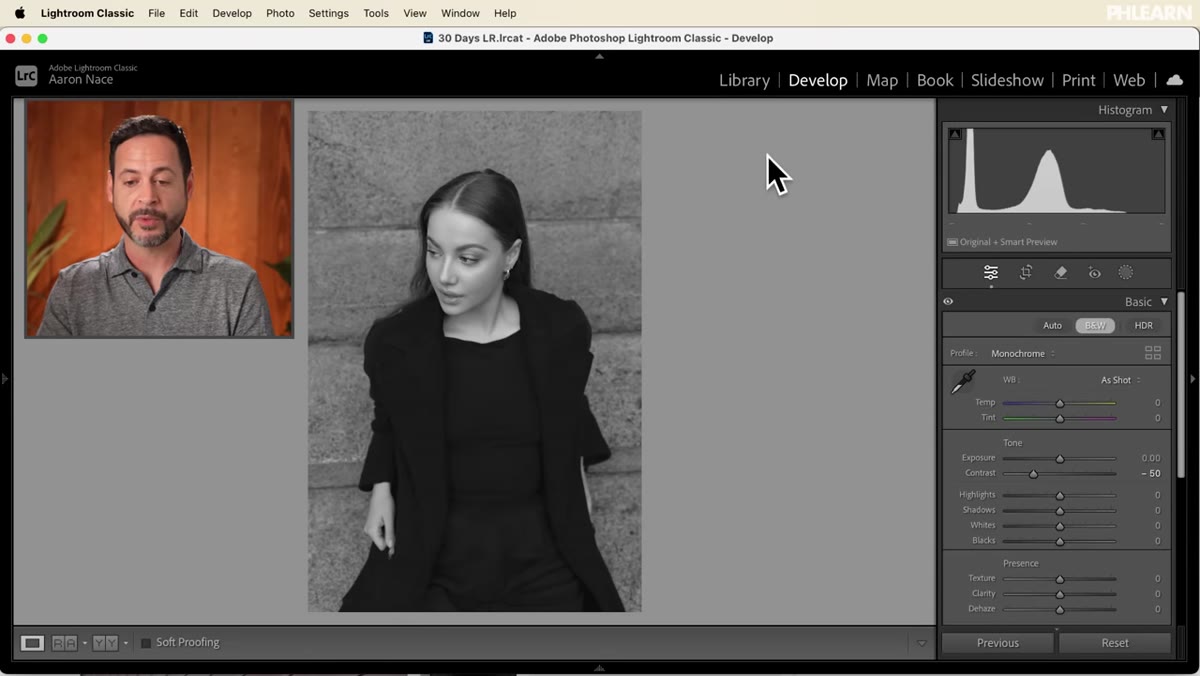 Library grid showing original color image and B&W virtual copy side by side
Once you’ve finished editing your virtual copy, press G or click “Library” in the module picker to return to the grid view. You’ll now see your original and your variant sitting in the stack together. Expanding the stack shows the color original and the black and white version clearly labeled. This is the deliverable set. Export both and you’ve just handed your client two finished looks for the price of one editing session.
Library grid showing original color image and B&W virtual copy side by side
Once you’ve finished editing your virtual copy, press G or click “Library” in the module picker to return to the grid view. You’ll now see your original and your variant sitting in the stack together. Expanding the stack shows the color original and the black and white version clearly labeled. This is the deliverable set. Export both and you’ve just handed your client two finished looks for the price of one editing session.
Aaron’s workflow here is clean and repeatable. You could create a warm-toned version, a desaturated matte version, and a black and white version of every image in a shoot, all from the same originals, all stacked and filterable.
One Thing I’d Add: Name Your Virtual Copies Before You Export
Aaron doesn’t dig into this in the tutorial, but if you’re creating several virtual copies per image, naming them before export saves a lot of confusion. In the Library module, you can add a custom label or rename the copy in the metadata fields. I usually name mine after the treatment style, something like “warm film” or “high contrast BW.” Yes, I’m the person who names presets after songs, so naturally the organizational system got the same treatment. A copy called “01-image-virtual-copy-2.jpg” in your exports folder tells your client nothing. A file called “portrait-bw-matte.jpg” tells them exactly what they’re looking at.
Virtual copies are one of those Lightroom features that feel like a small quality-of-life upgrade until you start using them on actual client projects, and then they become non-negotiable. The ability to show a client three distinct creative directions from a single shoot, without tripling your editing time, is genuinely valuable. It’s the kind of thing that makes you look more thorough than you actually had to be, and there’s nothing wrong with that.
Watch the full tutorial on YouTube to follow along with Aaron’s walkthrough, especially if you want to see the filtering system and stacking in action.
Comments (2)
This is exactly what I needed today. Been struggling with this for weeks.
Excellent tutorial. I'd add that from a landscape standpoint, this technique is incredibly versatile.
Leave a Comment