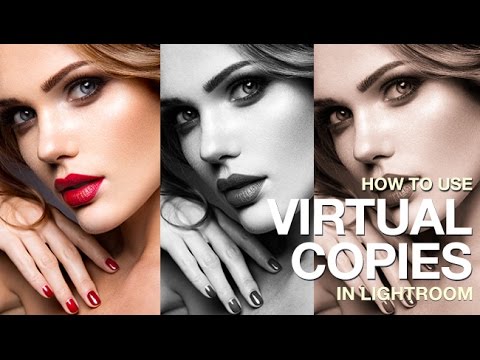
There’s a specific kind of dread that hits when a client asks for “a few different looks” on 200 wedding photos. Your first instinct is to duplicate everything, which means double the storage, double the catalog clutter, and double the time spent organizing files you didn’t need in triplicate. For years, I handled this the hard way before I understood what virtual copies could actually do for a portrait and event workflow. The concept sounds almost too simple, but it changes how you think about delivering work to clients.
In this Aaron Nace (PHLEARN) tutorial, the technique gets a clean, practical walkthrough using a real image and three distinct treatments: color, black and white, and sepia. Watch the full tutorial on YouTube if you want to follow along with the video while you read. What I want to do here is expand on each step so you can execute it without rewinding the video six times.
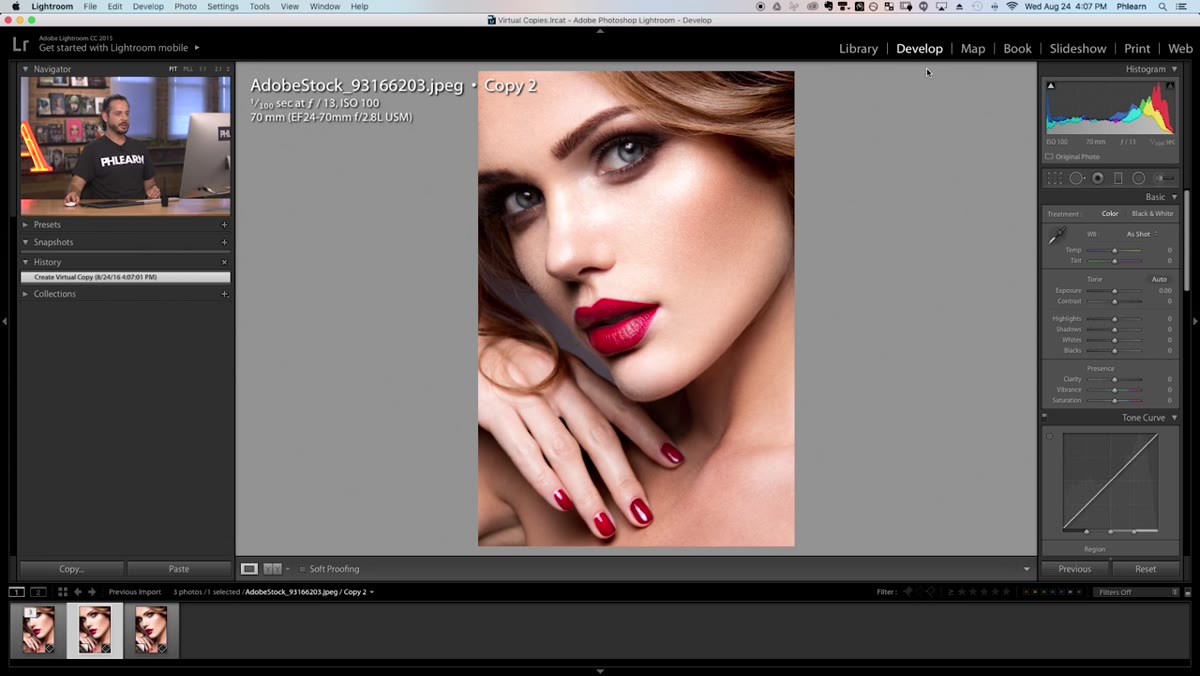
The core idea is this: Lightroom’s virtual copies exist only inside the catalog. Your hard drive sees one file. Lightroom sees as many versions as you want to create and edit independently. You export them, and suddenly a 100-image shoot becomes a 300-image delivery. That’s not padding, that’s genuine value. Clients love having options, and it takes a fraction of the time that shooting three separate looks would require.
Step 1: Open Your Image in Grid View
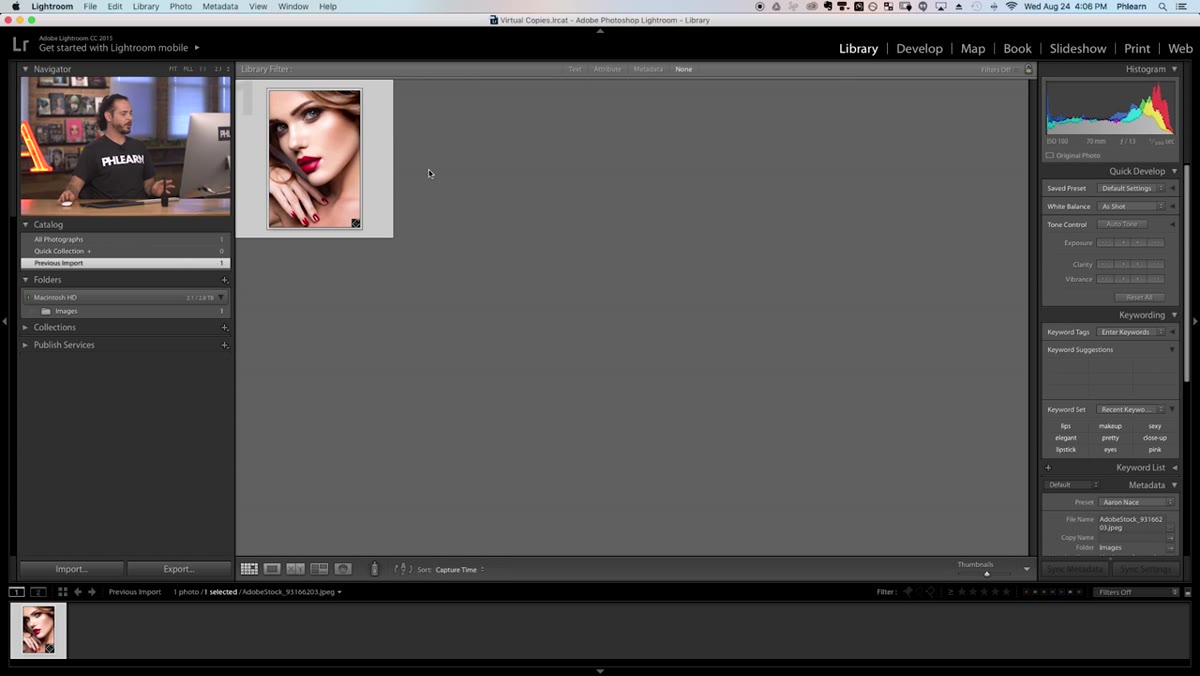 Grid view with single stock photo loaded in Lightroom library
Start in the Library module, not Develop. Press G to jump to Grid View, or click the grid icon at the bottom of the filmstrip panel. You want to see your image as a thumbnail here because the virtual copy command lives in the right-click context menu on the thumbnail itself. If you’re in the Develop module when you right-click, you get a different set of options and things get confusing fast. Grid View is your home base for this entire process.
Grid view with single stock photo loaded in Lightroom library
Start in the Library module, not Develop. Press G to jump to Grid View, or click the grid icon at the bottom of the filmstrip panel. You want to see your image as a thumbnail here because the virtual copy command lives in the right-click context menu on the thumbnail itself. If you’re in the Develop module when you right-click, you get a different set of options and things get confusing fast. Grid View is your home base for this entire process.
Step 2: Create Your Virtual Copies
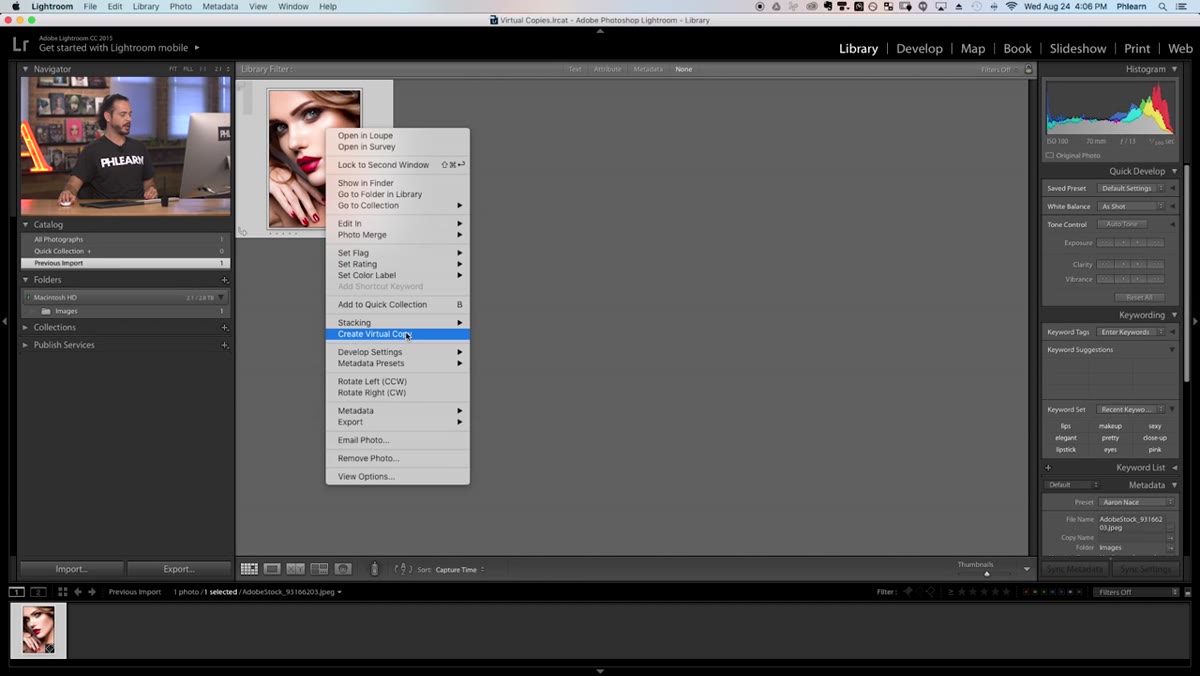 Right-click context menu showing “Create Virtual Copy” option
Right-click your image thumbnail and select “Create Virtual Copy” from the menu. Do this twice so you end up with three versions total: your original plus two copies. Lightroom stacks these in the grid and labels the copies with a small folded-corner badge in the bottom-left of the thumbnail. That badge is your visual confirmation that these are virtual, not physical duplicates. If you open Finder (Mac) or File Explorer (Windows) and navigate to the original file’s folder, you’ll see only one file sitting there. No bloat, no confusion.
Right-click context menu showing “Create Virtual Copy” option
Right-click your image thumbnail and select “Create Virtual Copy” from the menu. Do this twice so you end up with three versions total: your original plus two copies. Lightroom stacks these in the grid and labels the copies with a small folded-corner badge in the bottom-left of the thumbnail. That badge is your visual confirmation that these are virtual, not physical duplicates. If you open Finder (Mac) or File Explorer (Windows) and navigate to the original file’s folder, you’ll see only one file sitting there. No bloat, no confusion.
Step 3: Verify No Duplicate Files Were Created on Disk
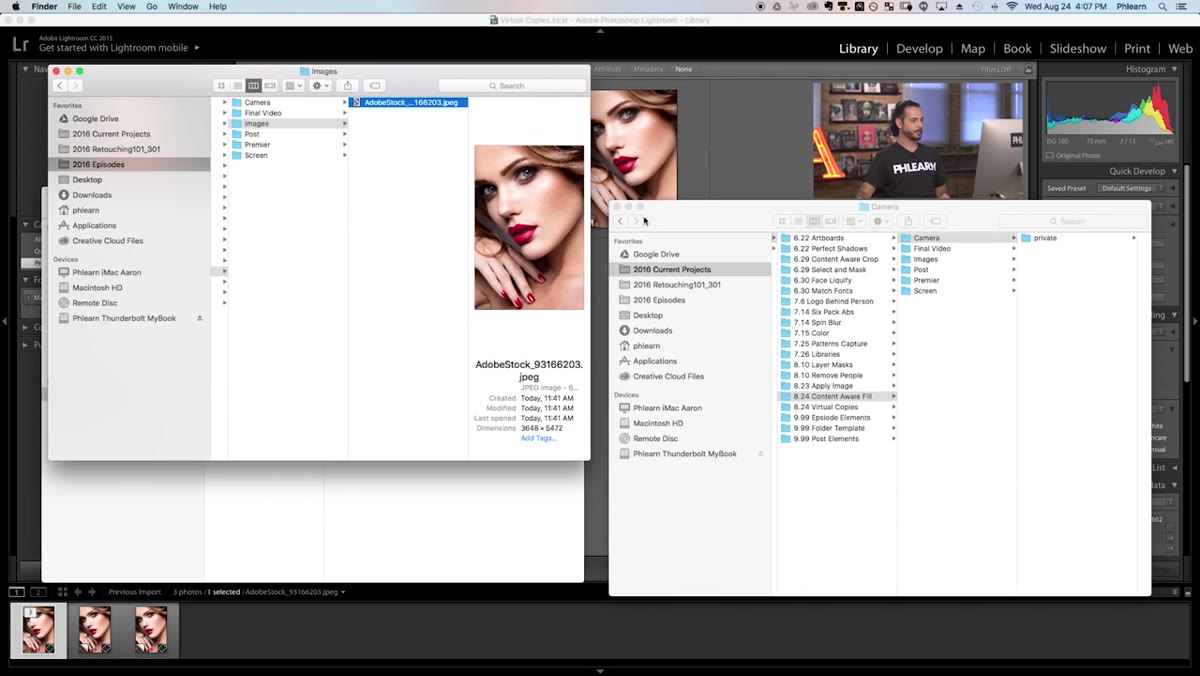 Finder window showing single original image file on disk
This step is worth doing at least once, especially if you’re new to the concept and you’re the kind of person who likes to trust but verify. Right-click the original image (not a copy) and choose “Show in Finder” or “Show in Explorer.” The folder contains one file. That’s the whole magic trick confirmed. Every virtual copy shares that same source data, but each carries its own independent set of develop settings inside the catalog. Once you see it, the concept clicks immediately.
Finder window showing single original image file on disk
This step is worth doing at least once, especially if you’re new to the concept and you’re the kind of person who likes to trust but verify. Right-click the original image (not a copy) and choose “Show in Finder” or “Show in Explorer.” The folder contains one file. That’s the whole magic trick confirmed. Every virtual copy shares that same source data, but each carries its own independent set of develop settings inside the catalog. Once you see it, the concept clicks immediately.
Step 4: Apply a Black and White Treatment to the Second Copy
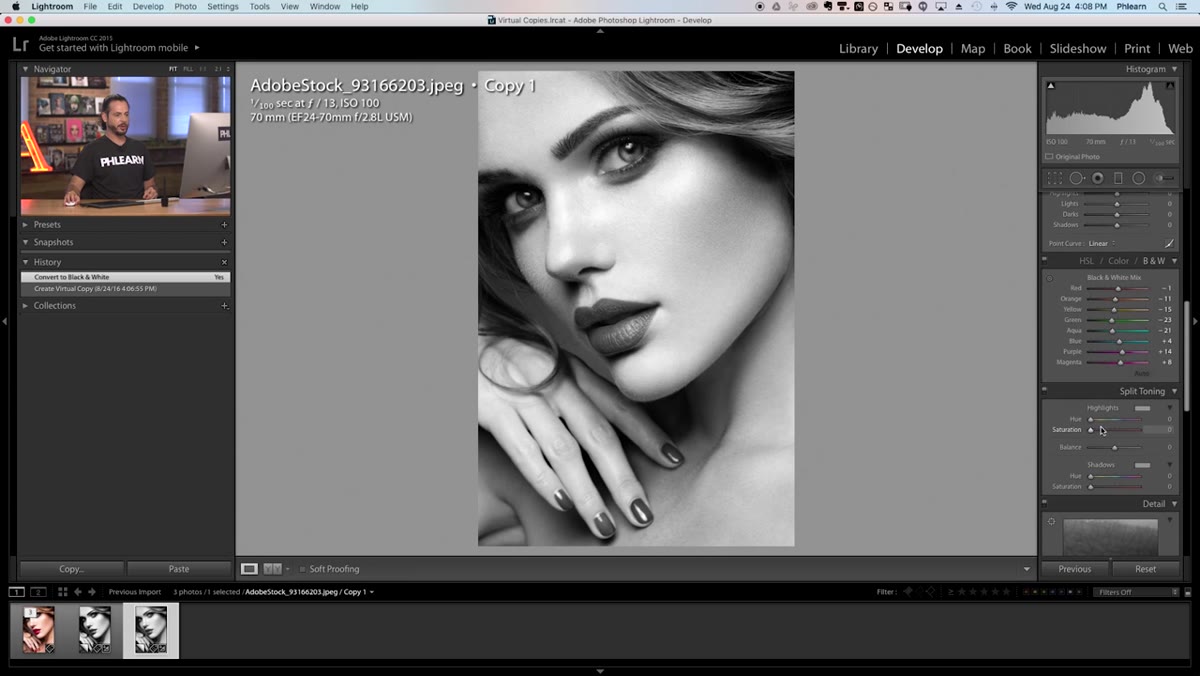
 Develop module with Black and White mix panel open, sliders adjusted
Click on your first virtual copy and head into the Develop module. Activate the Black and White treatment, which you’ll find by clicking “Black & White” at the top of the HSL/Color panel, or by pressing V as a shortcut. Scroll down to the Black and White Mix panel. This is where you get precise control over how different color channels convert to gray tones. For portraits especially, bring the Red and Orange sliders up to brighten skin tones and give the face a clean, glowing quality. Push contrast up slightly in the Basic panel afterward to add some depth. A starting point: Red around +20 to +30, Orange around +15, and Contrast bumped by 10 to 15 points. The exact numbers depend on your image’s color temperature and skin tone, so use those as a range rather than gospel.
Develop module with Black and White mix panel open, sliders adjusted
Click on your first virtual copy and head into the Develop module. Activate the Black and White treatment, which you’ll find by clicking “Black & White” at the top of the HSL/Color panel, or by pressing V as a shortcut. Scroll down to the Black and White Mix panel. This is where you get precise control over how different color channels convert to gray tones. For portraits especially, bring the Red and Orange sliders up to brighten skin tones and give the face a clean, glowing quality. Push contrast up slightly in the Basic panel afterward to add some depth. A starting point: Red around +20 to +30, Orange around +15, and Contrast bumped by 10 to 15 points. The exact numbers depend on your image’s color temperature and skin tone, so use those as a range rather than gospel.
Step 5: Build a Sepia Version Using Split Toning
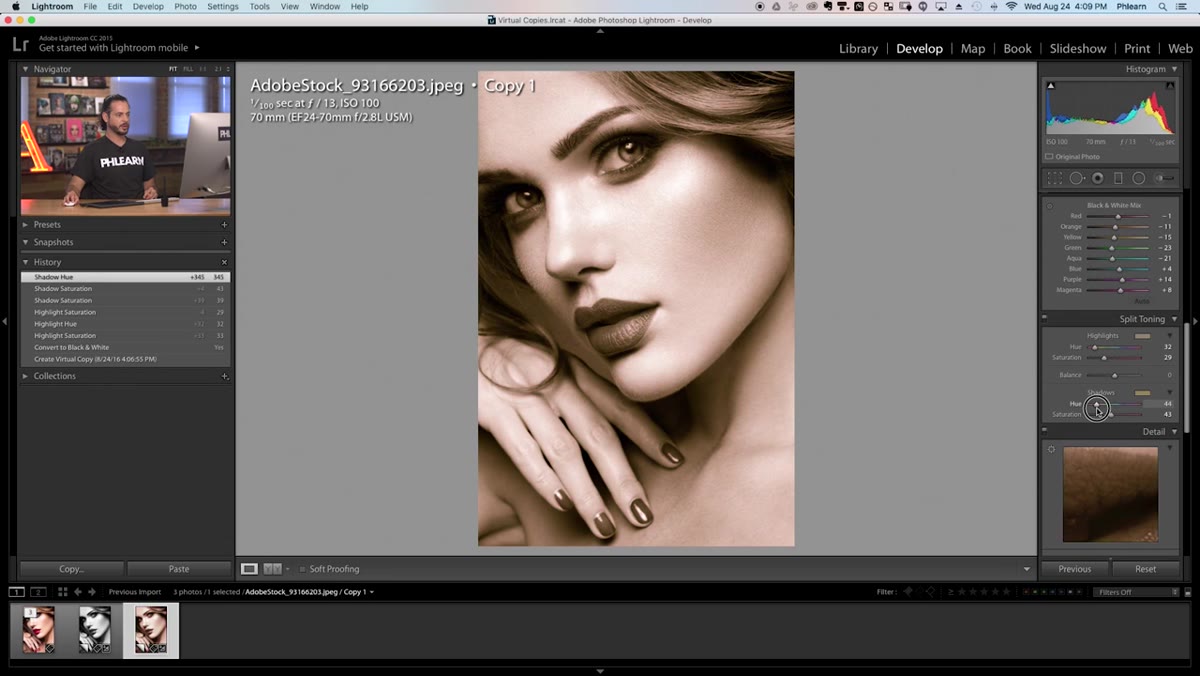
 Split Toning panel open with warm highlights and reddish shadows added
Click your second virtual copy and head back to Develop. Start the same way you did with the black and white version: activate the Black & White treatment and adjust the mix panel so the luminosity values match (you can literally copy-paste the settings from your B&W copy using “Copy Settings” if you want consistency). Then scroll to the Split Toning panel. This is where the sepia character comes from. In the Highlights section, bring the Saturation slider up to around 15 to 20, then slowly drag the Hue slider to the right until you land in warm amber territory, somewhere around 40 to 50 degrees. For Shadows, bump the Saturation up slightly and push the Hue toward a warmer red, somewhere in the 10 to 20 degree range. The interplay between warm highlights and slightly richer shadows is what separates a real sepia tone from a flat yellow-brown wash.
Split Toning panel open with warm highlights and reddish shadows added
Click your second virtual copy and head back to Develop. Start the same way you did with the black and white version: activate the Black & White treatment and adjust the mix panel so the luminosity values match (you can literally copy-paste the settings from your B&W copy using “Copy Settings” if you want consistency). Then scroll to the Split Toning panel. This is where the sepia character comes from. In the Highlights section, bring the Saturation slider up to around 15 to 20, then slowly drag the Hue slider to the right until you land in warm amber territory, somewhere around 40 to 50 degrees. For Shadows, bump the Saturation up slightly and push the Hue toward a warmer red, somewhere in the 10 to 20 degree range. The interplay between warm highlights and slightly richer shadows is what separates a real sepia tone from a flat yellow-brown wash.
Step 6: Export All Three Versions as Individual Files
 Library grid showing three thumbnail versions of the same image side by side
Select all three images in Grid View by clicking the first, then shift-clicking the last. Go to File, then Export. Set your export destination, choose JPEG, and pick your quality settings (90 to 95 is a solid range for client delivery). Lightroom will export each virtual copy as its own separate JPEG file, named sequentially. The result: three distinct images, one original file on disk, and a catalog that stays clean and organized. Batch this across a full shoot and you’ve multiplied your deliverables without multiplying your editing time proportionally.
Library grid showing three thumbnail versions of the same image side by side
Select all three images in Grid View by clicking the first, then shift-clicking the last. Go to File, then Export. Set your export destination, choose JPEG, and pick your quality settings (90 to 95 is a solid range for client delivery). Lightroom will export each virtual copy as its own separate JPEG file, named sequentially. The result: three distinct images, one original file on disk, and a catalog that stays clean and organized. Batch this across a full shoot and you’ve multiplied your deliverables without multiplying your editing time proportionally.
A Note on When to Use This (and When Not To)
Virtual copies shine in event, portrait, and wedding work where multiple aesthetics serve a single client. Where I’ve seen photographers misuse them is in commercial shoots where the client has approved a specific look. Creating three versions of a hero product shot when the client signed off on one color treatment is a recipe for revision chaos, not added value. Use virtual copies when variety is genuinely useful. Also, if you’re working with RAW files (which you should be whenever possible), the non-destructive nature of virtual copies pairs perfectly with that workflow. Everything stays fluid and reversible right up until export.
Virtual copies are one of those Lightroom features that feels minor until you realize how much time and storage it saves across a full season of shooting. The single most important thing to take away: creating a virtual copy never touches the file on your hard drive. Every edit lives in the catalog, every version exports independently, and your client gets three images that feel thoughtfully crafted rather than mechanically duplicated.
Watch the full tutorial on YouTube to see Aaron walk through the exact adjustments in real time. His visual breakdown of the split toning panel alone is worth four minutes of your day.
Comments (1)
Printing this out and pinning it next to my monitor. That good.
Leave a Comment