My default assumption for years was simple: if something needs to be cloned or duplicated in a photo, you open Photoshop. Full stop. Lightroom handles the global stuff, the color, the light, the tone, and then you kick it over to Photoshop when the real surgery starts. That workflow isn’t wrong, but it has a cost. Every round-trip to Photoshop adds friction, adds file size, and pulls you out of the editing headspace you were in. So when I came across a technique that lets you duplicate an object entirely inside Lightroom, I stopped what I was doing and watched it twice.
In this KelbyOne tutorial, Scott Kelby works through a product-style photo of ornate knives mounted on a wall. The goal is to create a fourth knife where only three exist. It sounds like the kind of thing that would require layers and masking and a decent chunk of Photoshop time. It doesn’t. The whole thing happens inside the Spot Removal tool, and once you see the logic behind it, you’ll start thinking about every photo differently. Watch the full tutorial on YouTube
The technique relies on a behavior that most people treat as an annoyance: when Lightroom automatically picks a sample source for your Spot Removal selection, it often guesses wrong. Kelby flips that around and uses the manual override to point the sample source at exactly the object you want to copy. That’s the whole trick. The rest is just execution.
Step 1: Open the Spot Removal Tool
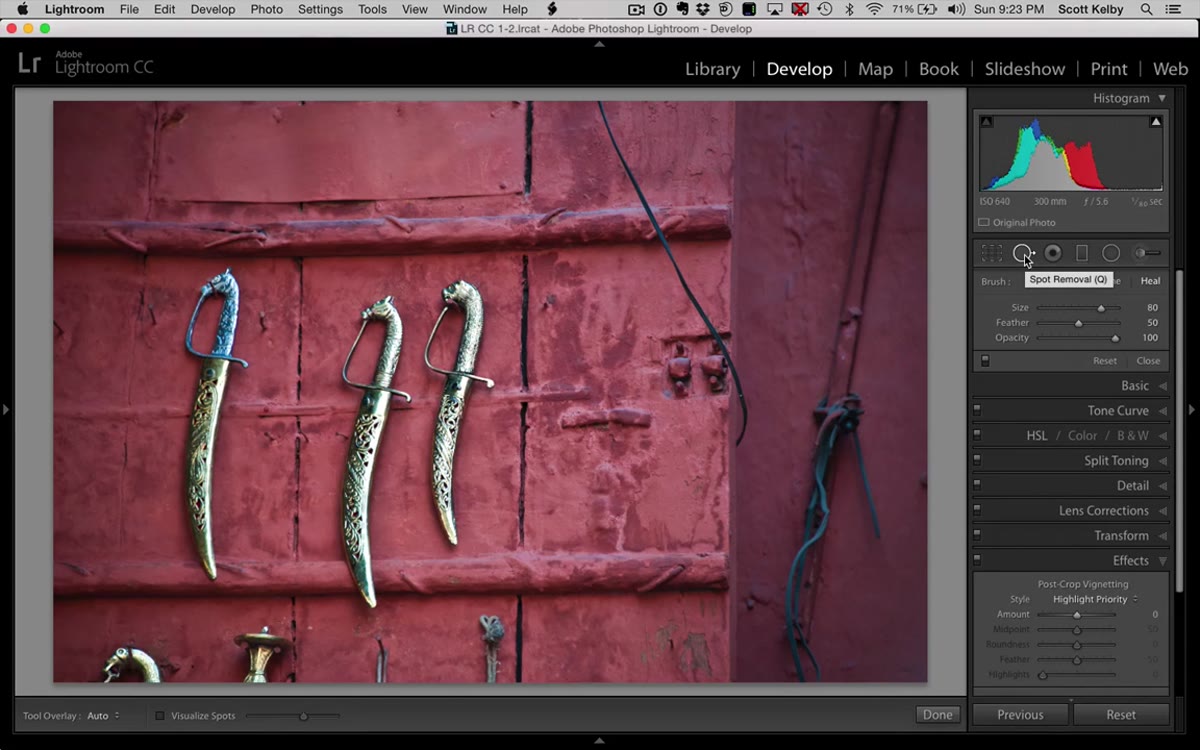 Spot Removal tool selected in the Lightroom toolbar
Head to the toolbar on the right side of the Develop module and select the Spot Removal tool, the one that looks like a small circle with an arrow. You’ll see two mode options at the top: Heal and Clone. Kelby notes that Heal is usually the right call for blending, but Clone can work better for certain textures. His advice: try Clone first. If the edge blending looks harsh, switch to Heal. For objects with defined edges like the knives in his example, Heal actually performs better because it blends the borders more naturally with the surrounding texture.
Step 2: Draw Your Selection Where You Want the Copy to Appear
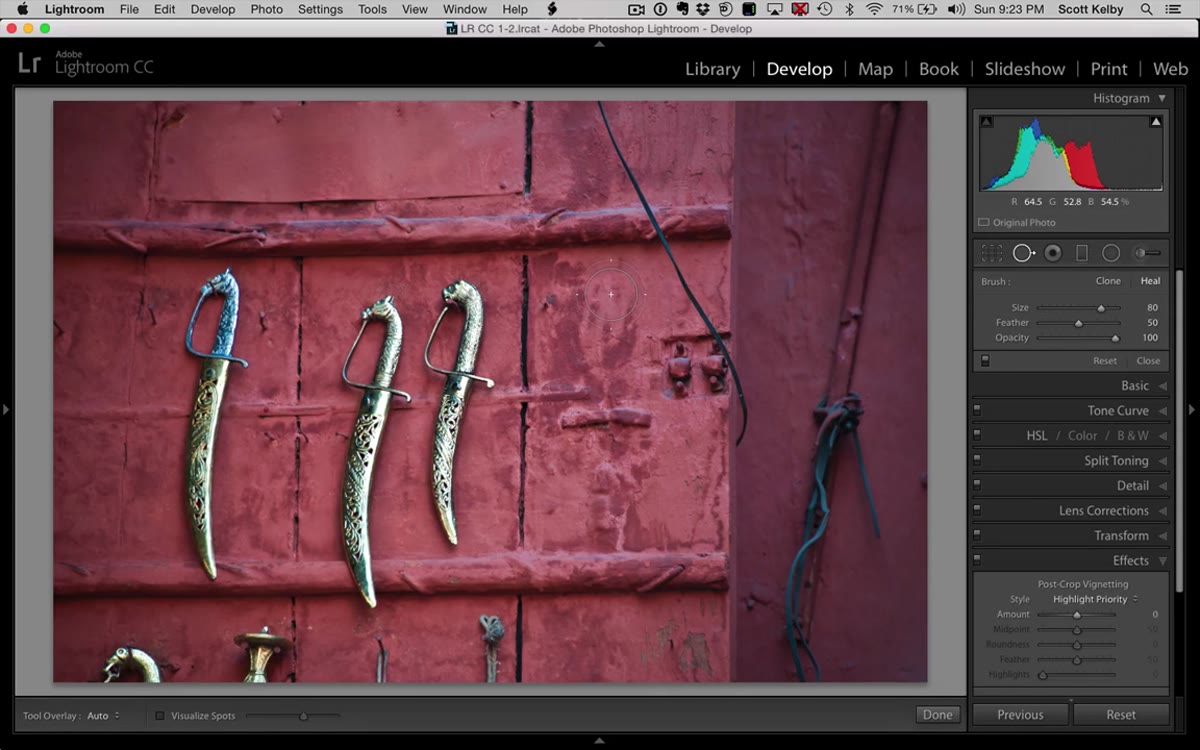 Brush selection drawn over the destination area on the wall
This is the counterintuitive part. Instead of selecting the object you want to copy, you draw your selection where you want the copy to land. Think of it as painting the destination, not the source. Drag the Spot Removal brush over the area where you want the duplicated object to appear, roughly matching the shape of the original. It doesn’t have to be pixel-perfect. Lightroom will auto-select a sample source the moment you release the mouse, and it will almost certainly pick the wrong spot. That’s expected. Don’t adjust anything yet.
Step 3: Identify the Source and Destination Pins
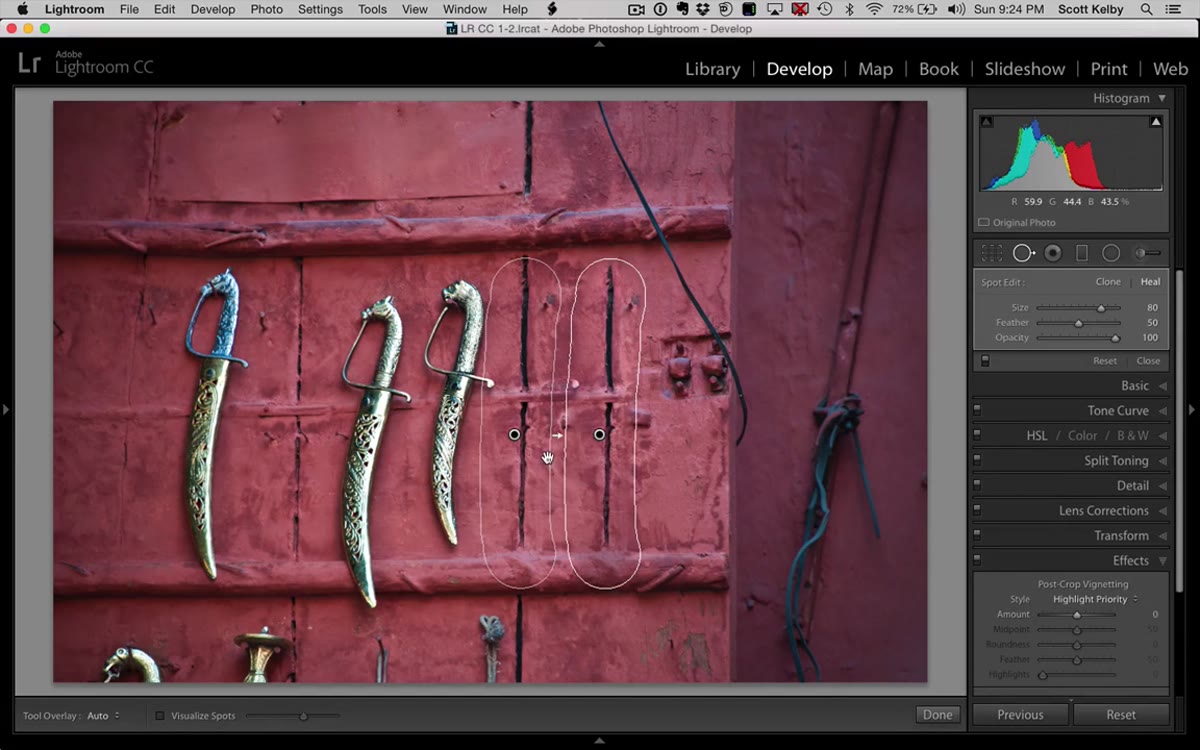 Two pins connected by an arrow showing source and destination areas
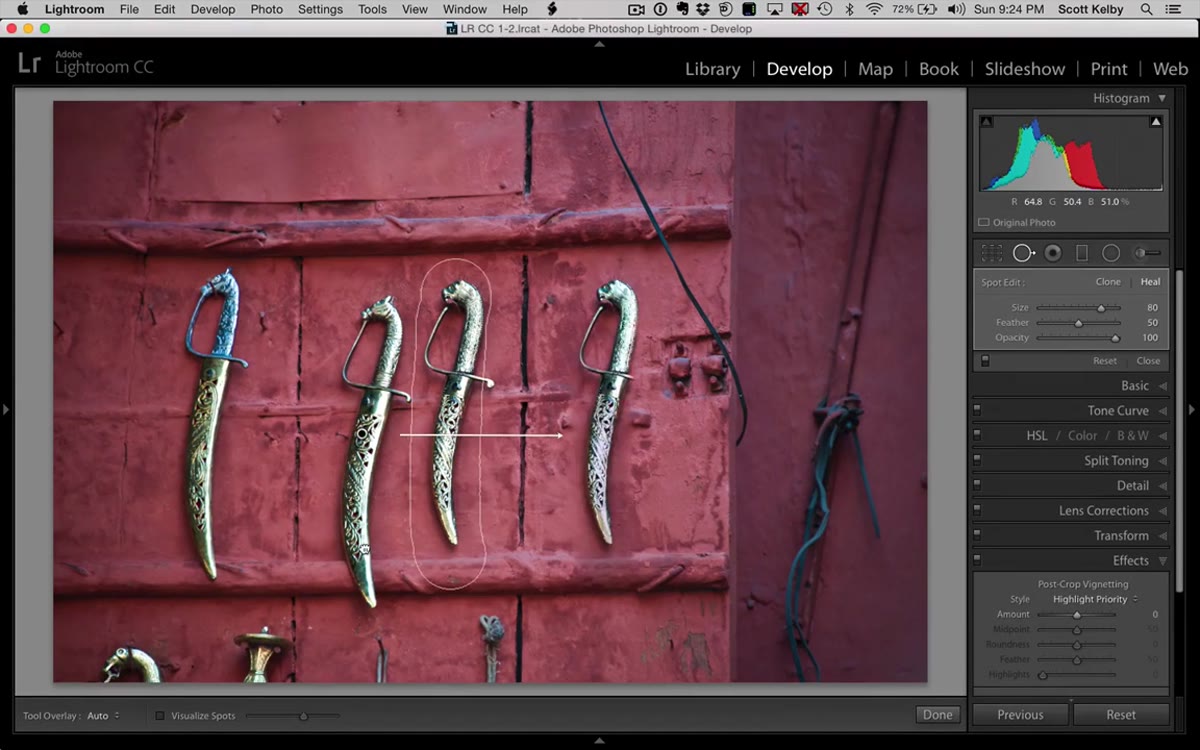
After you release the brush, Lightroom places two circles connected by an arrow. The circle sitting over your painted area is the destination. The other circle, wherever Lightroom dropped it, is the sample source. That source pin is what you need to move. Kelby describes this clearly: the arrow always points from the sample toward the destination, so you can see at a glance which is which. Getting comfortable reading those pins is key to making this technique work quickly.
Step 4: Drag the Source Pin onto the Object You Want to Duplicate
 Source pin being dragged to the original knife object
Click directly on the source pin and drag it onto the object you want to clone. In Kelby’s example, he drags it right onto one of the existing knives. As you drag, Lightroom updates the destination preview in real time, so you can see the duplicate forming while you position the source. Line it up carefully. For objects with strong directional detail like a blade or a stripe, small positional shifts will be obvious in the result. Take your time here. This single drag is the moment the “cloning miracle,” as Kelby calls it, actually happens.
Step 5: Evaluate the Result and Adjust if Needed
 Duplicated knife now visible in the destination area
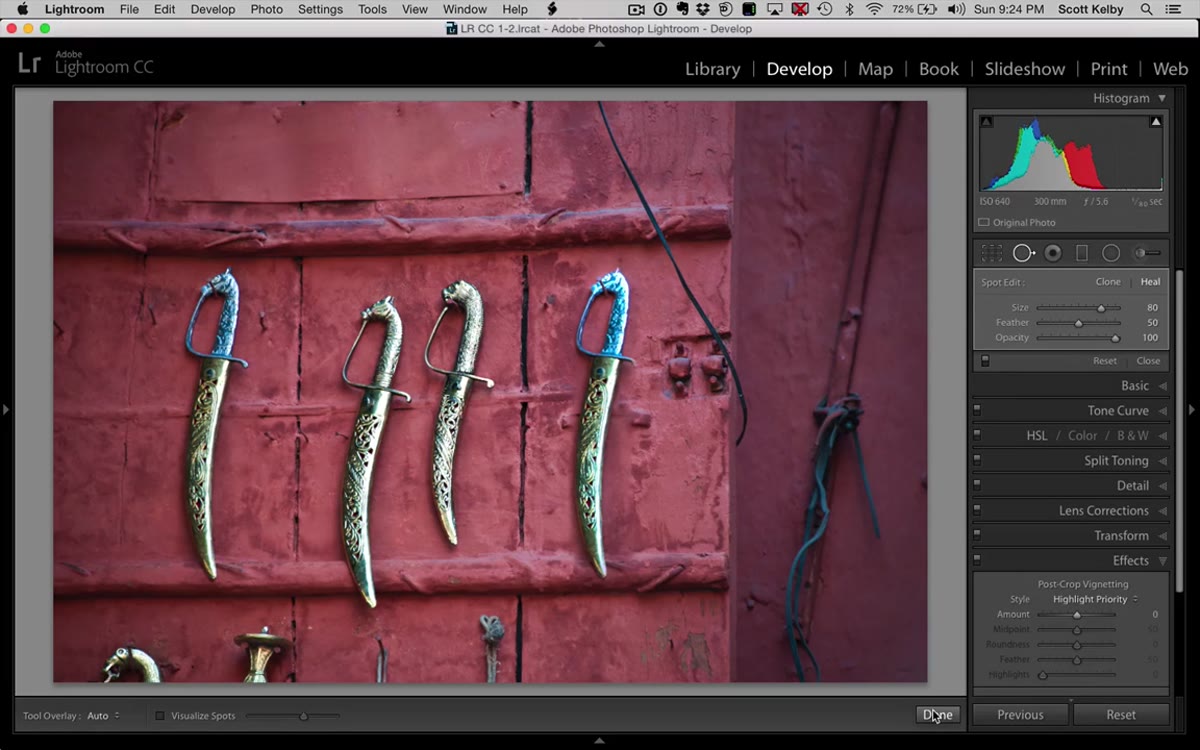
Once the source pin is positioned over the original object, you should see a convincing copy sitting in the destination area. Zoom in and check the edges. If you used Clone mode and the edges look too hard, switch to Heal in the tool options. If the overall placement feels slightly off, you can nudge the source pin in small increments. Lightroom renders the blend live, so adjustments are instant. At this stage the duplicate exists as its own independent Spot Removal pin, which matters for the next step.
Step 6: Remove the Original (Optional, But Powerful)
 New spot removal selection drawn over the original object
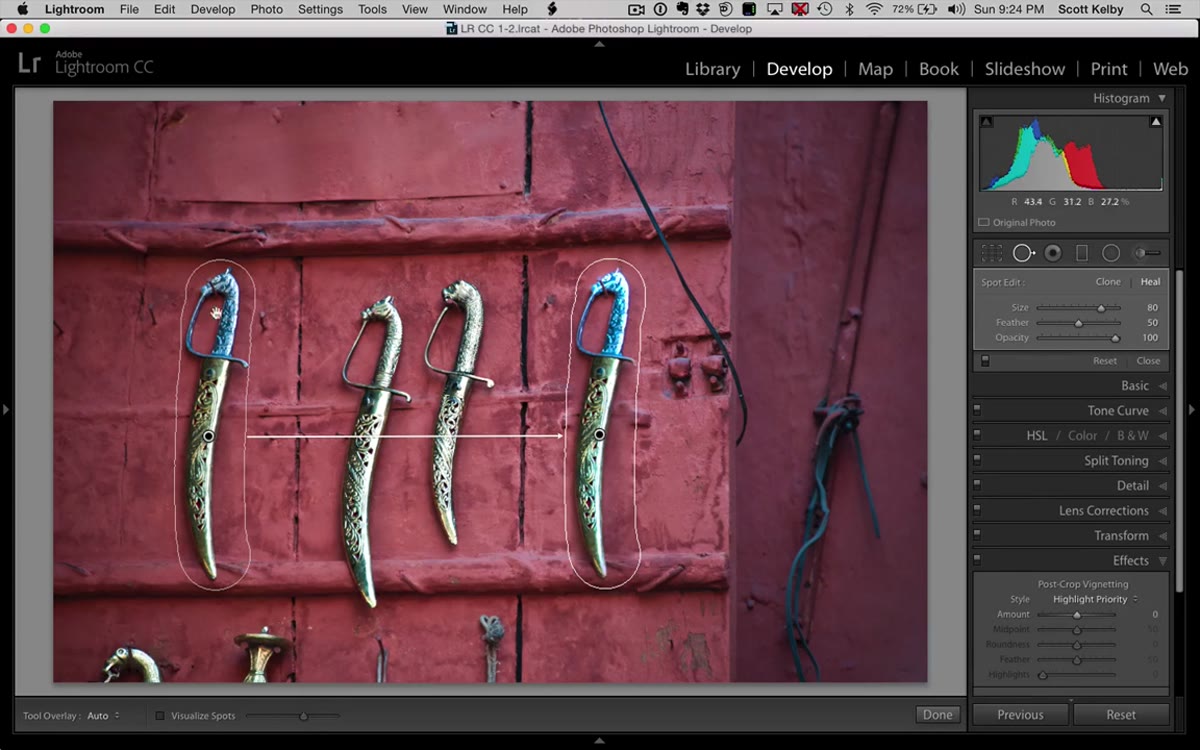
Here’s where this workflow gets genuinely flexible. Because the duplicate is its own separate pin, you can go back and remove the original object with a second Spot Removal selection. Draw a new selection over the original, let Lightroom guess a source, and then manually drag that new source pin to a clean area of background texture. Kelby is honest here: Lightroom won’t always find a perfect patch. You may need to try a few source positions, use a smaller brush for a second cleanup pass, and accept that the result might be “not terrible” rather than invisible. For backgrounds with consistent texture, like a plain wall, it usually lands somewhere between decent and seamless.
What I’d Add: Layer This With the Healing Brush for Cleaner Edges
The technique Kelby demonstrates is remarkably effective for straightforward duplications, but I’ve found one consistent weak point: edge blending on objects with strong contrast against their background. If I’m cloning something with a hard edge, say a logo on a product or a dark object against a light wall, I’ll run through Kelby’s steps exactly as shown, then do a second pass with a smaller Spot Removal brush set to Heal, tracing just the perimeter of the clone. That secondary pass smooths out any halo or fringe the initial selection left behind. It adds maybe thirty seconds to the process and closes the gap between “good enough for a quick edit” and “actually solid.”
This technique won’t replace Photoshop for complex compositing. But for simple object duplication and removal inside a single editing session, staying inside Lightroom means you stay in your rhythm. No export dialog, no layer stack, no PSD sitting next to your raw file. Just a couple of pins and a drag.
The biggest takeaway here is a mindset shift: Lightroom’s Spot Removal tool isn’t just for dust spots and blemishes. It’s a fully functional cloning interface, and the manual source override is the key that unlocks it. Once that clicks, you’ll find yourself reaching for it in situations you’d previously handed off to Photoshop without thinking.
Watch the full tutorial on YouTube and see Scott Kelby walk through the whole technique in real time. It’s short, it’s specific, and it’ll change how you think about what Lightroom can handle on its own.
Comments (2)
I tried this on a client project yesterday and the results were way better than expected.
I tried this on a client project yesterday and the results were way better than expected.
Leave a Comment