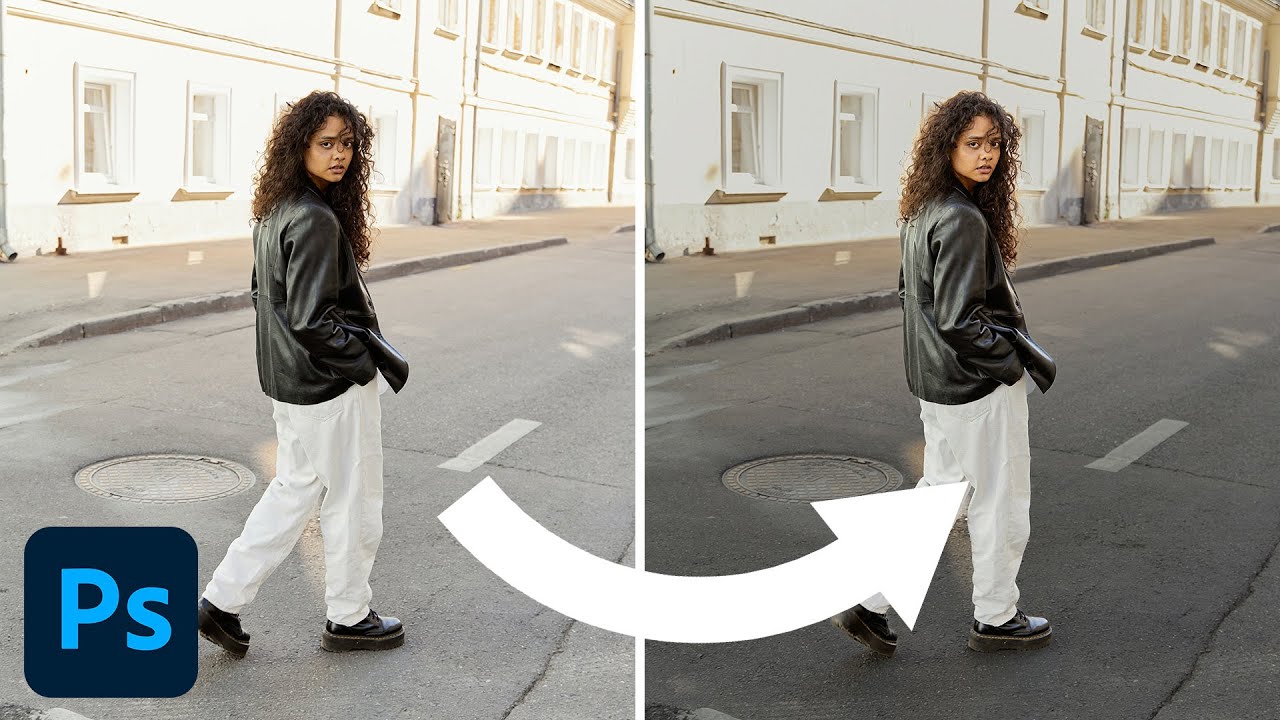
There’s a specific kind of frustration that comes with a photo that’s almost perfect. The subject looks great, the composition is solid, but the background is blown out, and every time you drag the exposure slider down to fix it, your subject goes flat and dark with it. I’ve been there more times than I care to admit. It’s one of those problems that looks like a retouching issue but is really a workflow issue. You’re trying to fix two different things with one slider, and that’s never going to work cleanly.
In this Aaron Nace (PHLEARN) tutorial, the fix is surprisingly elegant: use Lightroom’s masking tools to isolate your subject and your background, then treat each one as its own independent edit. Watch the full tutorial on YouTube. What I appreciate about this approach is that it’s entirely non-destructive, meaning you can go back and adjust any of these masks at any point without starting over. For anyone who edits portraits, event photos, or outdoor shots, this technique is going to save you real time.
The image Aaron works with has an overexposed background with a well-lit subject standing in front of it. It’s a classic scenario, and the solution he walks through applies directly to dozens of situations you’ll encounter in your own library. Here’s how it works, step by step.
Step 1: Understand Why a Global Exposure Adjustment Won’t Cut It
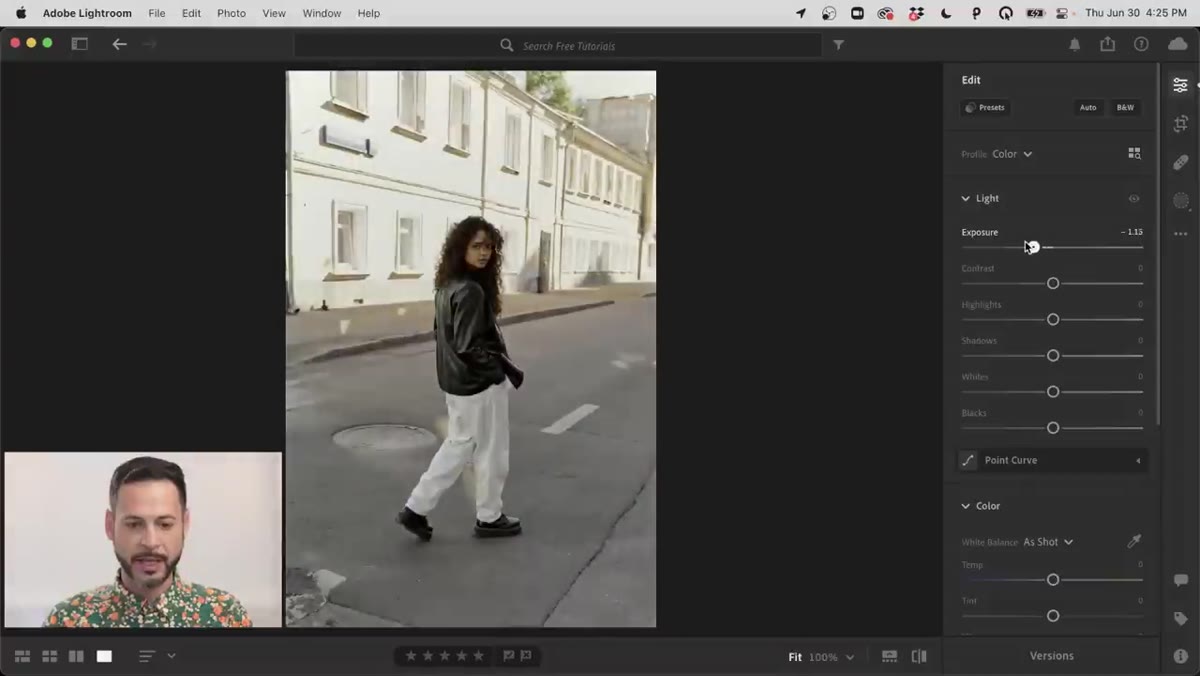 Dragging the exposure slider causes subject to go dark
Before reaching for any masking tools, Aaron demonstrates why the obvious move fails. Pulling the exposure slider down in the main Edit panel does recover highlight detail in the background, but it immediately underexposes the subject. This is worth pausing on, because a lot of people stop here and start trying to split the difference with the slider. There is no split-the-difference position that makes both areas look correct simultaneously. Seeing the problem demonstrated clearly makes the solution feel necessary rather than optional.
Dragging the exposure slider causes subject to go dark
Before reaching for any masking tools, Aaron demonstrates why the obvious move fails. Pulling the exposure slider down in the main Edit panel does recover highlight detail in the background, but it immediately underexposes the subject. This is worth pausing on, because a lot of people stop here and start trying to split the difference with the slider. There is no split-the-difference position that makes both areas look correct simultaneously. Seeing the problem demonstrated clearly makes the solution feel necessary rather than optional.
Step 2: Create a Mask and Select the Subject
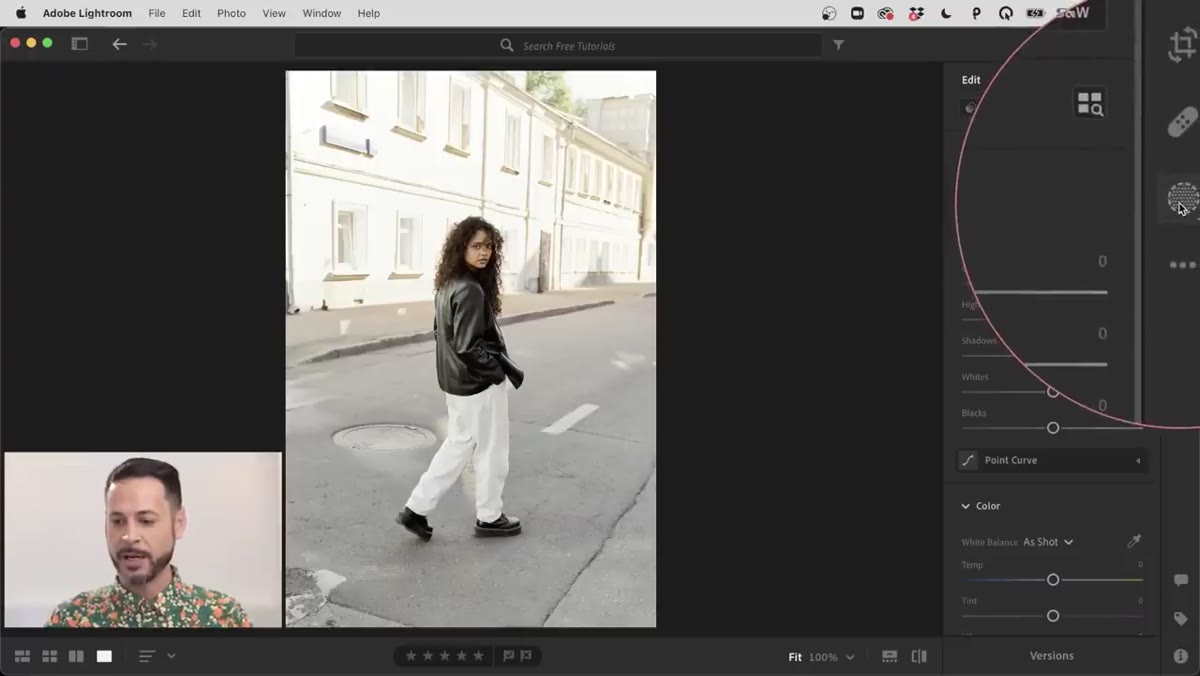 Clicking the Masks panel and choosing Select Subject
Open the Masks panel, which lives in the right-side panel group in Lightroom Desktop. Click “Add New Mask” and choose “Select Subject.” Lightroom’s AI selection will analyze the image and isolate your subject automatically. You’ll see a red overlay showing what’s been selected. At this point, the subject is selected, but what you actually want to work on first is the background, so there’s one more step before making any adjustments.
Clicking the Masks panel and choosing Select Subject
Open the Masks panel, which lives in the right-side panel group in Lightroom Desktop. Click “Add New Mask” and choose “Select Subject.” Lightroom’s AI selection will analyze the image and isolate your subject automatically. You’ll see a red overlay showing what’s been selected. At this point, the subject is selected, but what you actually want to work on first is the background, so there’s one more step before making any adjustments.
Step 3: Invert the Mask to Target the Background
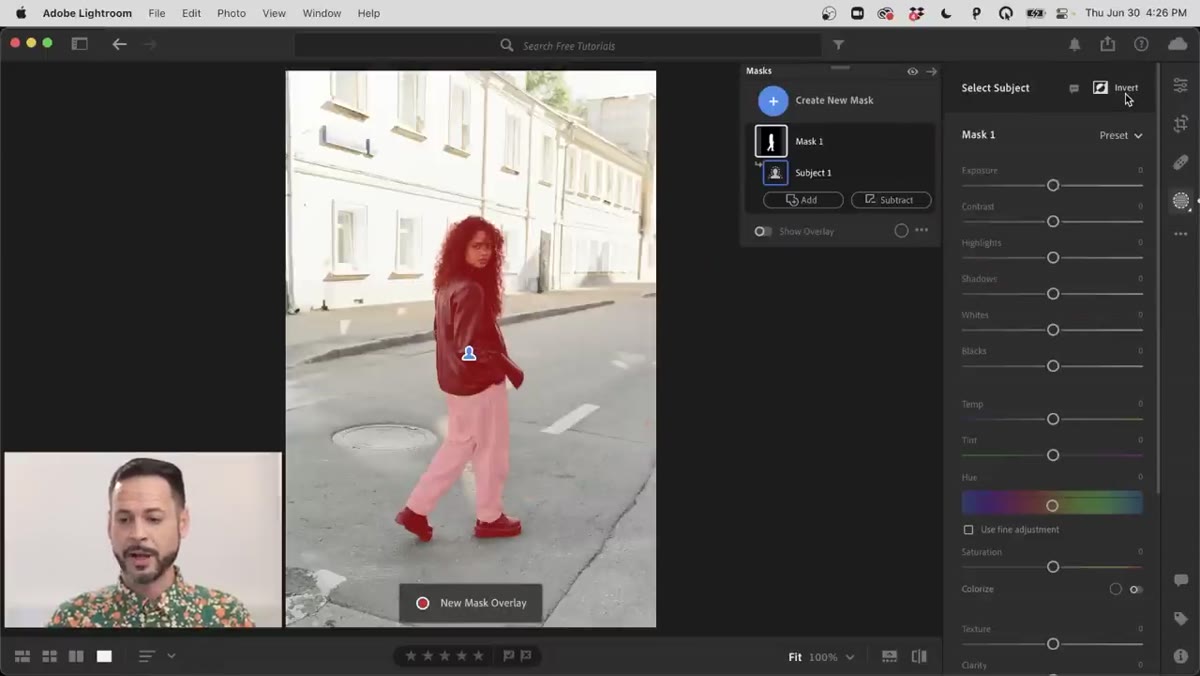 Clicking the Invert button to switch selection to background
At the top of your mask controls, you’ll see an Invert option. Click it. The red overlay shifts from your subject to everything around them, and that’s the mask you want to adjust. With the background now isolated, drag the Exposure slider down. You’ll immediately see the blown-out areas pulling back into detail without touching the subject at all. From there, target the Highlights slider specifically, pulling it left to recover the brightest areas of the background. The result is a background that reads as natural again, while the subject stays exactly as exposed as they were.
Clicking the Invert button to switch selection to background
At the top of your mask controls, you’ll see an Invert option. Click it. The red overlay shifts from your subject to everything around them, and that’s the mask you want to adjust. With the background now isolated, drag the Exposure slider down. You’ll immediately see the blown-out areas pulling back into detail without touching the subject at all. From there, target the Highlights slider specifically, pulling it left to recover the brightest areas of the background. The result is a background that reads as natural again, while the subject stays exactly as exposed as they were.
Step 4: Add a Linear Gradient to Darken the Ground
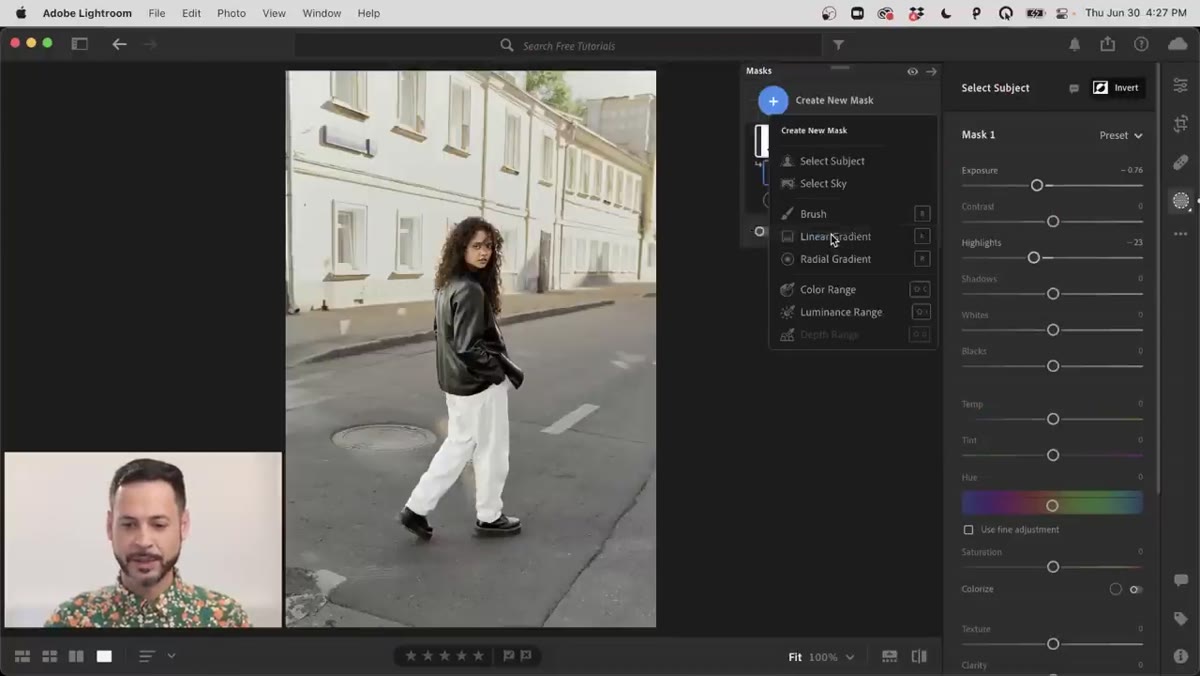 Dragging a Linear Gradient across the bottom of the frame
The background correction helps, but Aaron takes it one step further: the ground beneath the subject is still reading a little bright, which means the subject doesn’t have enough visual separation from the scene. Create a new mask, this time choosing Linear Gradient. Click and drag from the bottom of the frame upward to roughly the midpoint. This creates a gradient selection that covers the lower portion of the image. The problem is that it also catches part of the subject, so you need to refine it.
Dragging a Linear Gradient across the bottom of the frame
The background correction helps, but Aaron takes it one step further: the ground beneath the subject is still reading a little bright, which means the subject doesn’t have enough visual separation from the scene. Create a new mask, this time choosing Linear Gradient. Click and drag from the bottom of the frame upward to roughly the midpoint. This creates a gradient selection that covers the lower portion of the image. The problem is that it also catches part of the subject, so you need to refine it.
Step 5: Subtract the Subject from the Gradient Mask
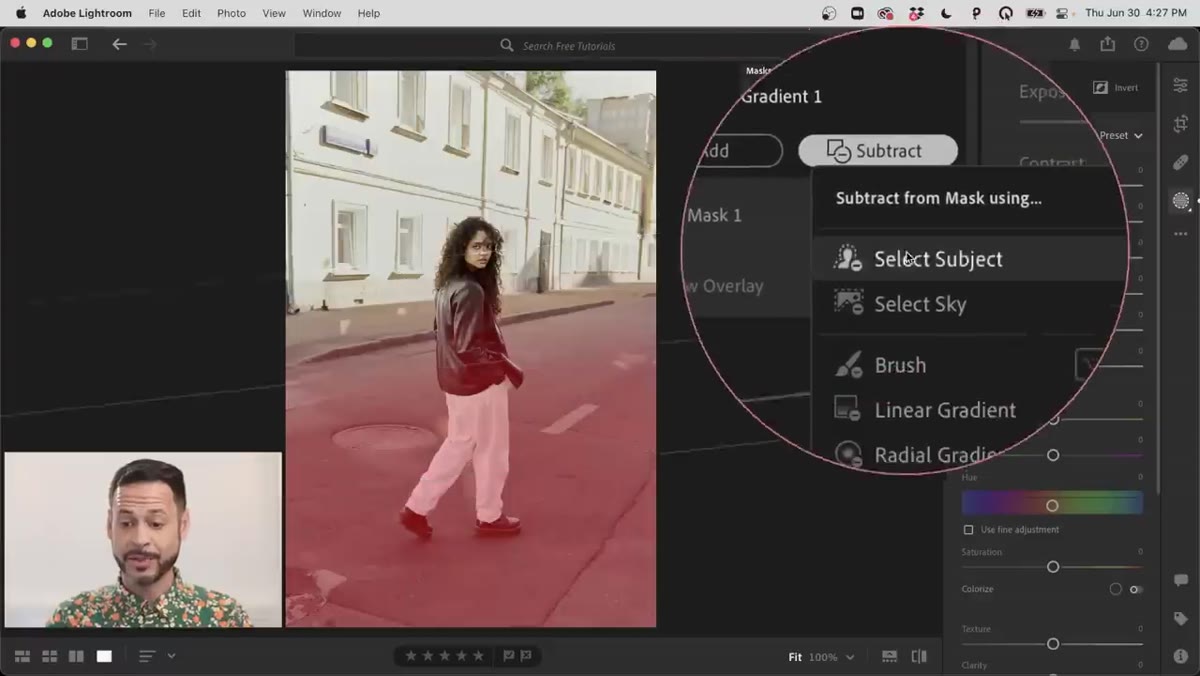 Using Subtract > Select Subject to remove person from gradient mask
With the Linear Gradient mask selected, click “Subtract” and then choose “Select Subject.” Lightroom removes the subject’s silhouette from the gradient mask automatically. Now you’re affecting only the ground in the lower frame, with the subject cleanly protected. Drop the Exposure slider on this mask to darken the ground slightly. It’s a subtle change, but subtle is the right call here. The result is that the subject pops forward from the scene without any artificial-looking vignette or heavy-handed darkening.
Using Subtract > Select Subject to remove person from gradient mask
With the Linear Gradient mask selected, click “Subtract” and then choose “Select Subject.” Lightroom removes the subject’s silhouette from the gradient mask automatically. Now you’re affecting only the ground in the lower frame, with the subject cleanly protected. Drop the Exposure slider on this mask to darken the ground slightly. It’s a subtle change, but subtle is the right call here. The result is that the subject pops forward from the scene without any artificial-looking vignette or heavy-handed darkening.
Step 6: Mask the Subject to Refine Specific Areas
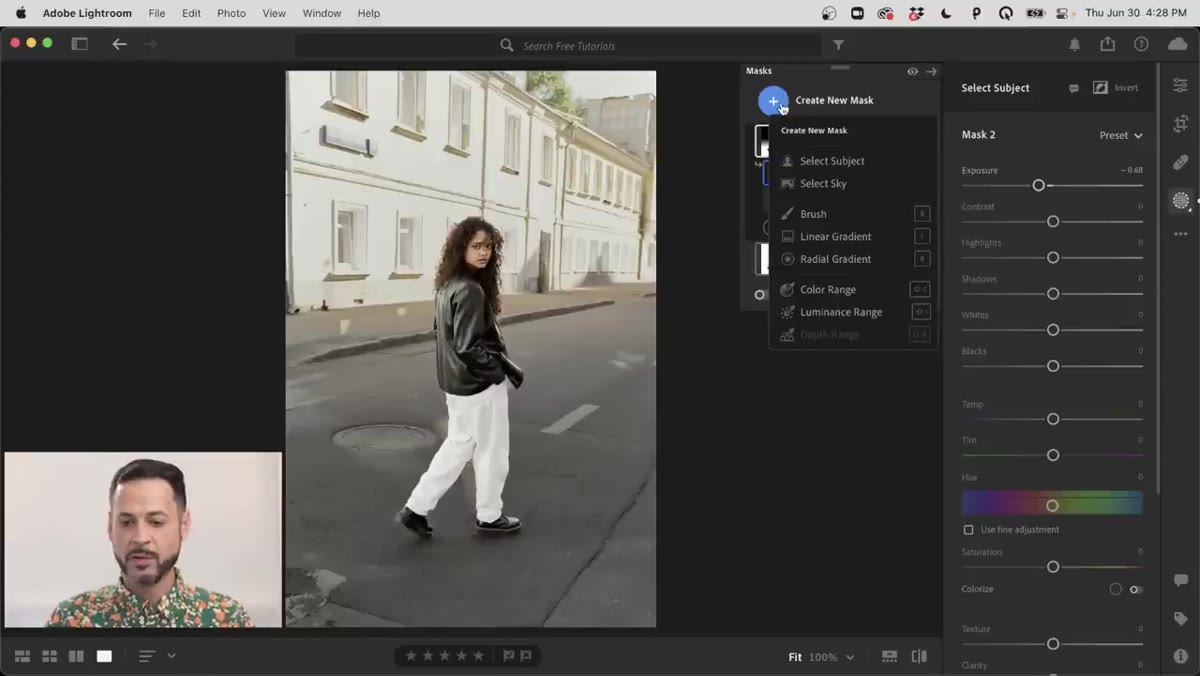 Creating a new Subject mask to paint away the jacket and shoes
The last mask in the sequence targets the subject directly. Create a new mask using “Select Subject” again, this time leaving the selection on the subject rather than inverting it. This lets you make adjustments to the subject independently of everything else. In the tutorial, Aaron notices the subject’s pants are reading a little bright given the corrected background. Rather than affecting the whole subject, he uses the Subtract function with the Brush tool to paint away areas he doesn’t want to adjust, like the jacket and shoes, leaving only the pants within the mask. Then a small exposure reduction brings the pants in line with the rest of the image.
Creating a new Subject mask to paint away the jacket and shoes
The last mask in the sequence targets the subject directly. Create a new mask using “Select Subject” again, this time leaving the selection on the subject rather than inverting it. This lets you make adjustments to the subject independently of everything else. In the tutorial, Aaron notices the subject’s pants are reading a little bright given the corrected background. Rather than affecting the whole subject, he uses the Subtract function with the Brush tool to paint away areas he doesn’t want to adjust, like the jacket and shoes, leaving only the pants within the mask. Then a small exposure reduction brings the pants in line with the rest of the image.
Why I’d Push This Technique One Step Further
The workflow Aaron demonstrates is clean and fast, and I use a version of it constantly. One thing I’d add: once you’ve built out these masks, take a few minutes to adjust the White Balance individually on the background mask if the background is daylight and the subject was lit with a strobe or a different color temperature light source. Mixed lighting is incredibly common in portrait and event work, and just because the exposure is balanced doesn’t mean the color temperature is. A slight warming or cooling of the background mask can make a corrected photo look like it was shot in perfect conditions to begin with.
Also worth knowing: you can toggle any individual mask on and off using the eyeball icon next to that mask in the panel. Aaron mentions this briefly, but it’s genuinely useful for evaluating what each mask is contributing. Holding the icon gives you a live before/after for that specific adjustment, not the whole edit stack.
The single most important thing this tutorial reinforces is that exposure correction isn’t a one-slider problem. Lightroom’s masking tools exist specifically so you can treat different parts of an image as separate editing targets, and the Select Subject AI is accurate enough now that the workflow is fast rather than fiddly. If you’ve been avoiding masks because they felt complicated, this video makes a strong case that they’re more accessible than you think.
Watch the full tutorial on YouTube to see Aaron walk through each mask in real time. Seeing the red overlay shift as he builds and subtracts selections is the fastest way to internalize how this workflow actually operates.
Comments (1)
I keep coming back to this article. It's that useful.
Leave a Comment