There’s a specific kind of frustration that hits when you get home from a shoot, pull up your images, and realize the composition needs a serious crop. Maybe there was a distracting element along the edge, or your subject was just a little too far away. Either way, you drag those crop handles inward, and suddenly your 26-megapixel file is looking like something off a 2009 phone camera. Pixelated, soft, unusable. I’ve been there more times than I want to admit, and for a long time my answer was just “shoot tighter next time” — which is not exactly a satisfying solution.
That’s why this tutorial from landscape photographer Mark Denney caught my attention. Watch the full tutorial on YouTube — he walks through one of Lightroom’s least-talked-about tools with the kind of clarity that makes you wonder why Adobe doesn’t lead with it in their own marketing. The short version: Lightroom has a built-in AI-powered Enhance feature that can nearly quadruple your effective megapixel count after a crop. If you shoot RAW, you already have access to it. Here’s how to put it to work.
Step 1: Start With a RAW File and Identify Your Crop
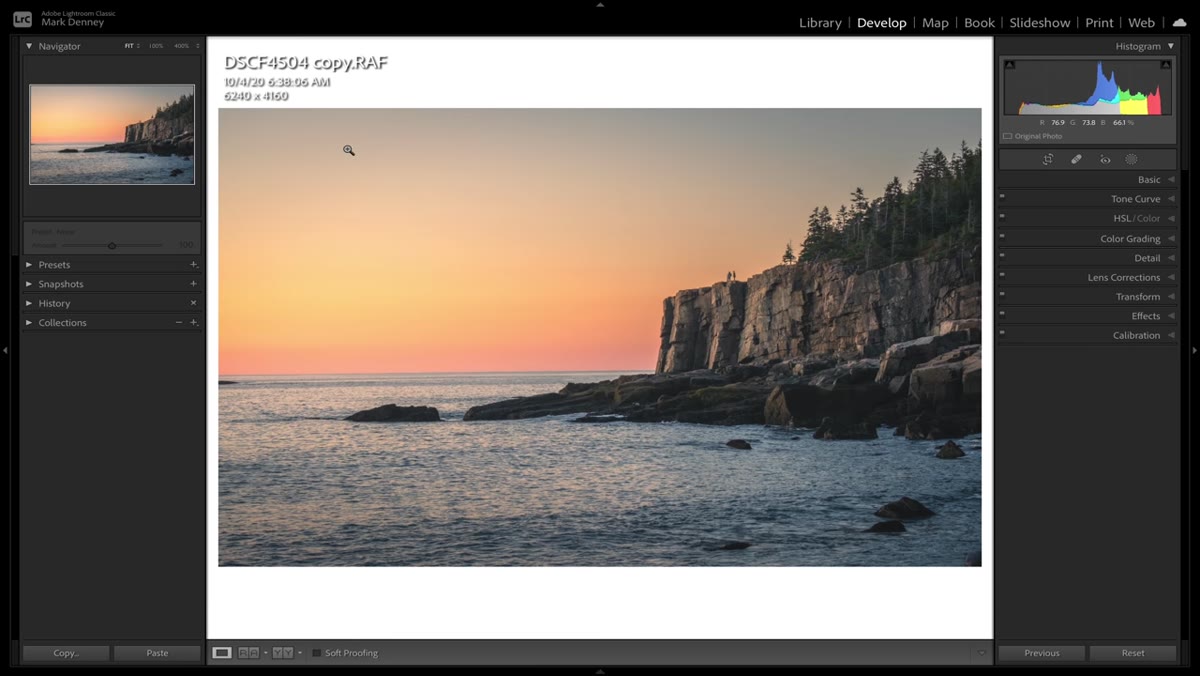 26-megapixel Fuji XT4 image open in Lightroom Develop module
Before anything else, make sure you’re working with a RAW file. The Enhance tool technically works on other formats, but RAW is where it earns its keep. Denney uses images shot across three different cameras in this tutorial, from a 26-megapixel Fuji XT4 up to a 102-megapixel medium format body, and the difference in results is dramatic. For most of us shooting with something in the 24-45 megapixel range, the results are still genuinely impressive.
26-megapixel Fuji XT4 image open in Lightroom Develop module
Before anything else, make sure you’re working with a RAW file. The Enhance tool technically works on other formats, but RAW is where it earns its keep. Denney uses images shot across three different cameras in this tutorial, from a 26-megapixel Fuji XT4 up to a 102-megapixel medium format body, and the difference in results is dramatic. For most of us shooting with something in the 24-45 megapixel range, the results are still genuinely impressive.
Open your image in the Develop module and take stock of what you’re working with. Check the pixel dimensions in the bottom-left corner of the image panel. You’ll want that number in your head so you can appreciate what happens after the Enhance step does its thing.
Step 2: Apply Your Aggressive Crop Without Holding Back
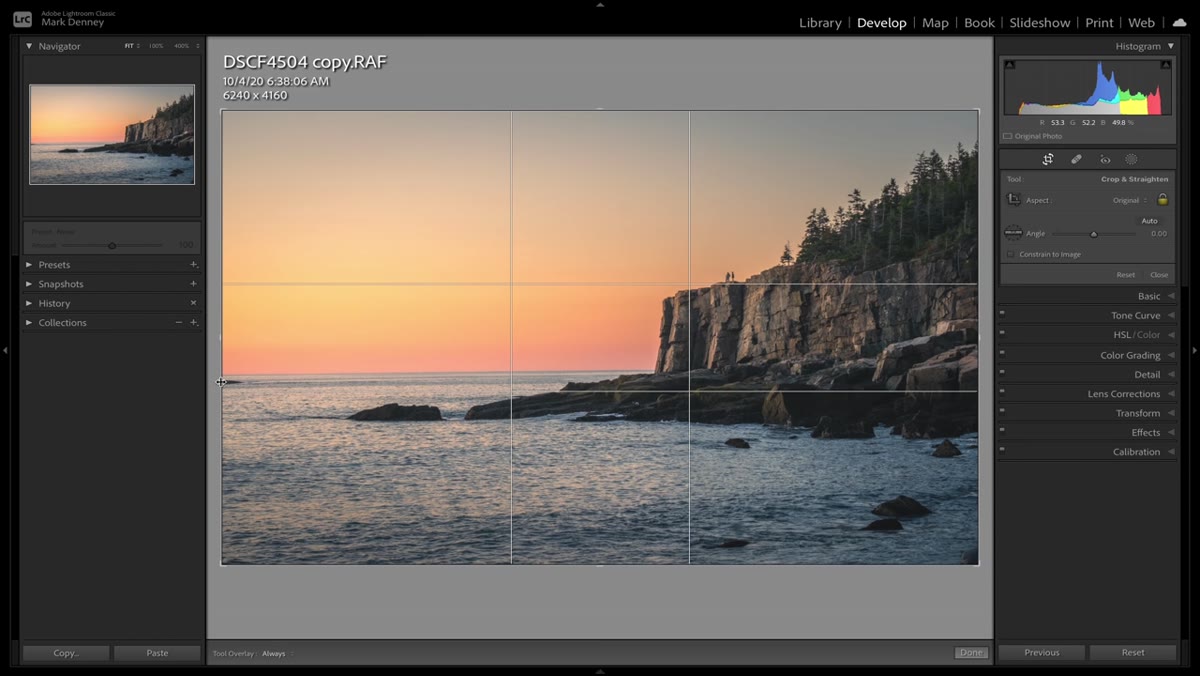 Crop overlay tool active, handles being dragged inward aggressively
This is the part most of us have been trained to avoid. Go ahead and crop the image the way it actually needs to be cropped, without worrying about what it does to your resolution. Denney pulls the crop handles way in on all four sides, trimming out distractions and landing on a composition that actually works. In his example with the XT4, he goes from 26 megapixels down to roughly 5 megapixels. That would normally be a death sentence for print work.
Crop overlay tool active, handles being dragged inward aggressively
This is the part most of us have been trained to avoid. Go ahead and crop the image the way it actually needs to be cropped, without worrying about what it does to your resolution. Denney pulls the crop handles way in on all four sides, trimming out distractions and landing on a composition that actually works. In his example with the XT4, he goes from 26 megapixels down to roughly 5 megapixels. That would normally be a death sentence for print work.
Commit to the crop and hit Enter. Watch the pixel dimensions update in the lower corner. For Denney’s test image, the cropped file came in at 2812 by 1875 pixels, a little over 5 megapixels. Remember that number. You’re about to change it.
Step 3: Navigate to Photo, Then Enhance
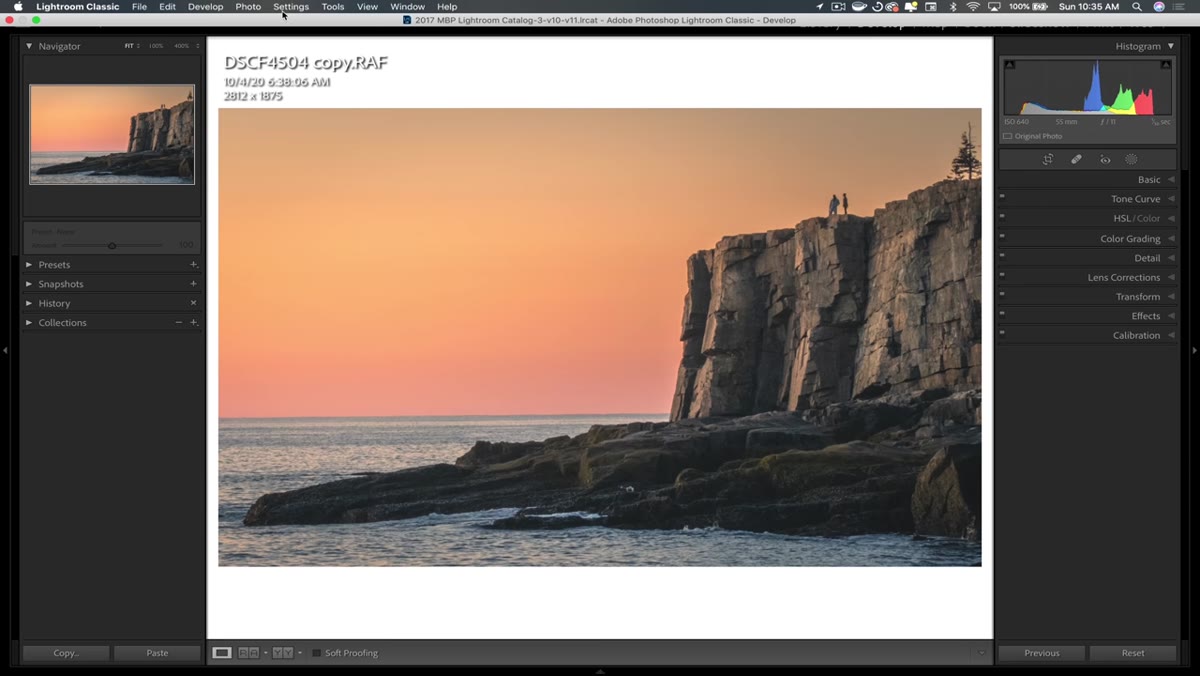 Photo menu open in menu bar with Enhance option highlighted
With your cropped image selected, go up to the top menu bar and click “Photo.” Scroll down through the dropdown and you’ll see “Enhance.” Click it. A dialog box will open with a preview panel and a couple of options. This is the tool Denney calls one of the least-talked-about features in all of Lightroom, and honestly, after seeing it work, I’d agree.
Photo menu open in menu bar with Enhance option highlighted
With your cropped image selected, go up to the top menu bar and click “Photo.” Scroll down through the dropdown and you’ll see “Enhance.” Click it. A dialog box will open with a preview panel and a couple of options. This is the tool Denney calls one of the least-talked-about features in all of Lightroom, and honestly, after seeing it work, I’d agree.
The dialog box gives you a before-and-after preview window so you can see the difference even before you commit. Zoom in on an area with fine texture, like fabric, foliage, or anything with edge detail, and the difference is visible even at this stage.
Step 4: Confirm Raw Details Is Checked
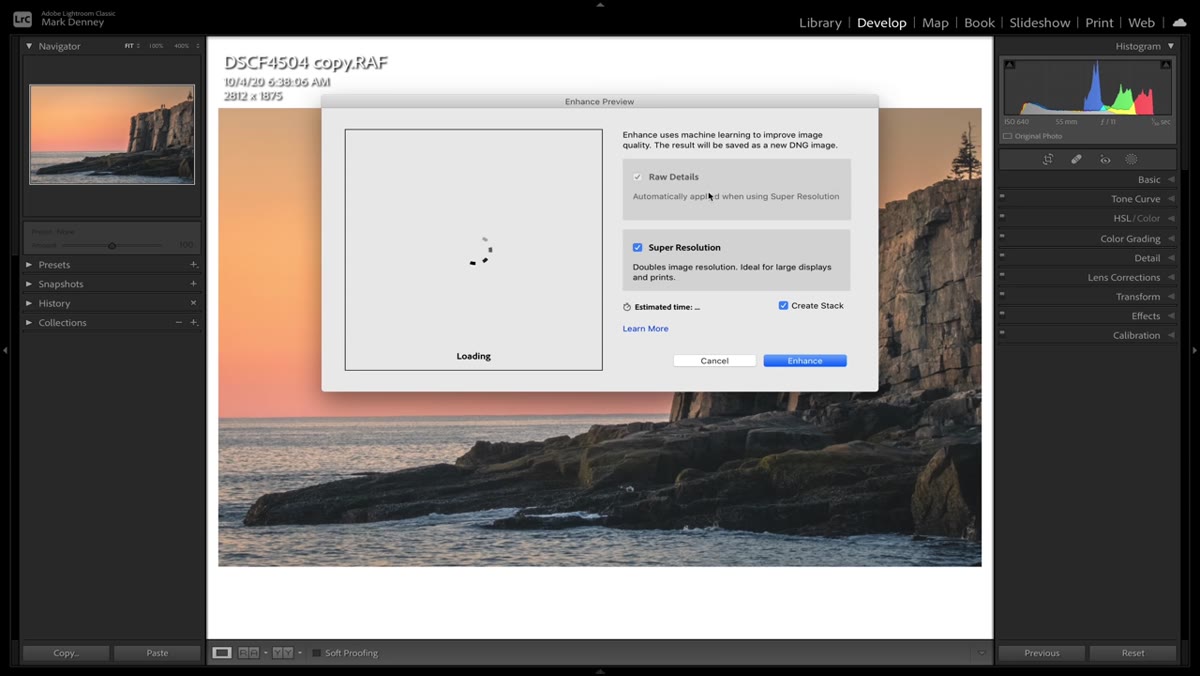 Enhance dialog box open showing Raw Details checkbox selected
Inside the Enhance dialog, you’ll see a checkbox for “Raw Details.” When you’re working with a RAW file, this will be checked automatically. Leave it checked. This is the core of what makes the tool so effective on RAW files specifically — it uses machine learning to re-interpret the RAW data and reconstruct detail that a standard demosaic algorithm would lose.
Enhance dialog box open showing Raw Details checkbox selected
Inside the Enhance dialog, you’ll see a checkbox for “Raw Details.” When you’re working with a RAW file, this will be checked automatically. Leave it checked. This is the core of what makes the tool so effective on RAW files specifically — it uses machine learning to re-interpret the RAW data and reconstruct detail that a standard demosaic algorithm would lose.
There’s also a “Super Resolution” option in some versions of Lightroom. If you see it, that’s the nuclear option — it doubles the linear dimensions of the image, which means it quadruples the total pixel count. Denney’s workflow in this tutorial focuses on the Raw Details enhancement, but Super Resolution is worth a separate experiment if you want to push even further.
Step 5: Note the Estimated Processing Time and Hit Enhance
 Enhance dialog showing estimated processing time before confirming
Lightroom will show you an estimated processing time before you confirm. For Denney’s files, it was around 15 seconds. Larger files, particularly those shot on high-megapixel bodies, will take longer. Click “Enhance” and let it run. You’ll see a progress bar at the top of the screen as Lightroom creates what it calls an “enhanced DNG” — a new file that sits alongside your original in the catalog without overwriting anything.
Enhance dialog showing estimated processing time before confirming
Lightroom will show you an estimated processing time before you confirm. For Denney’s files, it was around 15 seconds. Larger files, particularly those shot on high-megapixel bodies, will take longer. Click “Enhance” and let it run. You’ll see a progress bar at the top of the screen as Lightroom creates what it calls an “enhanced DNG” — a new file that sits alongside your original in the catalog without overwriting anything.
The non-destructive nature here is worth pausing on. Your original cropped file stays intact. The enhanced version is a separate DNG. You can compare them directly, which is exactly what Denney does in the next step.
Step 6: Compare the Enhanced and Original Files Side by Side
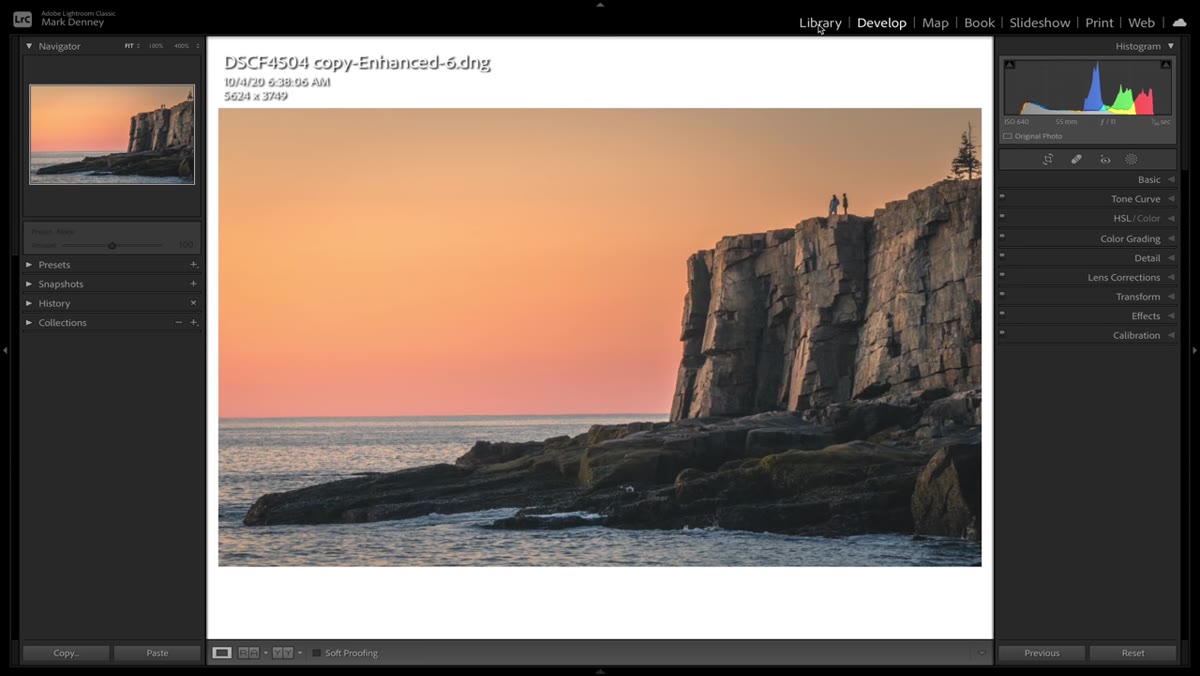 Library module showing original and enhanced DNG files unstacked for comparison
Head back to the Library module. Lightroom will have automatically stacked the enhanced DNG with your original. Unstack them so you can view both side by side. Denney’s cropped XT4 file went from 2812 by 1875 up to 5624 by 3749 — from roughly 5 megapixels to around 21. That’s not a rounding error. That’s a completely different file.
Library module showing original and enhanced DNG files unstacked for comparison
Head back to the Library module. Lightroom will have automatically stacked the enhanced DNG with your original. Unstack them so you can view both side by side. Denney’s cropped XT4 file went from 2812 by 1875 up to 5624 by 3749 — from roughly 5 megapixels to around 21. That’s not a rounding error. That’s a completely different file.
Zoom into an area with fine texture or subject detail. Denney zooms into a crowd scene and the difference is immediately obvious. The enhanced version has crisp edges and recoverable detail. The original at the same zoom level looks like someone put petroleum jelly on the lens. For anyone who’s ever printed a heavily cropped image and been disappointed, this is what you’ve been missing.
A Note From My Own Workflow
I’ve been using the Enhance tool for a few months now, and the one thing Denney doesn’t cover that I’d add is this: run the Enhance step before doing your final sharpening pass in the Detail panel. When I’ve applied output sharpening first and then enhanced, the results looked slightly over-processed, almost plasticky around fine edges. The cleaner approach is to enhance first, then do your Detail panel work on the enhanced DNG. The AI has more honest data to work with, and your sharpening sits on top of a stronger foundation.
Also worth noting: the enhanced DNG will be a noticeably larger file. If you’re working off a drive that’s already close to full, clear some space before you run a batch of these. A heavily cropped 26-megapixel RAW that started around 50MB can come out of Enhance sitting north of 200MB.
The takeaway from Mark Denney’s tutorial is simple but genuinely useful: you don’t need a medium format camera to rescue an aggressive crop. Lightroom’s Enhance feature is sitting inside a menu most people never open, and it can pull a 5-megapixel crop back up toward print-viable quality in under a minute. The best camera is the one you have with you, but the best file is the one you actually finish editing.
Watch the full tutorial on YouTube to see Denney’s side-by-side comparisons across all three of his test cameras, including what happens when you run this on a 102-megapixel file. That part, as he puts it, is genuinely shocking.
Comments (2)
Been doing this wrong for years apparently. Thanks for the wake-up call.
Great article! I actually covered something related on my site — the photoshop angle is really complementary to this.
Leave a Comment