Every photographer I know has a version of the same problem: clients want to see options before committing to a final selection, and sending a folder of 200 JPEGs feels about as professional as handing someone a shoebox of prints. For a long time I was exporting contact sheets from a separate app, which added steps and broke my flow right in the middle of a session. Then I watched this CreativeLive tutorial on customizing portrait proof sheets entirely inside Lightroom, and I realized I’d been ignoring a tool that was sitting in front of me the whole time.
Watch the full tutorial on YouTube
The whole approach lives in Lightroom’s Print module, which most people treat like a waiting room they walk through on the way to exporting files. The trick here is that you never actually send anything to a printer. You use the module to build a polished, grid-based proof layout, drop in a branded background image as an identity plate, and output the whole thing as a JPEG. Clean, repeatable, and entirely self-contained. Here’s exactly how it works.
Step 1: Open the Print Module and Switch the Output to JPEG
 Lightroom Print module open with layout options visible
Head to the Print module from the top navigation bar. Before you touch anything else, scroll all the way to the bottom of the right-hand panel and find the print destination setting. By default it’s pointed at your system printer. Change it to “JPEG File.” This is the move that most people miss. You’re not printing anything, you’re generating a file, and that distinction changes how you should think about every setting that follows.
Lightroom Print module open with layout options visible
Head to the Print module from the top navigation bar. Before you touch anything else, scroll all the way to the bottom of the right-hand panel and find the print destination setting. By default it’s pointed at your system printer. Change it to “JPEG File.” This is the move that most people miss. You’re not printing anything, you’re generating a file, and that distinction changes how you should think about every setting that follows.
Once you’ve made that switch, the module starts behaving more like an export dialog than a print queue. Everything you build here will render out as a single flat image you can email, upload to a client gallery, or drop into a PDF.
Step 2: Set Up a Single Image Contact Sheet Layout
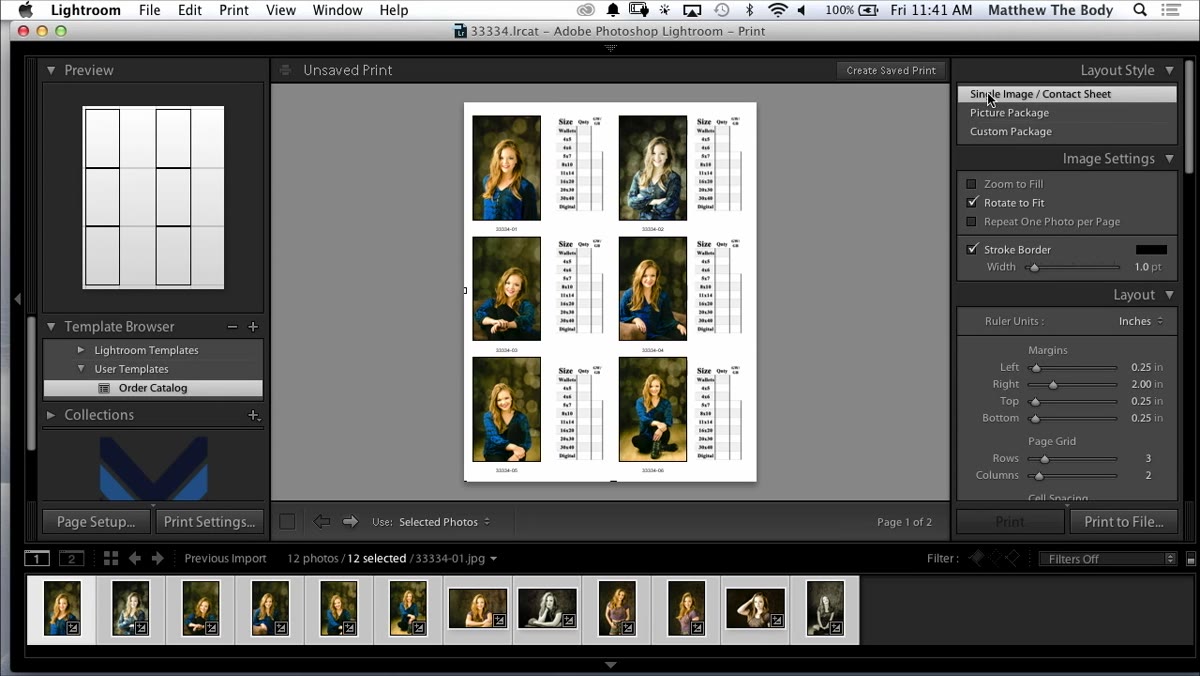
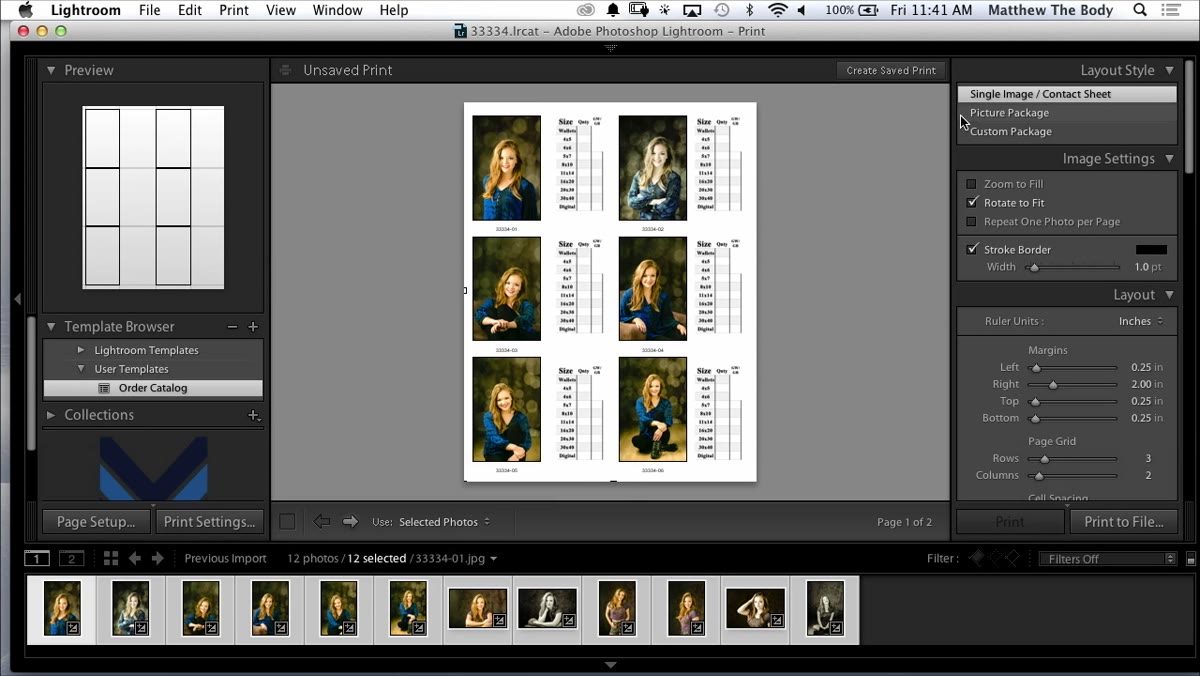 Single image contact sheet layout selected in Print module
In the Layout panel on the right side, you want to select “Single Image / Contact Sheet” as your layout style. This gives you grid control rather than a freeform picture package. From there, adjust the grid to a 1x1 configuration to start. You’ll expand the grid dimensions in a moment, but beginning with one cell keeps things legible while you dial in the other settings.
Single image contact sheet layout selected in Print module
In the Layout panel on the right side, you want to select “Single Image / Contact Sheet” as your layout style. This gives you grid control rather than a freeform picture package. From there, adjust the grid to a 1x1 configuration to start. You’ll expand the grid dimensions in a moment, but beginning with one cell keeps things legible while you dial in the other settings.
Think of this step as laying the foundation. The grid is your canvas, and everything else, the background, the stroke, the photo info, gets built on top of it.
Step 3: Create and Load a Graphical Identity Plate
 Identity plate editor open with graphical option selected
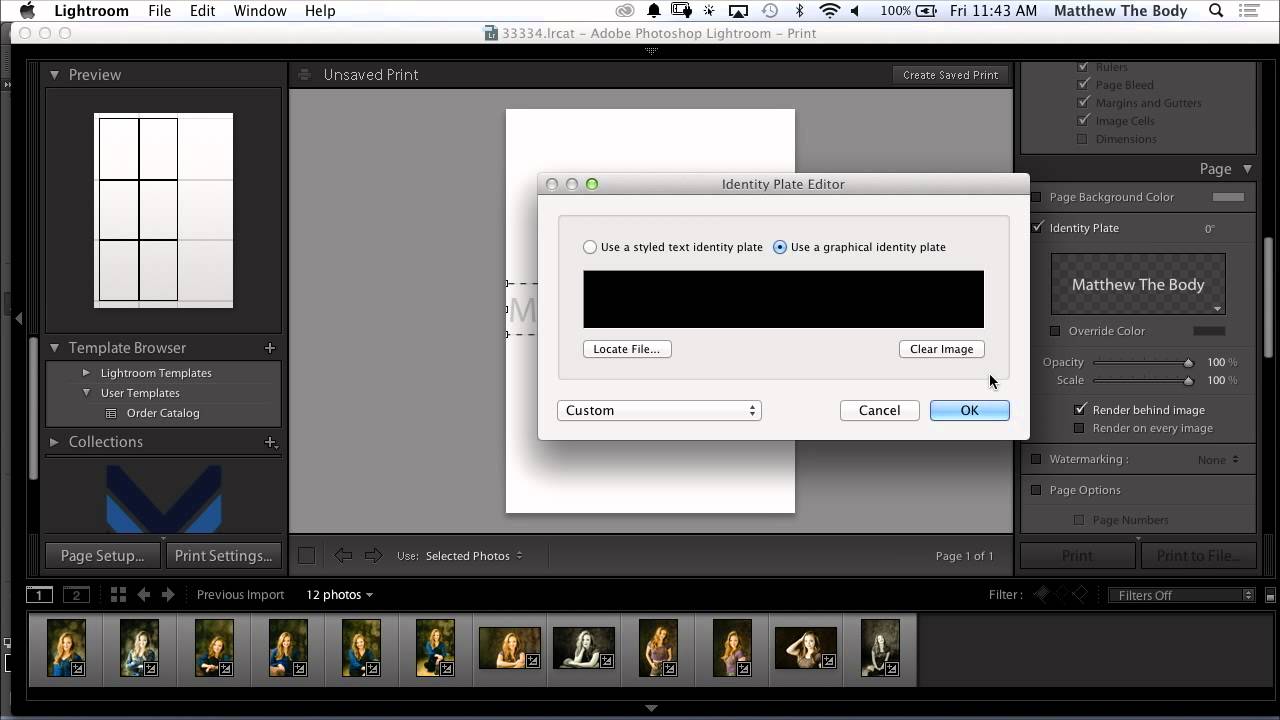
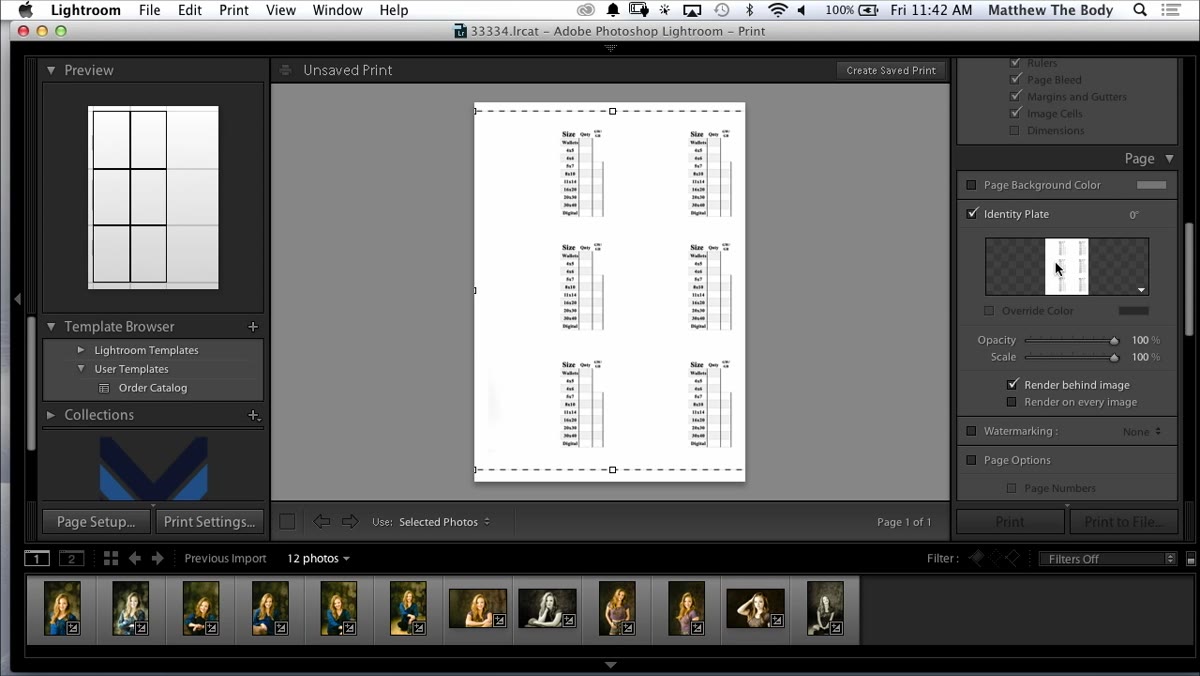
This is where the workflow gets interesting. The identity plate in Lightroom isn’t just for watermarks and logos. Here, it becomes your entire proof sheet background. Go to the identity plate editor (found at the top of the Print module’s right panel), click “Edit,” and switch the option from text to “Graphical.”
Identity plate editor open with graphical option selected
This is where the workflow gets interesting. The identity plate in Lightroom isn’t just for watermarks and logos. Here, it becomes your entire proof sheet background. Go to the identity plate editor (found at the top of the Print module’s right panel), click “Edit,” and switch the option from text to “Graphical.”
You’ll need a background image prepared in advance. The tutorial calls for a simple 5x7 image, which you can build in Photoshop or even Canva. A clean grid graphic or a branded template both work well. Once your image is ready, use the “Locate File” option inside the identity plate editor to link it. Lightroom may throw a warning dialogue when you load it. Click “Use Anyway” and move on.
Step 4: Match the Background Color and Set Opacity
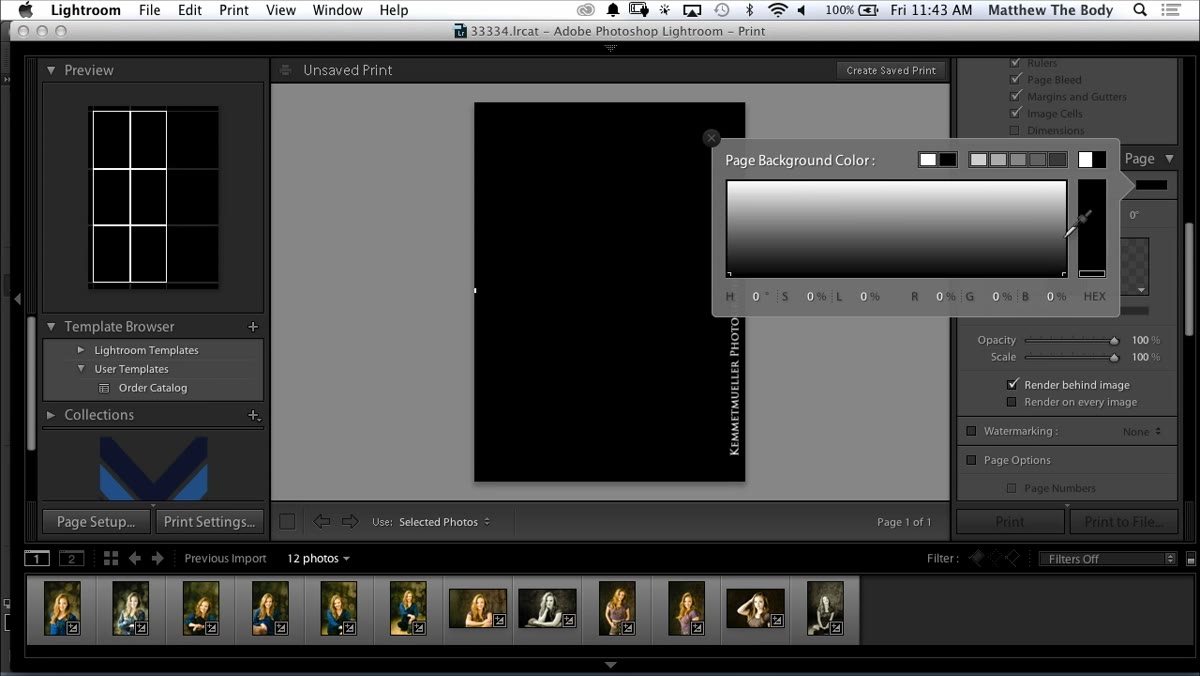 Background set to black with identity plate at 100% opacity
After loading the graphical identity plate, set the page background color to black. This matches the identity plate background and eliminates any visual gap between the image and the edges of the layout. It’s a small detail, but proof sheets with a mismatched border color look unfinished fast.
Background set to black with identity plate at 100% opacity
After loading the graphical identity plate, set the page background color to black. This matches the identity plate background and eliminates any visual gap between the image and the edges of the layout. It’s a small detail, but proof sheets with a mismatched border color look unfinished fast.
Set the identity plate opacity to 100% and scale it to 100% as well. You want full coverage with no transparency bleed. At this point your background should be locked in and consistent across the entire layout.
Step 5: Adjust the Cell Size to Match Your Image Dimensions
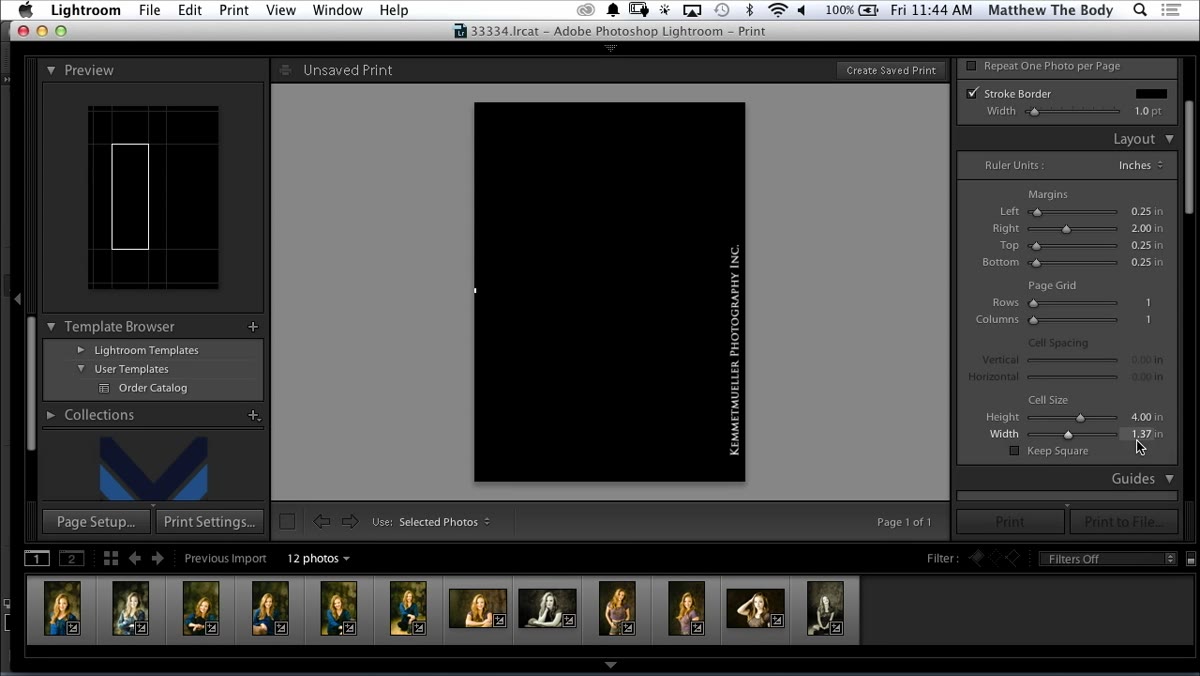 Grid dimensions being set to six by four in cell panel
Back in the Layout panel, update the grid to reflect the actual dimensions of the images you’re proofing. The tutorial uses a 6x4 ratio, which maps to standard portrait or landscape orientations depending on how you shot. Set the cell height to 6 and the cell width to 4 using the dimension inputs in the Cells section.
Grid dimensions being set to six by four in cell panel
Back in the Layout panel, update the grid to reflect the actual dimensions of the images you’re proofing. The tutorial uses a 6x4 ratio, which maps to standard portrait or landscape orientations depending on how you shot. Set the cell height to 6 and the cell width to 4 using the dimension inputs in the Cells section.
Getting these numbers right matters because mismatched cell sizes will force Lightroom to crop or letterbox your images inside each cell, which defeats the whole point of a clean proof sheet. Match your cell ratio to your image aspect ratio and you’ll get edge-to-edge fills every time.
Step 6: Add a White Stroke and Enable Rotate to Fit
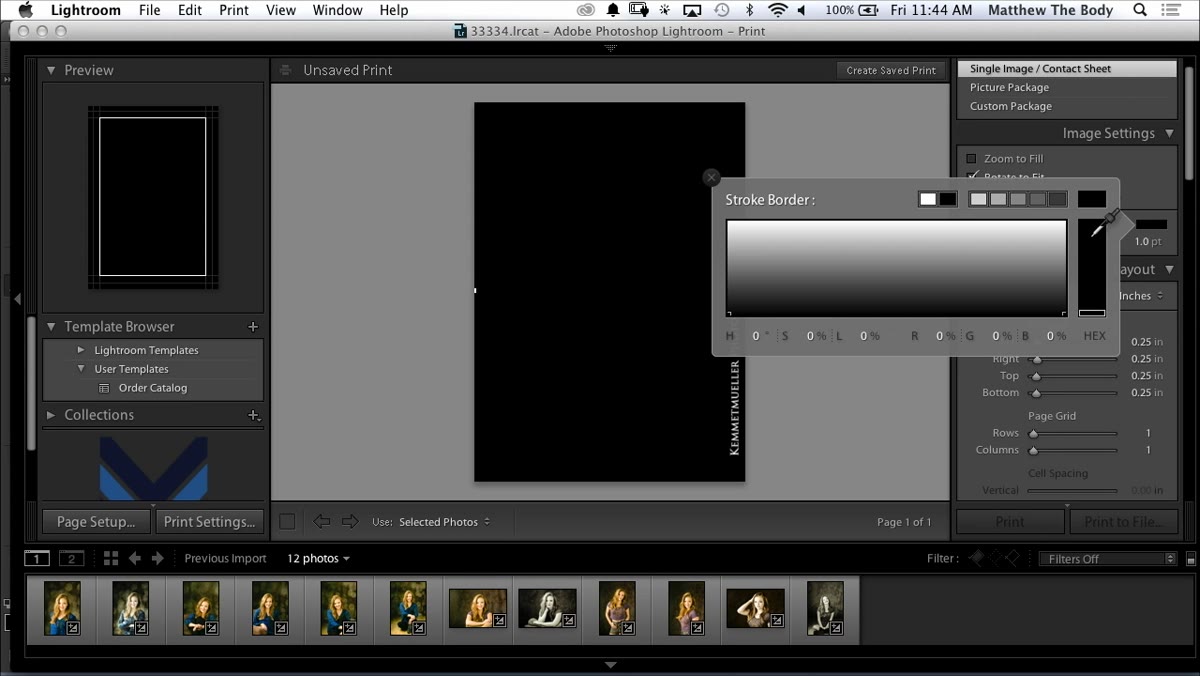 White border stroke applied to image cells in layout
In the Image Settings panel, turn on “Stroke Border” and set the color to white. This puts a clean white border around each image cell on the proof sheet, which makes individual photos easier to distinguish at a glance. A thin stroke, around 1-2 points, is usually enough. Heavier borders start to eat into your image area.
White border stroke applied to image cells in layout
In the Image Settings panel, turn on “Stroke Border” and set the color to white. This puts a clean white border around each image cell on the proof sheet, which makes individual photos easier to distinguish at a glance. A thin stroke, around 1-2 points, is usually enough. Heavier borders start to eat into your image area.
Also enable “Rotate to Fit.” This tells Lightroom to automatically orient each image inside its cell rather than letting it sit at a fixed angle. It’s especially useful if your shoot has a mix of portrait and landscape frames in the same proof sheet.
Step 7: Turn On Photo Info Before Exporting
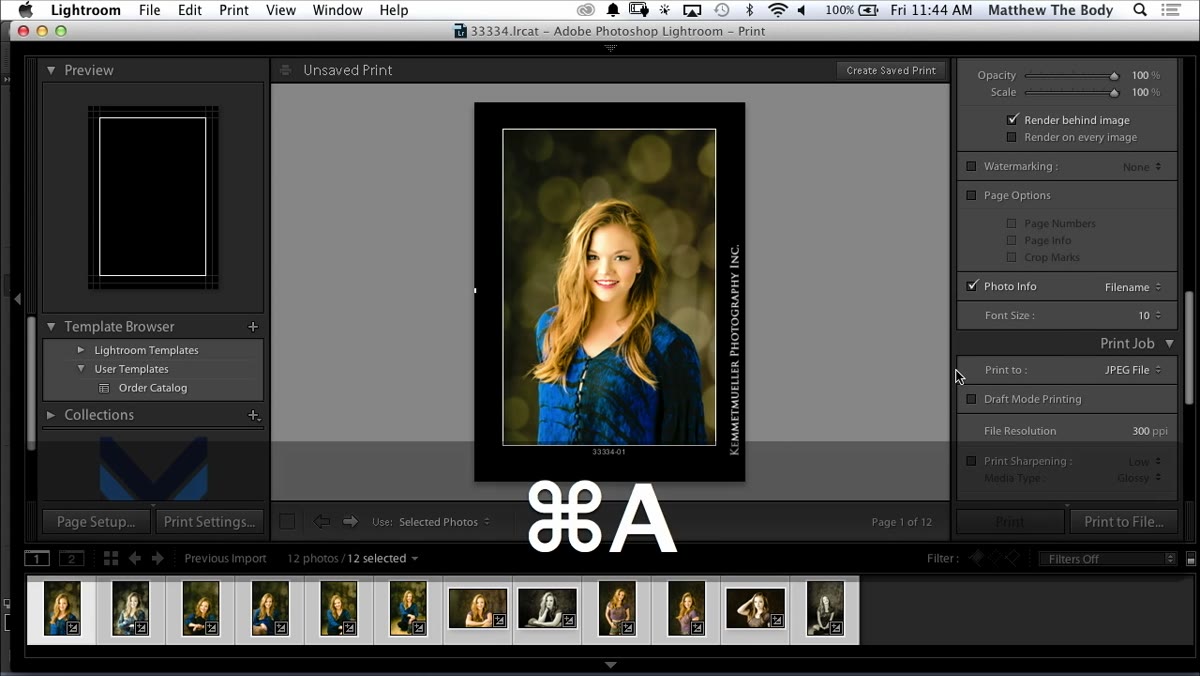 Photo info panel enabled with file name option selected
In the same Image Settings area, enable “Photo Info.” This overlays metadata directly onto each image in the grid. File name is the most practical choice here because it gives your client a reference number to use when they’re calling out favorites. No more “the one with the blue sky and the guy sort of squinting” as a selection method.
Photo info panel enabled with file name option selected
In the same Image Settings area, enable “Photo Info.” This overlays metadata directly onto each image in the grid. File name is the most practical choice here because it gives your client a reference number to use when they’re calling out favorites. No more “the one with the blue sky and the guy sort of squinting” as a selection method.
Hit “Select All” in the filmstrip to make sure every image you want on the sheet is included, then print to JPEG using the button at the bottom right.
A Note on Turning This Into a Template You’ll Actually Reuse
The real value of this workflow shows up the third or fourth time you use it, not the first. After you’ve dialed in the layout, save it as a template by clicking the “+” icon in the Template Browser on the left panel. Name it something you’ll recognize later. I follow my personal habit of naming things after songs, so mine is called “Proof - Jolene,” which makes no logical sense but I always know exactly which one it is.
The identity plate background is a separate file, so keep it somewhere stable in your folder structure. If Lightroom loses the link to it, the whole layout breaks and you’ll be relinking it every time you switch machines or reorganize your drives. I keep mine in a dedicated “LR Assets” folder in my main documents directory and haven’t had to hunt it down since.
The biggest thing this tutorial clarified for me is that the Print module is not just about paper. It’s a layout engine that happens to also talk to printers. Once you start treating it that way, a lot of tasks you’ve been doing with third-party tools start moving back inside Lightroom where your library and your workflow already live.
Watch the full tutorial on YouTube to see the full CreativeLive walkthrough, including the specific background template they reference throughout.
Comments
Leave a Comment