Every few years, a new computer shows up and suddenly you’re staring at a migration project you were not mentally prepared for. I’ve been there. New laptop arrives, old one needs to go, and somewhere in the middle is your entire Lightroom catalog with years of edits, collections, and presets that you absolutely cannot afford to lose or rebuild from scratch. The process is not complicated once you understand what Lightroom actually is doing under the hood, but if you go in blind, you will end up with a library full of question marks and a very bad afternoon.
In this Matt Kloskowski tutorial, he walks through exactly how he moved Lightroom from his laptop to a new iMac, which is actually a great use case because he had both machines available at the same time. That is the ideal scenario. Watch the full tutorial on YouTube if you want to follow along with the video, but I’ve broken it down below into steps you can actually follow without pausing and rewinding every thirty seconds.
The thing that makes this migration click, once you really get it, is understanding that Lightroom never actually owns your photos. It is a reference system. It points to wherever your photos live on your drive. That one concept changes how the whole process makes sense.
Step 1: Understand What Lightroom Is Actually Tracking
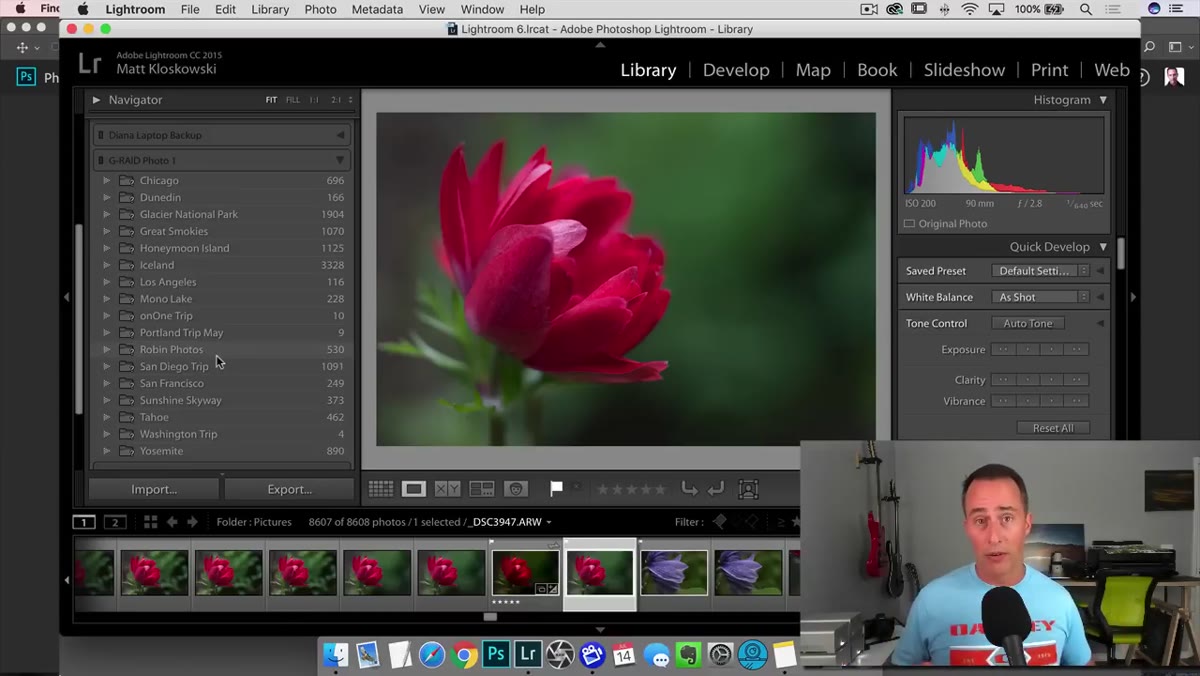
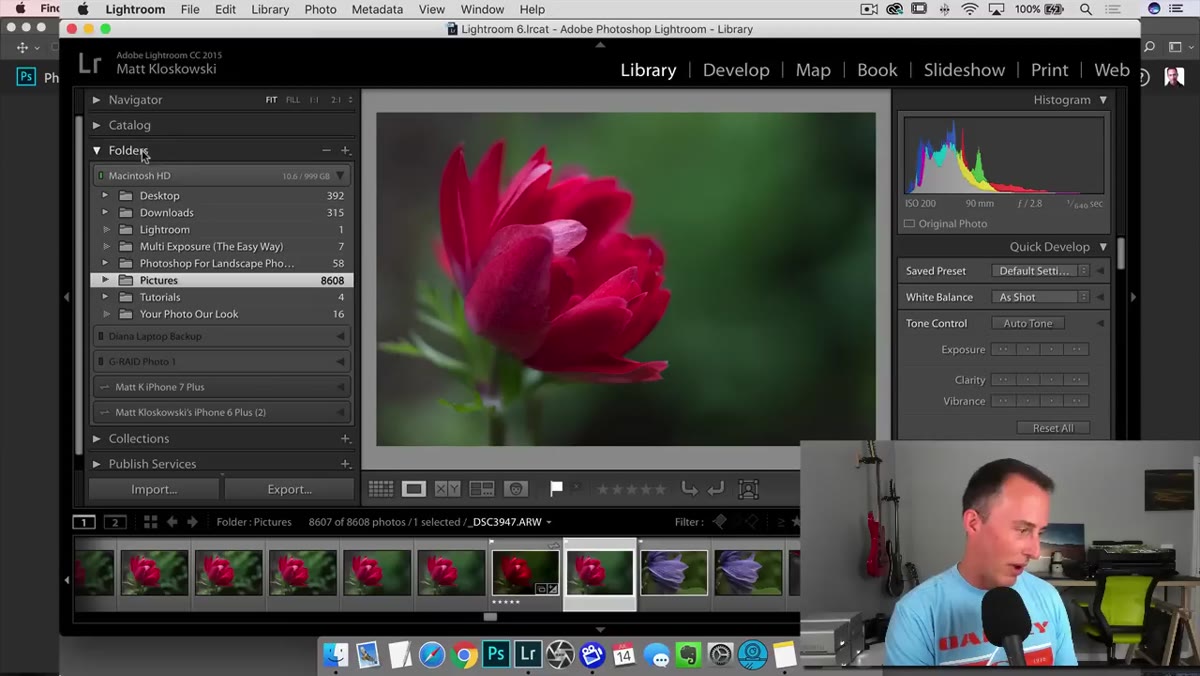 Lightroom Library panel showing folder structure on local hard drive
Before you touch a single file, spend two minutes in the Library module with your Folders panel open. What you are looking at is not a photo storage system. It is a map. Every folder listed there is a real location on your hard drive or an attached external drive, and Lightroom is simply looking at those locations and displaying what it finds. When a drive is disconnected, those folders show question marks. That is not an error. That is Lightroom being honest with you about what it can and cannot find.
Lightroom Library panel showing folder structure on local hard drive
Before you touch a single file, spend two minutes in the Library module with your Folders panel open. What you are looking at is not a photo storage system. It is a map. Every folder listed there is a real location on your hard drive or an attached external drive, and Lightroom is simply looking at those locations and displaying what it finds. When a drive is disconnected, those folders show question marks. That is not an error. That is Lightroom being honest with you about what it can and cannot find.
This matters enormously for migration. If your photos live on your main hard drive and you move to a new machine without recreating that exact folder structure, every single file will appear offline. If your photos live on an external drive, the migration becomes dramatically simpler because the drive goes with you and Lightroom can find everything again the moment you plug it in.
Step 2: Move Your Photos to an External Drive Before You Start (If They Are Not There Already)
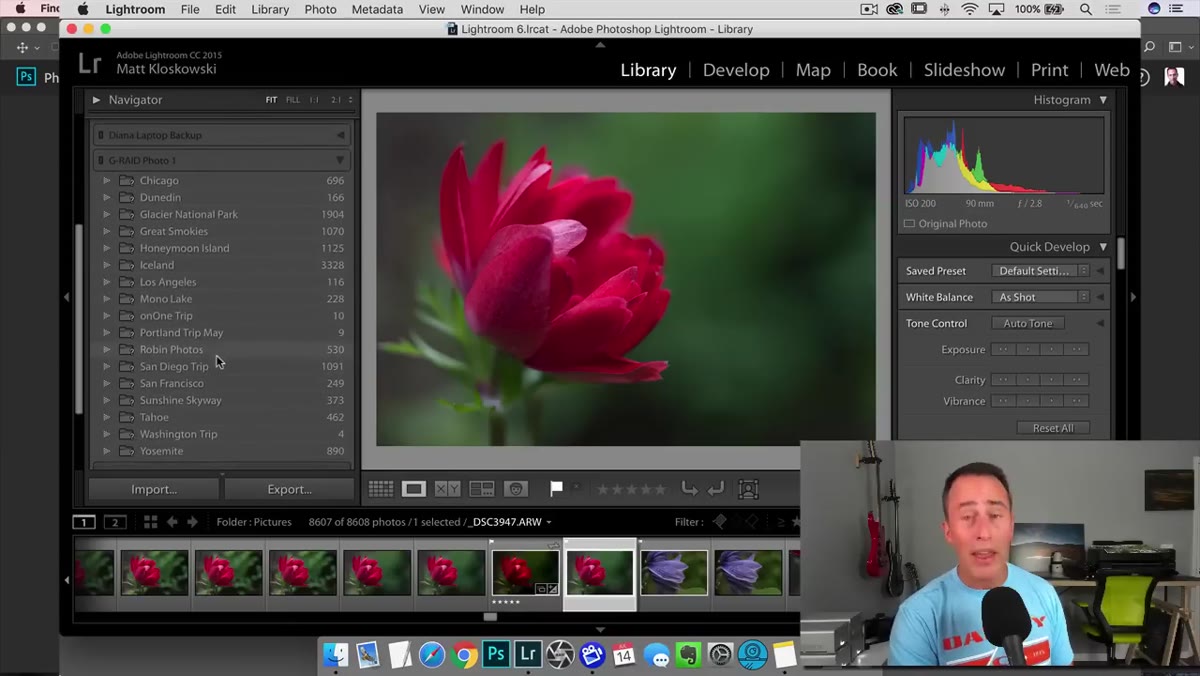 External drive “Photo Drive Number One” shown in Folders panel
If your photo library is sitting on your internal hard drive right now, this is the step that will save you hours of relinking later. Get an external drive, move your photos there using Lightroom’s own folder-dragging tools inside the Library module (not through Finder or Explorer), and let Lightroom update its references automatically. Do this before you touch anything else.
External drive “Photo Drive Number One” shown in Folders panel
If your photo library is sitting on your internal hard drive right now, this is the step that will save you hours of relinking later. Get an external drive, move your photos there using Lightroom’s own folder-dragging tools inside the Library module (not through Finder or Explorer), and let Lightroom update its references automatically. Do this before you touch anything else.
The reason Matt recommends external drives for anyone using multiple computers is simple: the drive becomes portable and the catalog’s references stay intact. You plug the same drive into the new machine, and Lightroom knows exactly where everything is. One physical drive, one source of truth.
Step 3: Find Your Catalog File Location
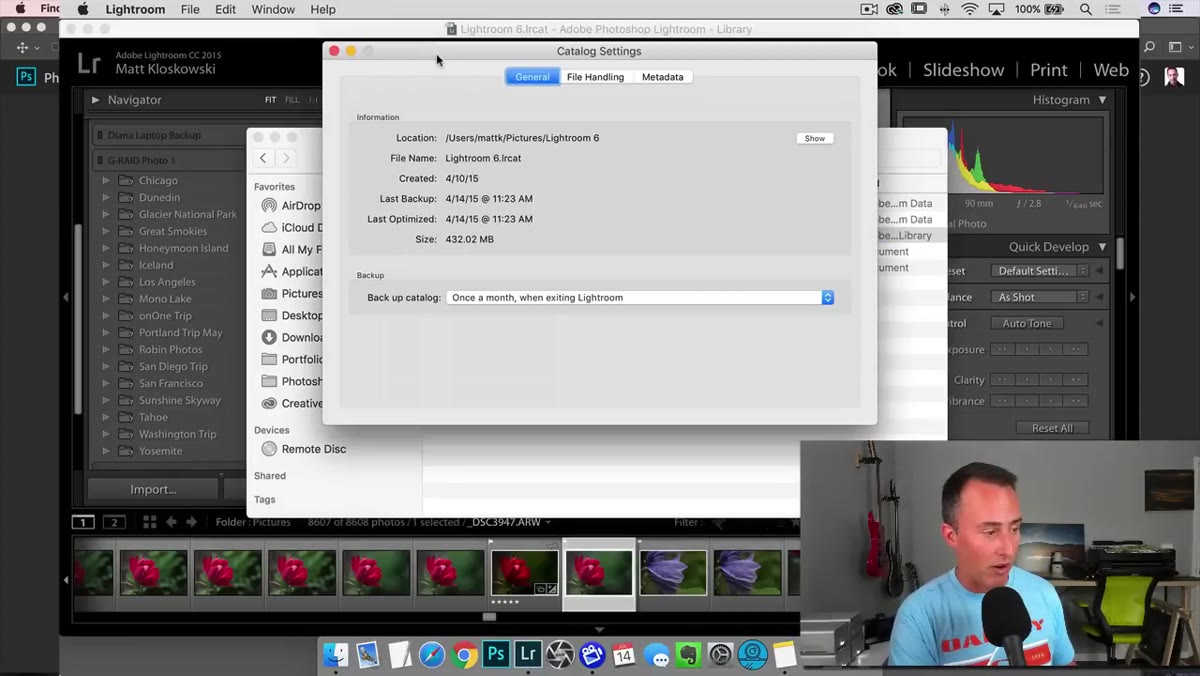
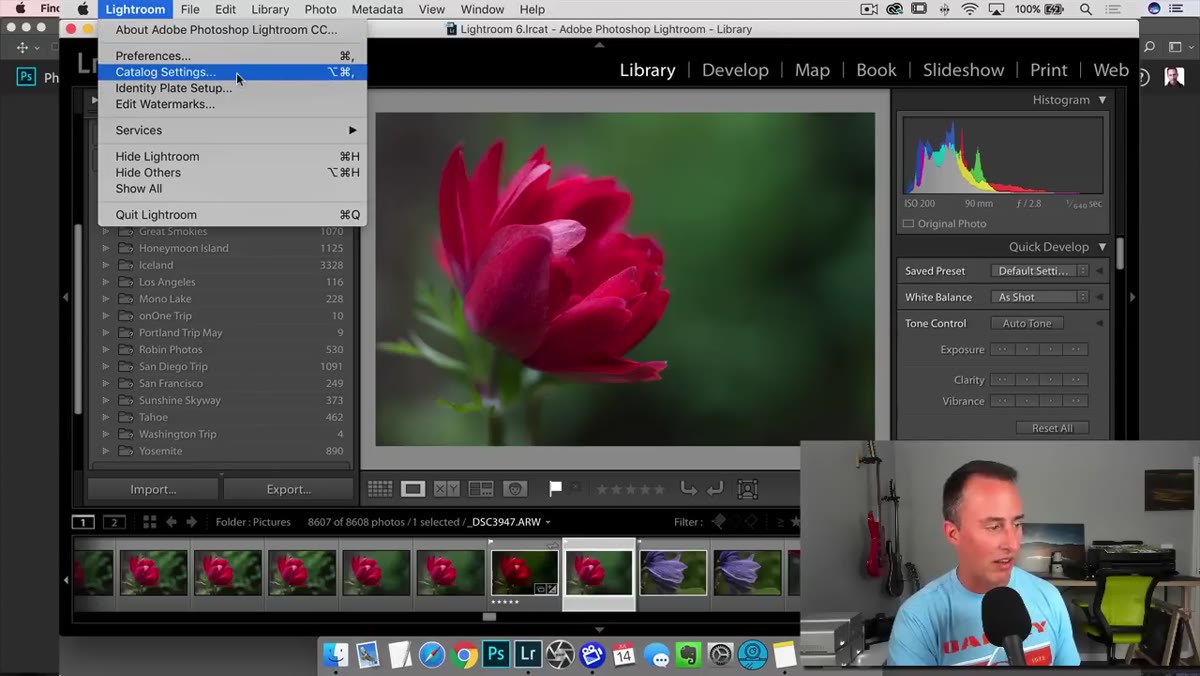 Catalog Settings window showing file location and Show button
Your catalog file is the actual brain of Lightroom. It contains your edit history, collections, metadata, keywords, everything you have done since day one. You need to find it before you can move it. Go to the Lightroom menu on Mac (or Edit menu on PC) and open Catalog Settings. Under the General tab, you will see the file location listed, and there is a Show button that will open that folder directly in Finder or Explorer.
Catalog Settings window showing file location and Show button
Your catalog file is the actual brain of Lightroom. It contains your edit history, collections, metadata, keywords, everything you have done since day one. You need to find it before you can move it. Go to the Lightroom menu on Mac (or Edit menu on PC) and open Catalog Settings. Under the General tab, you will see the file location listed, and there is a Show button that will open that folder directly in Finder or Explorer.
Inside that folder, you will see a few different files. The one ending in .lrcat is your catalog. There is also a Previews file, which stores the rendered preview images that let Lightroom display your photos quickly without re-reading the originals every time. You want to bring both of these to your new machine.
Step 4: Quit Lightroom Before Copying Anything
 Lightroom closed with temporary lock files removed from catalog folder
This sounds obvious but it is easy to skip: fully quit Lightroom before you copy the catalog folder. While Lightroom is running, it creates temporary lock files in that same folder. If you copy those to your new machine along with everything else, you can create problems when the new installation tries to open the catalog. Quit Lightroom, go back to that folder, and you will see those temporary files disappear. Now you have a clean set of files to transfer.
Lightroom closed with temporary lock files removed from catalog folder
This sounds obvious but it is easy to skip: fully quit Lightroom before you copy the catalog folder. While Lightroom is running, it creates temporary lock files in that same folder. If you copy those to your new machine along with everything else, you can create problems when the new installation tries to open the catalog. Quit Lightroom, go back to that folder, and you will see those temporary files disappear. Now you have a clean set of files to transfer.
Step 5: Copy the Entire Catalog Folder to Your New Machine
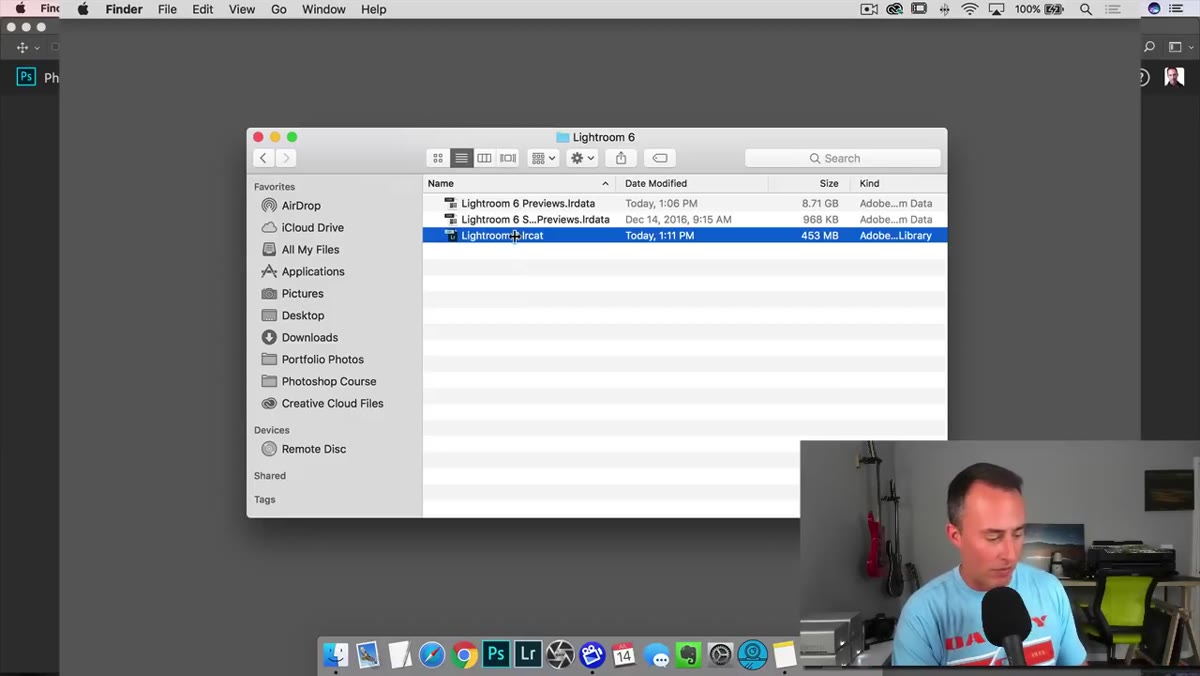 Catalog folder contents ready to be copied or transferred
Grab the whole catalog folder and move it to your new computer, either via an external drive, AirDrop, a network transfer, or whatever method makes sense for your setup. Copying the entire folder rather than individual files is the safer play. Put it somewhere consistent on the new machine, ideally the same relative location it lived in before, like your Pictures folder or Documents.
Catalog folder contents ready to be copied or transferred
Grab the whole catalog folder and move it to your new computer, either via an external drive, AirDrop, a network transfer, or whatever method makes sense for your setup. Copying the entire folder rather than individual files is the safer play. Put it somewhere consistent on the new machine, ideally the same relative location it lived in before, like your Pictures folder or Documents.
Once it is on the new machine, do not double-click the catalog yet. Make sure Lightroom is installed and updated to a compatible version first. Then open Lightroom, go to File, and choose Open Catalog. Navigate to the .lrcat file you just copied over, open it, and let Lightroom load it up.
Step 6: Reconnect Your External Drive and Confirm Photos Are Linking Correctly
 Question marks on offline external drive folders in Library panel
Plug in your external photo drive and watch the Library panel. Those question mark folders should resolve themselves automatically once Lightroom detects the drive and recognizes the file paths. If some folders still show question marks, right-click on one and choose Find Missing Folder, then navigate to where that folder now lives. Lightroom will relink it and often reconnect neighboring folders in the same process.
Question marks on offline external drive folders in Library panel
Plug in your external photo drive and watch the Library panel. Those question mark folders should resolve themselves automatically once Lightroom detects the drive and recognizes the file paths. If some folders still show question marks, right-click on one and choose Find Missing Folder, then navigate to where that folder now lives. Lightroom will relink it and often reconnect neighboring folders in the same process.
If your photos were on an internal drive and you did not migrate to an external before starting, you will need to go through this relinking process for every top-level folder. It is doable but tedious. Consider this your sign to make the external drive switch before your next machine upgrade.
One Thing I Would Add: Migrate Your Presets Too
The tutorial covers the catalog side of things thoroughly, but do not forget your presets, especially if you have spent serious time building a personal collection. On Mac, they live in your user Library folder under Application Support / Adobe / Lightroom / Develop Presets. On PC, it is a similar path through AppData. Copy that Develop Presets folder to the same location on your new machine before you open Lightroom for the first time. I have lost a preset pack to a computer migration before, and rediscovering that fact three months later when I reached for a preset that no longer existed was genuinely depressing. Five extra minutes of copying protects a lot of work.
The single most important thing you can take from all of this is the external hard drive habit. Every other part of this migration gets easier the moment your photos are not on your internal drive. The catalog moves, the drive moves with it, and Lightroom reconnects in about thirty seconds. Everything else is just file management.
Watch the full tutorial on YouTube to see Matt walk through this on his own machines in real time. Watching someone do it with live folders and a real catalog makes the logic of the whole thing land in a way that a written breakdown cannot fully replace.
Comments (5)
Would love to see a follow-up going deeper into this topic.
Just subscribed. If the rest of your content is this good, I'm in.
Just used this on a wedding shoot edit. Client was thrilled.
I keep coming back to this article. It's that useful.
Love this. I referenced a similar technique in one of my recent posts. Always good to see other perspectives.
Leave a Comment