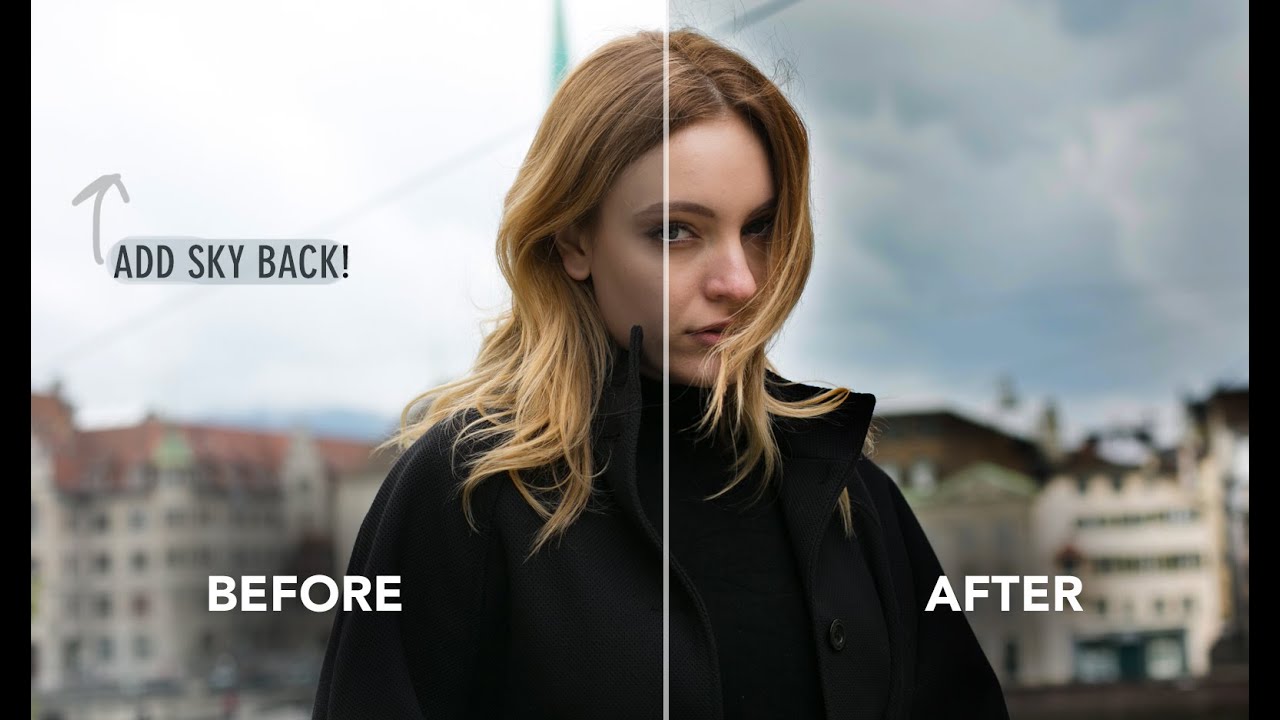
There’s a particular kind of frustration that comes with reviewing a shoot and realizing the sky is completely blown out. The subject looks great, the light on their face is perfect, and the sky is just… white. Nothing. A void. I’ve been there more times than I’d like to admit, and for a while my solution was to either swap the sky entirely or just crop it out and pretend it never existed. Neither of those felt great.
What I didn’t fully appreciate until recently is how much detail can still be hiding in an overexposed sky, as long as the image wasn’t completely clipped at capture. In this Jessica Kobeissi tutorial, she walks through a deceptively simple technique for pulling that latent detail back out using the Adjustment Brush in Lightroom, combined with a color tinting trick that keeps the result looking natural rather than processed. The whole thing takes maybe five minutes, and the before-and-after difference is significant enough that I immediately went back and re-edited three photos I had written off.
The key caveat, and Kobeissi makes this clear upfront, is that this only works if there’s actually some data to recover. If your histogram is slamming against the right wall and everything is pure white, you’re not going to conjure clouds out of nothing. But if your sky looks washed out rather than obliterated, especially in dramatic weather conditions like overcast skies or incoming storms, there’s a good chance the information is there and just needs coaxing.
Step 1: Identify a Photo With Recoverable Sky Data
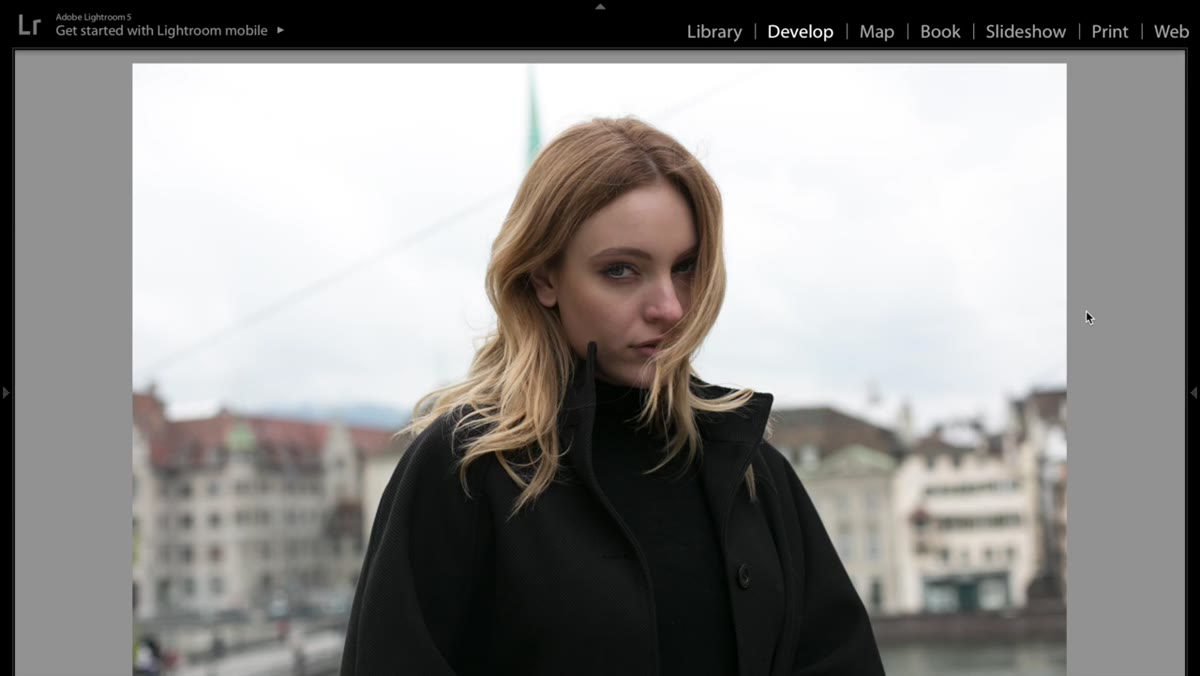 Storm clouds visible but washed out over Switzerland landscape
Before you open a single panel, do a quick reality check on your image. Look at the sky and ask whether you can see any tonal variation at all, even slight gradations or the ghost of cloud shapes. Kobeissi shot this particular image in Switzerland under storm conditions, which meant the clouds had inherent contrast and texture baked into the raw file even if the sky read as too bright on screen. Photos taken in flat, midday sun against a white sky are a much harder rescue. Set your expectations accordingly and pick a frame where the sky is overexposed rather than nonexistent.
Storm clouds visible but washed out over Switzerland landscape
Before you open a single panel, do a quick reality check on your image. Look at the sky and ask whether you can see any tonal variation at all, even slight gradations or the ghost of cloud shapes. Kobeissi shot this particular image in Switzerland under storm conditions, which meant the clouds had inherent contrast and texture baked into the raw file even if the sky read as too bright on screen. Photos taken in flat, midday sun against a white sky are a much harder rescue. Set your expectations accordingly and pick a frame where the sky is overexposed rather than nonexistent.
Step 2: Open the Adjustment Brush and Paint Over the Sky
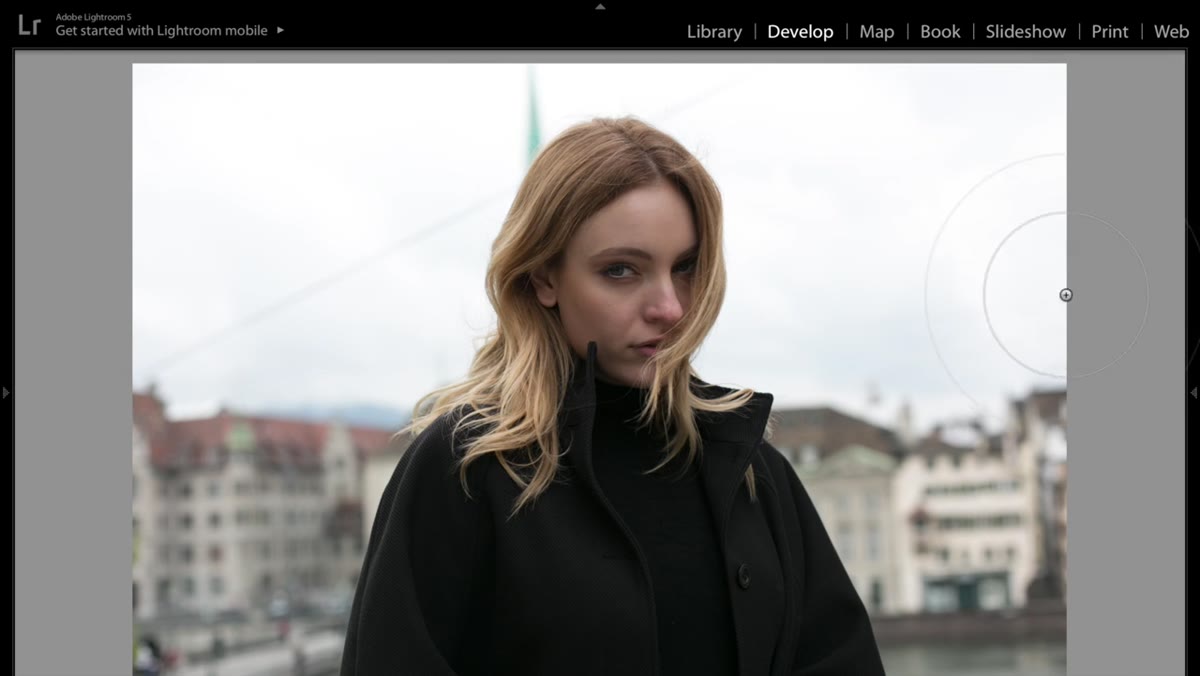 Adjustment Brush panel open with default settings active
Hit K on your keyboard or click the Adjustment Brush icon in the toolbar above the Basic panel. Leave all the sliders at their default values for now. You’re just masking at this stage. Using a brush size that lets you work fairly quickly, paint over the entire sky area, getting as close to the horizon line and any foreground elements as you can. Don’t stress about perfection yet. Kobeissi recommends lowering the exposure temporarily once you’ve done a rough pass, which makes any missed spots show up clearly as bright patches so you can go back and fill them in. The erase function (hold Alt on Windows or Option on Mac) lets you clean up any overspray onto your subject or foreground without starting over.
Adjustment Brush panel open with default settings active
Hit K on your keyboard or click the Adjustment Brush icon in the toolbar above the Basic panel. Leave all the sliders at their default values for now. You’re just masking at this stage. Using a brush size that lets you work fairly quickly, paint over the entire sky area, getting as close to the horizon line and any foreground elements as you can. Don’t stress about perfection yet. Kobeissi recommends lowering the exposure temporarily once you’ve done a rough pass, which makes any missed spots show up clearly as bright patches so you can go back and fill them in. The erase function (hold Alt on Windows or Option on Mac) lets you clean up any overspray onto your subject or foreground without starting over.
Step 3: Pull Down Exposure to Reveal Hidden Detail
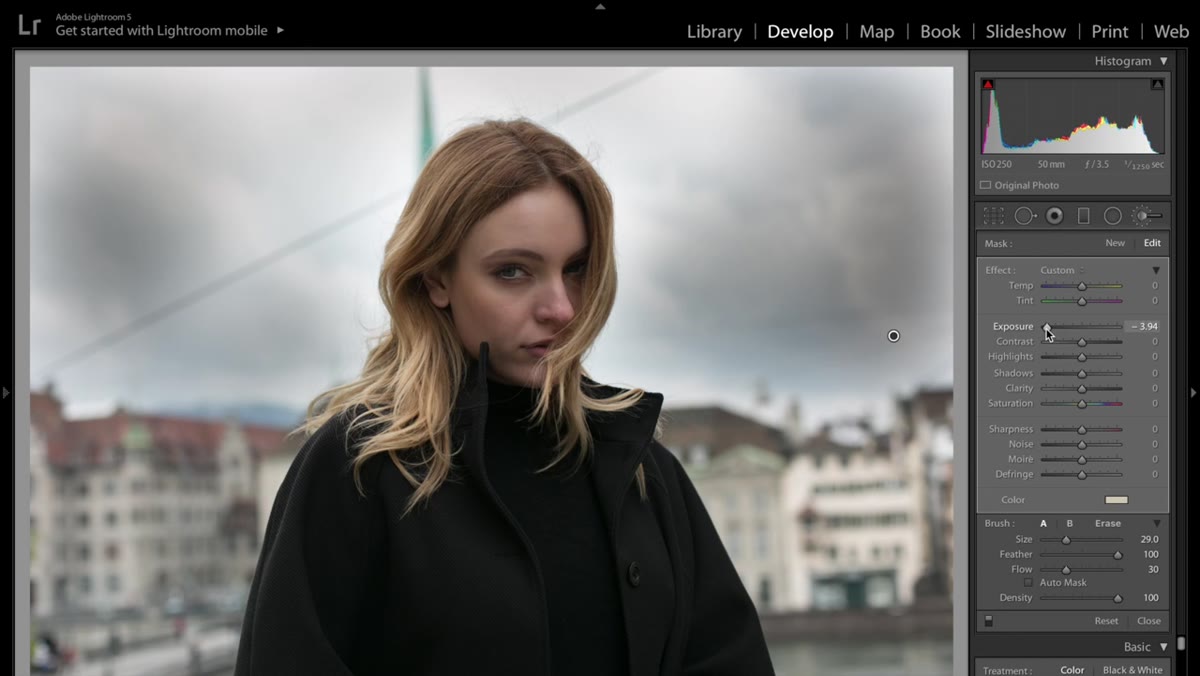 Exposure slider being lowered, cloud texture becoming visible
Once your mask covers the sky, start dragging the Exposure slider to the left. Kobeissi lands around -2.28 on this image, which sounds aggressive but makes sense given how bright the sky was to begin with. Watch what happens as you drag. Detail that looked completely absent starts to emerge, cloud shapes reappear, and you go from a white canvas to an actual sky. The exact value you land on will depend entirely on your image, so don’t treat her number as a universal target. Move the slider until the sky looks balanced with the rest of the frame, not so dark that it looks like a different photo was pasted in.
Exposure slider being lowered, cloud texture becoming visible
Once your mask covers the sky, start dragging the Exposure slider to the left. Kobeissi lands around -2.28 on this image, which sounds aggressive but makes sense given how bright the sky was to begin with. Watch what happens as you drag. Detail that looked completely absent starts to emerge, cloud shapes reappear, and you go from a white canvas to an actual sky. The exact value you land on will depend entirely on your image, so don’t treat her number as a universal target. Move the slider until the sky looks balanced with the rest of the frame, not so dark that it looks like a different photo was pasted in.
Step 4: Bring Highlights Down (Carefully)
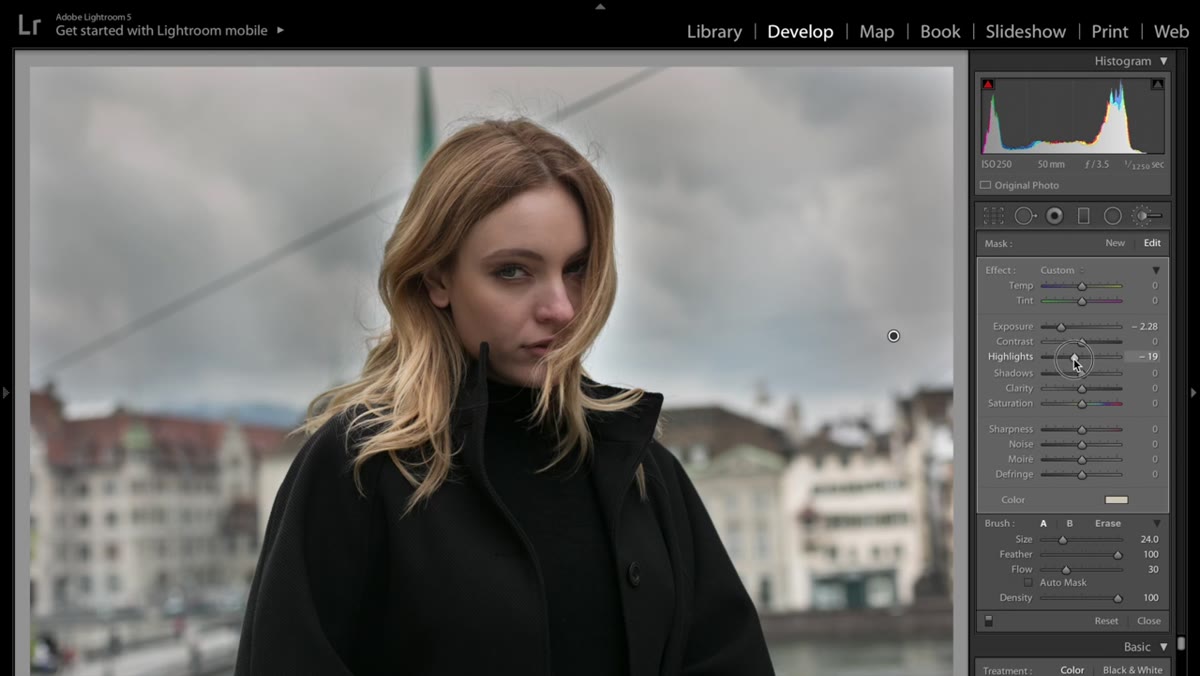 Highlights slider adjusted, sky texture refined but not overdone
After exposure, pull the Highlights slider down a little, but resist the urge to drag it all the way to -100. Kobeissi specifically flags this as the move that makes sky recoveries look fake. Over-crushed highlights produce that murky, HDR-gone-wrong effect where the clouds look like a painting rather than a photograph. Think of the Highlights adjustment here as fine-tuning rather than heavy lifting. The Exposure slider does the work, and Highlights cleans up the brightest remaining patches. Keep checking your overall image balance as you adjust. The sky should feel like it belongs to the same photo, not like it was added afterward.
Highlights slider adjusted, sky texture refined but not overdone
After exposure, pull the Highlights slider down a little, but resist the urge to drag it all the way to -100. Kobeissi specifically flags this as the move that makes sky recoveries look fake. Over-crushed highlights produce that murky, HDR-gone-wrong effect where the clouds look like a painting rather than a photograph. Think of the Highlights adjustment here as fine-tuning rather than heavy lifting. The Exposure slider does the work, and Highlights cleans up the brightest remaining patches. Keep checking your overall image balance as you adjust. The sky should feel like it belongs to the same photo, not like it was added afterward.
Step 5: Add a Subtle Blue Tint in the Color Panel
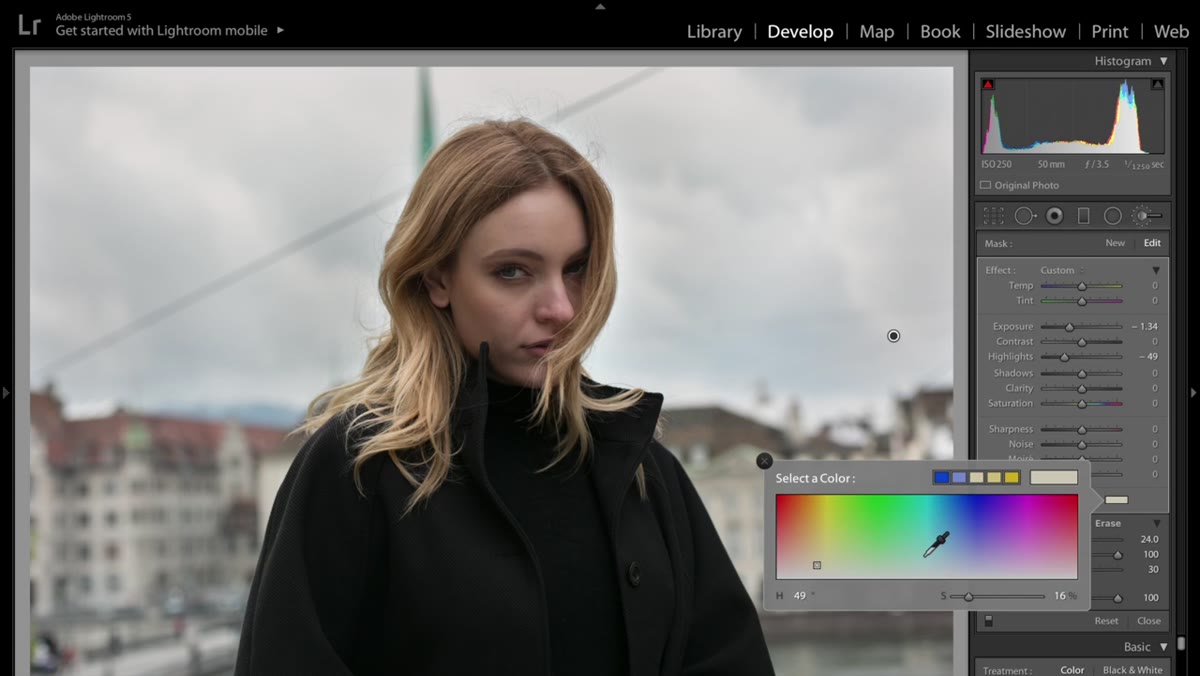 Color panel open inside Adjustment Brush, soft blue hue selected
This is the step I hadn’t seen presented this clearly before, and it’s what separates a technically recovered sky from one that actually looks right. Still inside the Adjustment Brush settings, scroll down to the Color panel and add a very faint blue tint to the mask. The operative word is faint. Kobeissi demonstrates what happens if you go too saturated, and it immediately looks artificial. You want the lowest, most whisper-quiet version of blue you can apply. What this does is counteract the gray-brown cast that often appears when you push exposure recovery this far, and it nudges the sky back toward a believable cool tone. It’s a small move with a disproportionately large visual impact.
Color panel open inside Adjustment Brush, soft blue hue selected
This is the step I hadn’t seen presented this clearly before, and it’s what separates a technically recovered sky from one that actually looks right. Still inside the Adjustment Brush settings, scroll down to the Color panel and add a very faint blue tint to the mask. The operative word is faint. Kobeissi demonstrates what happens if you go too saturated, and it immediately looks artificial. You want the lowest, most whisper-quiet version of blue you can apply. What this does is counteract the gray-brown cast that often appears when you push exposure recovery this far, and it nudges the sky back toward a believable cool tone. It’s a small move with a disproportionately large visual impact.
Step 6: Finish the Overall Edit and Check the Sky in Context
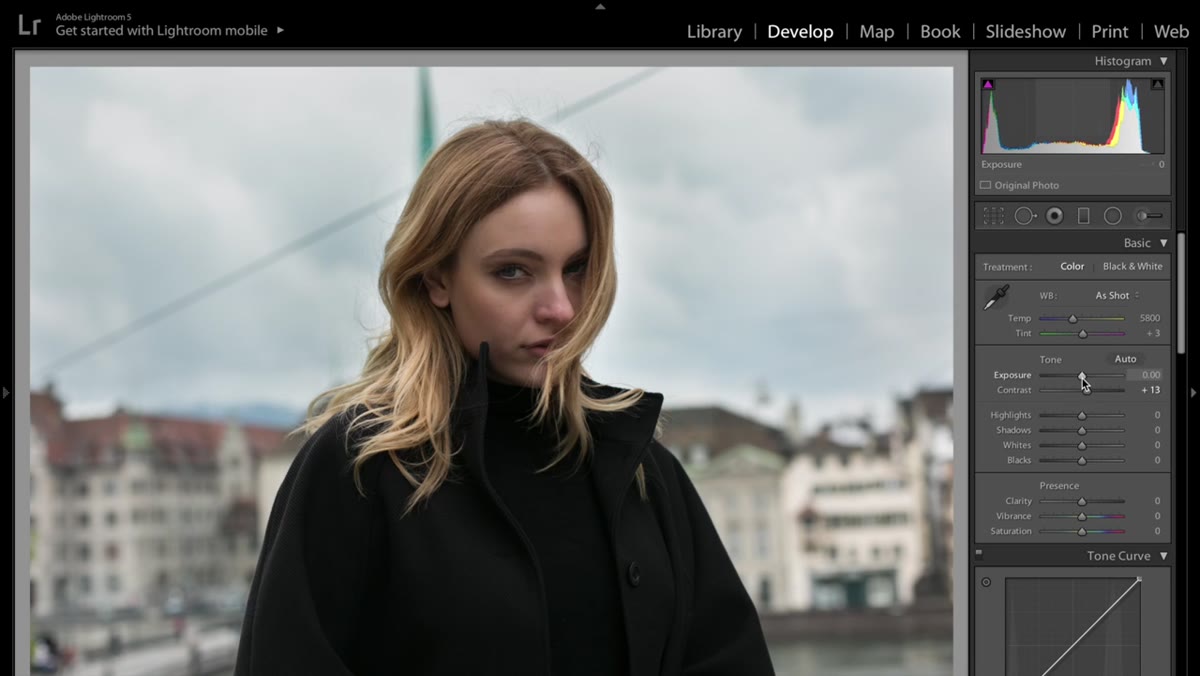 Full before and after comparison with completed edit visible
Once the sky mask is where you want it, close the Adjustment Brush and finish editing the rest of the image. Add your curves, adjust your overall color grade, do whatever you normally do. Then toggle the before-and-after view (backslash key) and evaluate the sky in context. This is the check that matters. A sky recovery that looked great in isolation can fall apart once you’ve warmed up the shadows or shifted the overall tone. If it looks off, go back into the Adjustment Brush mask and fine-tune, usually by adjusting the color tint slightly to match your new overall grade.
Full before and after comparison with completed edit visible
Once the sky mask is where you want it, close the Adjustment Brush and finish editing the rest of the image. Add your curves, adjust your overall color grade, do whatever you normally do. Then toggle the before-and-after view (backslash key) and evaluate the sky in context. This is the check that matters. A sky recovery that looked great in isolation can fall apart once you’ve warmed up the shadows or shifted the overall tone. If it looks off, go back into the Adjustment Brush mask and fine-tune, usually by adjusting the color tint slightly to match your new overall grade.
One Thing I’d Add From My Own Work
If you’re shooting with this technique in mind from the start, expose for the subject or midtones and let the sky clip slightly, knowing you’ll bring it back in post. Shooting in RAW is non-negotiable here. JPEG compression throws away the very tonal data this technique depends on. I’ve also found that running a slight Dehaze adjustment inside the Adjustment Brush mask, just a nudge, can further sharpen cloud definition on days when the atmosphere was hazy. It pairs well with the exposure pull and doesn’t require a separate mask.
The single most important thing Kobeissi communicates in this tutorial is also the most unsexy one: you have to start with a photo that has recoverable data. No amount of slider magic creates detail from nothing. But if you’re shooting in RAW, in dramatic light, and you’ve exposed thoughtfully, you probably have more sky to work with than you think. This technique is fast, it’s clean, and once you run it a few times it becomes second nature.
Watch the full tutorial on YouTube to see Kobeissi walk through the before-and-after on her Switzerland shot, which does a better job than any screenshot of showing how much the sky transforms.
Comments (1)
Clear and practical. No fluff. Appreciate that.
Leave a Comment