Every February, Adobe quietly drops a point update to Lightroom. No splashy keynote, no Twitter hype cycle. Just a line item in the Creative Cloud updater that most people click past without reading. I almost did that with 8.2 until I caught Matt Kloskowski’s breakdown of what actually changed. Watch the full tutorial on YouTube before we dig in, because watching him toggle the before/after preview live makes the problem this feature solves click in a way that screenshots alone can’t.
The headlining feature in this update is Enhanced Details, and I’ll be upfront with you the same way Matt is in the video: this is not going to change your editing workflow if you shoot casual portraits or landscapes and deliver them at web resolution. But if you’re working with Bayer or X-Trans raw files and you’ve ever zoomed into 400% and seen color noise that looks like someone dragged a watercolor brush through your fine detail, this feature was built for you. Understanding when a tool is NOT for you is just as valuable as knowing how to use it, and that’s what I want to nail down here.
Step 1: Update Lightroom to Version 8.2
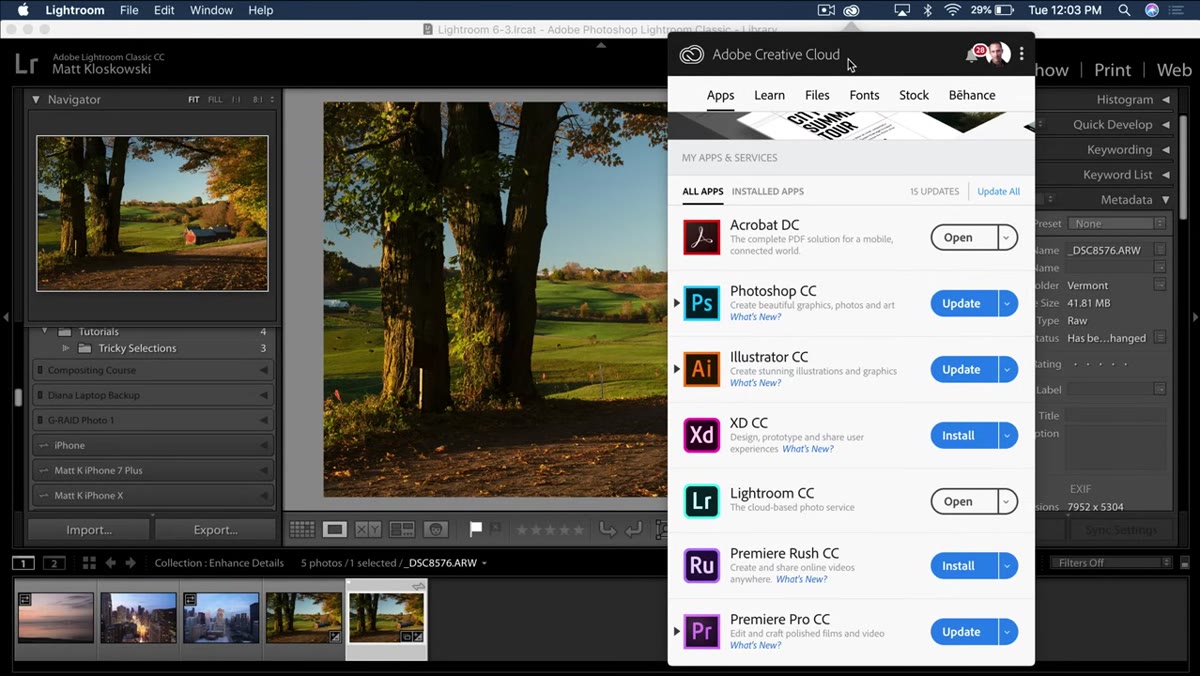 Lightroom “About” screen showing version 8.2
Before anything else, confirm you’re actually running 8.2. Open Lightroom, go to the menu bar, and click “Lightroom Classic” on Mac or “Help” on Windows, then select “About Lightroom.” The version number will be right there. If it doesn’t say 8.2, open your Adobe Creative Cloud desktop app and check for updates. Matt notes in his walkthrough that sometimes the update takes a few hours to appear, and a full computer restart can shake it loose if you’re not seeing it. These features simply won’t exist in earlier versions, so this step isn’t optional.
Lightroom “About” screen showing version 8.2
Before anything else, confirm you’re actually running 8.2. Open Lightroom, go to the menu bar, and click “Lightroom Classic” on Mac or “Help” on Windows, then select “About Lightroom.” The version number will be right there. If it doesn’t say 8.2, open your Adobe Creative Cloud desktop app and check for updates. Matt notes in his walkthrough that sometimes the update takes a few hours to appear, and a full computer restart can shake it loose if you’re not seeing it. These features simply won’t exist in earlier versions, so this step isn’t optional.
Step 2: Open a Raw File That Shows Visible Artifacting
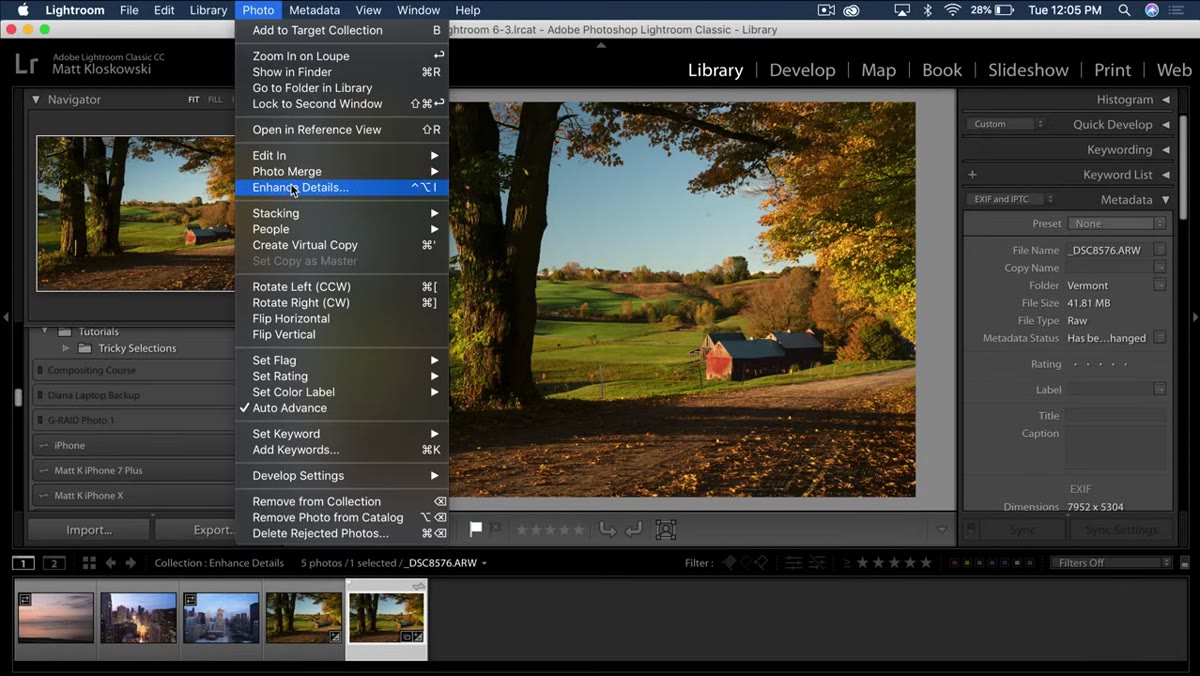 Raw file open in Lightroom Develop module
Enhanced Details is designed specifically for Bayer sensor raw files and X-Trans raw files, the kind that come out of Fujifilm cameras in particular. Open a raw file in Lightroom’s Develop module. You don’t need to apply any edits first. The feature works on the underlying raw data, so you can run it on a fresh import. If you’re not sure whether your camera uses one of these sensor patterns, check your camera’s specs. Most modern DSLRs and mirrorless cameras use Bayer sensors. Fujifilm’s X-series cameras use X-Trans.
Raw file open in Lightroom Develop module
Enhanced Details is designed specifically for Bayer sensor raw files and X-Trans raw files, the kind that come out of Fujifilm cameras in particular. Open a raw file in Lightroom’s Develop module. You don’t need to apply any edits first. The feature works on the underlying raw data, so you can run it on a fresh import. If you’re not sure whether your camera uses one of these sensor patterns, check your camera’s specs. Most modern DSLRs and mirrorless cameras use Bayer sensors. Fujifilm’s X-series cameras use X-Trans.
Step 3: Navigate to Photo Menu and Select Enhance Details
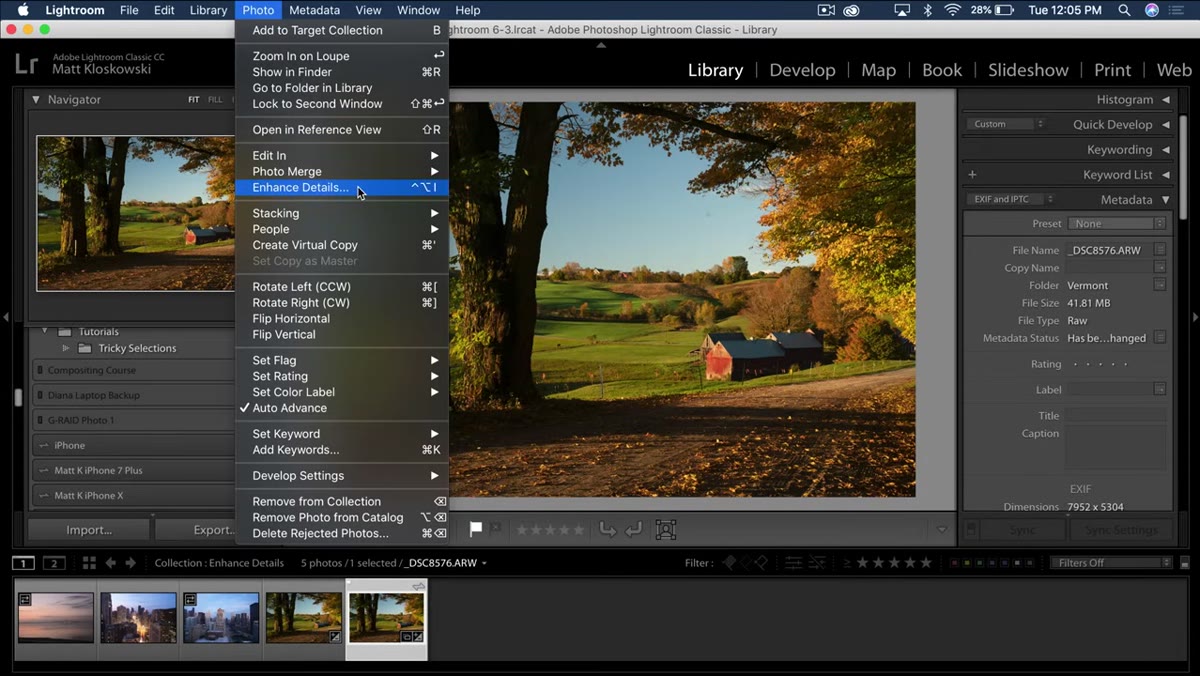 Photo menu open with Enhance Details option visible
With your raw file selected in the Develop module, go up to the “Photo” menu in the top navigation bar and scroll down to “Enhance Details.” You won’t find this in the panels on the right side. It lives in the menu, which is easy to miss if you’re used to doing everything through sliders. Click it, and Lightroom will take a moment to build a preview. This processing step can take several seconds depending on your machine’s speed and the file size, so give it a beat before you assume something’s broken.
Photo menu open with Enhance Details option visible
With your raw file selected in the Develop module, go up to the “Photo” menu in the top navigation bar and scroll down to “Enhance Details.” You won’t find this in the panels on the right side. It lives in the menu, which is easy to miss if you’re used to doing everything through sliders. Click it, and Lightroom will take a moment to build a preview. This processing step can take several seconds depending on your machine’s speed and the file size, so give it a beat before you assume something’s broken.
Step 4: Use the Preview Window to Evaluate the Difference
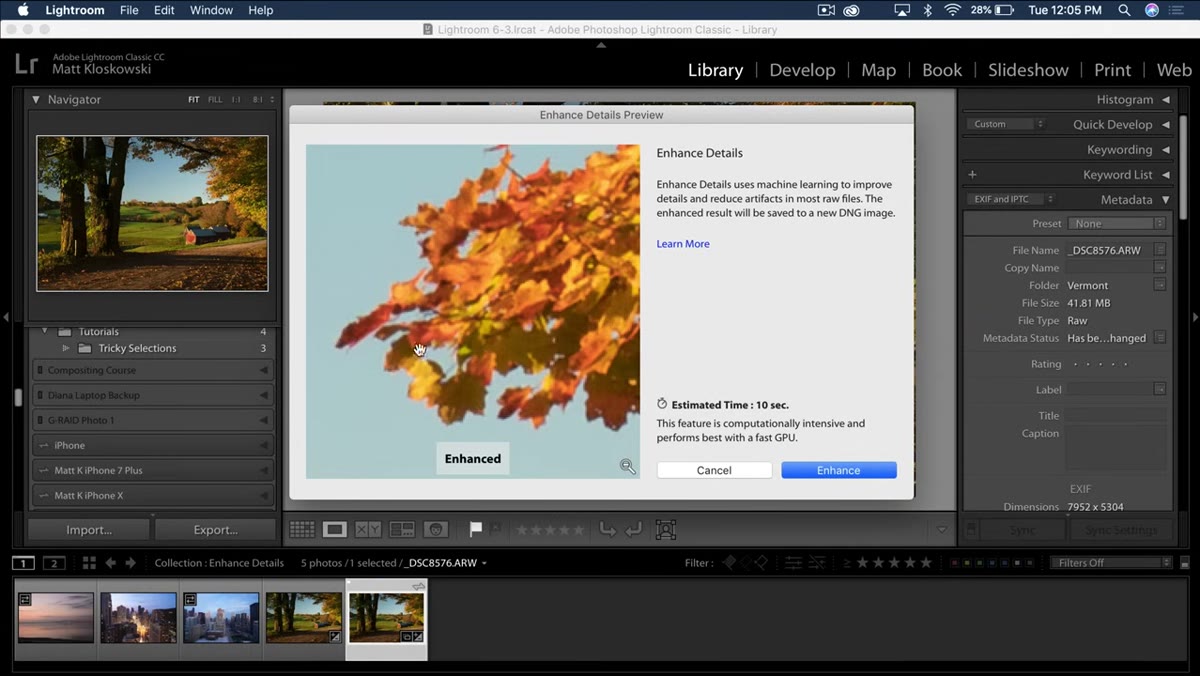 Enhance Details preview dialog with before/after toggle
Once the preview dialog opens, Lightroom gives you an interactive comparison right inside the window. Click and hold inside the preview to see the non-enhanced version. Release your click to see the enhanced version. Matt’s technique here is smart: zoom into an area where you already know there’s a problem. Look for fine detail areas like hair, fabric texture, or foliage where color fringing or a maze-like pattern appears. That moire-adjacent artifacting is exactly what this tool targets. If you click back and forth and genuinely cannot see a difference, close the dialog and move on. Running the process on a file that doesn’t need it wastes time and creates a larger file for no reason.
Enhance Details preview dialog with before/after toggle
Once the preview dialog opens, Lightroom gives you an interactive comparison right inside the window. Click and hold inside the preview to see the non-enhanced version. Release your click to see the enhanced version. Matt’s technique here is smart: zoom into an area where you already know there’s a problem. Look for fine detail areas like hair, fabric texture, or foliage where color fringing or a maze-like pattern appears. That moire-adjacent artifacting is exactly what this tool targets. If you click back and forth and genuinely cannot see a difference, close the dialog and move on. Running the process on a file that doesn’t need it wastes time and creates a larger file for no reason.
Step 5: Understand the Output Before You Commit
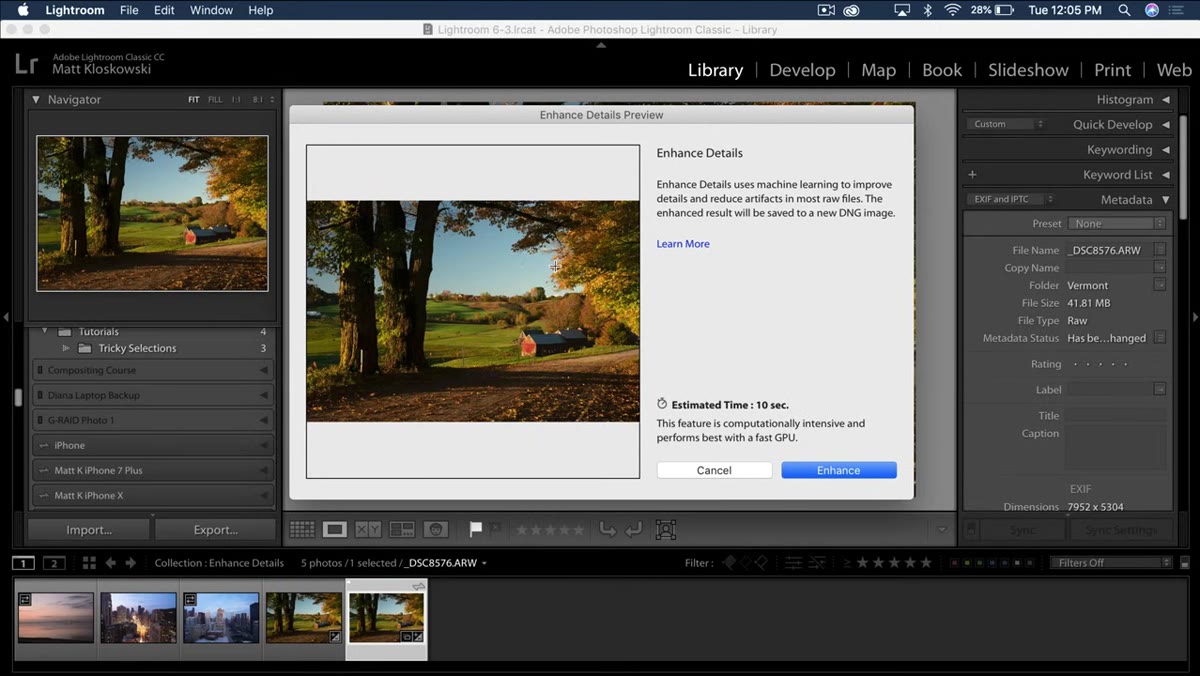 Dialog note about DNG file creation
One important detail Matt flags: Enhanced Details does not overwrite your original file. It creates a new DNG file alongside your existing raw file. That new file is what Lightroom applies the enhancement to. This is a non-destructive operation in the sense that your original is preserved, but it does add to your storage footprint. For a single file that’s not a big deal. If you’re thinking about batch-processing an entire shoot, add that math up first. The enhanced DNG files can be significantly larger than the original raws.
Dialog note about DNG file creation
One important detail Matt flags: Enhanced Details does not overwrite your original file. It creates a new DNG file alongside your existing raw file. That new file is what Lightroom applies the enhancement to. This is a non-destructive operation in the sense that your original is preserved, but it does add to your storage footprint. For a single file that’s not a big deal. If you’re thinking about batch-processing an entire shoot, add that math up first. The enhanced DNG files can be significantly larger than the original raws.
Step 6: Confirm the Enhancement and Compare at Multiple Zoom Levels
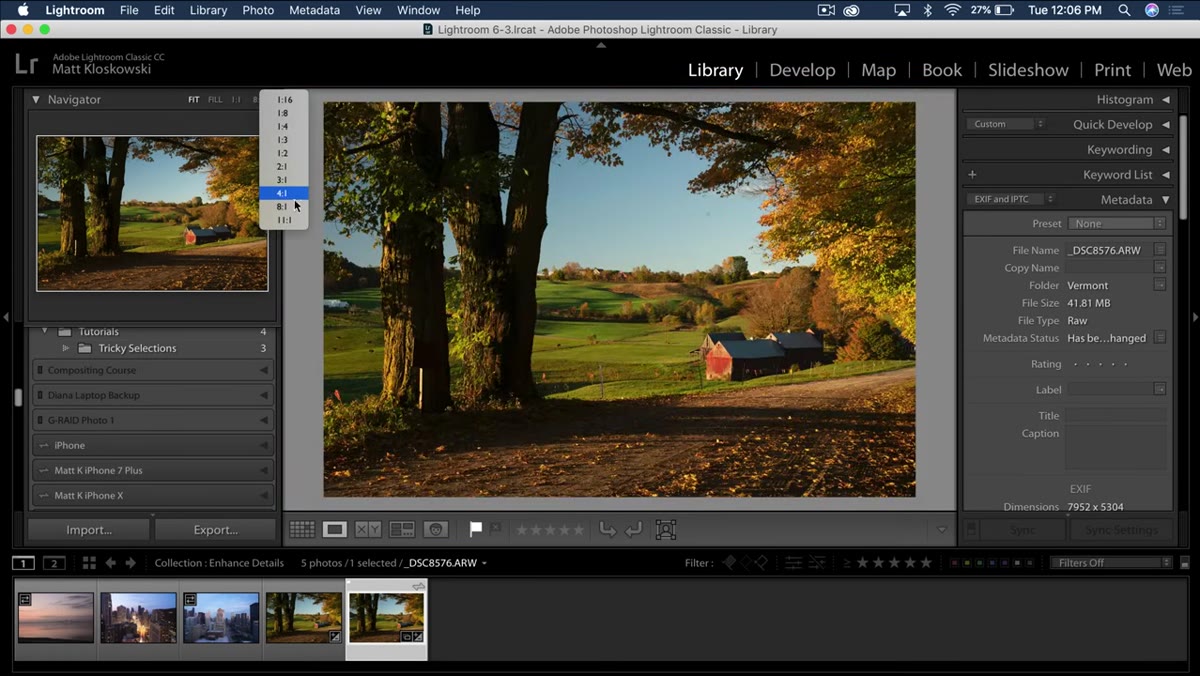 Navigator panel showing photo at 400% zoom
After you click “Enhance” and Lightroom finishes processing, use the Navigator panel on the left side of Develop to zoom into the same problem area you checked in the preview. Matt suggests going to at least 400% to see the effect clearly. At normal screen fit, you will not see a difference. At 200%, you probably won’t see much either. This is a detail-level correction, and it’s meant for outputs where pixel-level sharpness matters: large format prints, commercial licensing, anything where the final delivery is high resolution and gets scrutinized up close. If your final output is Instagram or a 1080p website header, zoom out, take a breath, and skip this step entirely.
Navigator panel showing photo at 400% zoom
After you click “Enhance” and Lightroom finishes processing, use the Navigator panel on the left side of Develop to zoom into the same problem area you checked in the preview. Matt suggests going to at least 400% to see the effect clearly. At normal screen fit, you will not see a difference. At 200%, you probably won’t see much either. This is a detail-level correction, and it’s meant for outputs where pixel-level sharpness matters: large format prints, commercial licensing, anything where the final delivery is high resolution and gets scrutinized up close. If your final output is Instagram or a 1080p website header, zoom out, take a breath, and skip this step entirely.
My Take: The Preview Almost Always Looks Better Than the Result
I’ve run Enhanced Details on files from several different cameras since this update dropped, and I want to echo something Matt says almost as an aside, because I think it’s actually the most useful thing in the whole video: the preview inside the dialog tends to look more dramatic than the final processed file. I’ve opened that preview, seen what looked like a miraculous cleanup, clicked Enhance, and then zoomed into my Develop module only to find the improvement is subtler than I expected. That’s not a knock on the feature. It still works. But calibrate your expectations before you commit, especially if you’re working on a deadline and don’t want to spend ten minutes processing a file for a result you’ll never see at final output size.
The honest answer to “should I use Enhanced Details?” is almost always “zoom in first, then decide.” If you can see the artifact at 400%, run it. If you can’t, don’t.
The single biggest lesson from this Matt Kloskowski tutorial is that knowing a feature’s intended audience saves you more time than knowing how to use it. Enhanced Details is a precision tool for photographers who print large, shoot Fujifilm X-Trans, or deliver high-resolution files to commercial clients. For everyone else, it’s a feature to know about and ignore most of the time. That’s not a flaw. That’s a well-designed tool doing exactly what it was built to do.
Watch the full tutorial on YouTube to see Matt’s live before/after toggle in the preview dialog. Watching it in motion makes the artifact difference much easier to spot than any screenshot can show.
Comments (2)
I've watched a dozen tutorials on this and yours is the clearest by far.
I've watched a dozen tutorials on this and yours is the clearest by far.
Leave a Comment