Every October, Adobe throws their Max conference and drops a round of updates across the Creative Cloud suite. For Lightroom Classic users, that usually means a new version number, a mandatory catalog upgrade, and a scramble to figure out what actually changed. I’ve been through this cycle enough times that I used to dread it. A new catalog always felt like handing your library to a slot machine and hoping everything came out intact.
In this Matt Kloskowski tutorial, he walks through the October 2020 release of Lightroom Classic 10, and what caught my attention wasn’t a flashy new panel or a trendy masking tool. It was something quieter: Adobe finally made the catalog upgrade process less annoying. That might sound minor, but if you’ve been using Lightroom since version 4 or 5, you know the pain of hunting through a folder full of catalogs named “Lightroom Catalog-v6-upgraded-2018-final-ACTUAL-FINAL.lrcat” and trying to figure out which one is your real working catalog. Watch the full tutorial on YouTube
This update also addresses performance in a meaningful way, and that matters more to me than most UI tweaks. I’m editing on a machine that isn’t new, and when Lightroom lags, I lose focus. The right edit requires momentum. So let’s get into what changed and how to make the most of it.
Step 1: Update Through Creative Cloud the Right Way
 Creative Cloud updater panel showing Lightroom Classic update available
Before you even open Lightroom, go to the Creative Cloud desktop app and check for updates. Here’s the first thing to know: Lightroom Classic 10 replaces version 9 automatically. Unlike Photoshop, which tends to stack versions on top of each other until your hard drive cries, Lightroom Classic handles this cleanly. The new install overwrites the old one. You won’t end up with two copies of Lightroom Classic eating storage space. Just hit update and let it run.
Creative Cloud updater panel showing Lightroom Classic update available
Before you even open Lightroom, go to the Creative Cloud desktop app and check for updates. Here’s the first thing to know: Lightroom Classic 10 replaces version 9 automatically. Unlike Photoshop, which tends to stack versions on top of each other until your hard drive cries, Lightroom Classic handles this cleanly. The new install overwrites the old one. You won’t end up with two copies of Lightroom Classic eating storage space. Just hit update and let it run.
This is a small but genuinely thoughtful change in how Adobe manages the app. It keeps things tidier for people who aren’t obsessive about their Applications folder, which is most people.
Step 2: Name Your New Catalog During the Upgrade
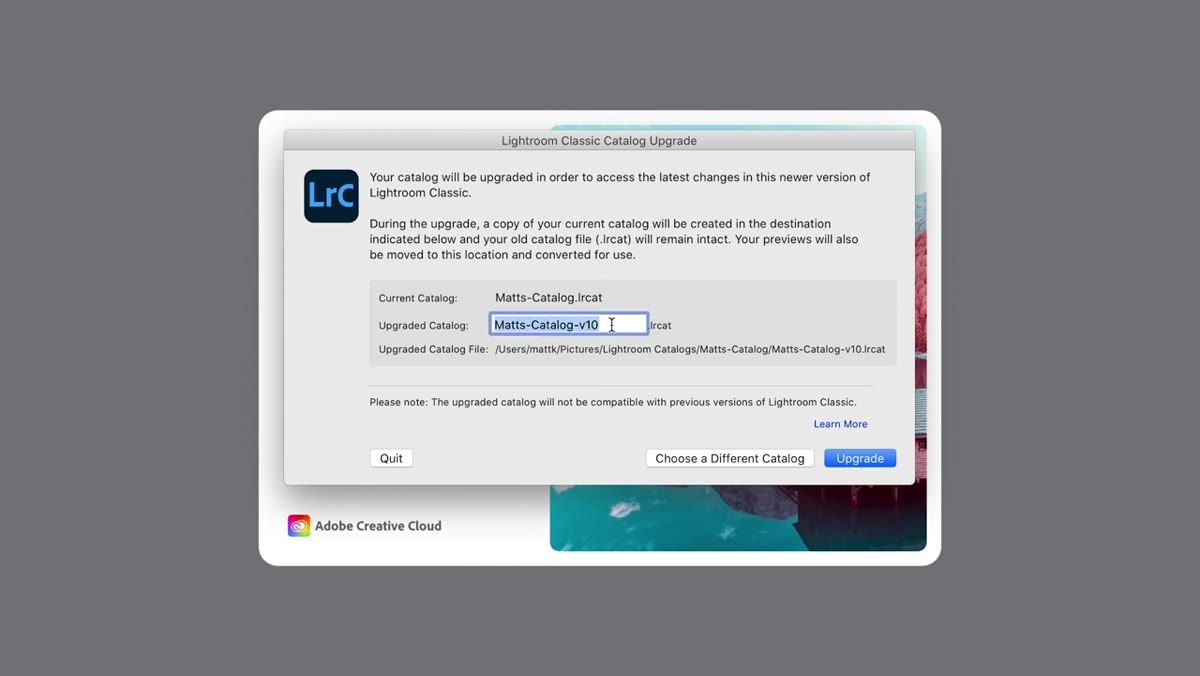
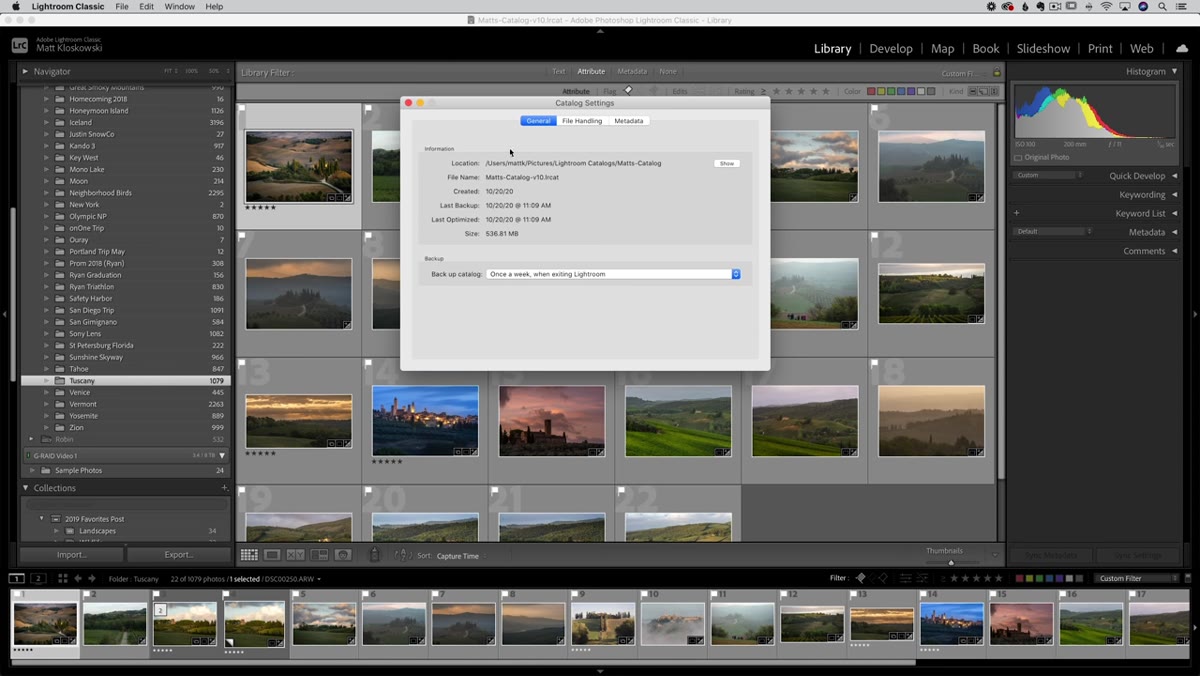 Catalog settings window showing catalog name field during upgrade prompt
When you launch Lightroom Classic 10 for the first time after updating, it will prompt you to upgrade your existing catalog. This has always happened with major version bumps. What’s new is that you now get to name the upgraded catalog before the process completes. The old catalog stays untouched as a backup. A new, renamed copy becomes your active catalog going forward.
Catalog settings window showing catalog name field during upgrade prompt
When you launch Lightroom Classic 10 for the first time after updating, it will prompt you to upgrade your existing catalog. This has always happened with major version bumps. What’s new is that you now get to name the upgraded catalog before the process completes. The old catalog stays untouched as a backup. A new, renamed copy becomes your active catalog going forward.
Take thirty seconds and give it a real name. Something like “Main Catalog - LRC10 - 2020” is plenty. The reason this matters: if you’ve been upgrading Lightroom since version 3 or 4, you probably have a graveyard of old catalogs sitting in a folder somewhere. With a proper name on the new one, you can finally go back and delete the old files without second-guessing yourself. You only need the most recent catalog. Everything else is dead weight.
Step 3: Verify Your Catalog Settings After the Upgrade
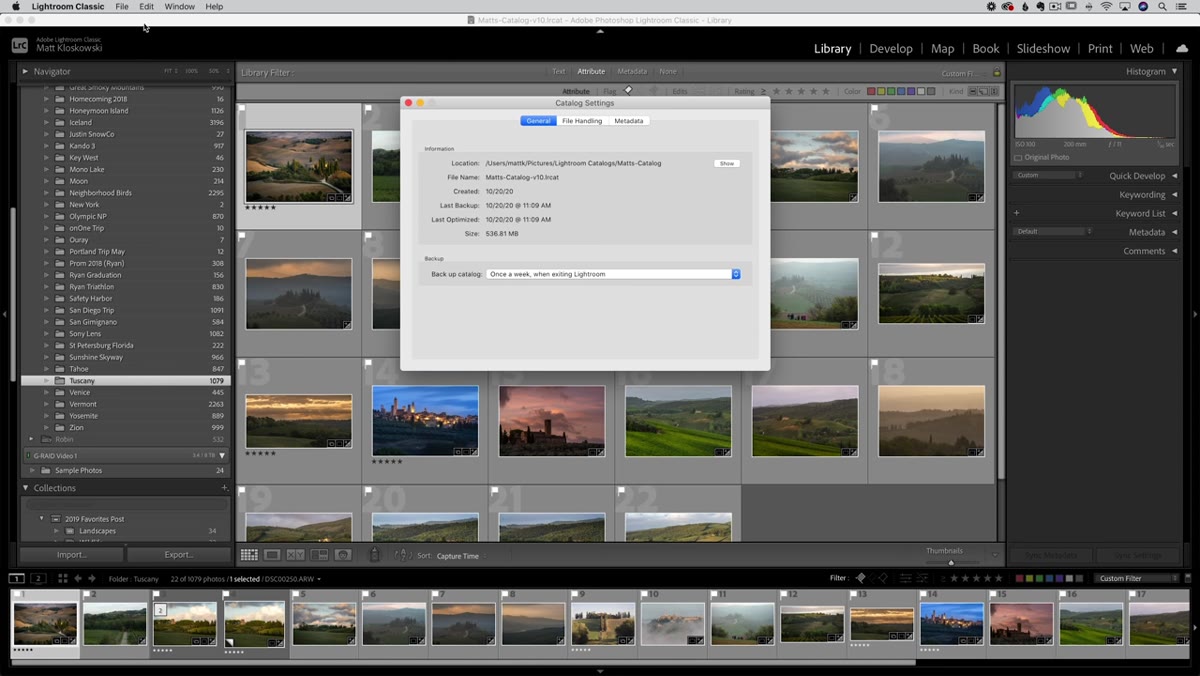 Lightroom Classic catalog settings panel showing catalog name and location
Once you’re inside the newly upgraded Lightroom Classic 10, pull up Catalog Settings. On a Mac that’s under the Lightroom menu. On a PC, it’s under Edit. You’ll see the catalog name you assigned, the file path, and some housekeeping options. This is a good moment to confirm everything landed where you expected it to.
Lightroom Classic catalog settings panel showing catalog name and location
Once you’re inside the newly upgraded Lightroom Classic 10, pull up Catalog Settings. On a Mac that’s under the Lightroom menu. On a PC, it’s under Edit. You’ll see the catalog name you assigned, the file path, and some housekeeping options. This is a good moment to confirm everything landed where you expected it to.
If your catalog lives on an external drive or a NAS, double-check that the path is correct and the drive is mounted. Catalog upgrades have a way of defaulting to unexpected locations if your external storage wasn’t connected during the process. Better to catch it now than three months from now when you’re wondering why your recent imports aren’t showing up.
Step 4: Notice the Performance Improvements in the Panels
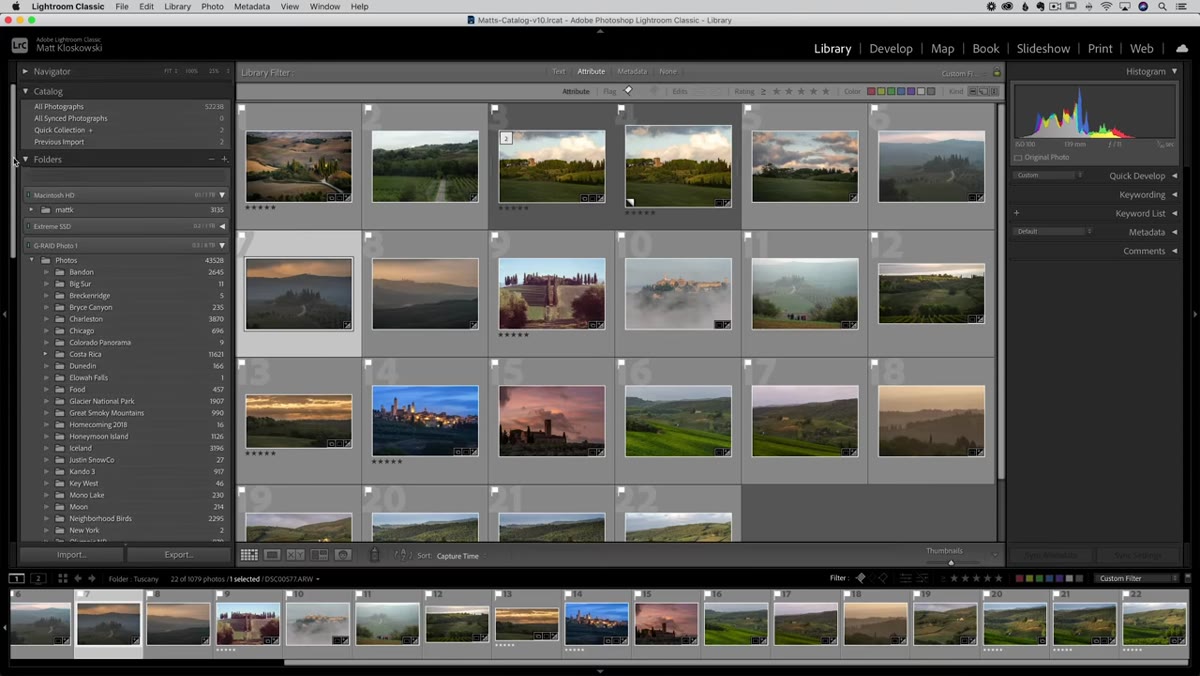 Scrolling through Lightroom folders and collections panel at speed
Adobe made a significant performance push earlier in 2020 that Matt describes as a genuine night-and-day improvement for a lot of users. The October 2020 update added another layer on top of that, moving more processing tasks to the GPU rather than leaning entirely on the CPU. The result is smoother scrolling, faster previews, and less of that stuttering drag that used to happen when you had a deep folder tree or a large collection set.
Scrolling through Lightroom folders and collections panel at speed
Adobe made a significant performance push earlier in 2020 that Matt describes as a genuine night-and-day improvement for a lot of users. The October 2020 update added another layer on top of that, moving more processing tasks to the GPU rather than leaning entirely on the CPU. The result is smoother scrolling, faster previews, and less of that stuttering drag that used to happen when you had a deep folder tree or a large collection set.
One of the most noticeable places to feel this is in the left panel when you’re scrolling through dozens of folders and collections. If you’ve got a library that’s been accumulating for years, that panel can get long fast. On my setup, fast scrolling through a dense collection list used to feel sluggish. After this update, it keeps up. It’s not magic, but it’s real. If you want to benchmark it the way Matt does, record yourself doing common tasks in version 9 before updating, then do the same tasks after. The difference is easier to feel than to describe.
Step 5: Keep Your Old Catalog Until You’ve Confirmed the New One
 File system view showing old catalog backup alongside new renamed catalog
This isn’t a step Adobe spells out, but it’s one I follow every time. After the catalog upgrade completes and you’ve confirmed that all your photos, edits, keywords, and collections are intact in the new catalog, wait at least two weeks before deleting the old one. Open a few different folders. Check some older edited images. Make sure the develop history is there and that everything synced as expected.
File system view showing old catalog backup alongside new renamed catalog
This isn’t a step Adobe spells out, but it’s one I follow every time. After the catalog upgrade completes and you’ve confirmed that all your photos, edits, keywords, and collections are intact in the new catalog, wait at least two weeks before deleting the old one. Open a few different folders. Check some older edited images. Make sure the develop history is there and that everything synced as expected.
After two weeks of normal use with no surprises, you can archive or delete the old catalog files. That backup exists for a reason, but it shouldn’t live on your main drive forever. Cleaning it out is satisfying, and with the new naming convention, you’ll finally know exactly which files to trash.
A Note From My Own Workflow: Don’t Sleep on the Performance Gains
I’ll be honest. When I first read the release notes for Lightroom Classic 10, I skimmed the performance section. Features get headlines. Performance improvements feel invisible until they’re not there. But after a few weeks of working in this version, the cumulative effect added up. Exporting large batches, switching between the Library and Develop modules, loading 1:1 previews, all of it feels tighter. If you’re on an older machine, this matters more than any new slider. Speed is the feature that makes every other feature usable.
The catalog naming improvement is the kind of fix that doesn’t generate excitement but quietly removes friction from thousands of workflows. That’s good design, and it’s worth calling out. The best software updates often fix the thing that was annoying you so consistently that you stopped noticing it.
The single most important takeaway here: upgrade, name your catalog properly when prompted, and give yourself permission to finally clean out those old catalog files you’ve been hoarding since the Obama administration. Watch the full tutorial on YouTube to see Matt walk through the update process in real time, including his own before-and-after scrolling demonstration that shows the performance difference more clearly than words can.
Comments (2)
Solid advice. Especially the part about taking your time with it.
Tried this technique this morning. Game changer for real.
Leave a Comment