Every time Adobe drops a Lightroom update, I do the same thing. I open the release notes, skim past the “performance improvements,” and hunt for anything that actually changes how I work. Most updates are quiet. Version 7.5, which Adobe pushed out in the third week of August 2018, is not one of those quiet updates. It’s got three specific changes that solve problems I’ve been working around for months.
I came across this rundown in a Matt Kloskowski tutorial, and it’s a tight, no-fluff walkthrough that gets right to the point. Matt is one of those educators who doesn’t waste your time, which is exactly the kind of energy I respect. Watch the full tutorial on YouTube if you want to follow along in real time, but everything you need to actually apply these updates is broken down below.
If you’re on Lightroom Classic CC, head to your Creative Cloud updater or go to Help and then Updates inside Lightroom itself. Make sure you’re running 7.5 before you try any of this. A few of these changes simply won’t be visible on older versions.
Step 1: Understand the New Preset Clustering System
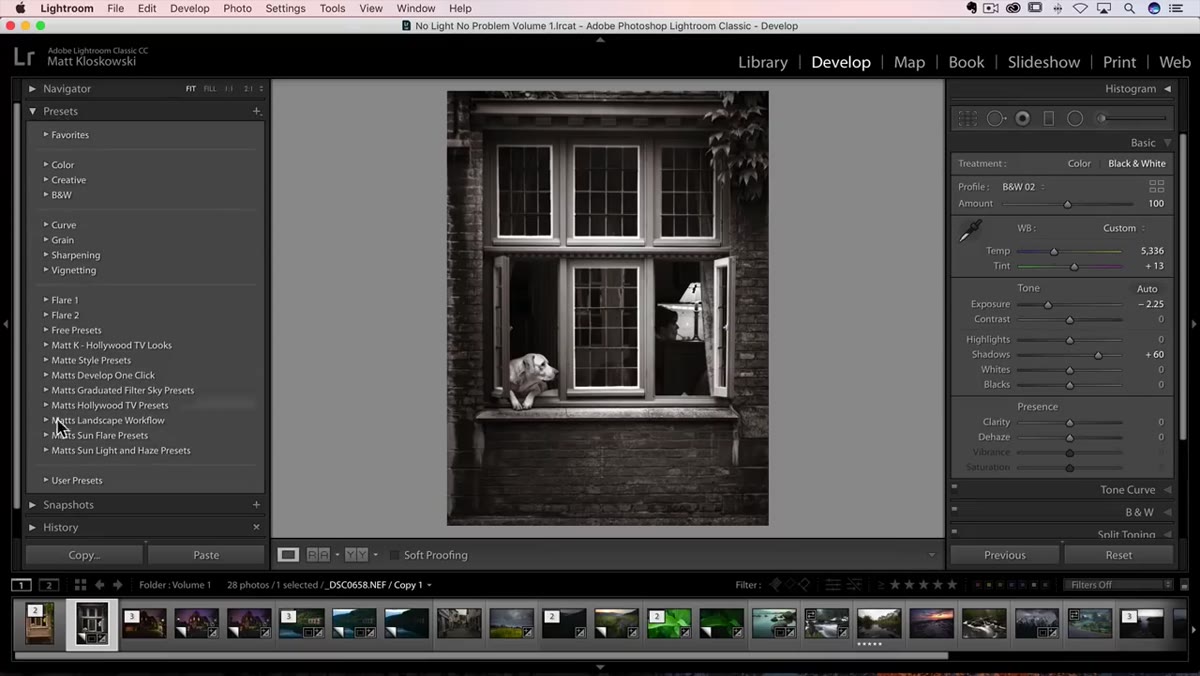 Presets panel with new visual divider lines visible
The presets panel looks different now, and the first time you open it after updating, you might think something broke. It didn’t. Adobe added small divider lines that visually group your presets into clusters. This actually traces back to something they introduced with the profiles update a few months earlier, where the basic panel used the same kind of grouped layout.
Presets panel with new visual divider lines visible
The presets panel looks different now, and the first time you open it after updating, you might think something broke. It didn’t. Adobe added small divider lines that visually group your presets into clusters. This actually traces back to something they introduced with the profiles update a few months earlier, where the basic panel used the same kind of grouped layout.
What this means in practice: if you’ve bought preset packs from multiple creators, or you’ve built your own sets over time, each collection now lives in its own visual section instead of everything blurring together in one long scrollable list. It sounds minor until you’re deep in an editing session and you can’t remember whether your black-and-white presets are above or below the film emulation ones.
Step 2: Hide the Preset Groups You Never Use
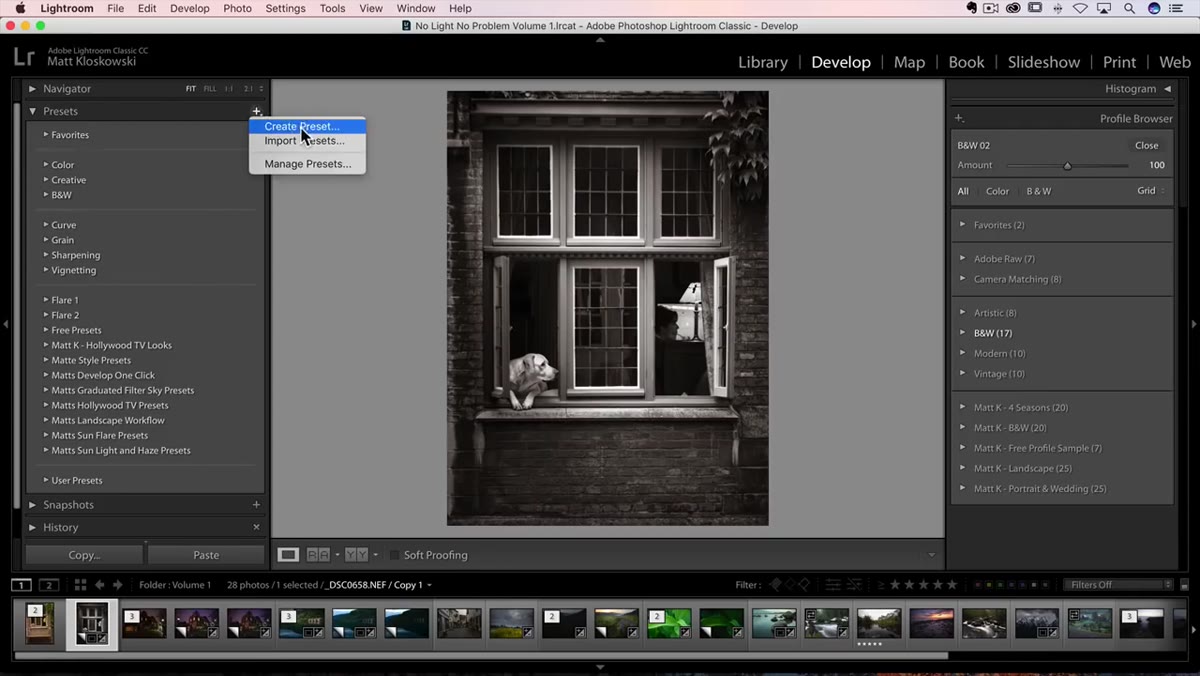 Manage presets dialog with toggleable preset groups
Inside the presets panel, you can right-click or go into the manage presets option to control which groups are actually visible. Say you never touch the built-in sharpening presets, or the creative color defaults have never done anything useful for your work. You can toggle those groups off so they stop cluttering your panel.
Manage presets dialog with toggleable preset groups
Inside the presets panel, you can right-click or go into the manage presets option to control which groups are actually visible. Say you never touch the built-in sharpening presets, or the creative color defaults have never done anything useful for your work. You can toggle those groups off so they stop cluttering your panel.
This is different from deleting presets, which feels permanent and a little nerve-wracking. Hiding them is reversible, and it keeps your workspace focused on what you actually use. I’ve got mine trimmed down to about four groups now, and scrolling through presets during a session is so much faster.
Step 3: Import Presets Directly from a Zip File
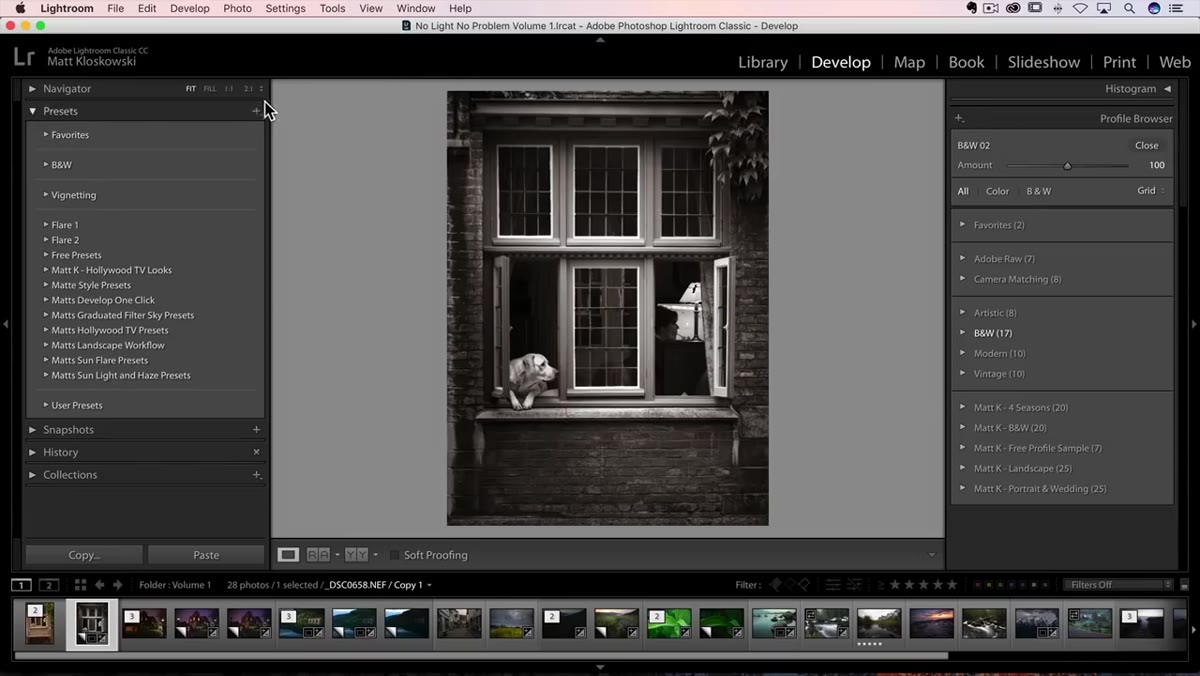 Import dialog showing zip file selection option
Here’s a practical one. When you click the plus icon at the top of the presets panel, you now get an import option that accepts zip files directly. Before 7.5, you had to unzip your preset pack first, then navigate to the folder, then select everything and bring it in. It was a three-step annoyance every single time.
Import dialog showing zip file selection option
Here’s a practical one. When you click the plus icon at the top of the presets panel, you now get an import option that accepts zip files directly. Before 7.5, you had to unzip your preset pack first, then navigate to the folder, then select everything and bring it in. It was a three-step annoyance every single time.
Now you just grab the zip, point Lightroom at it, and it handles the extraction automatically. If you’ve ever downloaded a preset pack and had to watch a separate install video just to figure out how to get it into Lightroom, this change is for you. Matt notes that this also applies if you’re distributing presets to others, since zip is already the standard format most creators use.
Step 4: Finally, a Real Import Button for Profiles
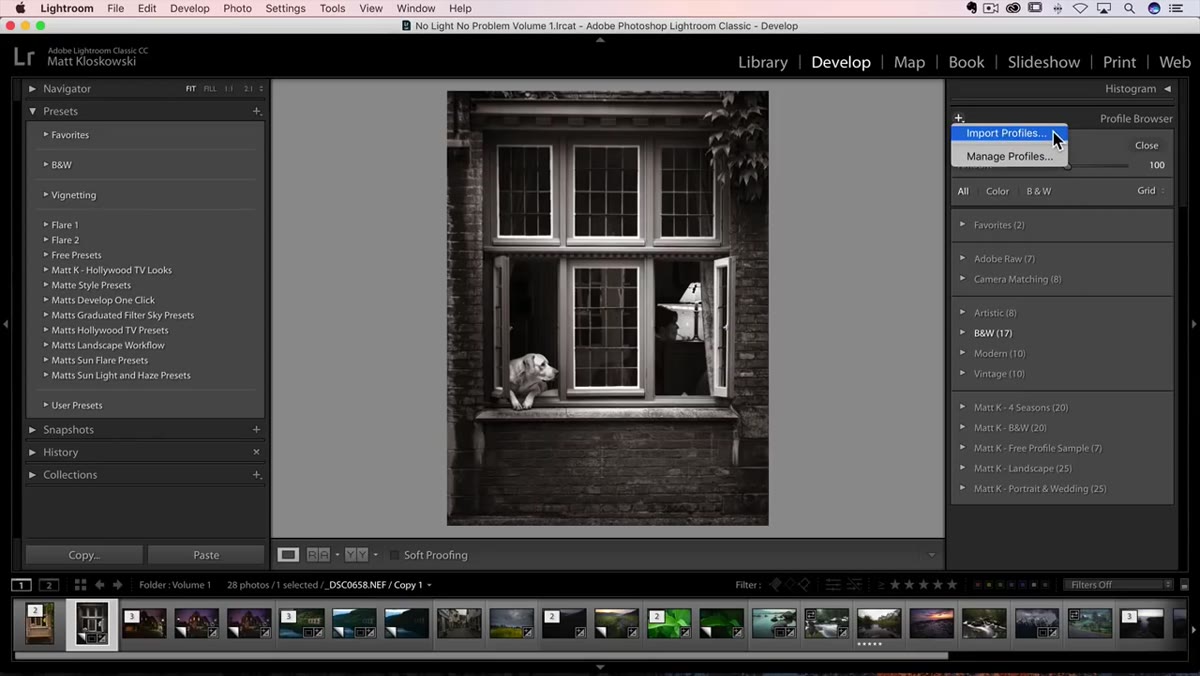 Profile browser with new import button in the header
This one is significant. Profiles have been in Lightroom since early 2018, but actually getting third-party profiles into the software was a confusing process with no dedicated import button. You had to dig around in file directories and manually drop things in the right folder, which is the kind of thing that makes new users give up and the rest of us mutter under our breath.
Profile browser with new import button in the header
This one is significant. Profiles have been in Lightroom since early 2018, but actually getting third-party profiles into the software was a confusing process with no dedicated import button. You had to dig around in file directories and manually drop things in the right folder, which is the kind of thing that makes new users give up and the rest of us mutter under our breath.
In 7.5, the profile browser (accessed through the grid icon in the basic panel) now has the same plus icon and import functionality that presets have. Click it, navigate to your profiles, and they come in cleanly. If you already went through the painful manual install, you’re fine. But for anything you add going forward, this makes profiles as easy to install as presets.
Step 5: Resize Cells in the Book Module
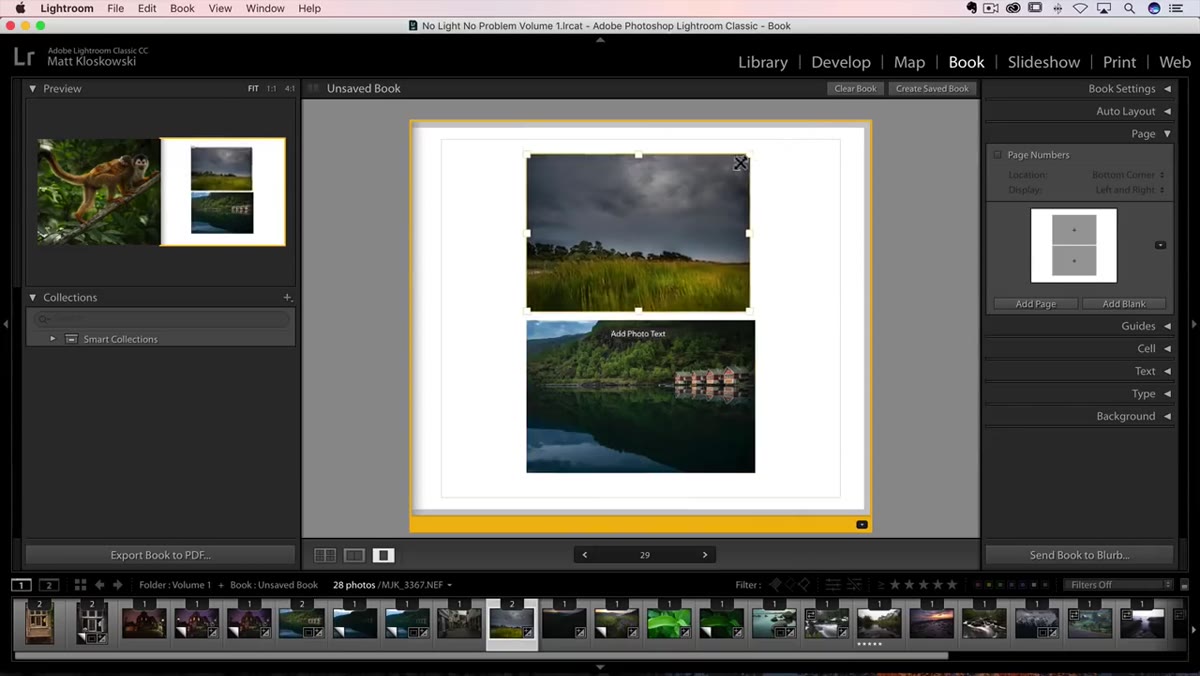 Book module with cell size being adjusted via slider
The book module updates are where 7.5 gets genuinely exciting for anyone who uses Lightroom to build photo books or client deliverables. Previously, your control over layout was mostly limited to resizing the photo within a fixed cell. The cell itself stayed the same size. That’s a frustrating limitation when you’re trying to create layouts that feel intentional rather than templated.
Book module with cell size being adjusted via slider
The book module updates are where 7.5 gets genuinely exciting for anyone who uses Lightroom to build photo books or client deliverables. Previously, your control over layout was mostly limited to resizing the photo within a fixed cell. The cell itself stayed the same size. That’s a frustrating limitation when you’re trying to create layouts that feel intentional rather than templated.
Now you can resize the cells themselves. This means you can shrink a cell down for a small accent photo, or expand one to dominate a spread. And once your photo is inside a resized cell, you can drag the image around to fine-tune the composition within that container. It’s the difference between fitting your photos into a layout and actually designing a layout around your photos.
Step 6: Overlap Cells for Creative Layouts
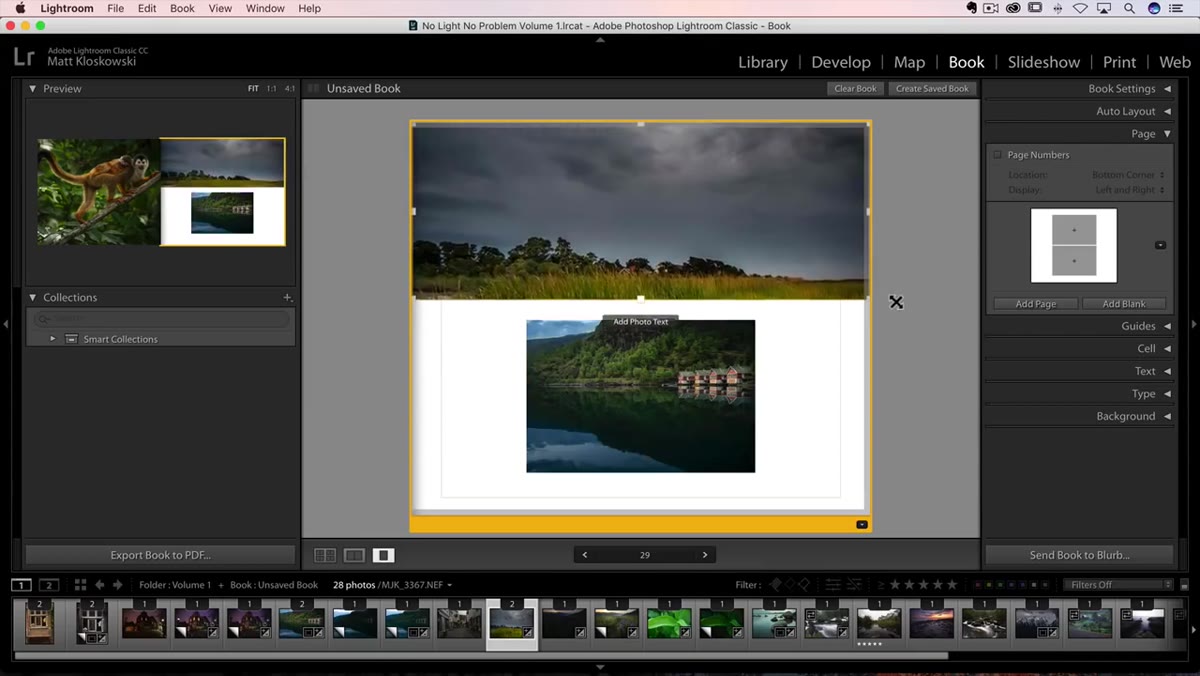 Two book module cells overlapping each other on the page
Extending from the cell resizing, 7.5 also allows cells to overlap each other on the page. Pull one cell over another, and instead of snapping or refusing to cooperate, Lightroom lets them stack. This opens up design options that previously required exporting to InDesign or Photoshop just to get a layered, editorial look.
Two book module cells overlapping each other on the page
Extending from the cell resizing, 7.5 also allows cells to overlap each other on the page. Pull one cell over another, and instead of snapping or refusing to cooperate, Lightroom lets them stack. This opens up design options that previously required exporting to InDesign or Photoshop just to get a layered, editorial look.
For portrait work especially, this is a big deal. Think about a full-bleed background image with a tighter, overlapping portrait dropped on top of it. That layout was basically impossible to build inside Lightroom’s book module before. Now it’s a drag operation.
What I’d Add From My Own Workflow
The preset clustering update is the one I keep coming back to. I name all my presets after songs, which means my panel was already organized in my head by album, but to anyone else looking at my screen it was chaos. The new clustering gives that internal logic a visual structure that actually reflects how I work.
If you build your own presets, spend a few minutes after updating to reorganize them into intentional clusters. Drag related ones together, give each group a clear start point, and hide anything you imported out of curiosity and never touched again. The time you spend now saves you friction on every session going forward. Think of it like organizing your record collection: once it’s sorted, you stop losing things.
The single most valuable update in Lightroom Classic 7.5 is the profile import button, because it removes the last real technical barrier to using profiles in your workflow. Everything else in this update makes the software more comfortable. The profile import makes it more accessible. Those are different things, and both matter.
Watch the full tutorial on YouTube to see Matt walk through each of these changes on screen.
Comments
Leave a Comment