
For a long time, I assumed everyone already knew there were three separate Lightroom applications. Then I started getting the same question over and over from readers: “Wait, which Lightroom am I supposed to download?” It’s a genuinely confusing situation, and Adobe hasn’t exactly made it easy to understand at a glance. If you’ve ever stared at the Creative Cloud app and wondered why there are multiple entries for what feels like the same program, this breakdown is for you.
In this Aaron Nace (PHLEARN) tutorial, Watch the full tutorial on YouTube, Aaron walks through all three Lightroom applications side by side and demonstrates the core editing workflow in each one. It’s Day 24 of his 30 Days of Lightroom series, and even though it’s framed as an overview, there’s real practical value here for anyone trying to figure out which app should anchor their editing setup. I’ve used all three in different seasons of my workflow, and I’ll add my own take after the walkthrough.
Step 1: Understand What Lightroom Classic Is Actually For
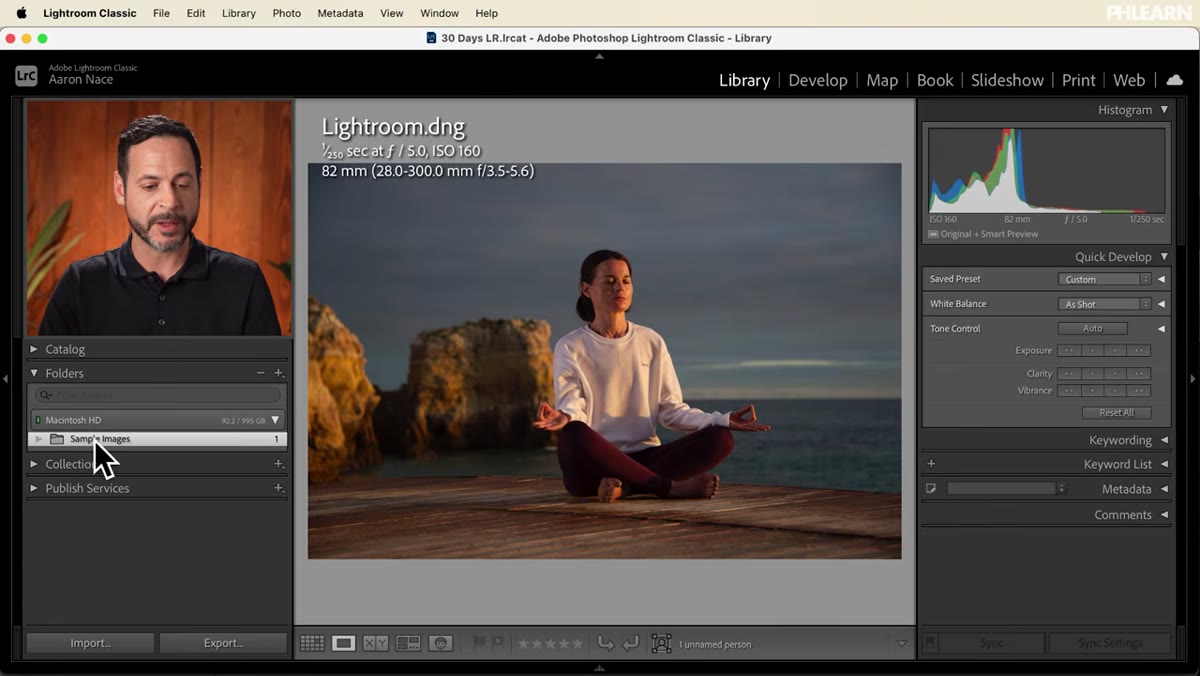
 Lightroom Classic library module showing imported RAW file
Lightroom Classic is the legacy powerhouse. It lives on your computer, works with files stored locally on your hard drive, and gives you the deepest feature set of the three apps. Aaron describes it as a professional-level program built around organizing and editing images that exist on your machine, and that framing is exactly right.
Lightroom Classic library module showing imported RAW file
Lightroom Classic is the legacy powerhouse. It lives on your computer, works with files stored locally on your hard drive, and gives you the deepest feature set of the three apps. Aaron describes it as a professional-level program built around organizing and editing images that exist on your machine, and that framing is exactly right.
The key word is local. Nothing in Lightroom Classic is cloud-first. Your catalog lives on your drive, your raw files live on your drive, and your exports land on your drive. If you’re shooting in a studio with a tethered camera setup, where images transfer directly from your camera to your screen in real time, Classic is the only option in the Lightroom family that supports that workflow. It’s also the most capable when it comes to batch editing, folder organization across multiple drives, and advanced masking.
Step 2: Recognize Where Lightroom (the Cloud App) Fits
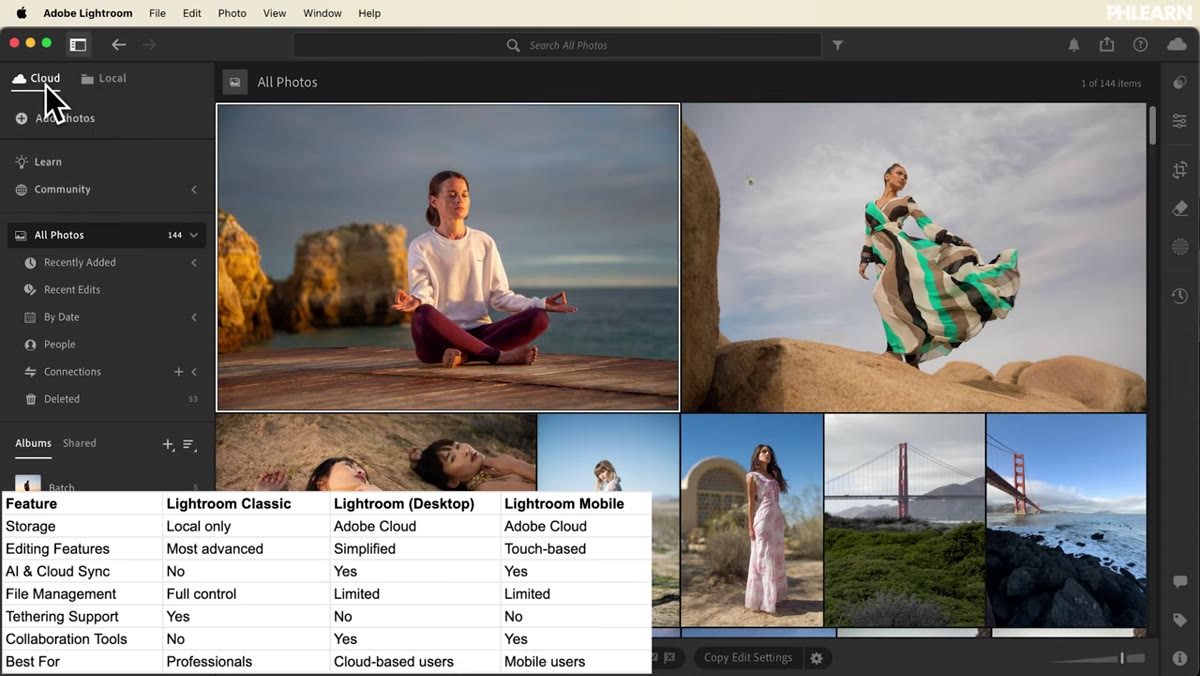 Lightroom cloud app interface with streamlined panel layout
Adobe’s simply-named “Lightroom” - no Classic, no modifier - is the newer, cloud-native version. Aaron points out that while you can still edit files that are sitting on your computer, the whole application was designed around uploading images to Adobe’s cloud. The interface is cleaner and more modern than Classic, with a layout that feels less overwhelming if you’re just getting started.
Lightroom cloud app interface with streamlined panel layout
Adobe’s simply-named “Lightroom” - no Classic, no modifier - is the newer, cloud-native version. Aaron points out that while you can still edit files that are sitting on your computer, the whole application was designed around uploading images to Adobe’s cloud. The interface is cleaner and more modern than Classic, with a layout that feels less overwhelming if you’re just getting started.
The practical upside here is redundancy and access. If your hard drive fails tomorrow, your photos are already safe on Adobe’s servers. If you switch computers, you log in and everything is there. The tradeoff is storage cost, since Adobe cloud storage beyond the included amount requires a higher-tier subscription. But for photographers who travel, collaborate remotely, or simply want peace of mind, the cloud-first model makes a strong case for itself.
Step 3: See How Lightroom Mobile Completes the System
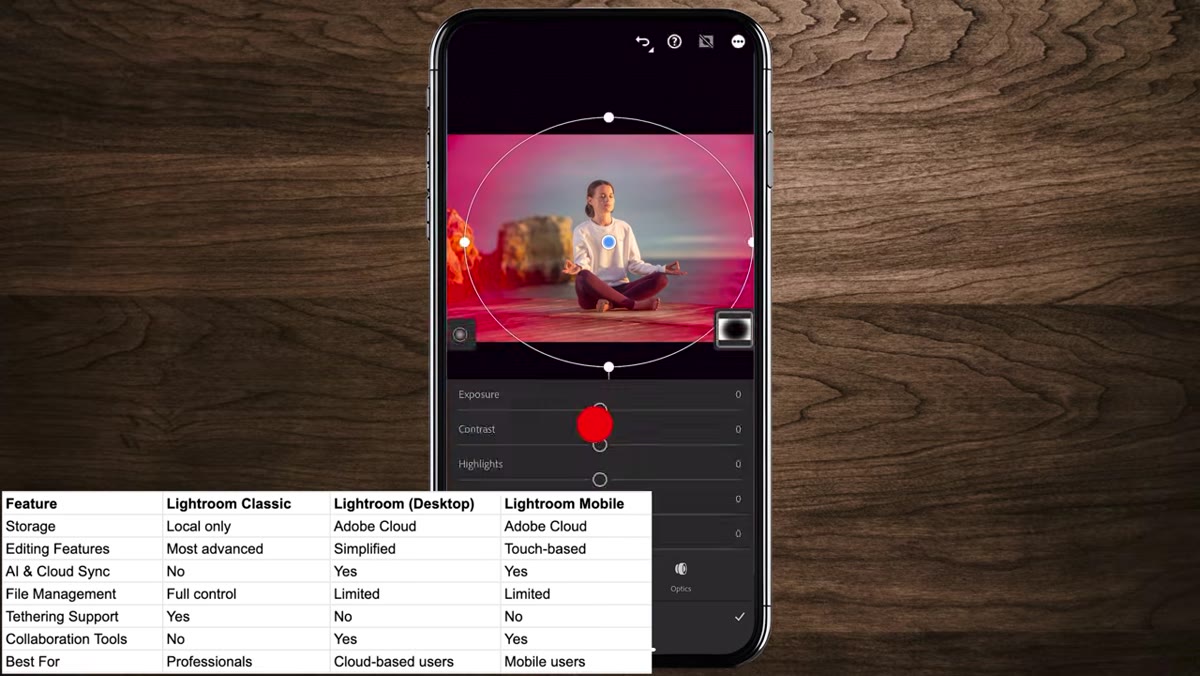 Lightroom Mobile interface on a tablet or phone screen
Lightroom Mobile is the phone and tablet version, and its main selling point is seamless sync with the cloud version on your desktop. Aaron makes this concrete: any edit you make on your phone shows up on your computer, and anything you adjust on your computer reflects immediately on your phone. There’s no manual syncing, no exporting and reimporting. It just works.
Lightroom Mobile interface on a tablet or phone screen
Lightroom Mobile is the phone and tablet version, and its main selling point is seamless sync with the cloud version on your desktop. Aaron makes this concrete: any edit you make on your phone shows up on your computer, and anything you adjust on your computer reflects immediately on your phone. There’s no manual syncing, no exporting and reimporting. It just works.
This matters more than it sounds. I’ve finished color grading a portrait on my couch while my laptop stayed closed on my desk, and by the time I opened it the next morning, everything was already there. Lightroom Mobile has full editing capabilities, not a stripped-down version of the tools, which means you can actually do serious work on it rather than just previewing what you did elsewhere.
Step 4: Tour the Lightroom Classic Editing Workflow
 Develop module open with Auto adjustment applied to RAW image
Aaron demonstrates a quick but complete editing pass inside Lightroom Classic using a single RAW file. Starting in the Library module where images are imported, he moves into the Develop module and applies an Auto adjustment, which analyzes the image and sets a starting point for exposure, contrast, and color. It’s a useful first move, especially when you want a baseline to push from rather than starting from zero.
Develop module open with Auto adjustment applied to RAW image
Aaron demonstrates a quick but complete editing pass inside Lightroom Classic using a single RAW file. Starting in the Library module where images are imported, he moves into the Develop module and applies an Auto adjustment, which analyzes the image and sets a starting point for exposure, contrast, and color. It’s a useful first move, especially when you want a baseline to push from rather than starting from zero.
From there, he jumps into Masking, specifically the Radio Gradient tool. He draws an elliptical gradient over the subject, increases the Feathering so the effect blends softly into the surrounding image, then nudges Shadows and Exposure up slightly. The result is a subtle brightness boost that pulls the eye toward the subject without looking obviously retouched. It’s the kind of light polish that makes a technically solid photo feel intentional.
Step 5: Export Your Work from Lightroom Classic
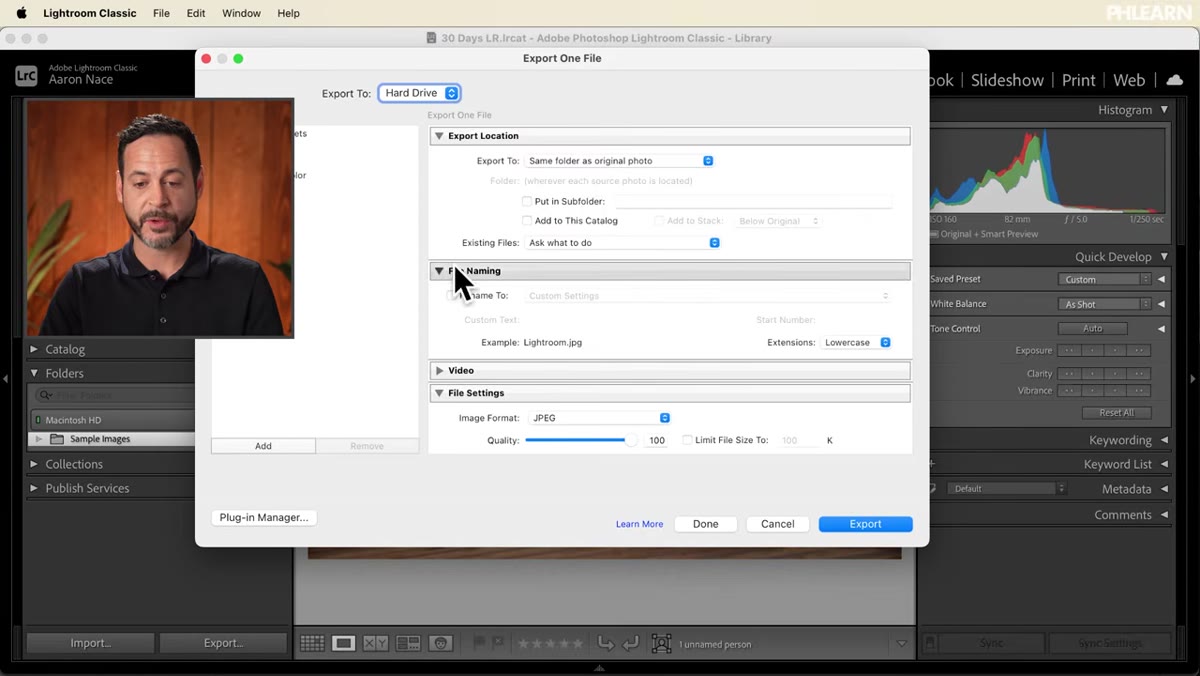 Export dialog box open with JPEG selected as file format
Once the edits are done in Classic, Aaron shows how to export. This is an important distinction from the cloud apps: in Lightroom Classic, your edits don’t automatically live anywhere other than the catalog. To get a finished file you can actually share or deliver, you go to File, then Export, choose your destination folder, set the file format (JPEG for most delivery situations), and click Export.
Export dialog box open with JPEG selected as file format
Once the edits are done in Classic, Aaron shows how to export. This is an important distinction from the cloud apps: in Lightroom Classic, your edits don’t automatically live anywhere other than the catalog. To get a finished file you can actually share or deliver, you go to File, then Export, choose your destination folder, set the file format (JPEG for most delivery situations), and click Export.
The original RAW file stays untouched. What gets created is a new JPEG with all your adjustments baked in. This non-destructive workflow is one of the strongest arguments for Lightroom as a whole, regardless of which version you use. You never overwrite your original file, which means you can always go back and re-edit from the raw data if a client changes their mind or your taste evolves.
My Take: The Apps Work Best as a Team, Not Competitors
I spent about two years treating these three apps as competing options and picking one to commit to. That was the wrong frame. The way I actually use them now: Lightroom Classic handles my serious, deadline-driven work where I need catalog organization and tethered shooting. Lightroom on desktop handles projects where I know I’ll want cloud backup or I’m sharing work with someone else. Lightroom Mobile is for everything on the go, quick selects from a shoot, minor touch-ups while I’m away from my desk, and showing clients a preview without pulling out my laptop.
The sync between the cloud app and Mobile is good enough that I’ve stopped thinking of Mobile as a companion app and started treating it as a genuine editing environment. The one thing I’d add that Aaron doesn’t cover in this overview: if you’re on an older computer with limited RAM, Classic can run heavy on large catalogs. In those cases, the cloud app is actually faster for single-image editing sessions. Worth knowing before you assume Classic is always the “serious professional” choice.
The single most important thing to take away from this tutorial is that these three apps are not versions of the same product at different price points. They’re built for genuinely different situations, and understanding that distinction will save you a lot of confusion when you’re deciding how to set up your editing environment. Classic for local, organized, professional workflows. Lightroom cloud for flexibility and redundancy. Mobile for everything in between.
Watch the full tutorial on YouTube to see Aaron walk through each app live, including the actual interface differences that are much easier to absorb when you can see them side by side.
Comments (1)
Would love to see a follow-up going deeper into this topic.
Leave a Comment