There’s a specific kind of frustration that every Lightroom user knows. You’re in the Develop module, flipping through a shoot, trying to find the frames worth keeping, and the software just… stalls. You click the next image and wait. Click again. Wait again. For anyone editing a full session, that lag compounds into something genuinely demoralizing. I’ve had days where I spent more time watching Lightroom load previews than actually making creative decisions, and that’s not a workflow problem you can preset your way out of.
So when Adobe pushed out the Lightroom CC 2015.6 and Lightroom 6.6 update, I went looking for a real breakdown of what actually changed versus what was marketing copy. I found it in this Tony & Chelsea Northrup tutorial: Watch the full tutorial on YouTube. Tony runs actual benchmarks instead of just reading the patch notes back to you, and this video is a good example of why that matters. The short version: the performance improvements are real this time, and there’s a new Guided Transforms feature that deserves a proper look.
Step 1: Update Lightroom and Check Your GPU Settings
 GPU acceleration toggle inside Lightroom Preferences panel
Before you do anything else, install the update. That sounds obvious, but the reason it matters here is that the GPU behavior changed in a meaningful way. Earlier versions of Lightroom introduced GPU acceleration with a lot of fanfare, but the implementation was rough. The software had to shuttle image data into graphics card memory every time you worked in the Develop module, and that transfer overhead actually made things slower for most users. The common fix at the time was to go into Preferences, open the Performance tab, and turn GPU acceleration off entirely.
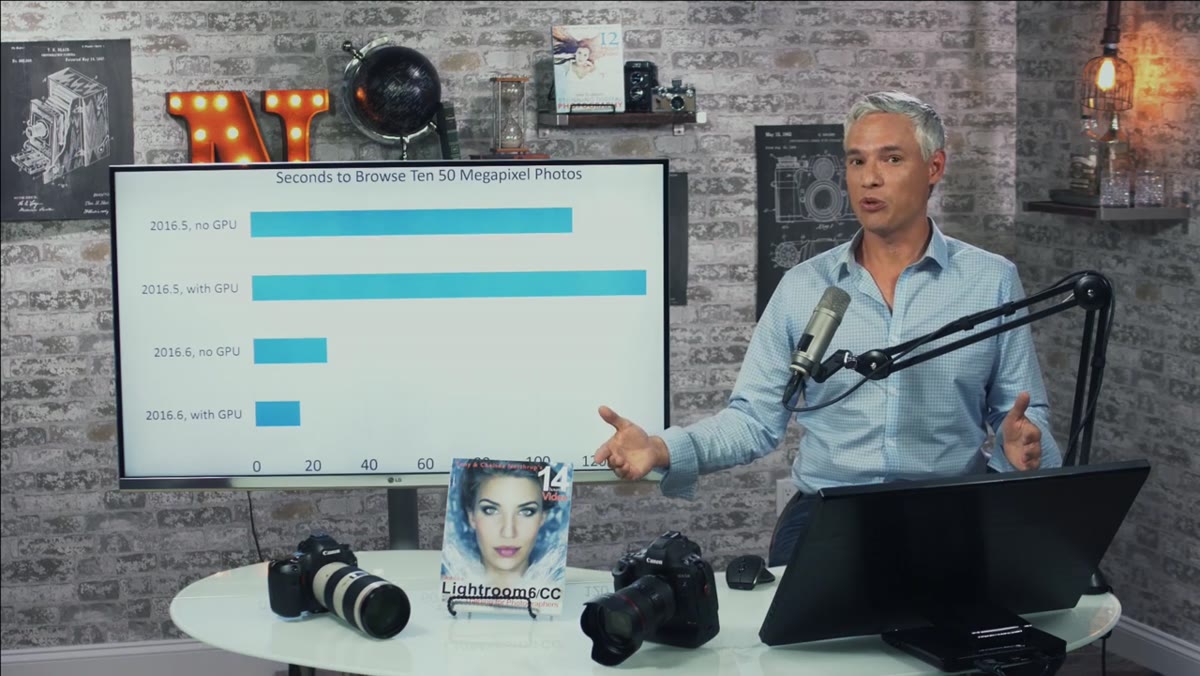
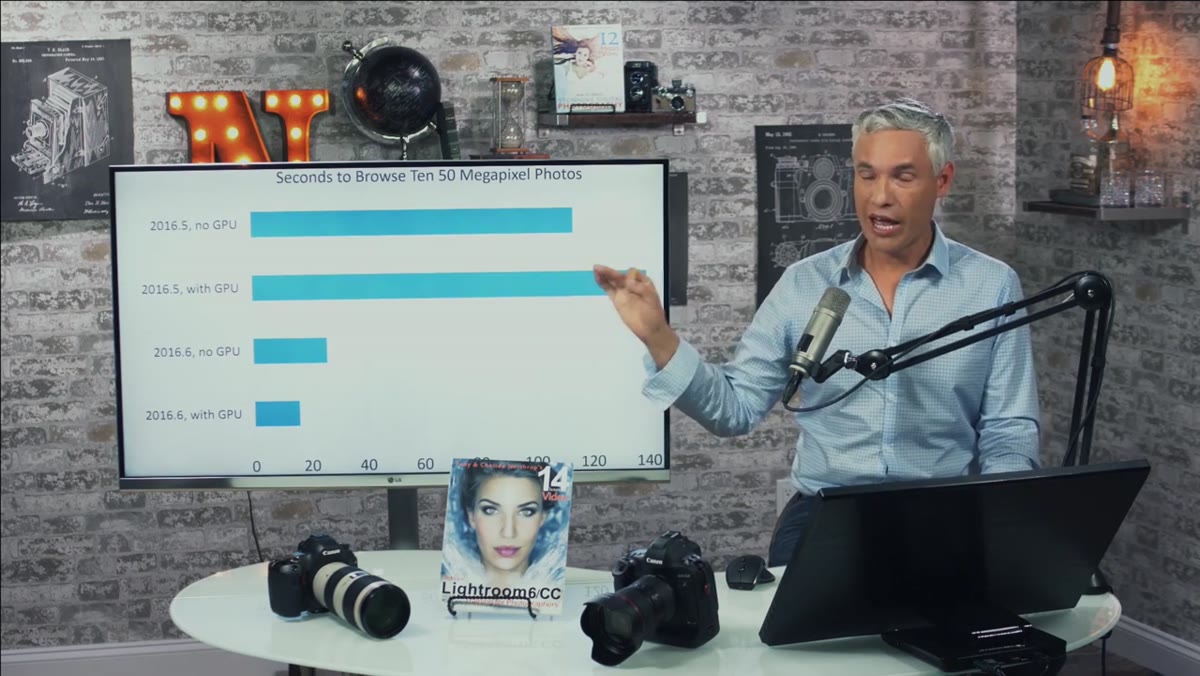
With the 6.6 update, that calculus flipped. Tony’s tests on his own machine showed dramatically faster browsing speeds with the GPU turned back on. If you disabled your GPU to survive the last version, go back into Preferences and re-enable it after updating. It’s worth testing both ways on your specific hardware, but the default GPU-on setting should now work better for most people.
Step 2: Benchmark Your Browsing Speed Before and After
 Lightroom develop module showing rapid image browsing in progress
This is the step most people skip, but it’s how you actually know whether an update helped you. Before installing the update, pick a folder with 10 to 20 high-resolution images. Flip through them in the Develop module and roughly time how long it takes for each image to fully render. Write it down. Then do the same test after updating.
Tony went from about 115 seconds to browse 10 fifty-megapixel images down to roughly 18 seconds on his machine. That’s not a rounding error. Even at 1:1 zoom, where load times are naturally longer, the new version was still nearly four times faster. Your numbers will vary based on your CPU, GPU, and how much RAM you’re running, but the directional improvement appears consistent. Having that before/after number also gives you something concrete if you ever need to make the case to a client for a hardware upgrade.
Step 3: Test Bulk Export on Large Jobs
 Export dialog with large batch of files queued
Adobe also claimed that bulk exports got faster, and Tony actually tested this in two scenarios. For small batches, around 10 to 11 images, the difference was negligible. Close enough to call it a wash. But for large exports, he ran 426 images through the pipeline and found the new version shaved off roughly a third of the total export time. That’s meaningful if you’re regularly delivering full wedding galleries or large commercial shoots.
The practical takeaway here is that the update is most valuable when you’re working at scale. If you typically export small batches, you won’t feel the difference much. But if you regularly queue up hundreds of files and walk away from your computer, that time savings adds up quickly across a busy editing season.
Step 4: Locate the Guided Transforms Panel
 Transform panel open in Lightroom Develop module
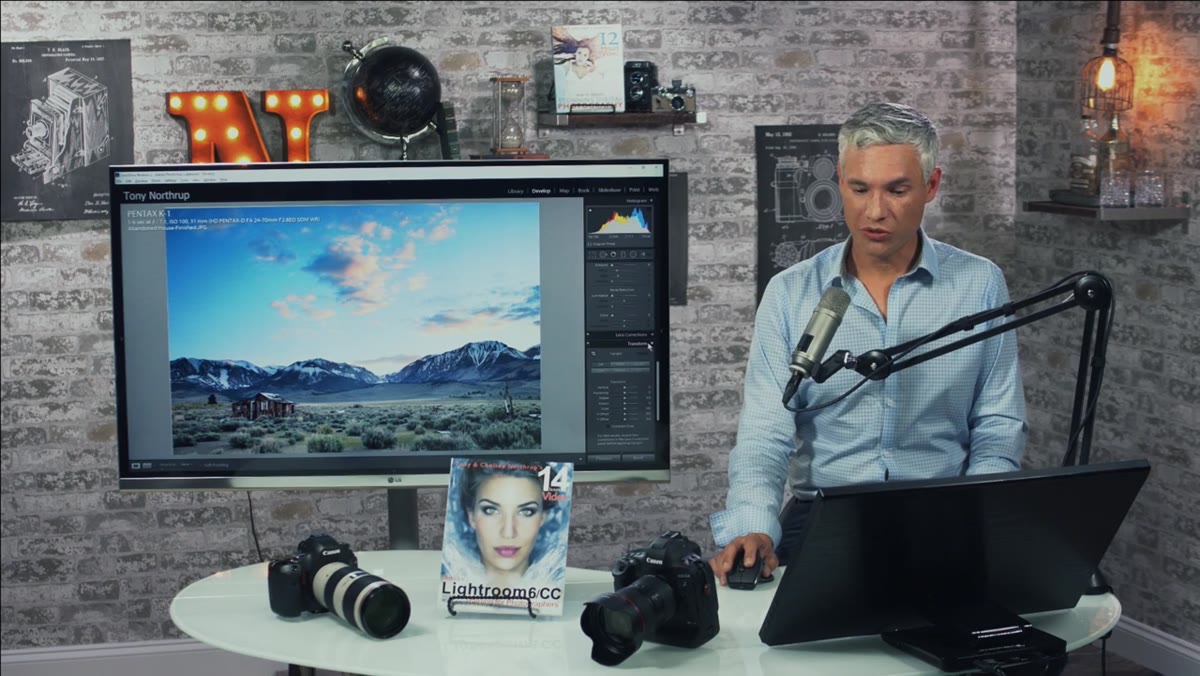
This is the genuinely new creative feature in this update, and it’s one that makes a real difference for architectural, interior, and wide-angle landscape work. In the Develop module, scroll down the right-hand panel until you reach the Transform section. This panel existed before, but previously it only offered automated correction modes that worked with varying results. The new Guided Transforms option changes what’s possible here.
You’ll see the familiar Auto, Level, Vertical, and Full buttons at the top. Below those, look for the Guided option. That’s what you want. When you click it, your cursor turns into a drawing tool that lets you define the lines that should be straight in your image.
Step 5: Draw Your Reference Lines on the Image
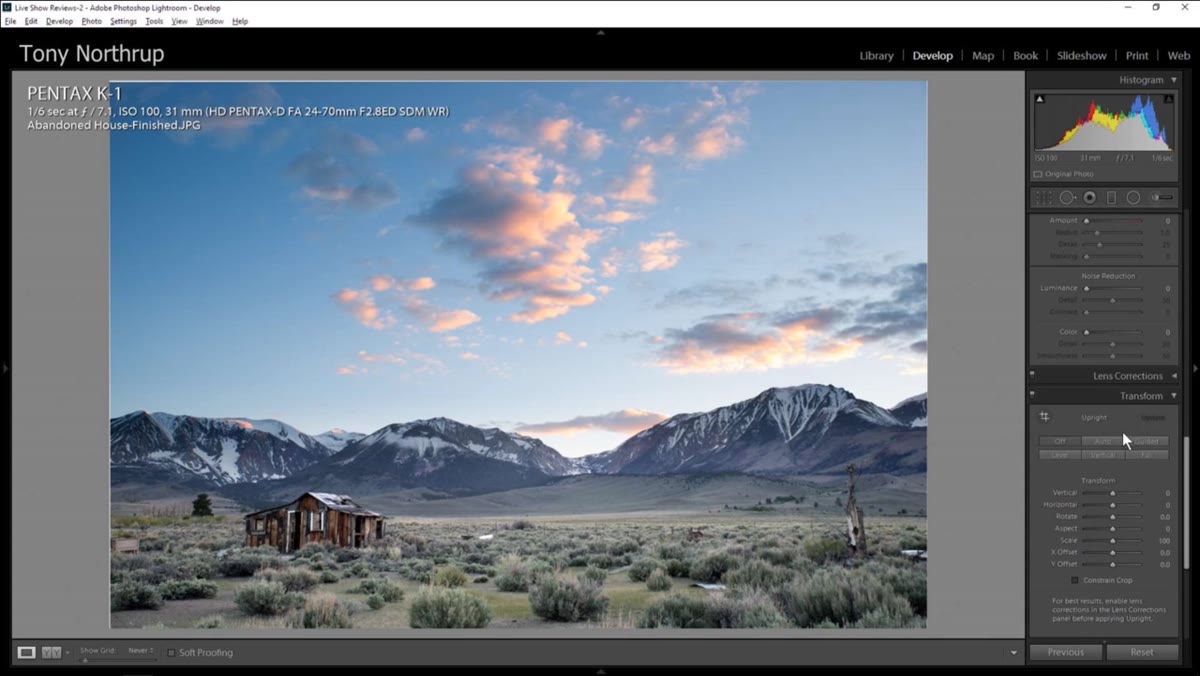 Wide-angle photo with guided transform lines being drawn
With Guided mode active, click and drag along any edge in your photo that should be perfectly vertical or horizontal. A straight building facade, a window frame, a horizon line, the edge of a doorway. Lightroom reads those lines as your anchor points and warps the perspective of the entire image to honor them. You can draw up to four lines, and in most cases two or three is enough to get a convincing correction.
The power here over the automatic modes is control. Auto corrections make assumptions about what matters in your frame, and they’re often wrong with complex architectural scenes or shots where the subject is off-center. Guided lets you tell Lightroom exactly which geometry needs to be respected, which means fewer overcorrected images and less time dragging the sliders manually in a separate step.
My Honest Caveat on Guided Transforms
Guided Transforms is genuinely useful, but it works best when your subject has clear, unambiguous straight lines to trace. I’ve run into trouble using it on organic scenes, wide-angle environmental portraits where the architecture is secondary, or any shot where there’s heavy foreground distortion from a fast wide-angle lens. In those cases, it can produce a correction that looks technically accurate but feels spatially wrong.
My workflow now is to use Guided Transforms first on anything architectural, evaluate the result, and then dial back the Transform Amount slider if the correction feels aggressive. Lightroom lets you reduce the intensity of the transformation after the fact, which is easy to miss if you’re new to the panel. That blend of automated geometry and manual softening tends to get me to a natural-looking result faster than either approach alone.
The single most important thing this update delivers is straightforward: Lightroom is finally fast enough to stop interrupting your creative thinking. The Guided Transforms feature is worth learning, but speed is what you’ll feel every single day. If you haven’t updated yet, do it, run the benchmark, and check your GPU settings.
Watch the full tutorial on YouTube to see Tony walk through the benchmarks and the Guided Transforms demo on actual wide-angle shots. His hands-on testing approach is worth the watch on its own.
Comments
Leave a Comment