
For a long time, I was a “Lightroom only” person. Not out of principle, just practicality. I learned Lightroom because my band needed press shots and nobody else was going to edit them. Photoshop felt like a different universe, one I didn’t have a reason to visit. Then I started pushing Lightroom harder on portrait work and kept running into the same wall: the tools were there, technically, but I was spending 20 minutes doing something that would take 3 minutes elsewhere.
That frustration is exactly what Terry White addresses in this KelbyOne tutorial, and it’s one of the more honest takes on the subject I’ve seen. He’s not trying to sell you on switching. He’s trying to help you recognize the moment when the tool you love stops being the right tool for the job. Watch the full tutorial on YouTube and follow along below with the breakdown.
The core argument is this: Lightroom is a fantastic starting point for nearly every image. But there are specific tasks where staying in Lightroom costs you real time, and a few things it simply cannot do at all. Knowing where that line is will make you faster and better without requiring you to abandon your entire workflow.
Step 1: Do Your Lightroom Work First
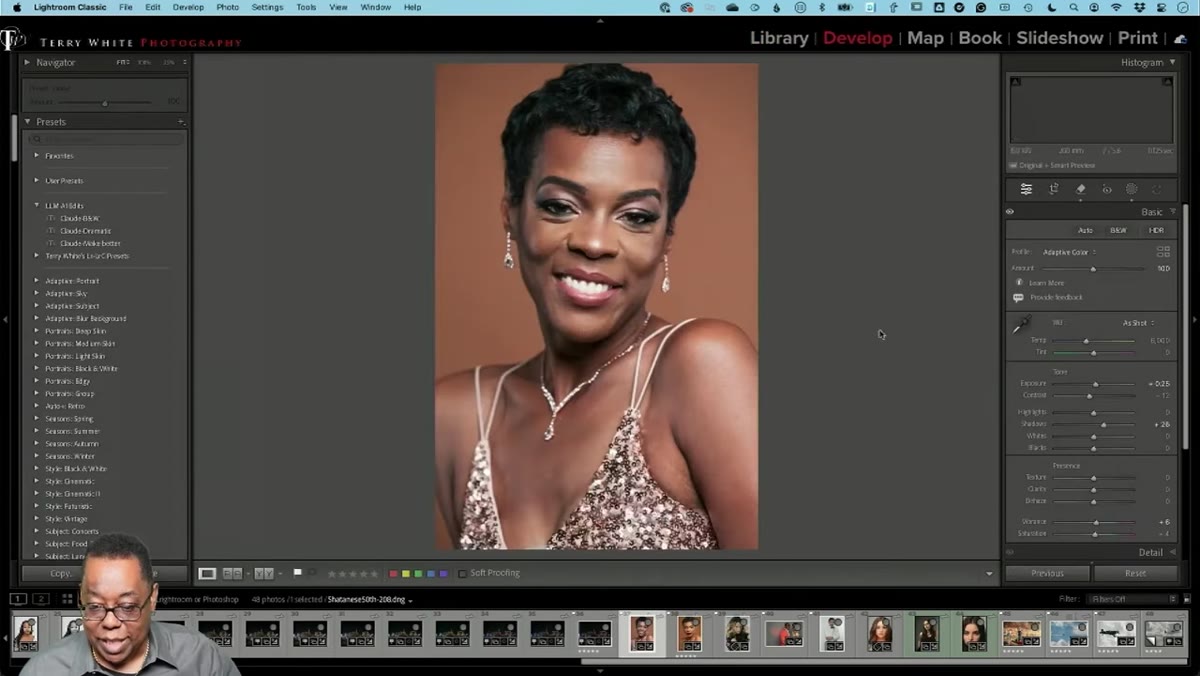 Lightroom develop panel with global adjustments applied to portrait
Before anything touches Photoshop, Terry’s approach is to push Lightroom as far as it sensibly goes. That means setting your profile, working through your global tone adjustments, and using masking to address specific areas like eyes or teeth. Lightroom’s masking tools have gotten genuinely powerful, and for a lot of portrait work, you may not need to go any further.
Lightroom develop panel with global adjustments applied to portrait
Before anything touches Photoshop, Terry’s approach is to push Lightroom as far as it sensibly goes. That means setting your profile, working through your global tone adjustments, and using masking to address specific areas like eyes or teeth. Lightroom’s masking tools have gotten genuinely powerful, and for a lot of portrait work, you may not need to go any further.
The key word there is “sensibly.” If you find yourself creating five nested masks and still not getting the result you want, that’s the signal. Lightroom is a non-destructive editing environment optimized for global and regional adjustments. It’s not a retouching application. Once you’ve done the color and tone work, flag the images that need more and move on.
Step 2: Send the Image to Photoshop
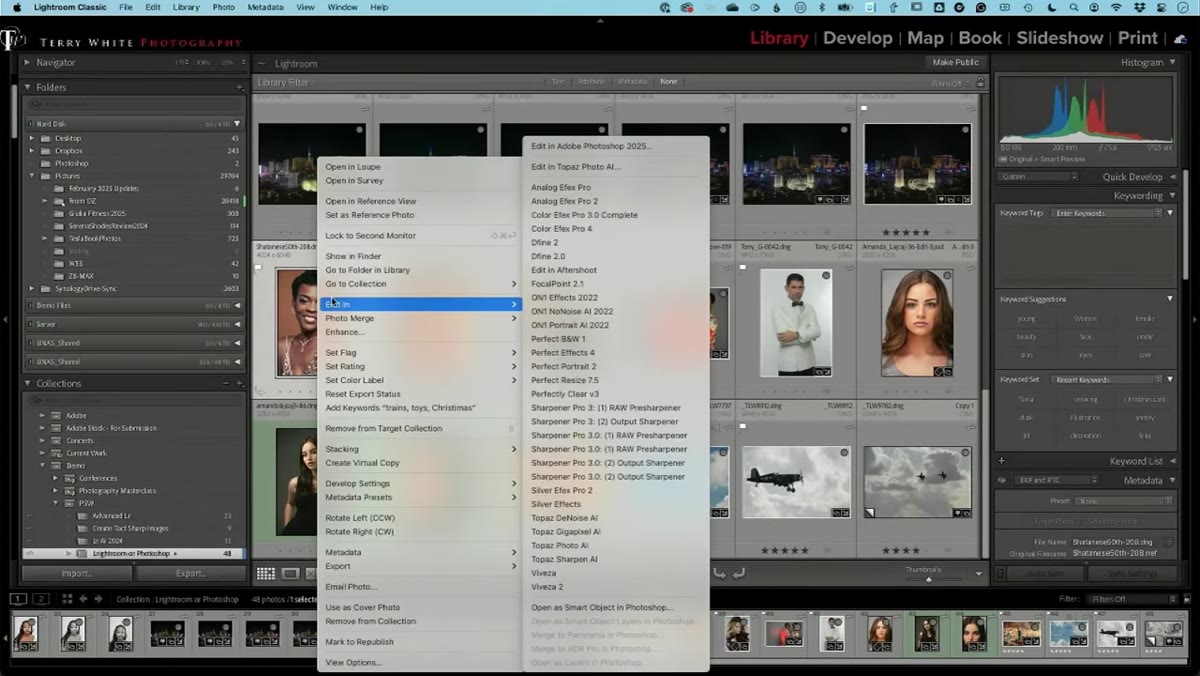 Right-click context menu showing “Edit in Photoshop” option in Lightroom
From Lightroom desktop, right-click your image and choose “Edit in Photoshop.” The keyboard shortcut is Command+E on Mac or Control+E on Windows. If you want to merge multiple exposures or layers before sending, use Command+Shift+E (or Control+Shift+E). In Lightroom cloud, the same shortcuts apply.
Right-click context menu showing “Edit in Photoshop” option in Lightroom
From Lightroom desktop, right-click your image and choose “Edit in Photoshop.” The keyboard shortcut is Command+E on Mac or Control+E on Windows. If you want to merge multiple exposures or layers before sending, use Command+Shift+E (or Control+Shift+E). In Lightroom cloud, the same shortcuts apply.
One thing Terry points out that I want to second: you don’t necessarily need to duplicate the layer when you arrive in Photoshop. Your original, with all its Lightroom adjustments intact, lives back in Lightroom. You’re working on a copy. That said, if you’re doing heavy retouching with multiple tools, a duplicate layer is still good practice for anything you might want to dial back selectively.
Step 3: Retouch Fine Lines with the Patch Tool
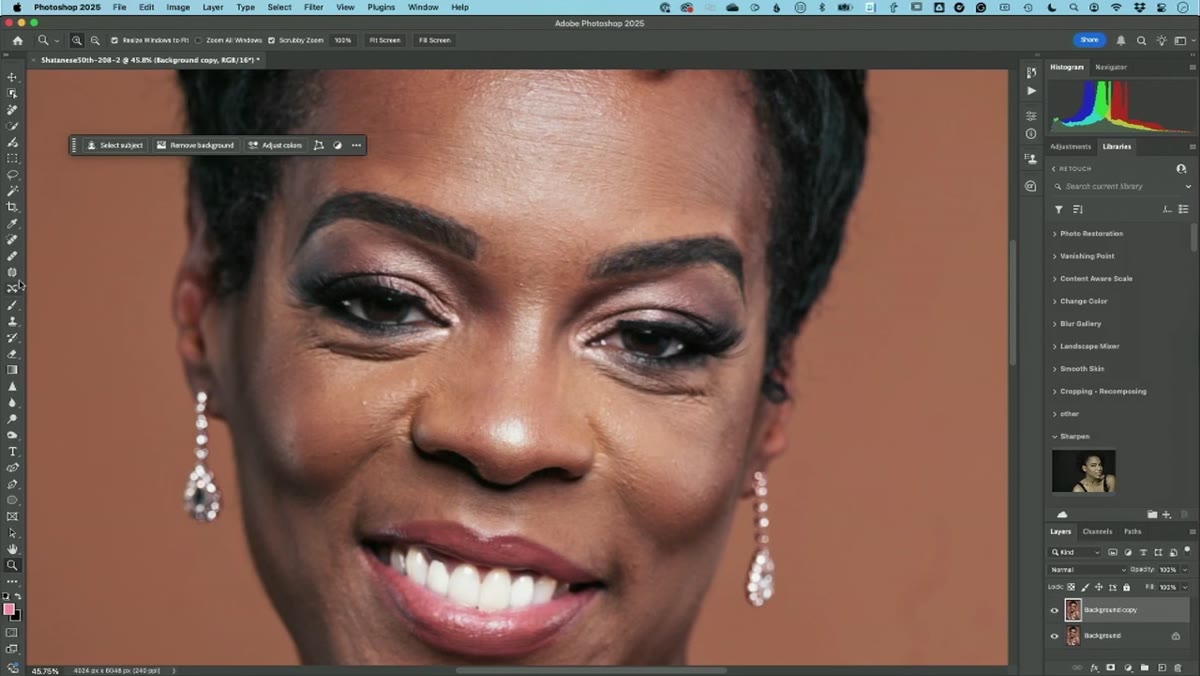 Patch tool selected, drawing selection around under-eye lines on portrait
The patch tool is one of Photoshop’s most underrated retouching options for skin work. Draw a selection around the area you want to soften, then drag it to a clean patch of nearby skin. What makes this better than just deleting the detail entirely is the fade option: after applying the patch, go to Edit and choose “Fade Patch Selection.” This lets you blend the correction back with the original, so you’re softening rather than erasing.
Patch tool selected, drawing selection around under-eye lines on portrait
The patch tool is one of Photoshop’s most underrated retouching options for skin work. Draw a selection around the area you want to soften, then drag it to a clean patch of nearby skin. What makes this better than just deleting the detail entirely is the fade option: after applying the patch, go to Edit and choose “Fade Patch Selection.” This lets you blend the correction back with the original, so you’re softening rather than erasing.
Completely removing lines or texture from a face almost always reads as fake. The fade slider is what keeps the result looking like a person instead of a render. Terry demonstrates this with under-eye lines, which is one of the most common portrait retouching requests I get from people who share their edits with me. Lightroom’s healing tools can handle small spots, but this level of controlled blending is outside what they’re built for.
Step 4: Use Generative AI Removal for Faster Results
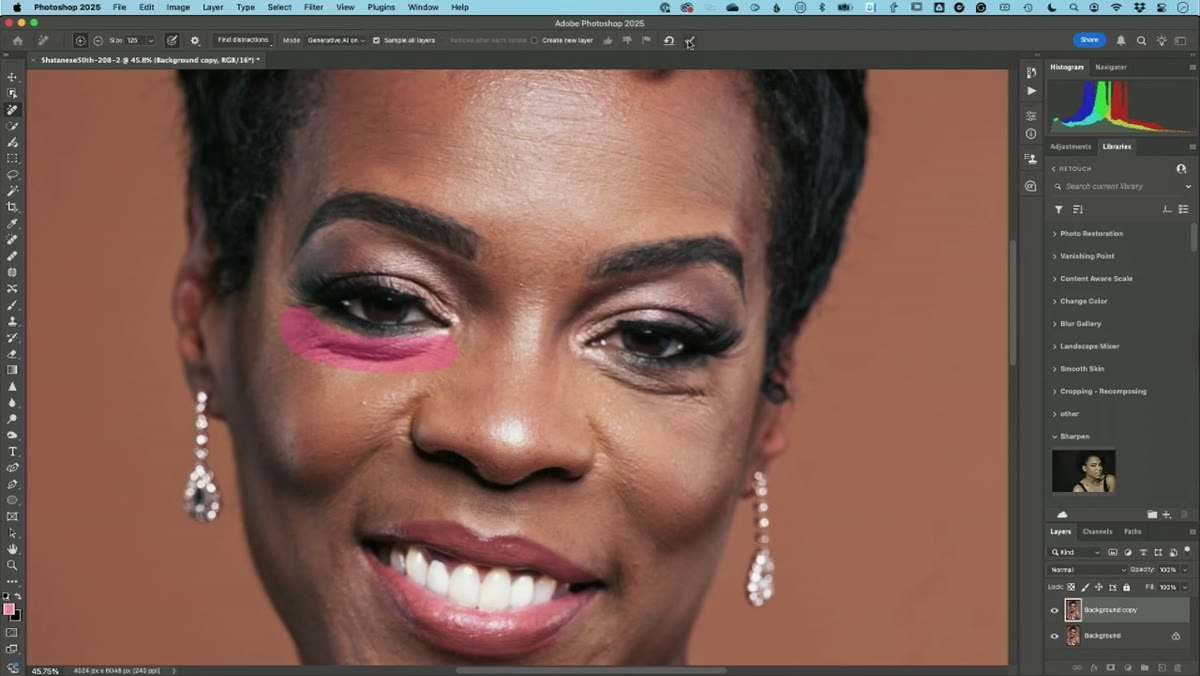 Generative AI remove tool processing under-eye area with variations panel visible
If the patch tool feels like too many steps, Photoshop’s Generative Remove is a legitimate alternative now. Select the area, enable Generative AI, and let it run. The tool generates three variations to choose from, and in Terry’s example it actually replaces subtle skin texture rather than just blurring the region flat.
Generative AI remove tool processing under-eye area with variations panel visible
If the patch tool feels like too many steps, Photoshop’s Generative Remove is a legitimate alternative now. Select the area, enable Generative AI, and let it run. The tool generates three variations to choose from, and in Terry’s example it actually replaces subtle skin texture rather than just blurring the region flat.
The results are not always perfect on the first pass. One of his variations added an unwanted highlight that he wouldn’t keep. But having three options to evaluate is a real workflow advantage. For quick client turnarounds, this gets you to “good enough” faster than most manual methods. Lightroom has a Remove tool as well, but the generative AI integration and variation selection in Photoshop is currently more refined for this kind of work.
Step 5: Expand a Tight Crop with Generative Expand
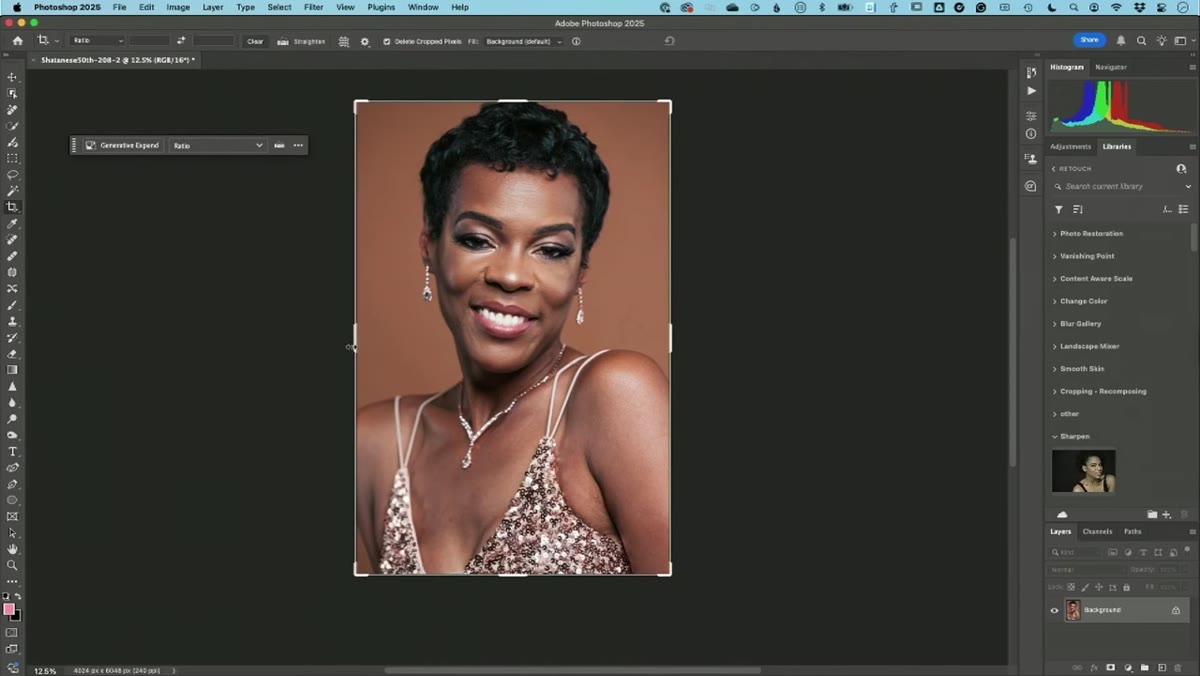 Crop tool extended beyond image border, Generative Expand option selected
This is the one that genuinely can’t be replicated in Lightroom right now. If a photo is cropped too tightly, you’re stuck in Lightroom. In Photoshop, grab the Crop tool, drag the canvas boundary beyond the edges of the original image, and select “Generative Expand” from the contextual toolbar. Photoshop will synthesize new image content to fill the extended area.
Crop tool extended beyond image border, Generative Expand option selected
This is the one that genuinely can’t be replicated in Lightroom right now. If a photo is cropped too tightly, you’re stuck in Lightroom. In Photoshop, grab the Crop tool, drag the canvas boundary beyond the edges of the original image, and select “Generative Expand” from the contextual toolbar. Photoshop will synthesize new image content to fill the extended area.
Terry uses this to recover shoulder room and headspace on a portrait where the original framing was too close. Again, three variations are generated and you pick the best one. It’s not magic, and occasionally the AI invents something anatomically questionable at the edges, but for architecture, environmental portraits, and product shots, this feature alone justifies the trip to Photoshop.
Step 6: Add Text or Graphics Directly to the Image
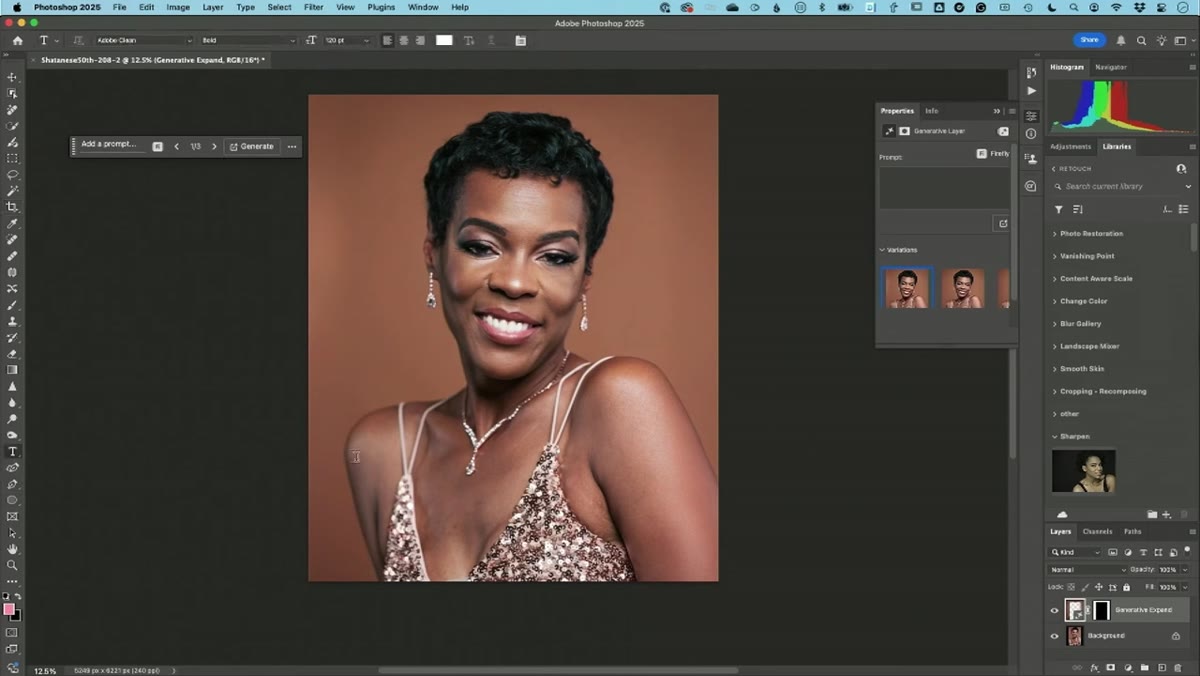 Type tool active with text being placed over portrait in Photoshop
Lightroom does not have a type tool. Full stop. If a client needs their logo on a proof, or you’re building a composite for a magazine layout, or you just want to add a watermark with custom styling, Photoshop is the only option in this ecosystem. Grab the Type tool, click on the canvas, and you have full access to fonts, sizing, color, and layer effects.
Type tool active with text being placed over portrait in Photoshop
Lightroom does not have a type tool. Full stop. If a client needs their logo on a proof, or you’re building a composite for a magazine layout, or you just want to add a watermark with custom styling, Photoshop is the only option in this ecosystem. Grab the Type tool, click on the canvas, and you have full access to fonts, sizing, color, and layer effects.
This sounds basic, but it’s a hard blocker for a specific category of work. If you do client delivery, editorial work, or social media graphics as part of your photography services, the lack of text tools in Lightroom will push you to Photoshop regularly.
What I’d Add from My Own Workflow
I’d extend Terry’s framework by suggesting you keep a mental checklist for each portrait session before you export. Ask: does anything need structural retouching beyond what masking handles? Is the crop final? Does the client need any graphics or overlays? If the answer to any of those is yes, the image goes to Photoshop before it goes anywhere else.
The other thing I’d add is to be honest about the learning curve on Generative Expand and Generative Remove. The results improve significantly when you make tight, deliberate selections rather than loose ones. Giving the AI a smaller, more defined area to work with almost always produces cleaner output than selecting broadly and hoping for the best.
The single most important thing I took from this tutorial is also the simplest: stop thinking of Photoshop as the “advanced” tool and Lightroom as the “beginner” tool. They solve different problems. Lightroom is where images are developed. Photoshop is where they’re finished. Once you internalize that, the question of which one to use basically answers itself.
Watch the full tutorial on YouTube to see Terry walk through all of this live, including his specific Generative AI results and how he evaluates the variations in real time.
Comments (2)
Solid advice. Especially the part about taking your time with it.
Clear and practical. No fluff. Appreciate that.
Leave a Comment