
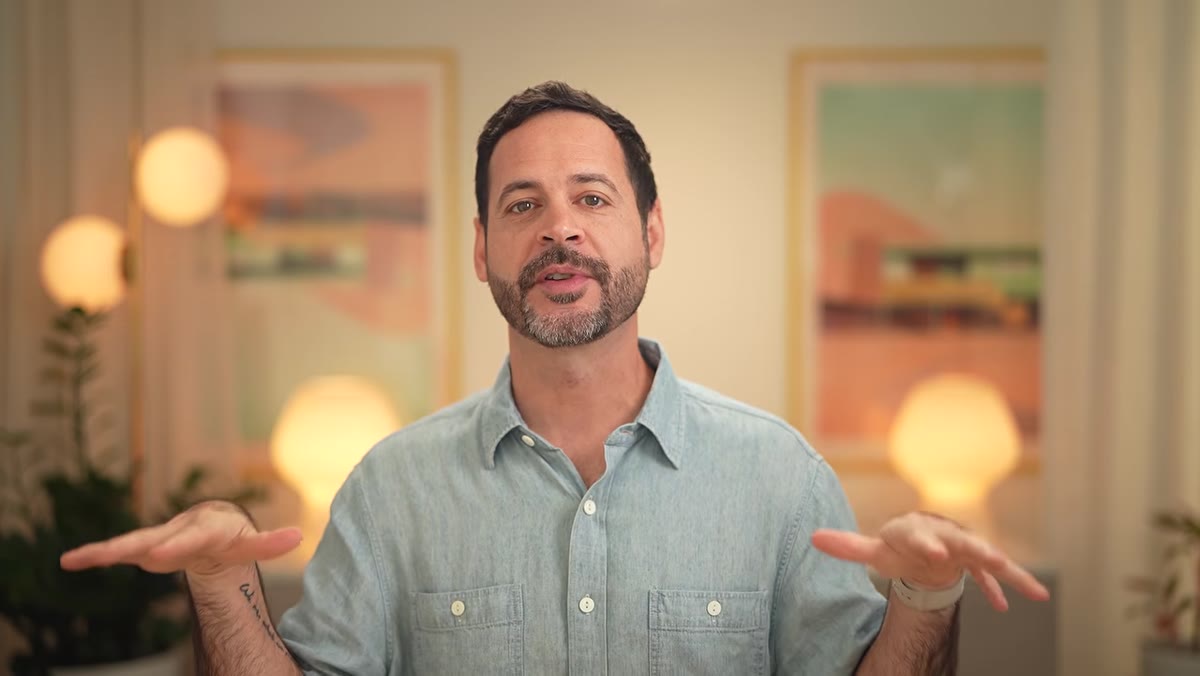
Culling has always been the part of my workflow I dread most. Not editing, not exporting, not even keywording (okay, maybe keywording). It’s that numb, repetitive process of clicking through 400 near-identical frames trying to figure out which ones are actually worth your time. I’ve tried every trick in the book: star ratings, color labels, the reject key, and yes, even a brief embarrassing phase where I tried to build a spreadsheet system. None of it felt fast enough.
So when I came across a recent Aaron Nace (PHLEARN) tutorial on Lightroom’s new AI-assisted culling feature, I dropped what I was doing and watched it twice. Watch the full tutorial on YouTube before or after reading this, depending on how you learn best. Aaron’s energy is infectious and the demo is tight. What I want to do here is slow it down and walk you through exactly what’s happening at each stage, so you can apply it immediately to your own imports.
This feature is available in both Lightroom Classic for desktop and the standard Lightroom for desktop. If you’ve updated recently, you likely already have it. The AI doesn’t do your creative culling for you, it won’t tell you which image has the best expression or the most interesting composition. What it does is ruthlessly filter out the technical failures: soft focus, closed eyes, blown exposures. That’s exactly the kind of mechanical sorting that shouldn’t require a human brain, and now it doesn’t have to.
Step 1: Drag Your Folder Into Lightroom to Open the Import Dialog
 Import dialog opening after dragging a folder into Lightroom Classic
Start by selecting your shoot folder and dragging it directly into Lightroom Classic. This pulls up the standard import dialog you’ve used a hundred times. Nothing unusual yet. The new feature lives just inside this familiar window, so if you’ve been skipping the import dialog in favor of synced folders, you’ll want to come back to this method to access AI culling at the earliest possible stage of your workflow.
Step 2: Locate the AI Assisted Culling Panel
 Assisted culling panel appearing on the right side of the import dialog
Inside the import dialog, look for the “Assisted Culling” option. Click it, and a new panel slides in on the right side of the interface. This is where all the AI scoring controls live. You’ll also notice that your image thumbnails now have small indicators on them. The panel is split into culling criteria on the left and score readouts on the right. It looks like a minor UI addition, but the functionality packed into it is significant.
Step 3: Enable Your Culling Criteria Checkboxes
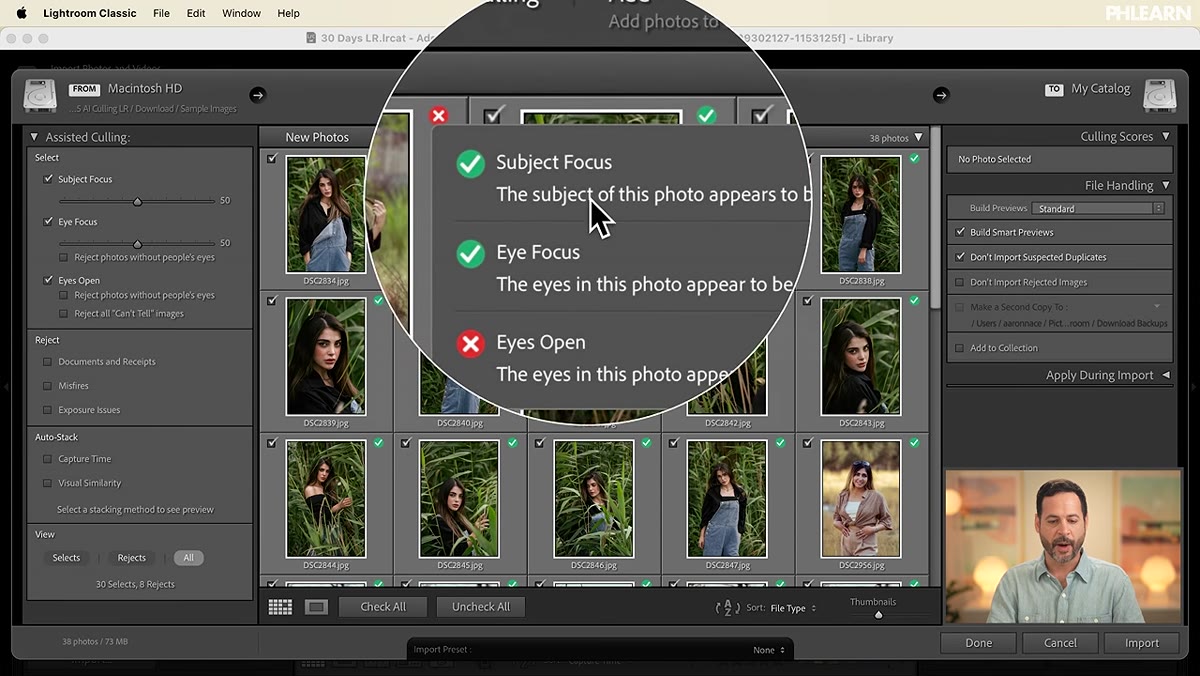
 Three checkboxes for subject focus, eye focus, and eyes open being selected
The panel gives you three primary focus-related criteria to toggle: subject focus, eye focus, and eyes open. Check all three to start. For portrait, event, or any people-focused photography, running all three simultaneously makes the most sense. Once checked, Lightroom runs its analysis and immediately marks images with green checkmarks for passes and red X’s for failures. You’ll see the results appear on your thumbnails in real time, which is a genuinely satisfying feedback loop once you experience it.
Step 4: Read the Culling Scores on Individual Images
 Culling scores panel showing individual scores for subject focus, eye focus, eyes open
Click on any flagged image to see its detailed score breakdown in the right panel. Each criterion gets its own numerical score from zero to one hundred. An image might score perfectly on eye focus but hit zero on eyes open, telling you exactly why it got flagged. This granularity is useful because it removes the guesswork. Instead of squinting at a thumbnail wondering if that’s soft or just the style, you get a number and a clear pass/fail indicator.
Step 5: Adjust the Strictness Thresholds to Match Your Standards
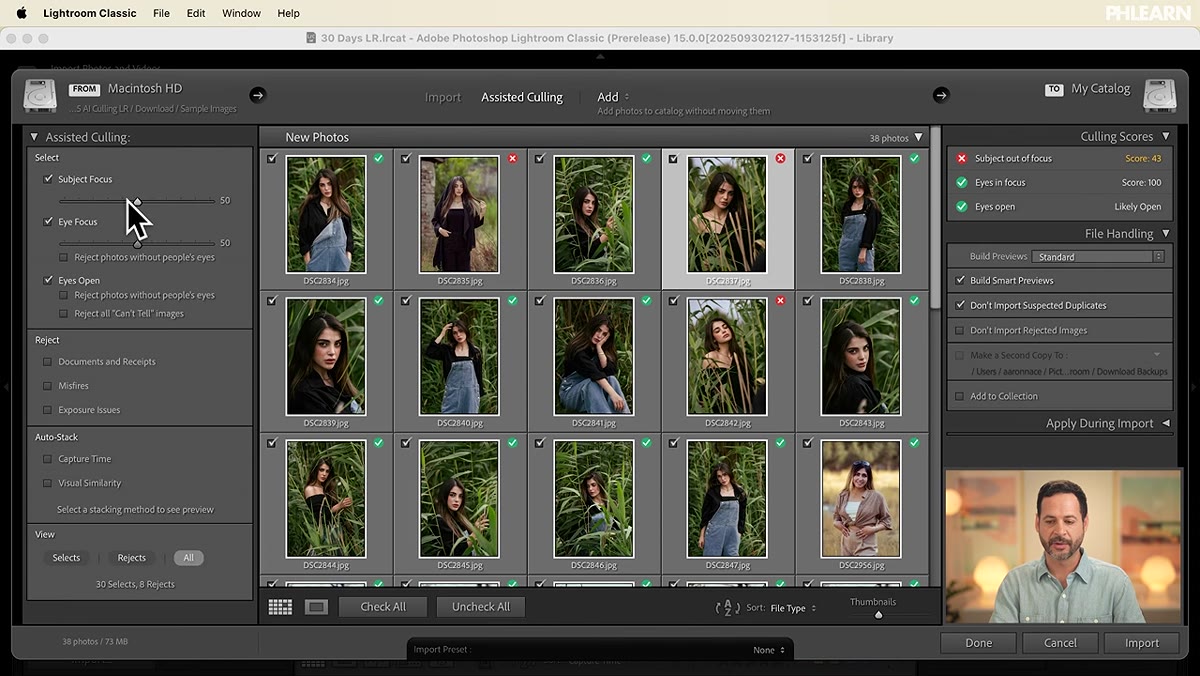 Threshold slider being adjusted to change the cutoff score for subject focus
This is the step that separates AI culling from a blunt instrument. Each criterion has a threshold slider on the left side of the panel. If Lightroom marks an image as failing subject focus with a score of 43, but you zoom in and think it looks acceptable for your purposes, you can drop the threshold to 40 and that image passes. You are not locked into Adobe’s default definition of “sharp enough.” Adjust these thresholds based on your delivery standards: editorial work might demand tighter numbers, while lifestyle or documentary work often has more room to breathe.
Step 6: Enable Exposure Misfires and Auto-Stack Options
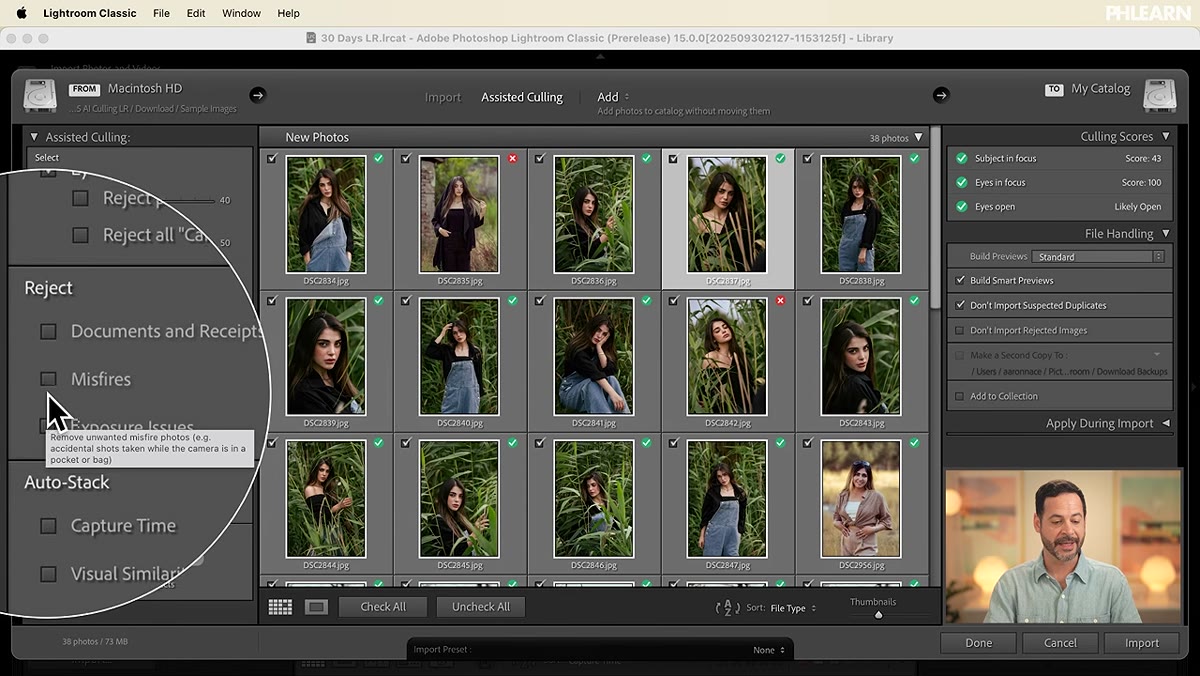 Checkboxes for exposure misfires and auto-stack by capture time being enabled
Below the focus criteria, you’ll find options for rejecting documents, receipts, and exposure misfires. The misfire detection is smart enough to catch frames that are severely over or underexposed, the kind you’d normally catch in two seconds but still have to click through to find. Enable it. You’ll also see an auto-stack option that groups images by capture time. If you shot multiple setups or locations in a single session, this organizes your import into logical clusters automatically. It’s a small thing, but it means you arrive at the editing phase with structure already in place instead of a flat pile of 400 files.
My Take: Where This Fits Into a Real Editing Day
I want to be straight with you about what this feature is and isn’t. It’s a first-pass technical filter, not a creative director. It won’t replace the moment where you’re choosing between two frames with identical sharpness but different energy. That part still takes a human. What it does is compress the boring part of culling down to almost nothing, which means by the time I’m making real creative decisions, I’m looking at a tighter, cleaner set of images.
One thing I’d add from my own testing: the threshold sliders are more important than they look. The defaults are calibrated for a kind of average use case, but every photographer has different standards. If you shoot a lot of environmental portraiture where slight subject softness is intentional, you’ll want to loosen the subject focus threshold right away. Spend five minutes dialing your thresholds in on your first import, save those settings, and future sessions will feel nearly instant.
The single biggest shift this feature creates is psychological. When culling feels fast, you stop dreading it, and when you stop dreading it, you actually do it properly instead of rushing through and second-guessing yourself in the edit. That alone is worth the update.
Watch the full tutorial on YouTube to see Aaron walk through the full import and culling workflow with live examples. He also covers what happens after import, which is worth seeing in motion.
Comments (1)
I keep coming back to this article. It's that useful.
Leave a Comment