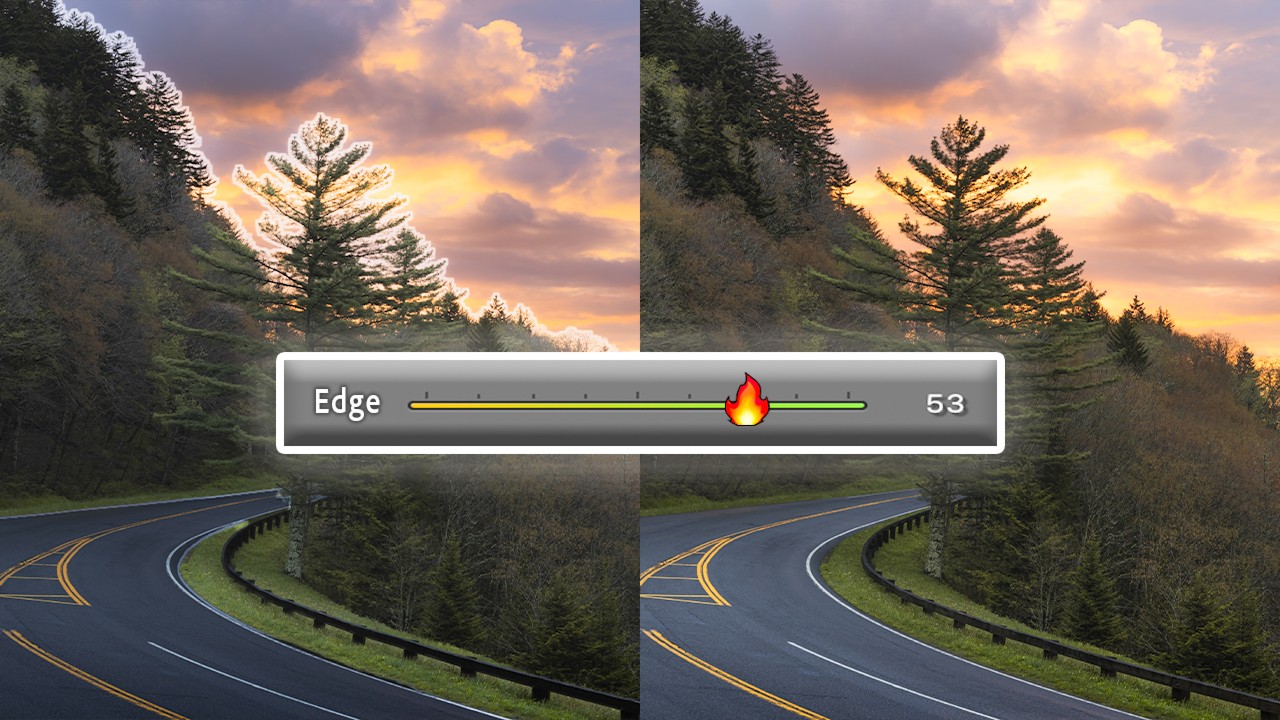
If you’ve spent any real time with Lightroom’s AI masking tools, you already know the specific frustration I’m talking about. You select the sky, make a solid exposure adjustment, and then zoom in to find your tree branches have turned into a soft, smeared mess along the mask boundary. Or you get that telltale halo glowing around every edge like the photo is auditioning for a soap opera. The adjustment itself might be perfect, but the edge blowout kills the whole thing. I’ve dialed back more sky adjustments than I care to admit, not because the correction was wrong, but because the mask edge made it look obvious and artificial.
In this Mark Denney tutorial, Watch the full tutorial on YouTube, he digs into Adobe’s August Lightroom update, which finally brings proper Edge and Feather controls to AI-generated masks directly inside Lightroom. These controls had already appeared in Camera Raw, and most people assumed it would be a long wait before Lightroom caught up. It wasn’t. The feature arrived faster than anyone expected, and after spending a few sessions testing it on my own landscape and portrait work, I can say it genuinely changes how useful these masks are in a real workflow.
What follows is a step-by-step breakdown of exactly what Mark demonstrates, translated into the kind of concrete instructions you can follow with your own images open right now.
Step 1: Build a Sky Mask and Push the Adjustment Until It Breaks
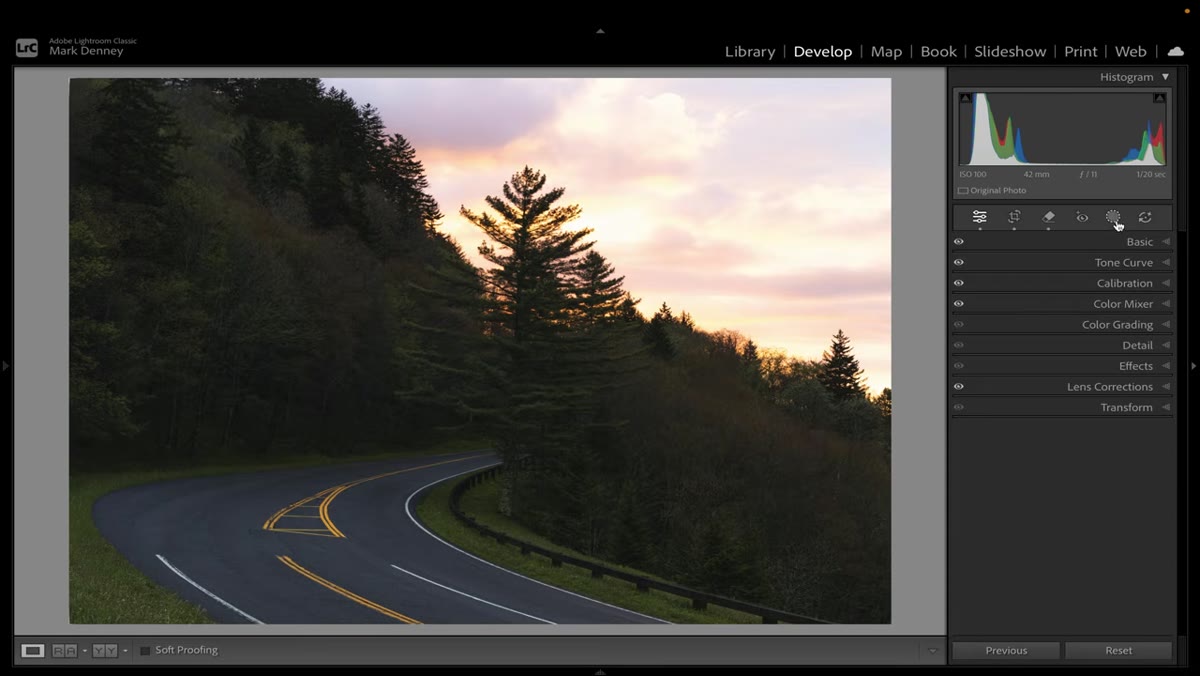 Sky mask applied to a winding road sunrise photograph
Open a landscape image with a defined sky and switch to the Develop module. Create a new mask using Select Sky, then apply a fairly aggressive exposure reduction, somewhere around -1.5 to -2.0 stops. The goal here is not to make a pretty edit. You’re stress-testing the mask. Once the adjustment is heavy enough, zoom into the boundary area between the sky and any foreground elements with fine detail, such as trees, branches, or grass. This is where the problem reveals itself most clearly.
Sky mask applied to a winding road sunrise photograph
Open a landscape image with a defined sky and switch to the Develop module. Create a new mask using Select Sky, then apply a fairly aggressive exposure reduction, somewhere around -1.5 to -2.0 stops. The goal here is not to make a pretty edit. You’re stress-testing the mask. Once the adjustment is heavy enough, zoom into the boundary area between the sky and any foreground elements with fine detail, such as trees, branches, or grass. This is where the problem reveals itself most clearly.
What you’ll see at this zoom level is either a halo brightening around the edges of foreground objects, or what Mark accurately calls “the mush” - fine details like tree branches softening and blending into the sky adjustment. Neither of these is an artifact you can fix by tweaking exposure or contrast. The mask edge itself is the problem.
Step 2: Try the Vegetation Mask to See the Halo Problem Separately
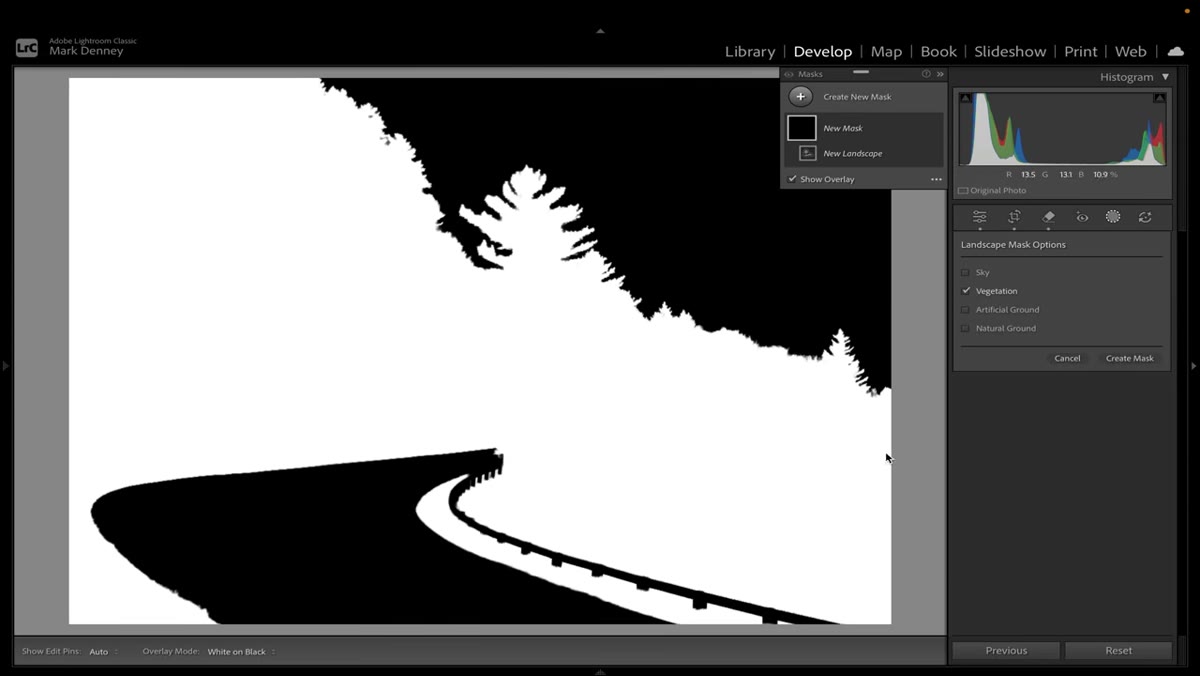 Vegetation mask selected with visible halos along tree edges
Delete the sky mask and this time use Lightroom’s landscape segmentation to select the vegetation in the scene. Lift the exposure on that selection instead of pulling it down. You’ll see the halo problem appear in the opposite direction - bright outlines forming around the vegetation boundary, especially where it meets the sky. This step is worth doing because it confirms the issue isn’t isolated to one mask type or one direction of adjustment. It’s a structural limitation of how these masks handled their edges before this update.
Vegetation mask selected with visible halos along tree edges
Delete the sky mask and this time use Lightroom’s landscape segmentation to select the vegetation in the scene. Lift the exposure on that selection instead of pulling it down. You’ll see the halo problem appear in the opposite direction - bright outlines forming around the vegetation boundary, especially where it meets the sky. This step is worth doing because it confirms the issue isn’t isolated to one mask type or one direction of adjustment. It’s a structural limitation of how these masks handled their edges before this update.
Once you’ve seen both versions of the problem on your own image, delete all masks and start fresh. The old approach was to either accept the artifacts or pull the adjustment back until they were less visible. Now there’s a real solution.
Step 3: Recreate the Sky Mask and Open the New Edge Controls
 New Edge and Feather sliders visible in the Lightroom mask panel
Create a new sky mask and apply the same heavy adjustment from Step 1. Now look at the mask panel. With the recent Lightroom update, you’ll see new controls available directly within the mask options, specifically Edge and Feather sliders. These weren’t there before. Before this update, once you created an AI mask, the edge behavior was locked in. You could add or subtract from the selection, but you couldn’t change how the mask transitioned into the unmasked area. These new sliders change that entirely.
New Edge and Feather sliders visible in the Lightroom mask panel
Create a new sky mask and apply the same heavy adjustment from Step 1. Now look at the mask panel. With the recent Lightroom update, you’ll see new controls available directly within the mask options, specifically Edge and Feather sliders. These weren’t there before. Before this update, once you created an AI mask, the edge behavior was locked in. You could add or subtract from the selection, but you couldn’t change how the mask transitioned into the unmasked area. These new sliders change that entirely.
Step 4: Use the Feather Slider to Soften the Mask Transition
 Feather slider being adjusted, mask edge softening in real time
The Feather slider controls how gradually the mask fades out at its boundary. Drag it to the right and the mask edge becomes a softer, more gradual transition rather than a hard line. Start with a moderate value and zoom back into that same problem area from Step 1. The mush on the tree branches will noticeably reduce because the adjustment is no longer hitting those edge pixels at full intensity. The effect is similar to what you’d get if you had manually feathered a brush mask, but applied automatically to the entire AI selection.
Feather slider being adjusted, mask edge softening in real time
The Feather slider controls how gradually the mask fades out at its boundary. Drag it to the right and the mask edge becomes a softer, more gradual transition rather than a hard line. Start with a moderate value and zoom back into that same problem area from Step 1. The mush on the tree branches will noticeably reduce because the adjustment is no longer hitting those edge pixels at full intensity. The effect is similar to what you’d get if you had manually feathered a brush mask, but applied automatically to the entire AI selection.
Keep in mind that more feathering isn’t always better. On images with a clean, high-contrast sky-to-subject separation, too much feathering will start pulling your adjustment into areas you didn’t intend to affect. Dial it in to just the point where the artifacts disappear, then stop.
Step 5: Use the Edge Slider to Refine the Mask Boundary Itself
 Edge slider adjustment showing boundary refinement on tree silhouettes
The Edge slider is a different tool from Feather and works on the actual position and quality of the mask boundary, not just the opacity falloff. Think of Feather as controlling softness and Edge as controlling precision. Pulling the Edge control in one direction will tighten the mask to harder subject boundaries, while moving it the other way will push the mask edge outward slightly. On images where the halo is appearing because the mask is cutting in too tight or leaving a sliver of sky included in the foreground selection, Edge is the slider you want.
Edge slider adjustment showing boundary refinement on tree silhouettes
The Edge slider is a different tool from Feather and works on the actual position and quality of the mask boundary, not just the opacity falloff. Think of Feather as controlling softness and Edge as controlling precision. Pulling the Edge control in one direction will tighten the mask to harder subject boundaries, while moving it the other way will push the mask edge outward slightly. On images where the halo is appearing because the mask is cutting in too tight or leaving a sliver of sky included in the foreground selection, Edge is the slider you want.
Used together, these two controls let you dial out both of the main artifacts. Halos typically respond better to Edge adjustments. The mush on fine details responds better to Feather.
What I’ve Found Working With This on My Own Images
The place where these controls have made the biggest difference for me personally isn’t sky replacements or dramatic landscape edits. It’s portrait work, specifically when I’m using a Select Subject mask to boost skin tones or adjust the background separately. The halo problem on hair detail, especially curly or flyaway hair against a bright background, was always the thing that made me fall back on manual brush masking. With the Edge control doing the boundary cleanup, I’m reaching for the brush far less often.
One thing worth watching: these controls are per-mask, not global. If you’ve stacked multiple masks with intersect or subtract logic, you’ll want to check each individual mask layer. Adjusting Feather on a combined mask doesn’t necessarily fix the sub-mask that’s creating the artifact.
The single biggest takeaway from Mark’s tutorial is this - the AI masks were already doing 90 percent of the work, and this update finally handles the remaining 10 percent that used to require either accepting the flaw or burning time on manual fixes. Edge and Feather controls feel less like a new feature and more like something that should have been there from the start.
Watch the full tutorial on YouTube to see Mark walk through the before and after on his actual landscape photographs. Seeing the mask overlay toggle in real time sells just how significant the difference is.
Comments
Leave a Comment