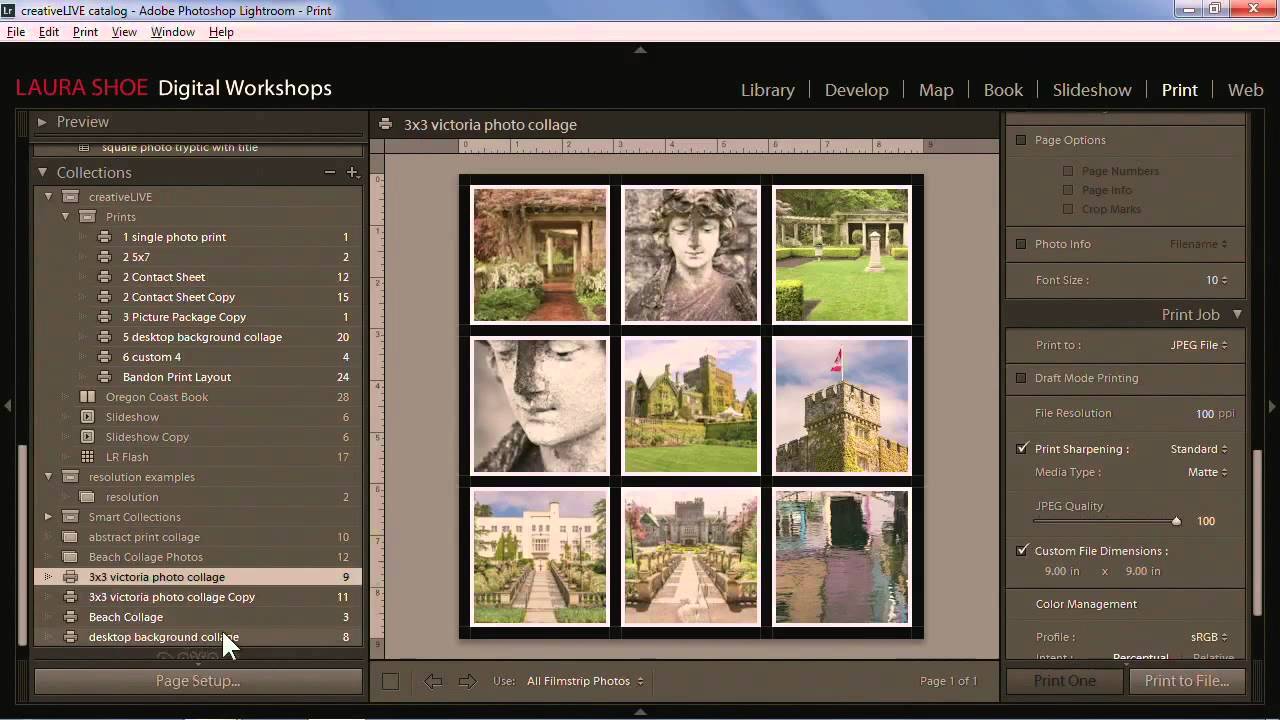
There’s a particular kind of frustration that lives inside the Lightroom Print module. You’ve done the work. The image looks exactly right in the Develop module. Then you try to export for a specific platform or send it to a printer and everything falls apart. The sizing is off. The colors shift. The output doesn’t match what you’ve been staring at for the last hour. I’ve been in that place more times than I want to admit, usually late at night with a deadline attached.
What changed things for me was actually sitting down with tutorials that treat the Print module like a real tool rather than an afterthought. Watch the full tutorial on YouTube - it’s a CreativeLive session that covers everything from layout basics to the output fundamentals that most people skim past. What caught my attention was a small tip buried in the session about ruler units - something the instructor admitted he didn’t know until a colleague emailed him the night before. That kind of honest, peer-to-peer knowledge passing is exactly what I find most useful.
The tutorial covers contact sheets, picture packages, freeform multi-photo layouts, soft proofing, and monitor calibration. But the section I want to walk you through is the practical, hands-on Print module output workflow - specifically the pixel sizing trick that makes producing output for social media or device-specific display far less painful than the usual workaround.
Step 1: Open the Print Module and Enable the Ruler
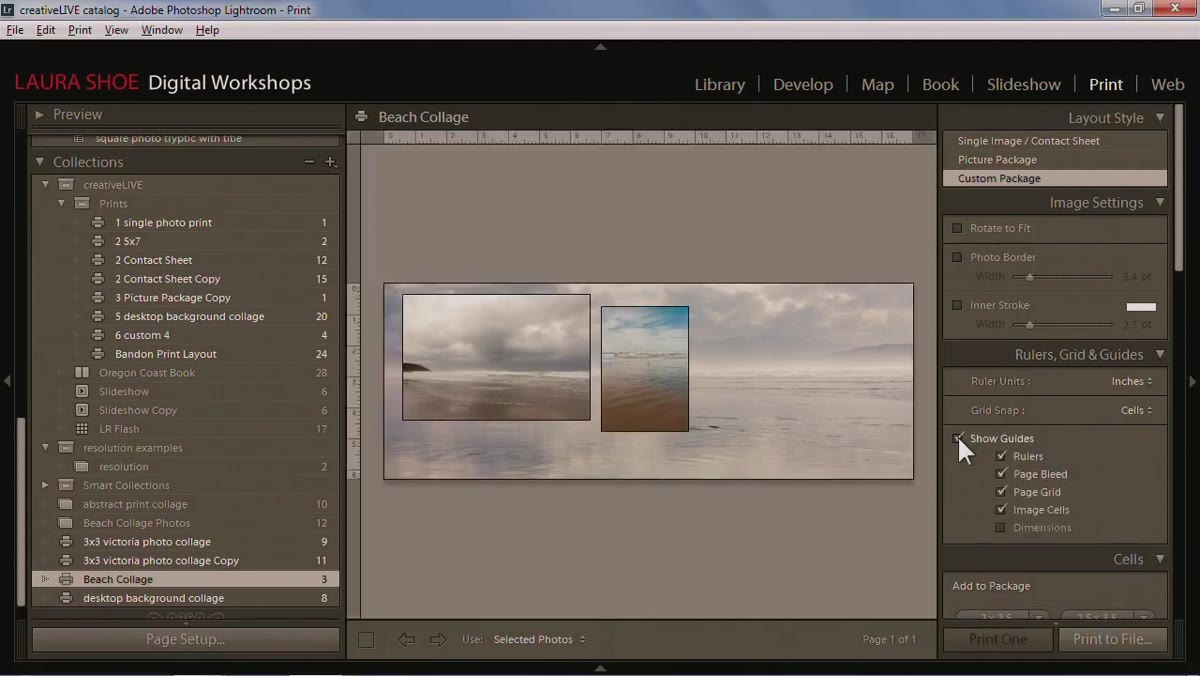 Ruler visible at top of Print module layout view
Before you touch any sizing settings, make the ruler visible. In the Print module, go to the Guides section in the right-hand panel. Toggle on the ruler if it’s not already showing. Once it’s visible, look at the very top of that Guides panel - you’ll see a dropdown labeled “Ruler Units.” By default, it’s almost certainly set to inches.
Ruler visible at top of Print module layout view
Before you touch any sizing settings, make the ruler visible. In the Print module, go to the Guides section in the right-hand panel. Toggle on the ruler if it’s not already showing. Once it’s visible, look at the very top of that Guides panel - you’ll see a dropdown labeled “Ruler Units.” By default, it’s almost certainly set to inches.
Most people never touch this dropdown. That’s a mistake. The setting here controls not just the ruler itself, but also how the file dimensions display in the Print Job panel when you’re outputting to JPEG. This one dropdown is the key to everything that follows.
Step 2: Switch Ruler Units to Get Your Preferred Measurement System
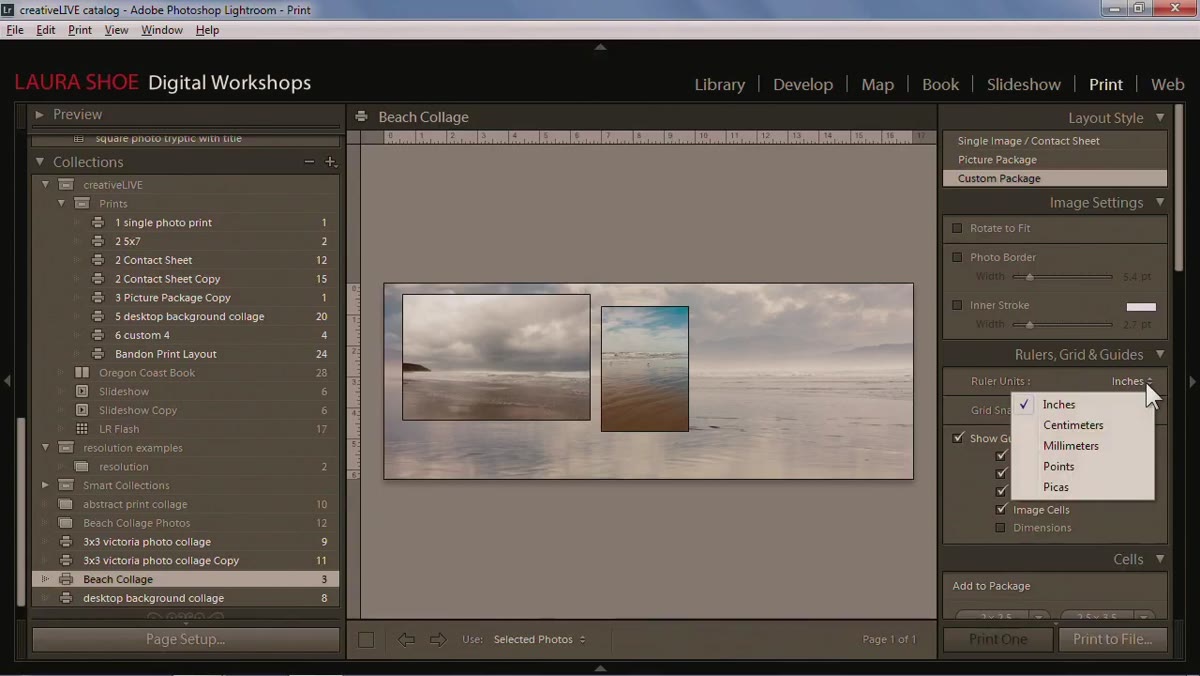 Ruler Units dropdown open showing inches, centimeters, points
Open that Ruler Units dropdown and you’ll find three options: inches, centimeters, and points. If you’re working in a metric context, switching to centimeters immediately updates all the dimension displays in the Print Job panel. The instructor flagged this because someone in the session had asked whether the American version of Lightroom could work in centimeters - and the answer is yes, buried right here.
Ruler Units dropdown open showing inches, centimeters, points
Open that Ruler Units dropdown and you’ll find three options: inches, centimeters, and points. If you’re working in a metric context, switching to centimeters immediately updates all the dimension displays in the Print Job panel. The instructor flagged this because someone in the session had asked whether the American version of Lightroom could work in centimeters - and the answer is yes, buried right here.
For social media and screen-based output, though, neither inches nor centimeters is what you actually want. You want pixels.
Step 3: Use “Points” to Work in Pixels
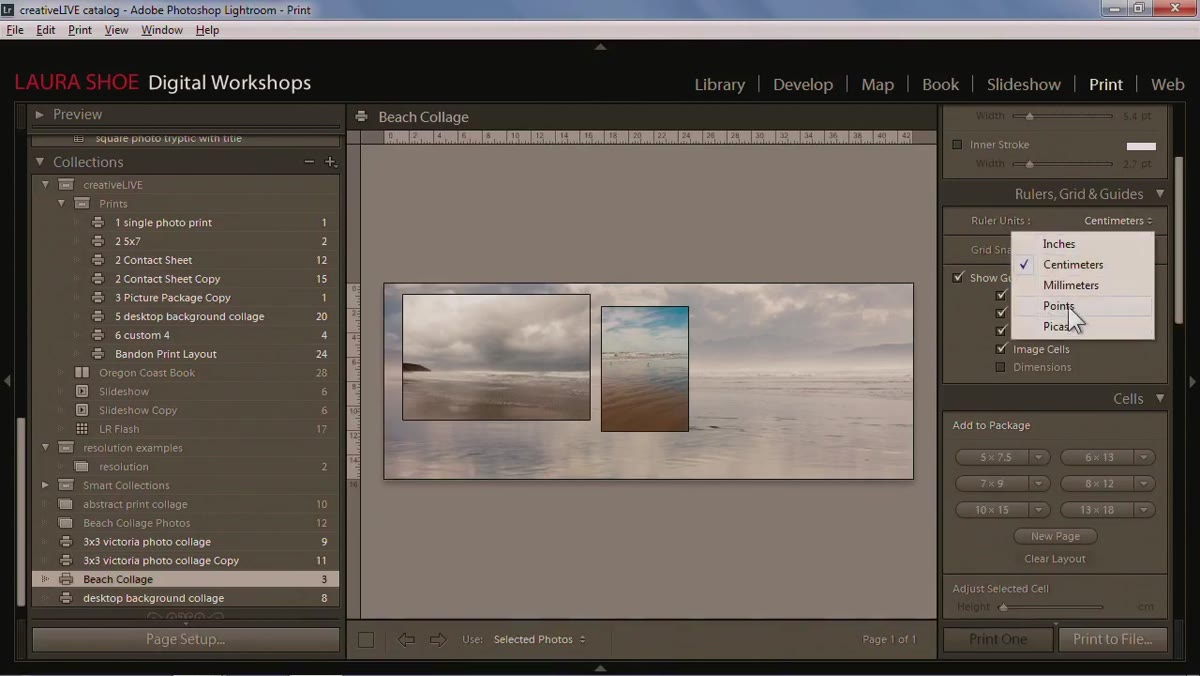 Ruler displaying pixel values after switching to Points
Here’s the trick: switch Ruler Units to “Points.” The label is counterintuitive - you’d expect points to mean typographic points - but in this context, Lightroom maps points to pixels. Once you make that switch, your ruler updates to show pixel values and, critically, the Custom File Dimensions fields in the Print Job panel now accept and display pixel counts directly.
Ruler displaying pixel values after switching to Points
Here’s the trick: switch Ruler Units to “Points.” The label is counterintuitive - you’d expect points to mean typographic points - but in this context, Lightroom maps points to pixels. Once you make that switch, your ruler updates to show pixel values and, critically, the Custom File Dimensions fields in the Print Job panel now accept and display pixel counts directly.
This is the move that saves you from the mental math gymnastics of converting inches-plus-resolution into pixels. No more multiplying 8.5 by 300 and hoping you got it right.
Step 4: Set Your Output Dimensions in the Print Job Panel
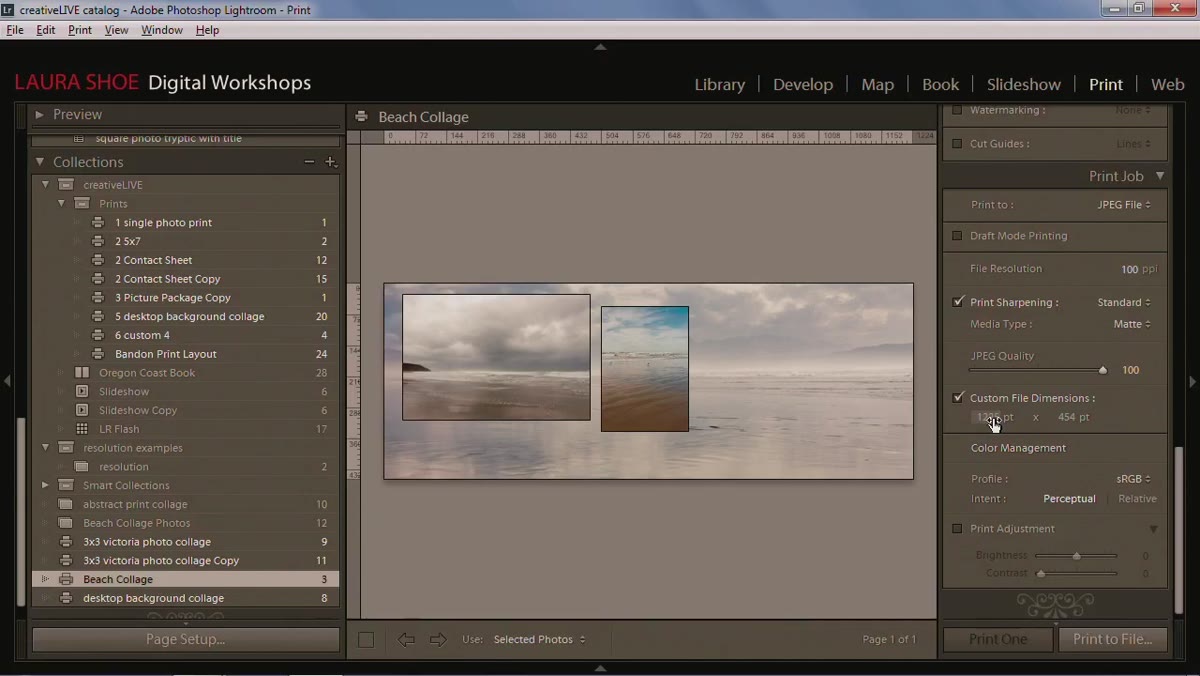 Print Job panel showing custom pixel dimensions entered for Facebook
Drop down to the Print Job panel and confirm your output is set to JPEG. Under Custom File Dimensions, enter your target pixel values directly. For a Facebook timeline cover image, for example, that’s 851 pixels wide by 315 pixels tall. For an older iPad display, it would be 1024 by 768. Whatever platform you’re targeting, you enter the exact spec without converting anything.
Print Job panel showing custom pixel dimensions entered for Facebook
Drop down to the Print Job panel and confirm your output is set to JPEG. Under Custom File Dimensions, enter your target pixel values directly. For a Facebook timeline cover image, for example, that’s 851 pixels wide by 315 pixels tall. For an older iPad display, it would be 1024 by 768. Whatever platform you’re targeting, you enter the exact spec without converting anything.
The instructor notes that after entering new dimensions, your layout may shift slightly and require some repositioning. That’s normal - just go back into your layout and nudge things back into place. The payoff is worth it because you know you’re working at the exact pixel count the platform expects.
Step 5: Adjust and Finalize Your Layout at the Correct Size
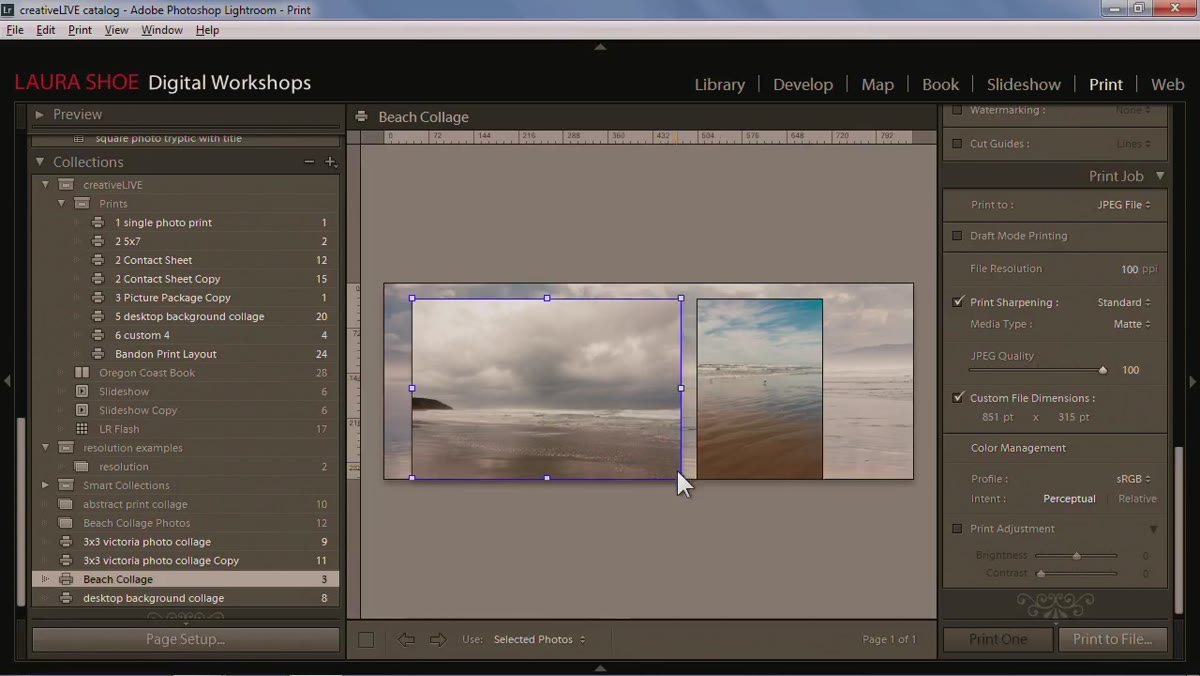 Layout view after pixel dimensions entered, image repositioned
Once your dimensions are locked in, treat the layout canvas exactly as you would for a print layout. Reposition your image or images, check margins, and confirm nothing is clipping at the edges. Because you’re now working in the actual pixel space of your intended output, what you see in the canvas is a much more accurate representation of the final file.
Layout view after pixel dimensions entered, image repositioned
Once your dimensions are locked in, treat the layout canvas exactly as you would for a print layout. Reposition your image or images, check margins, and confirm nothing is clipping at the edges. Because you’re now working in the actual pixel space of your intended output, what you see in the canvas is a much more accurate representation of the final file.
If you’re doing a collage or multi-photo layout for something like a timeline cover, this is also the point where you’d refine spacing and confirm that your most important visual elements sit within the “safe zone” away from the edges - since some platforms crop the display depending on the device.
Step 6: Export to JPEG Directly from the Print Module
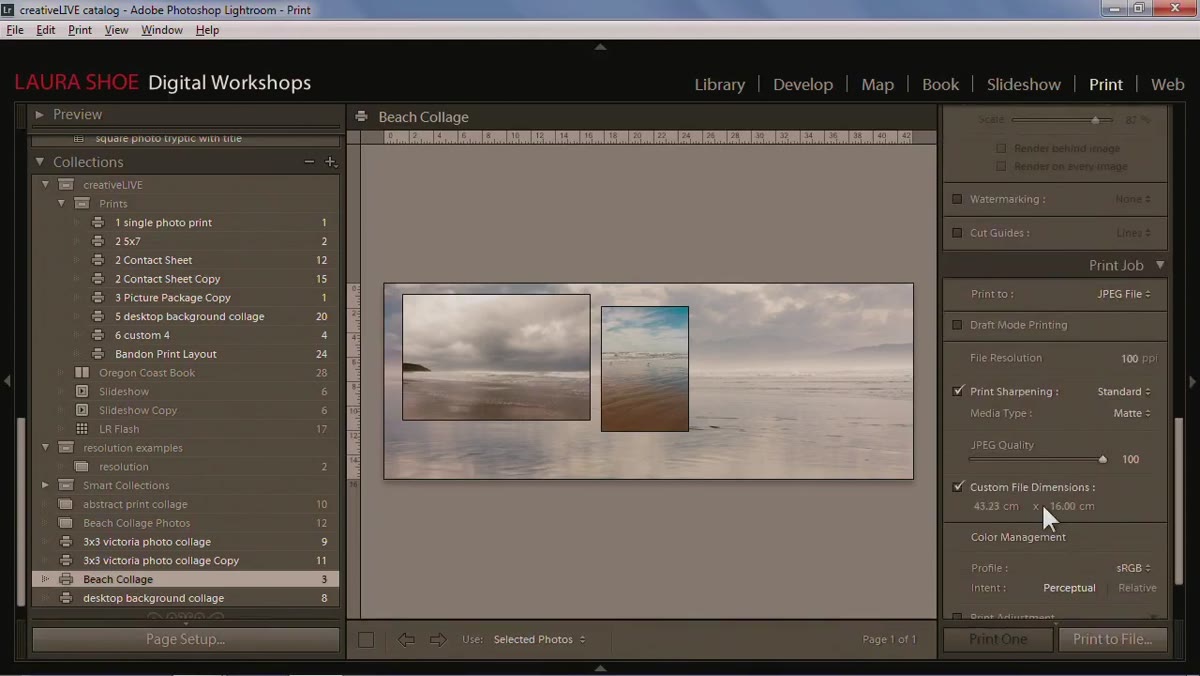 Print Job panel set to JPEG with file dimensions confirmed
With everything dialed in, use the “Print to File” button at the bottom of the module rather than sending to a physical printer. Lightroom will export a JPEG at exactly the pixel dimensions you specified. No additional resizing in Photoshop required, no guessing whether your export dialog settings match what you intended in the Print module.
Print Job panel set to JPEG with file dimensions confirmed
With everything dialed in, use the “Print to File” button at the bottom of the module rather than sending to a physical printer. Lightroom will export a JPEG at exactly the pixel dimensions you specified. No additional resizing in Photoshop required, no guessing whether your export dialog settings match what you intended in the Print module.
This is one of those workflow shortcuts that, once you start using it, you wonder why you weren’t doing it from the beginning. The Print module becomes a legitimate canvas for screen output, not just something you open when you need to send images to a lab.
What I’d Add From My Own Workflow
The points-equals-pixels behavior is genuinely useful, but it exposed a gap in how I used to think about the Print module - I treated it as printer-only territory and went to the Export dialog for everything screen-related. The real lesson here is that the Print module’s layout tools are more flexible than the Export dialog when you’re building something that isn’t a single standalone image. If you’re creating a collage, a press sheet, or any kind of composite output, the Print module gives you positional control that Export simply doesn’t have.
One thing to add: after you’ve built a layout you like, save it as a template using the plus button in the Template Browser on the left. Facebook specs change, platform requirements shift, but having a named template for your most common output sizes means you’re starting from a working foundation next time rather than rebuilding from scratch.
The most important thing I took from this tutorial is that the Print module’s Ruler Units setting is doing far more work than its label suggests. It’s not just changing what numbers appear on a ruler - it’s changing the entire unit system for your output dimensions. Switching to “points” for pixel-based work is a small setting change with a big impact on how accurately you can target platform-specific output.
Watch the full tutorial on YouTube for the complete session, including the layout workflows, soft proofing coverage, and monitor calibration fundamentals that provide context for everything covered here.
Comments (2)
Been doing this wrong for years apparently. Thanks for the wake-up call.
Never thought of approaching it this way. Really creative.
Leave a Comment