There’s a specific kind of frustration that comes from shooting a killer landscape, knowing you captured something real out there, and then opening your files to find that no single frame holds the whole scene. I’ve been there more times than I want to count. Wide-angle lenses help, but they also introduce distortion that can make a beautiful horizon look like it’s bending toward you. The smarter solution, the one working photographers have been using for years, is shooting a sequence of overlapping frames and stitching them into a panorama. The catch used to be that doing it well meant a roundtrip to Photoshop, which broke the flow of a Lightroom-centered workflow.
That’s exactly why I was genuinely excited when Adobe quietly rolled panoramic merging directly into Lightroom. In this Aaron Nace (PHLEARN) tutorial, Watch the full tutorial on YouTube, Aaron walks through the complete process of building a vertical Milky Way panorama from Nikon RAW files without ever leaving Lightroom. It’s a tighter workflow than most people realize, and once you do it once, you’ll plan your shoots differently to take advantage of it.
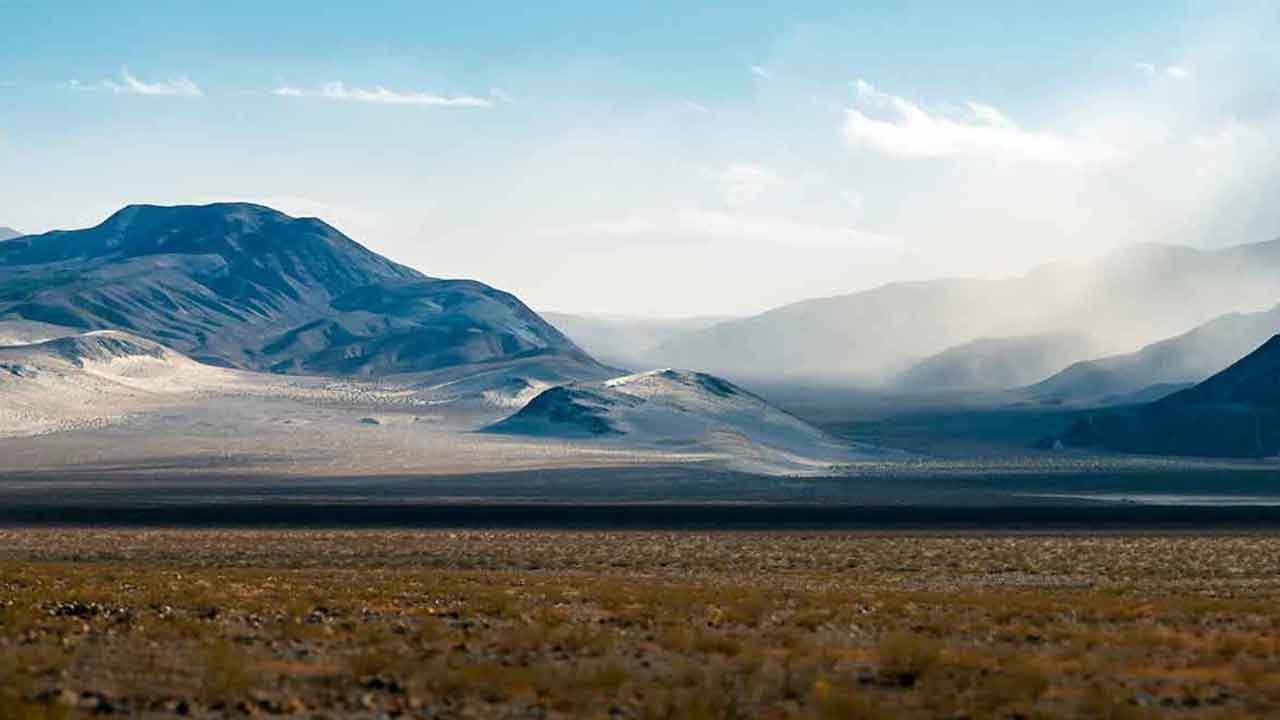
The other thing worth noting before we jump in: panoramas don’t have to be horizontal. Most people default to left-to-right captures, but if you’re shooting something like a star field where the interesting action runs from the ground up through the sky, a vertical panorama is the move. That reframe alone changed how I approach astrophotography setups.
Step 1: Import Your RAW Files by Dragging the Folder
 Dragging Milky Way NEF folder directly into Lightroom
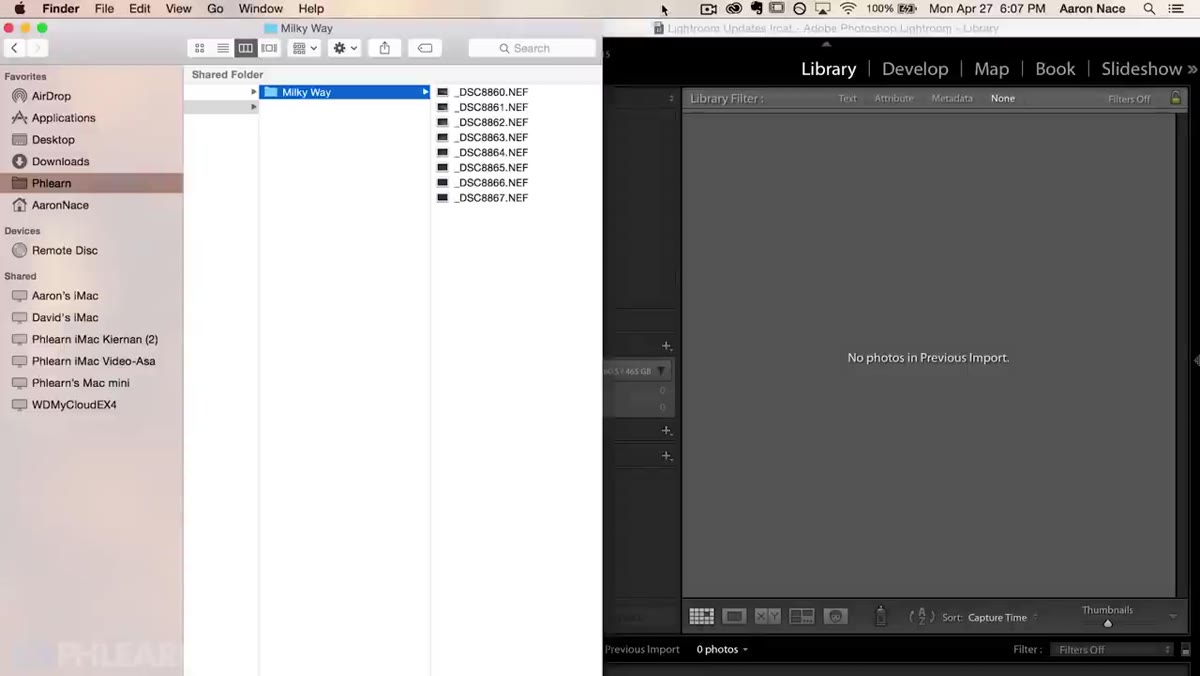
Skip the formal import dialog if you want to save time. Aaron’s preferred method is dragging the source folder directly into Lightroom from Finder (or File Explorer on Windows). In this case, the folder contains NEF files, which are Nikon’s proprietary RAW format. Once you drop the folder into Lightroom’s panel, the import screen opens automatically. Hit import and let Lightroom add the files to your catalog. This approach keeps you from hunting through nested directories inside Lightroom’s import browser, which is genuinely one of those small quality-of-life improvements that adds up across a full editing session.
Dragging Milky Way NEF folder directly into Lightroom
Skip the formal import dialog if you want to save time. Aaron’s preferred method is dragging the source folder directly into Lightroom from Finder (or File Explorer on Windows). In this case, the folder contains NEF files, which are Nikon’s proprietary RAW format. Once you drop the folder into Lightroom’s panel, the import screen opens automatically. Hit import and let Lightroom add the files to your catalog. This approach keeps you from hunting through nested directories inside Lightroom’s import browser, which is genuinely one of those small quality-of-life improvements that adds up across a full editing session.
Step 2: Review the Sequence and Understand Your Panorama’s Orientation
 Scrolling through vertical sky sequence left to right
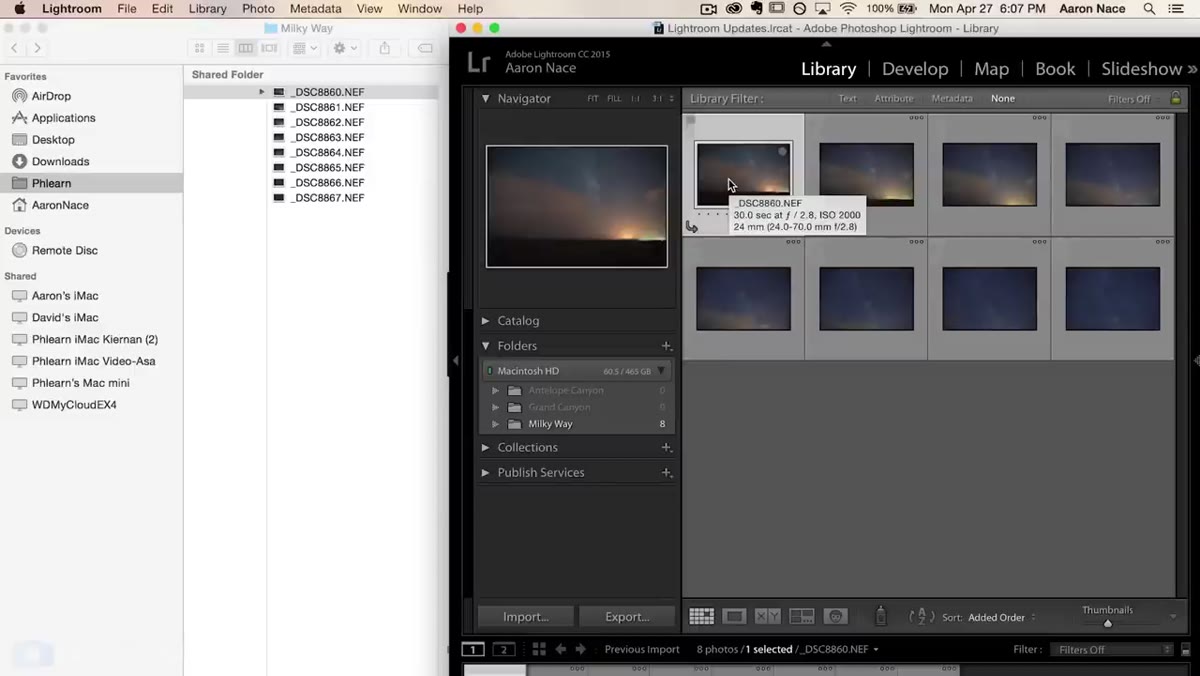
Before you select anything, scroll through the images to understand what you actually captured. Aaron’s sequence moves from the bottom of the sky to the top, covering the full arc of the Milky Way across multiple frames. This is important because it tells you the panorama is vertical, not horizontal. Knowing your orientation before you merge helps you anticipate what the final output will look like and whether you need to adjust your crop afterward. If you shot horizontally and have extra frames at either end that don’t line up cleanly, don’t stress. Lightroom is reasonably good at identifying which frames contribute useful overlap and working with what it needs.
Scrolling through vertical sky sequence left to right
Before you select anything, scroll through the images to understand what you actually captured. Aaron’s sequence moves from the bottom of the sky to the top, covering the full arc of the Milky Way across multiple frames. This is important because it tells you the panorama is vertical, not horizontal. Knowing your orientation before you merge helps you anticipate what the final output will look like and whether you need to adjust your crop afterward. If you shot horizontally and have extra frames at either end that don’t line up cleanly, don’t stress. Lightroom is reasonably good at identifying which frames contribute useful overlap and working with what it needs.
Step 3: Select All Frames and Open the Panorama Merge Dialog
 Shift-clicking images and right-clicking to access Photo Merge
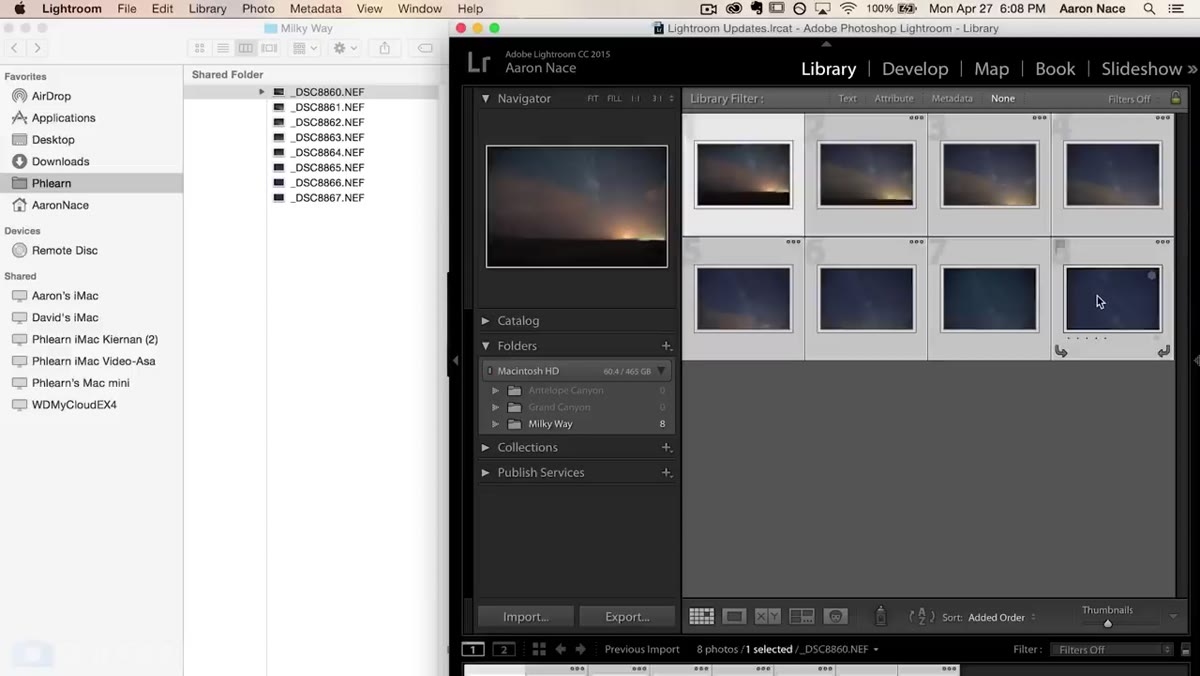
Shift-click to select all the frames you want to include in your stitch. Then right-click anywhere on the selection, navigate to Photo Merge in the context menu, and choose Panorama. The keyboard shortcut is Command+M on Mac or Control+M on Windows. Lightroom will begin rendering a preview of the merged result in the background. This takes a moment depending on file size and how many frames you’re working with, but it runs faster than you might expect for RAW files. Wait for the preview to fully render before making any projection decisions, because the visual difference between projection modes can be subtle until you see the actual output.
Shift-clicking images and right-clicking to access Photo Merge
Shift-click to select all the frames you want to include in your stitch. Then right-click anywhere on the selection, navigate to Photo Merge in the context menu, and choose Panorama. The keyboard shortcut is Command+M on Mac or Control+M on Windows. Lightroom will begin rendering a preview of the merged result in the background. This takes a moment depending on file size and how many frames you’re working with, but it runs faster than you might expect for RAW files. Wait for the preview to fully render before making any projection decisions, because the visual difference between projection modes can be subtle until you see the actual output.
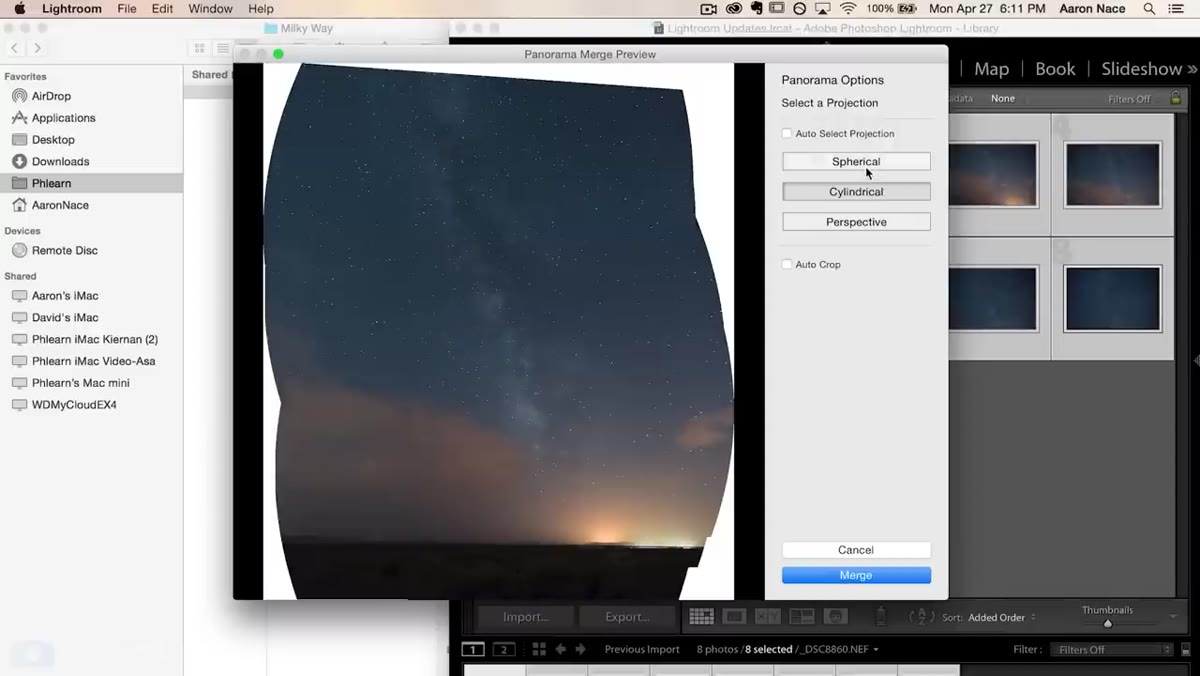
Step 4: Choose Your Projection Method
 Panorama Merge Preview window showing projection options
This is where the technical decision-making lives. Lightroom gives you three projection options: Spherical, Cylindrical, and Perspective. The dialog also offers an Auto Select option that lets Lightroom pick based on the image data. For most landscape and astrophotography panoramas, Cylindrical projection tends to produce the most natural-looking result because it handles wide horizontal spans without the edge warping you can get from Spherical. Spherical works better for very wide captures that extend in multiple directions. Perspective projection is best for architectural shots with straight lines that need to stay straight. Toggle through the options in the preview window and trust your eyes. The right answer is whichever one makes your specific image look least distorted along the horizon line.
Panorama Merge Preview window showing projection options
This is where the technical decision-making lives. Lightroom gives you three projection options: Spherical, Cylindrical, and Perspective. The dialog also offers an Auto Select option that lets Lightroom pick based on the image data. For most landscape and astrophotography panoramas, Cylindrical projection tends to produce the most natural-looking result because it handles wide horizontal spans without the edge warping you can get from Spherical. Spherical works better for very wide captures that extend in multiple directions. Perspective projection is best for architectural shots with straight lines that need to stay straight. Toggle through the options in the preview window and trust your eyes. The right answer is whichever one makes your specific image look least distorted along the horizon line.
Step 5: Enable Auto Crop and Merge
 Auto Crop checkbox and Merge button in the Panorama dialog
Once you’ve settled on a projection, check the Auto Crop box before hitting Merge. This trims the irregular, jagged edges that appear whenever Lightroom stitches frames together. Without it, you get a transparent border around the merged image that you’d have to crop manually anyway. After hitting Merge, Lightroom processes the files and creates a new DNG in your catalog alongside the original source images. The merged DNG is a full-resolution RAW file, which means all your normal Lightroom editing tools work exactly as they would on any single RAW file. You’re not working on a flattened export. That matters more than it might sound because it means you can still recover highlights, push shadows, and apply lens corrections after the merge.
Auto Crop checkbox and Merge button in the Panorama dialog
Once you’ve settled on a projection, check the Auto Crop box before hitting Merge. This trims the irregular, jagged edges that appear whenever Lightroom stitches frames together. Without it, you get a transparent border around the merged image that you’d have to crop manually anyway. After hitting Merge, Lightroom processes the files and creates a new DNG in your catalog alongside the original source images. The merged DNG is a full-resolution RAW file, which means all your normal Lightroom editing tools work exactly as they would on any single RAW file. You’re not working on a flattened export. That matters more than it might sound because it means you can still recover highlights, push shadows, and apply lens corrections after the merge.
What I Do Differently: Apply Edits Before the Merge
One thing the tutorial doesn’t cover, but that I’ve built into my own workflow, is applying base adjustments to one source frame and syncing them to all the other frames before merging. If your frames have inconsistent exposures or white balance because the light shifted during capture, those inconsistencies will show up as visible seams in the final panorama. I’ll sync exposure, white balance, and noise reduction across the whole sequence first, then run the merge. It adds maybe two minutes to the front end and saves a lot of frustration on the back end, especially with astrophotography where high ISO noise can look different from frame to frame.
The most important thing to take away from Aaron’s tutorial is that Lightroom’s Panorama Merge is not a toy feature. It produces a full DNG output that keeps your non-destructive workflow completely intact, and the projection options give you enough control to handle most shooting scenarios without reaching for Photoshop. If you’ve been avoiding panoramic shooting because the stitching process felt like too much overhead, this changes the math.
Watch the full tutorial on YouTube to see Aaron walk through the complete Milky Way stitch from start to finish.
Comments
Leave a Comment