Coming back from a shoot with 800 raw files is one of those problems that sounds like a good problem until you’re actually sitting in front of it at 11pm. I used to just start from the top and delete anything obviously bad, which meant I spent most of my energy on the garbage instead of the gold. It wasn’t until I started treating culling as its own deliberate phase of the workflow, completely separate from editing, that my output quality actually improved. The bottleneck wasn’t my editing skills. It was my selection process.
Watch the full tutorial on YouTube
In this Aaron Nace (PHLEARN) tutorial from his 30 Days of Lightroom series, he walks through a surprisingly systematic approach to narrowing down a full shoot into your true favorites. The core idea is that you don’t make one big decision. You make several small ones, across multiple rounds, using three different marking tools built right into Lightroom Classic. Here’s how it actually works.
Step 1: Clean Up Your Workspace First
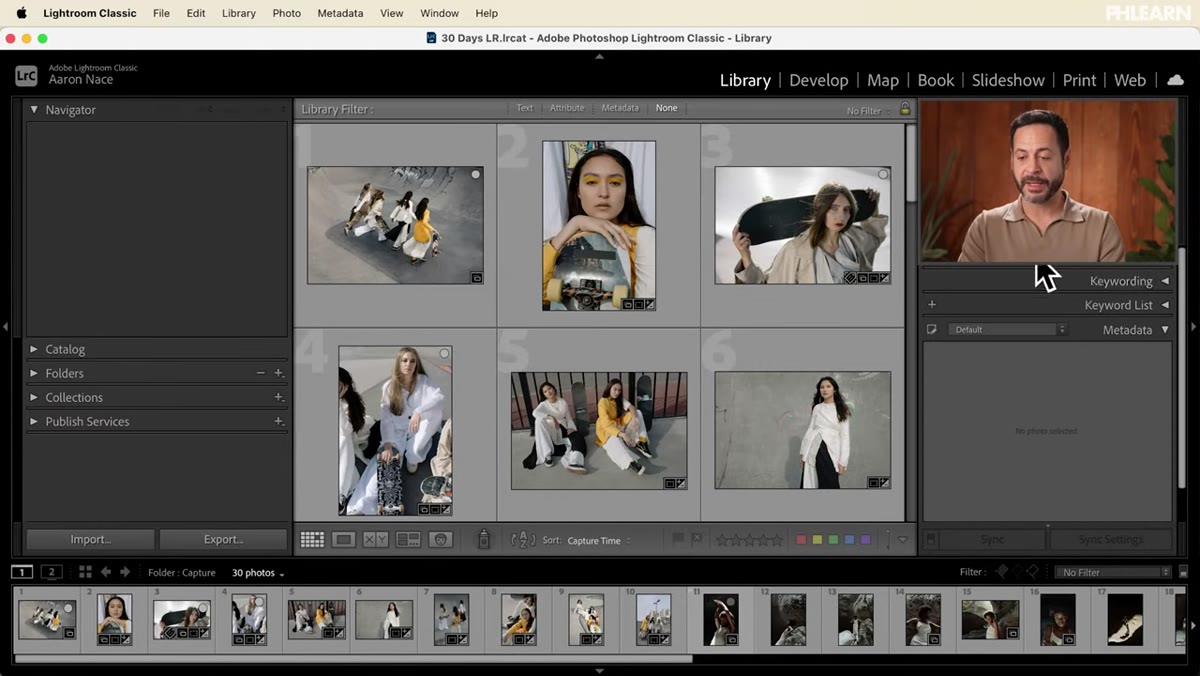 Lightroom Classic with sidebars collapsed for a clean workspace
Before you touch a single image, collapse the right-side panel and the film strip at the bottom. Click the small arrows on each edge of the interface to hide them. This isn’t just aesthetic. When you’re moving through hundreds of images making rapid gut-call decisions, visual clutter adds friction. The cleaner your workspace, the faster you move, and speed matters during culling. You want to be reacting, not navigating.
Lightroom Classic with sidebars collapsed for a clean workspace
Before you touch a single image, collapse the right-side panel and the film strip at the bottom. Click the small arrows on each edge of the interface to hide them. This isn’t just aesthetic. When you’re moving through hundreds of images making rapid gut-call decisions, visual clutter adds friction. The cleaner your workspace, the faster you move, and speed matters during culling. You want to be reacting, not navigating.
Step 2: Understand the Three Marking Tools
 Bottom panel showing flags, star ratings, and color labels
Lightroom gives you three ways to mark images: flags (also called picks), star ratings from one to five, and color labels. You can see all three options along the bottom of the panel when you’re in the Library module. Each tool serves a different round of selection. Flags are your first pass. Stars refine that. Colors can be used however you like, whether that’s marking images for a client, flagging specific edits needed, or sorting by subject. Think of them as three layers of a filter, not three separate systems.
Bottom panel showing flags, star ratings, and color labels
Lightroom gives you three ways to mark images: flags (also called picks), star ratings from one to five, and color labels. You can see all three options along the bottom of the panel when you’re in the Library module. Each tool serves a different round of selection. Flags are your first pass. Stars refine that. Colors can be used however you like, whether that’s marking images for a client, flagging specific edits needed, or sorting by subject. Think of them as three layers of a filter, not three separate systems.
Step 3: Do Your First Pass With Flags
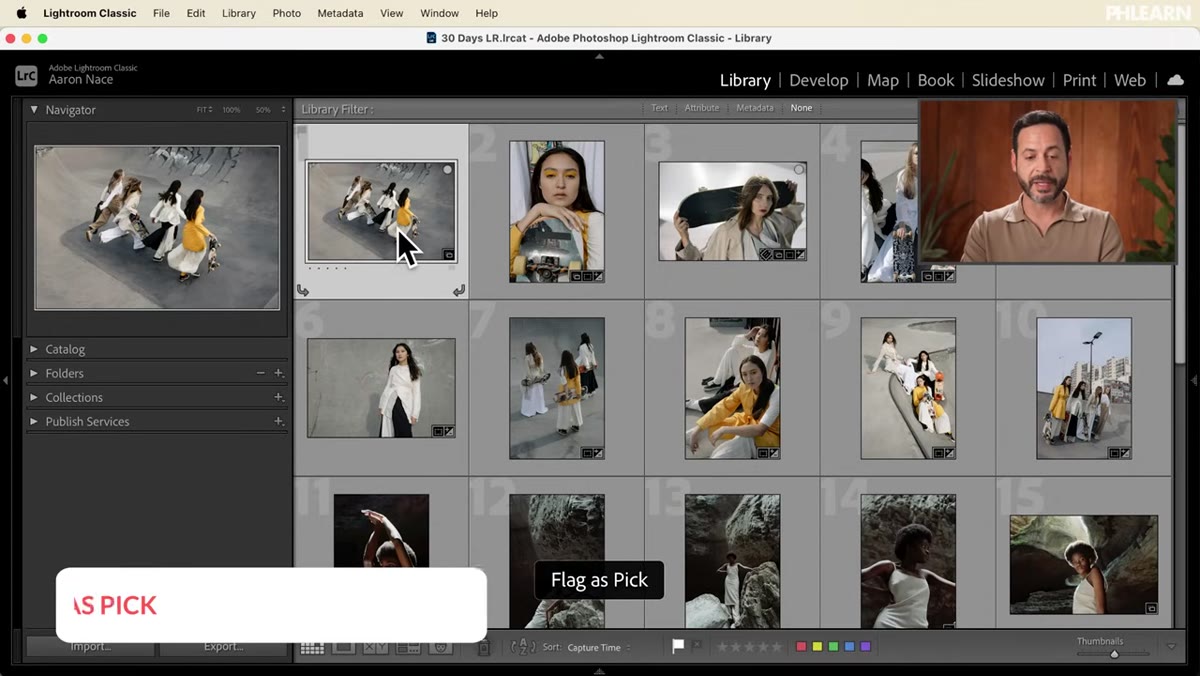 Single image in loop view with a white flag pick indicator visible
Double-click any image to enter the full-screen Loop view, then use the left and right arrow keys to move through your shoot. When an image earns it, press P to flag it as a pick. A small white flag appears in the corner of the thumbnail. The key advice here, and it’s worth taking seriously, is to move quickly and trust your gut. Don’t hover on a frame debating whether the focus is sharp enough or whether you got a better expression later. That’s what the next rounds are for. Your first instinct about an image is usually honest. Honor it and keep moving.
Single image in loop view with a white flag pick indicator visible
Double-click any image to enter the full-screen Loop view, then use the left and right arrow keys to move through your shoot. When an image earns it, press P to flag it as a pick. A small white flag appears in the corner of the thumbnail. The key advice here, and it’s worth taking seriously, is to move quickly and trust your gut. Don’t hover on a frame debating whether the focus is sharp enough or whether you got a better expression later. That’s what the next rounds are for. Your first instinct about an image is usually honest. Honor it and keep moving.
Aaron’s framing here resonates with me: you’re not making final decisions, you’re narrowing a field. The psychological pressure drops significantly once you internalize that.
Step 4: Flag Images From the Grid View Too
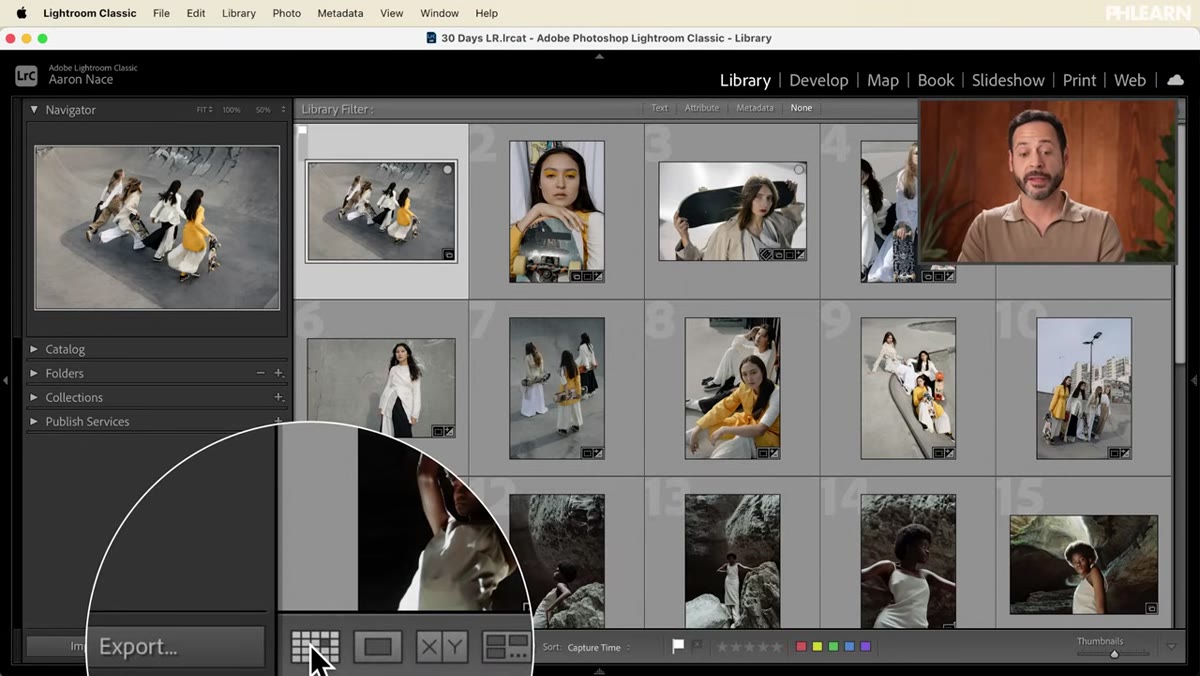 Grid view showing multiple thumbnails with white flag picks visible
You don’t have to stay in Loop view for the whole pass. The Grid view, the multi-thumbnail overview you get when you hit G, also lets you flag images. You can click a thumbnail to select it and then press P, or click the flag icon directly on the thumbnail. Some photographers prefer doing a fast scan of the grid to eliminate obvious duds before going image by image. Both approaches work. The grid gives you context across a sequence; the Loop view keeps you focused on one image at a time. Use whichever matches how your brain processes images.
Grid view showing multiple thumbnails with white flag picks visible
You don’t have to stay in Loop view for the whole pass. The Grid view, the multi-thumbnail overview you get when you hit G, also lets you flag images. You can click a thumbnail to select it and then press P, or click the flag icon directly on the thumbnail. Some photographers prefer doing a fast scan of the grid to eliminate obvious duds before going image by image. Both approaches work. The grid gives you context across a sequence; the Loop view keeps you focused on one image at a time. Use whichever matches how your brain processes images.
Step 5: Filter to See Only Your Picks
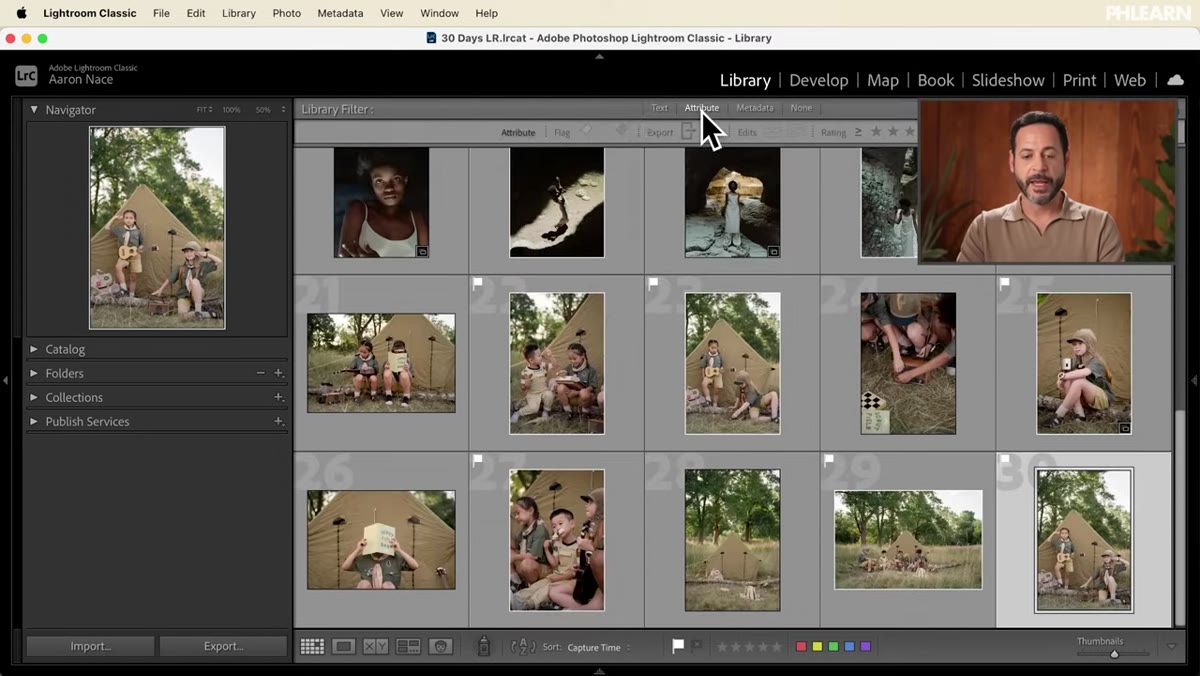 Library filter bar open with the flag/attribute filter selected
Once your first pass is done, go to the filter bar at the top of the grid. Click “Attribute,” then click the white flag icon. Lightroom will immediately hide every unflagged image and show you only your picks. What felt like a massive catalog is now a manageable set. This filter doesn’t delete anything, it just adjusts your view. Everything else is still there if you change your mind, which you will. I always do.
Library filter bar open with the flag/attribute filter selected
Once your first pass is done, go to the filter bar at the top of the grid. Click “Attribute,” then click the white flag icon. Lightroom will immediately hide every unflagged image and show you only your picks. What felt like a massive catalog is now a manageable set. This filter doesn’t delete anything, it just adjusts your view. Everything else is still there if you change your mind, which you will. I always do.
This step alone changes the energy of editing sessions. Instead of working from a pile of 600, you’re working from 80. That’s a different creative headspace entirely.
Step 6: Use Compare View to Make Harder Calls
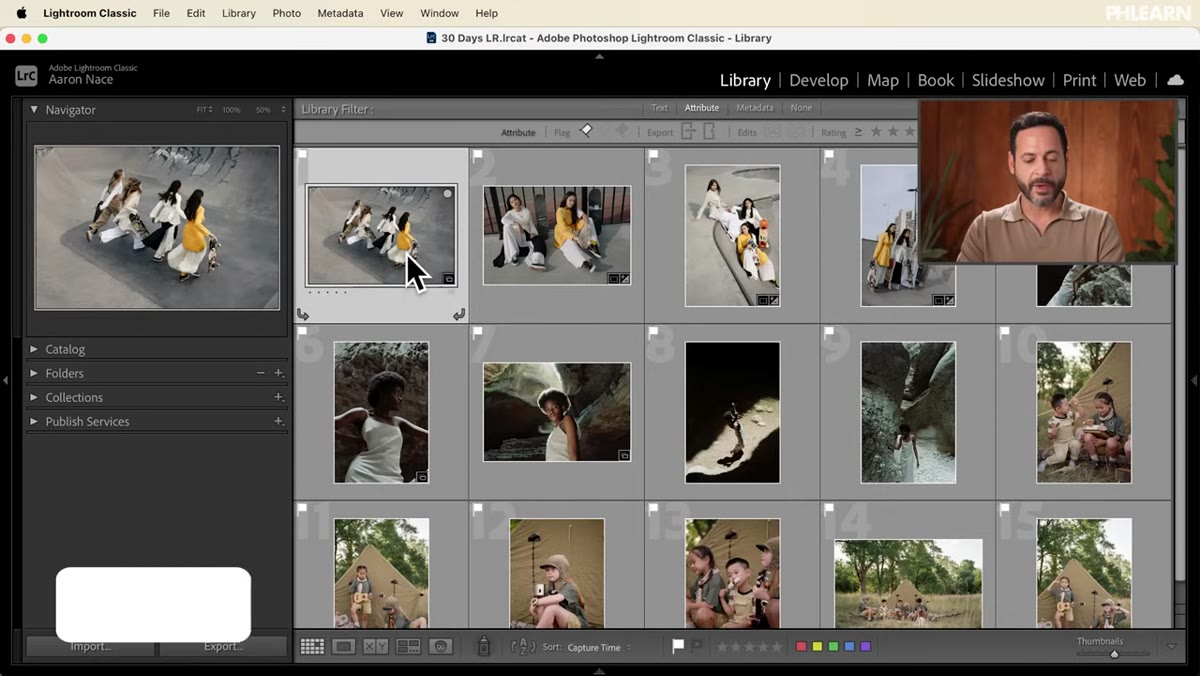 Compare view showing two images side by side in Lightroom
The Compare view is where things get interesting. Select two images and press C, and Lightroom places them side by side. This is specifically useful when you have near-duplicates, two frames from the same pose, the same moment from burst shooting, or two angles that accomplish the same thing. Seeing them next to each other makes the better one obvious in a way that flipping between them in Loop view never quite does. Your eye picks up subtle differences in expression, sharpness, and composition much faster in direct comparison.
Compare view showing two images side by side in Lightroom
The Compare view is where things get interesting. Select two images and press C, and Lightroom places them side by side. This is specifically useful when you have near-duplicates, two frames from the same pose, the same moment from burst shooting, or two angles that accomplish the same thing. Seeing them next to each other makes the better one obvious in a way that flipping between them in Loop view never quite does. Your eye picks up subtle differences in expression, sharpness, and composition much faster in direct comparison.
What I’d Add: Do at Least Three Rounds
One thing the tutorial sets up but doesn’t fully unpack in this segment is the multi-round approach, and I think it deserves emphasis. Your first flag pass is about volume reduction, not perfection. Once you’re looking at just your flagged images, do a second pass with star ratings. Give your absolute favorites four or five stars. Images you like but aren’t sure about get two or three. Then filter again to show only four-and-five-star images. By the time you sit down to actually edit, you’re working with the 15 or 20 images that genuinely earned it.
I’ve found that skipping rounds and trying to make final decisions too early leads to either over-editing mediocre shots or under-editing great ones. The rounds create distance between you and the work, which is exactly what good creative judgment requires. I actually named this workflow after a song, which is something I do with most of my presets and processes. It helps me remember that culling has rhythm. You find it by letting yourself move.
The single most important thing to take from this is that culling is a skill, not a chore. Treating it as its own disciplined phase, with tools, rounds, and intentional filtering, is what separates photographers who love editing from the ones who dread opening Lightroom after a shoot.
Watch the full tutorial on YouTube and see Aaron’s workflow in action. Day 3 of his 30-day series is worth watching even if you’ve been using Lightroom for years. Sometimes the fundamentals are what actually need the upgrade.
Comments (3)
Shared this with my photography group. Everyone loved it.
Tried this technique this morning. Game changer for real.
Great article! I actually covered something related on my site — the workflows angle is really complementary to this.
Leave a Comment