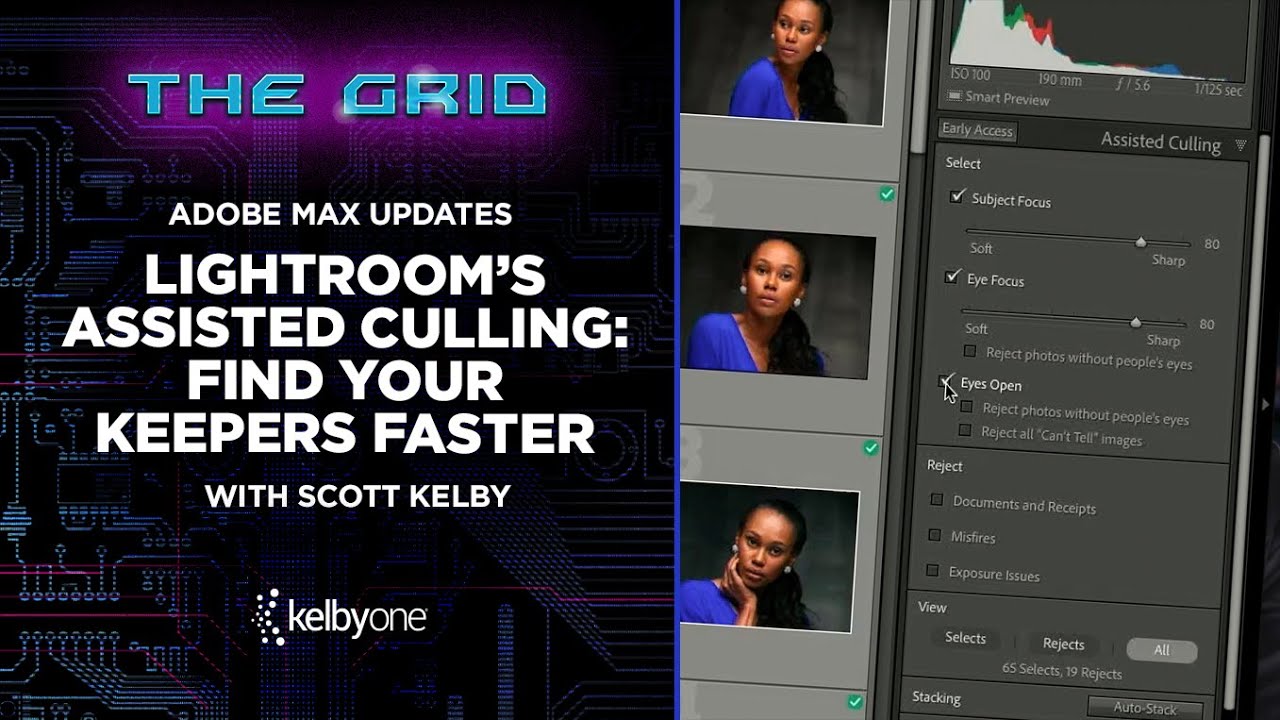
Culling is the part of my workflow I like least. I will spend an entire Sunday afternoon obsessing over a single preset’s tone curve, but asking me to sit down and reject 800 near-identical frames from a portrait session? That’s where motivation goes to die. After a while, you stop making real decisions and start clicking randomly, which defeats the whole point. So when Adobe dropped their Adobe Max announcements and Scott Kelby broke down the new Assisted Culling feature in a recent KelbyOne tutorial, I watched it twice before my coffee finished brewing. Watch the full tutorial on YouTube
What Kelby walks through is not some vague “AI magic” hand-wave. It’s a specific, controllable workflow with sliders you can actually tune to match how strict you are as an editor. And the speed of it is the thing that got me. The system makes its first pass nearly instantly. We’re talking about a tool that could realistically cut an hour of culling down to ten minutes of review. Here’s exactly how it works.
Step 1: Find the Assisted Culling Panel in the Library Module
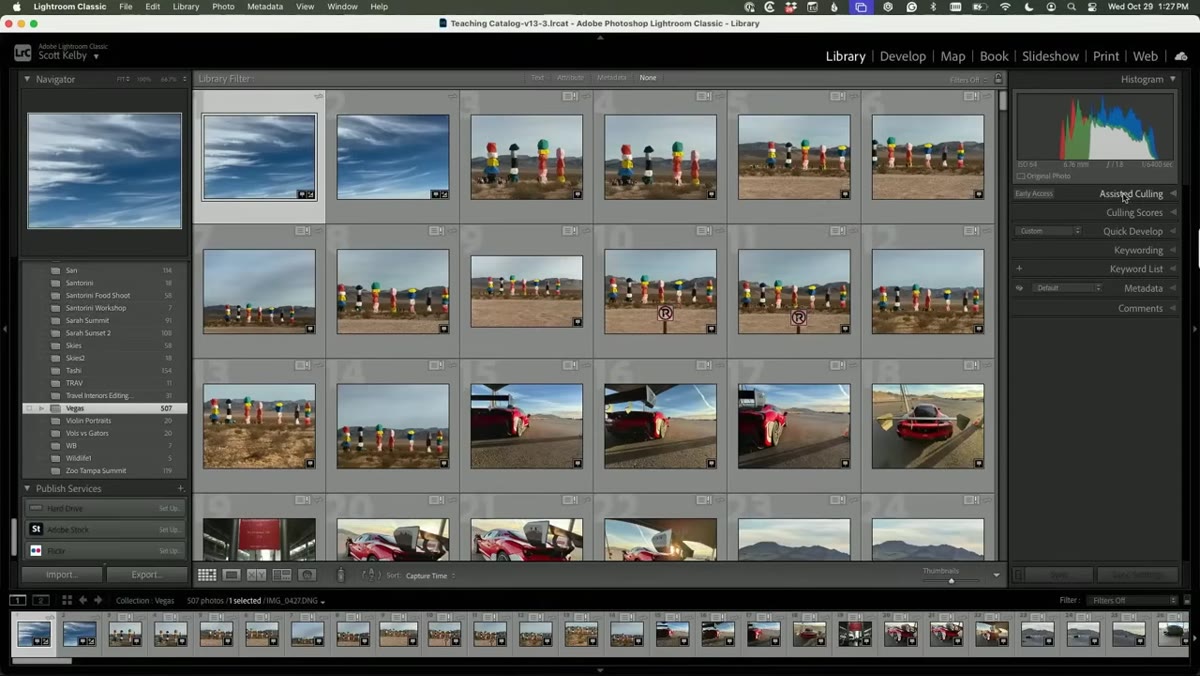 Assisted Culling panel location at the top of Library module
Assisted Culling lives in the Library module, not Develop. That’s an important distinction because a lot of the newer AI tools have been scattered across both modules and it gets confusing. Once you’re in Library, look at the very top of the right panel stack. You’ll see the Assisted Culling option labeled as “Early Access,” which just means Adobe is still actively refining it. Don’t let that label spook you. Kelby makes the point that even in its current state it’s genuinely useful, and it will only get more accurate as Adobe continues training it.
Assisted Culling panel location at the top of Library module
Assisted Culling lives in the Library module, not Develop. That’s an important distinction because a lot of the newer AI tools have been scattered across both modules and it gets confusing. Once you’re in Library, look at the very top of the right panel stack. You’ll see the Assisted Culling option labeled as “Early Access,” which just means Adobe is still actively refining it. Don’t let that label spook you. Kelby makes the point that even in its current state it’s genuinely useful, and it will only get more accurate as Adobe continues training it.
Step 2: Open the Panel and Understand Why Nothing Happens at First
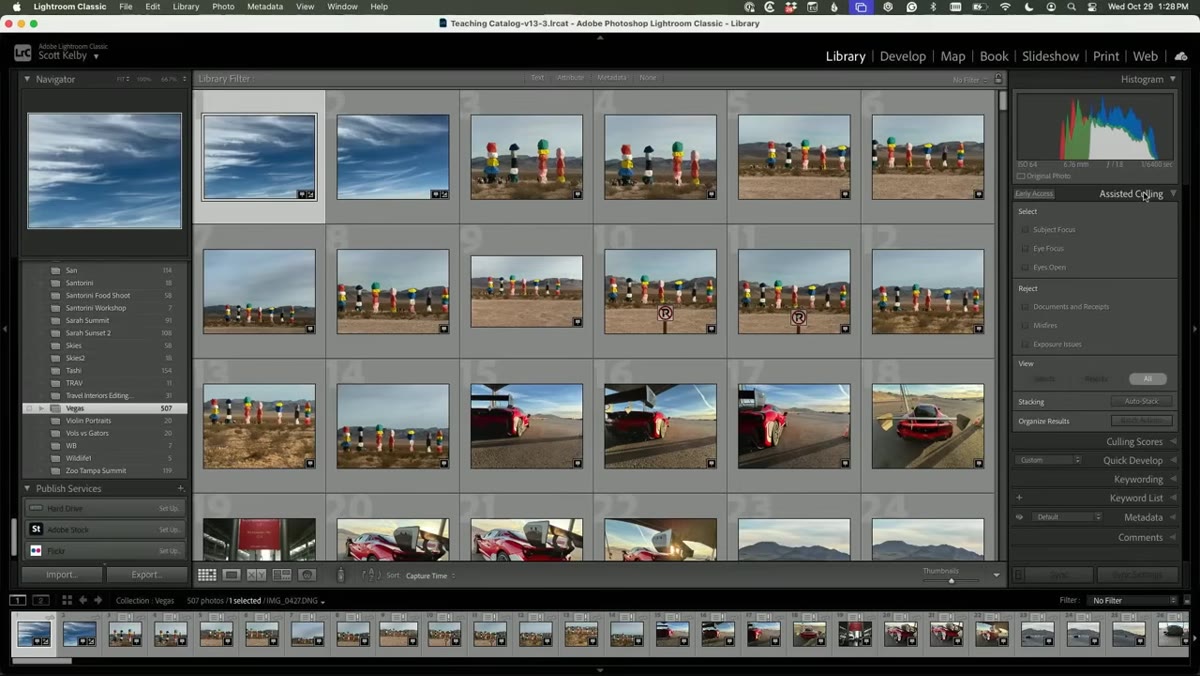 Empty Assisted Culling panel before any criteria selected
When you first click to open the panel, nothing fires. No progress bar, no thinking spinner, nothing. This is intentional and it’s actually good design. The panel is waiting for you to tell it what matters to you before it does any work. Think of it like a filter you have to configure before it runs. The criteria you set are what define what counts as a “keeper” versus a reject, so the tool makes no assumptions until you give it direction.
Empty Assisted Culling panel before any criteria selected
When you first click to open the panel, nothing fires. No progress bar, no thinking spinner, nothing. This is intentional and it’s actually good design. The panel is waiting for you to tell it what matters to you before it does any work. Think of it like a filter you have to configure before it runs. The criteria you set are what define what counts as a “keeper” versus a reject, so the tool makes no assumptions until you give it direction.
Step 3: Turn On “Subject in Focus” to Run the First Pass
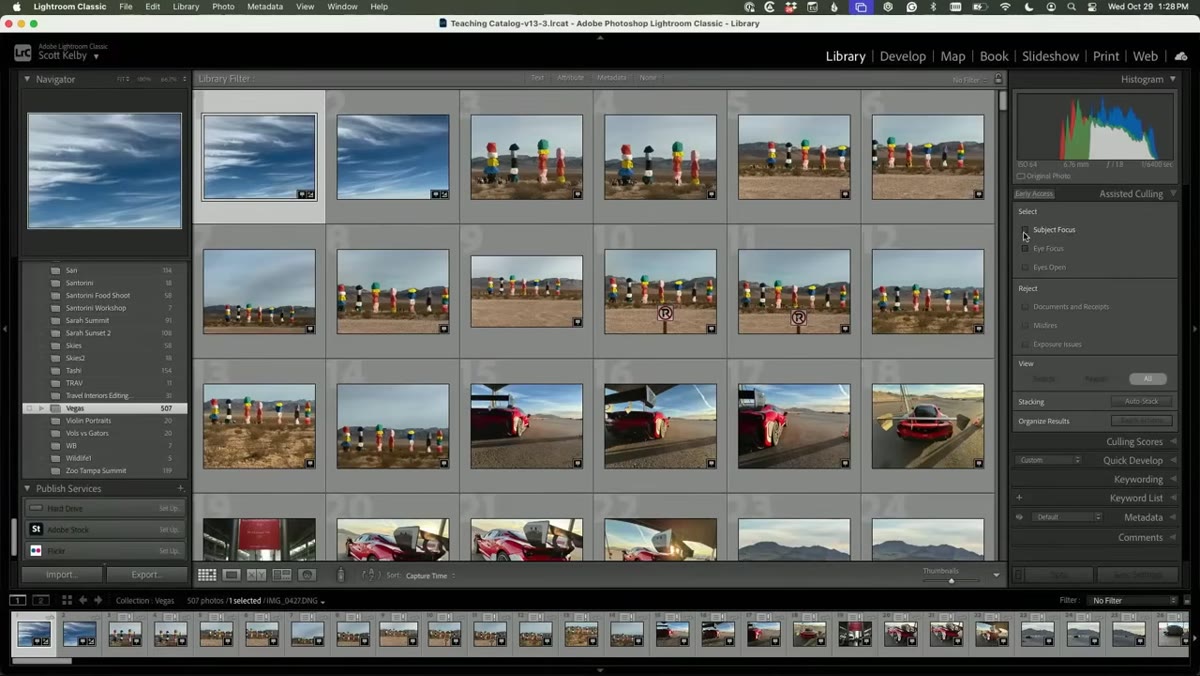 Checking Subject in Focus checkbox, rejection count appearing
The first and most powerful criterion is subject focus. When you check the “Subject in Focus” box, the AI identifies what it reads as the main subject in each frame, similar to how Lightroom’s Select Subject feature works, and then evaluates whether that subject is actually sharp. In Kelby’s demo, checking this single box immediately rejected 23 photos from a shoot with 266 total images. That’s almost 10% of the take, flagged and sorted in less than a second. The AI is not just running a global sharpness check on the image. It’s locating the subject first, then evaluating focus specifically there, which makes it much smarter than a blanket blur filter.
Checking Subject in Focus checkbox, rejection count appearing
The first and most powerful criterion is subject focus. When you check the “Subject in Focus” box, the AI identifies what it reads as the main subject in each frame, similar to how Lightroom’s Select Subject feature works, and then evaluates whether that subject is actually sharp. In Kelby’s demo, checking this single box immediately rejected 23 photos from a shoot with 266 total images. That’s almost 10% of the take, flagged and sorted in less than a second. The AI is not just running a global sharpness check on the image. It’s locating the subject first, then evaluating focus specifically there, which makes it much smarter than a blanket blur filter.
Step 4: Adjust the Strictness Slider to Match Your Standards
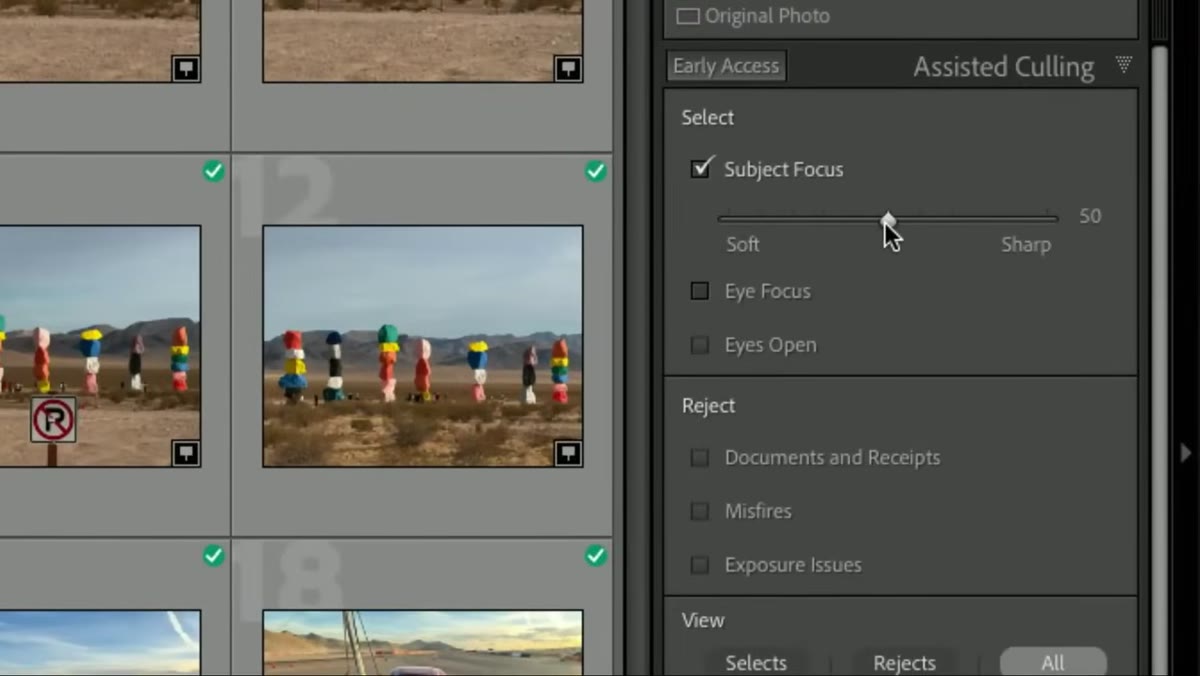 Strictness slider being dragged right, select count dropping to 35
Here’s where the tool gets genuinely interesting. After you enable a criterion, a slider appears underneath it. The default sits at 50, which Kelby describes as a middle-ground judgment: images that are reasonably sharp pass, but nothing demanding. Drag the slider right and you’re telling the AI to apply a tighter standard. In the demo, bumping the slider up caused the “selects” count to drop from 243 all the way down to 35. That means the photos that survived the first pass but weren’t tack-sharp got reclassified as rejects. Drag left, and the AI becomes more lenient, keeping images that are slightly soft but still usable. The right position on that slider depends entirely on the project. Panning shots from a live event? You might leave it around 40. Studio portraits where you need razor focus on the eyes? Push it toward 70 or 75.
Strictness slider being dragged right, select count dropping to 35
Here’s where the tool gets genuinely interesting. After you enable a criterion, a slider appears underneath it. The default sits at 50, which Kelby describes as a middle-ground judgment: images that are reasonably sharp pass, but nothing demanding. Drag the slider right and you’re telling the AI to apply a tighter standard. In the demo, bumping the slider up caused the “selects” count to drop from 243 all the way down to 35. That means the photos that survived the first pass but weren’t tack-sharp got reclassified as rejects. Drag left, and the AI becomes more lenient, keeping images that are slightly soft but still usable. The right position on that slider depends entirely on the project. Panning shots from a live event? You might leave it around 40. Studio portraits where you need razor focus on the eyes? Push it toward 70 or 75.
Step 5: Work with Selects and Rejects as Lightroom Flags
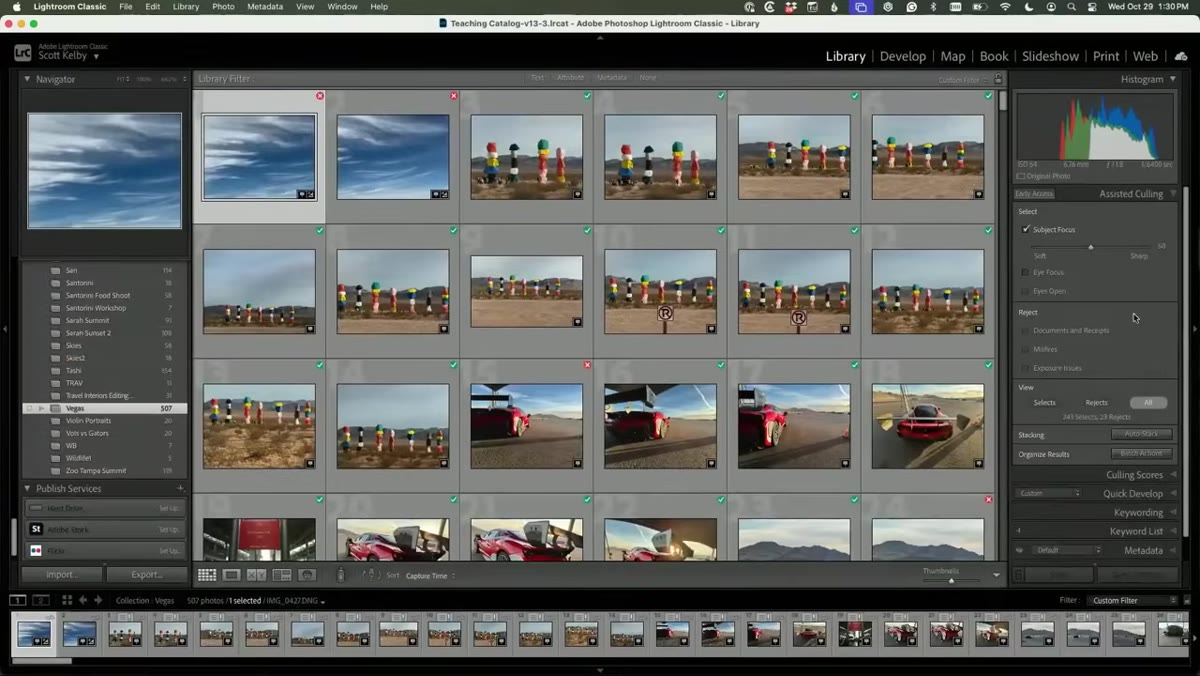 Select and reject counts displayed at bottom of culling panel
The output of Assisted Culling maps directly onto Lightroom’s existing flag system. Images the AI deems good enough based on your criteria get flagged as Selects. Images that fall below your threshold get flagged as Rejects. This is not a separate system you have to learn. It plugs straight into the workflow you already use. Once the pass is complete, you can filter to show only Selects, review them quickly, and then manually override any calls the AI made that you disagree with. You’re not locked into its decisions. You’re using them as a starting point, which is the right way to think about any AI-assisted tool.
Select and reject counts displayed at bottom of culling panel
The output of Assisted Culling maps directly onto Lightroom’s existing flag system. Images the AI deems good enough based on your criteria get flagged as Selects. Images that fall below your threshold get flagged as Rejects. This is not a separate system you have to learn. It plugs straight into the workflow you already use. Once the pass is complete, you can filter to show only Selects, review them quickly, and then manually override any calls the AI made that you disagree with. You’re not locked into its decisions. You’re using them as a starting point, which is the right way to think about any AI-assisted tool.
Step 6: Use the Feature on Both New Imports and Existing Libraries
 Host explaining the feature works on already-imported images
One detail Kelby mentions that’s easy to miss: Assisted Culling is not limited to photos you’re actively importing. If you have a folder of images that have been sitting in your catalog for months, you can run the tool on those too. Open the folder in Library, pull up the Assisted Culling panel, set your criteria, and let it run. This matters a lot if you’ve been procrastinating on culling a backlog. And honestly, who hasn’t got a folder from six months ago they haven’t fully sorted? This tool gives you a legitimate reason to finally go back and deal with it.
Host explaining the feature works on already-imported images
One detail Kelby mentions that’s easy to miss: Assisted Culling is not limited to photos you’re actively importing. If you have a folder of images that have been sitting in your catalog for months, you can run the tool on those too. Open the folder in Library, pull up the Assisted Culling panel, set your criteria, and let it run. This matters a lot if you’ve been procrastinating on culling a backlog. And honestly, who hasn’t got a folder from six months ago they haven’t fully sorted? This tool gives you a legitimate reason to finally go back and deal with it.
A Note on Trusting the AI Without Surrendering to It
I’ve used enough AI-powered photo tools to know that none of them are infallible. Lightroom’s subject detection can misread a scene, especially with environmental portraits where the background competes with the subject. My advice: after the first AI pass, don’t immediately delete your rejects. Spend five minutes skimming through the rejected pile before you commit. In my experience, the miss rate is low enough that you won’t find many gems in there, but it’s worth a quick look. The slider calibration is also something I’d encourage you to experiment with on a set you know well first. Import a shoot you’ve already culled by hand, run Assisted Culling, and compare its calls to yours. That’s the fastest way to understand where the AI’s judgment aligns with yours and where you need to override it.
The single biggest takeaway from Kelby’s walkthrough is this: the tool does not replace your editorial judgment, it clears the path so your judgment can actually focus on the images that deserve attention. Faster culling means more time in Develop, and more time in Develop means better final images. That’s the whole equation.
Watch the full tutorial on YouTube to see Scott Kelby walk through the full Adobe Max feature set, including this Assisted Culling demo in real time.
Comments
Leave a Comment