There’s a specific kind of frustration that comes from finding your own photo on the internet with someone else’s name attached to it. It happens more than photographers like to admit, and most of the time it’s not even malicious. Someone downloaded an image, the file moved through five different apps, and by the time it landed somewhere it had no trail back to you. Your name, your website, your copyright claim. Gone. The fix is simpler than you’d expect, and it lives inside Lightroom in a panel most people scroll past without a second look.
In this Aaron Nace (PHLEARN) tutorial, Watch the full tutorial on YouTube, Aaron walks through how to build a metadata preset that embeds your copyright and creator information directly into every image file. Not as a watermark. Not as a text overlay. As invisible, file-level data that travels with the image no matter where it goes. JPEG, TIFF, Photoshop files, raw files. The copyright goes with it.
I’ve been doing this for years, but watching Aaron break it down reminded me how many photographers skip this step entirely because nobody explained what metadata actually is or why it matters. So here’s the full walkthrough.
Step 1: Understand What Metadata Actually Is
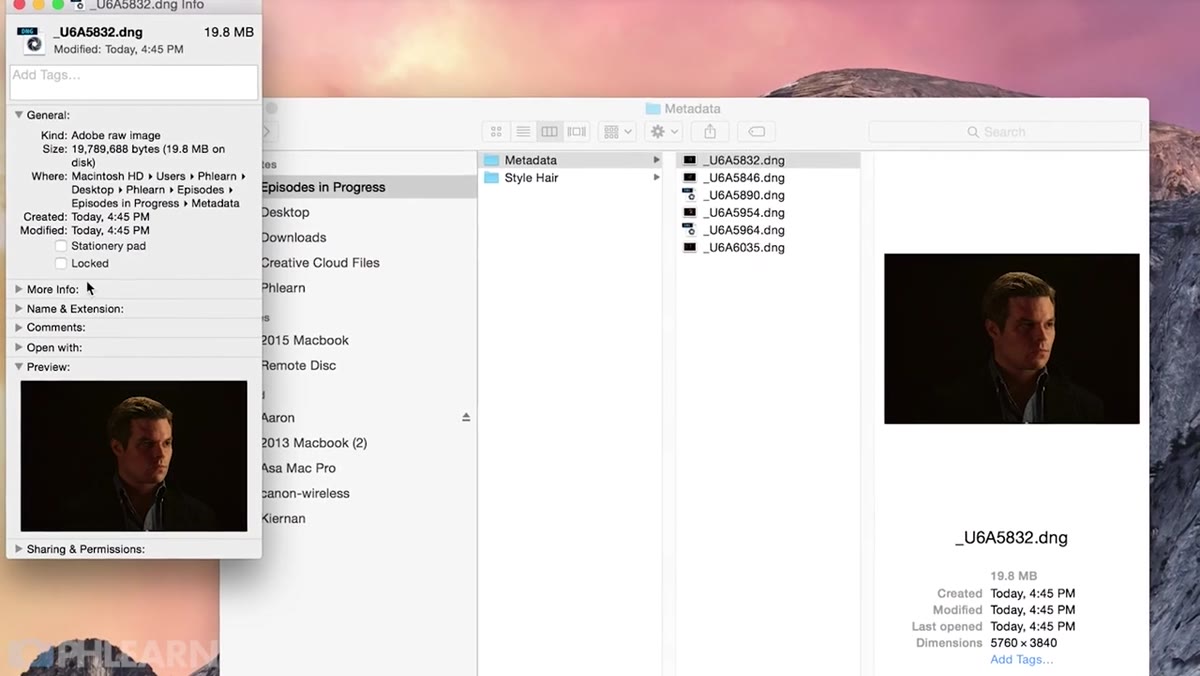 File info panel showing camera model, focal length, f-stop data
Before touching Lightroom, it helps to know what you’re looking at. Metadata is data stored inside the image file itself, invisible when you’re looking at the photo but readable by software, search engines, and anyone who checks the file properties. Aaron demonstrates this by opening a photo in Finder and pulling up the file info. Right there in the detail panel: camera model, focal length, aperture, shutter speed. None of that is painted onto the image. It’s embedded in the file.
The same mechanism that stores your camera settings is what we’re going to use to store your name, your website, and your copyright status. Think of it as a label sewn into the lining of a jacket. You don’t see it when you’re wearing it, but it’s there, and it proves who made it.
Step 2: Navigate to the Metadata Panel in Lightroom
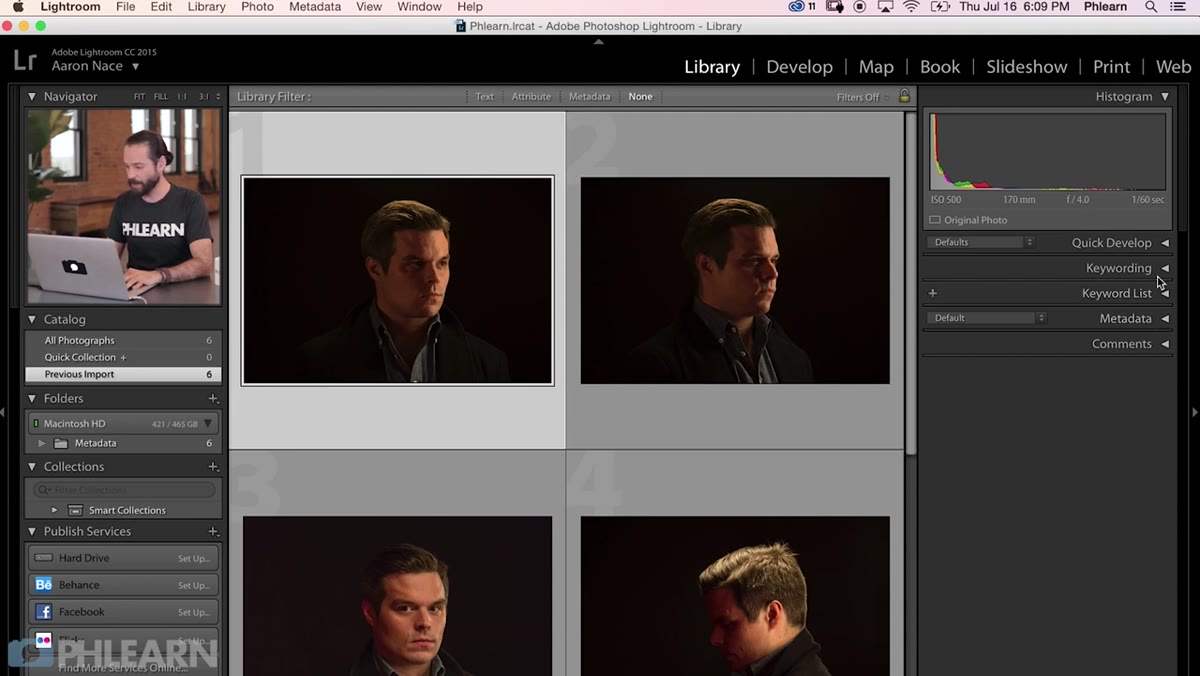 Lightroom Library module showing Metadata panel on the right side
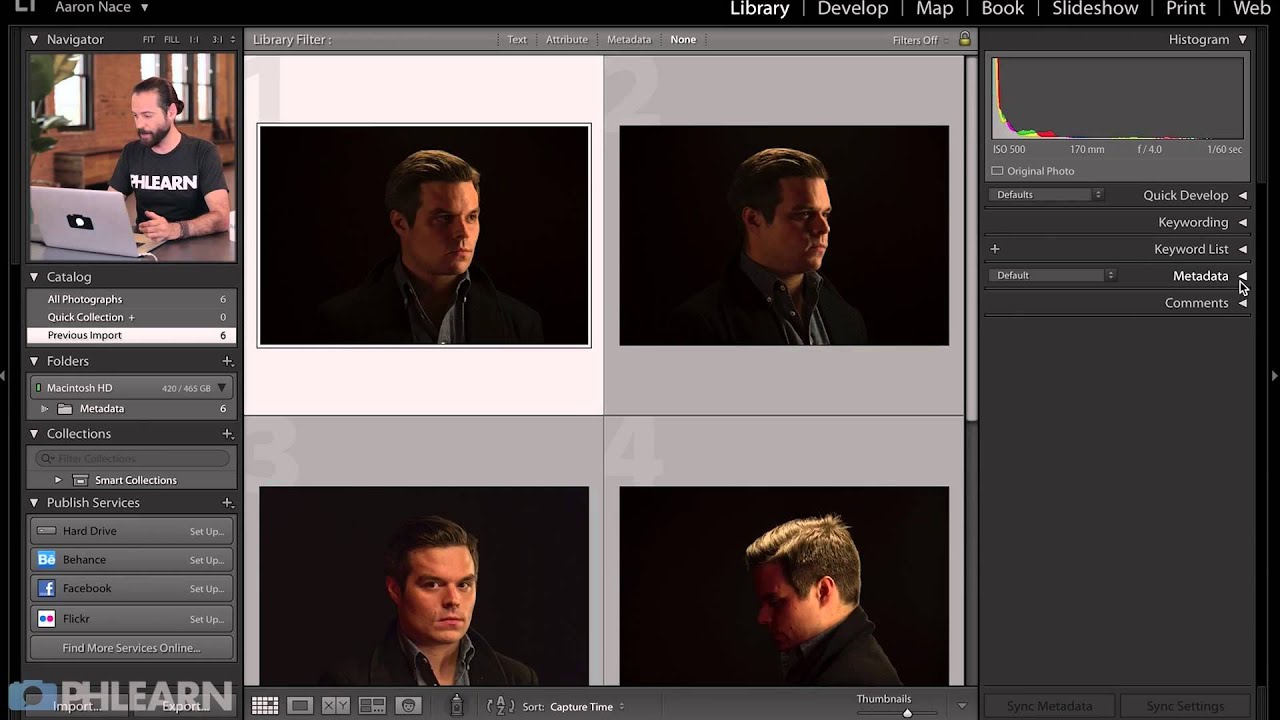
Open Lightroom and head to the Library module. Select any photo from your catalog. On the right-hand panel, scroll down past Keywording and Keyword List until you see the Metadata panel. This is where you’ll find a dropdown at the top labeled “Preset” that probably says “None” right now.
That preset field is the key to everything. Instead of manually typing your copyright information into every photo you import (please don’t do that), you’re going to build a metadata preset once and apply it automatically. Click the preset dropdown and choose “Edit Presets” at the bottom of the list to open the Edit Metadata Presets window.
Step 3: Fill In Your IPTC Copyright Information
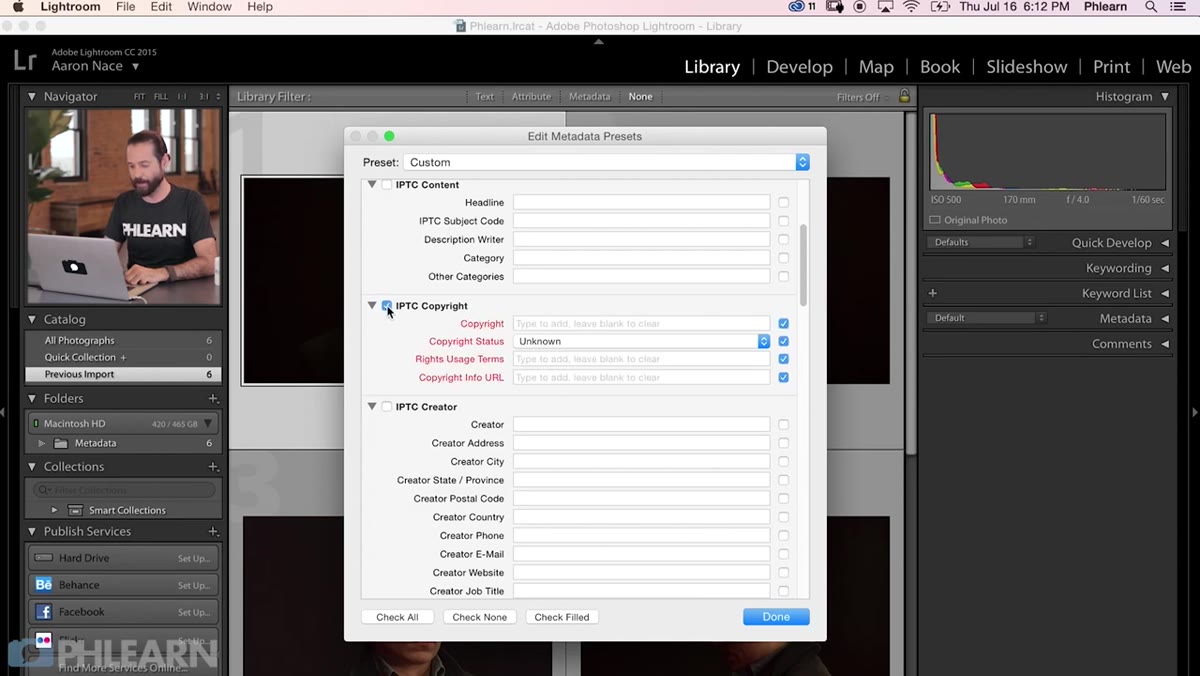 Edit Metadata Presets window with IPTC Copyright section open
The Edit Metadata Presets window looks dense, but you only need to focus on a couple of sections. Find the “IPTC Copyright” section and expand it. This is where the legally meaningful stuff lives.
In the Copyright field, type the copyright symbol (Option + G on Mac, or just paste one in), followed by your name and “All Rights Reserved.” Set the Copyright Status dropdown to “Copyrighted.” In the Rights Usage Terms field, write something like “All rights reserved. No reproduction without prior written permission.” Then add your website URL in the Copyright Info URL field. This is what gives someone a path back to you if they find your image in the wild.
Step 4: Add Your Creator Information
 Creator fields in Edit Metadata Presets showing name, city, email fields
Scroll down to the IPTC Creator section. Fill in your name in the Creator field. If you want to add your city, that’s worth doing for context. The fields for phone, postal code, and email are optional, but Aaron specifically recommends including at minimum your website and an email address.
Your email here doesn’t have to be your personal inbox. Use a contact or info address that you actually check. The goal is giving anyone who finds this file a legitimate way to reach you, whether that’s a client wanting to license the image properly or a publication that needs to credit you correctly.
Step 5: Save the Preset
 Save dialog for naming a new metadata preset in Lightroom
Once your information is filled in, hit the dropdown at the top of the Edit Metadata Presets window and choose “Save Current Settings as New Preset.” Give it a name that makes sense to you. Aaron uses something straightforward. I personally name mine the same way I name my editing presets. after songs. But call it whatever you’ll recognize six months from now when you’re setting up Lightroom on a new machine.
Click Create, then Done. The preset is now saved to your Lightroom catalog and available any time you want to apply it.
Step 6: Apply the Preset During Import
 Import dialog in Lightroom showing Apply During Import section with metadata preset field
Here’s where the preset pays off. When you import new photos into Lightroom, the Import dialog has an “Apply During Import” section on the right panel. There’s a Metadata dropdown inside it. Select the preset you just created, and every photo from that import will have your copyright information baked in before you’ve even looked at the images.
This is the part most photographers miss. They build the preset and then forget to actually use it. Setting it in the import dialog is the move that makes this automatic rather than something you have to remember.
A Note on Checking Your Metadata After Export
One thing the tutorial doesn’t dig into as much, and something I’ve made a habit of doing: verify your metadata survived the export. Some export settings and third-party apps strip metadata. After exporting a batch, right-click one of the exported files, open its info panel, and confirm your copyright fields are still there.
If you’re exporting for web, check your Lightroom export settings. Under “Metadata” in the export dialog, make sure you’re not set to “Copyright Only” when you actually want all the creator fields included, or vice versa. It’s a small setting that makes a real difference depending on where the photos are going.
Metadata is one of those things that takes twenty minutes to set up and then protects your work indefinitely. Building the preset, loading it into your import workflow, and spot-checking your exports. That’s the whole system. Your name and your copyright travel with every file you send into the world, and that’s a habit worth building before you need it rather than after.
Watch the full tutorial on YouTube to see Aaron walk through the complete process, including how to verify your metadata is visible and searchable once it’s embedded.
Comments
Leave a Comment