Every time I hand off images to a client, I think about how much time I wasted in my early days sending the wrong files. Wrong size, wrong color space, no watermark, files named something useless like “DSC_0047_edited_FINAL_v3.” It’s the unglamorous part of photography that nobody warns you about, and it costs you credibility fast.
Export settings are one of those things that feel obvious until you actually have to explain them to someone, and then you realize there are about fifteen decisions baked into a single dialog box. In this Aaron Nace (PHLEARN) tutorial on exporting from Lightroom Classic, Aaron walks through every one of those decisions in a way that actually makes the logic stick. Watch the full tutorial on YouTube if you want to follow along, or use this breakdown to work through it at your own pace.
The tutorial wraps up Aaron’s full intro-to-Lightroom-Classic series, which means it brings together the organizing, culling, and preset work from earlier episodes into one clean finishing move. Even if you’re jumping in here without that context, the export walkthrough stands on its own.
Step 1: Filter Down to Your Best Images Before You Export
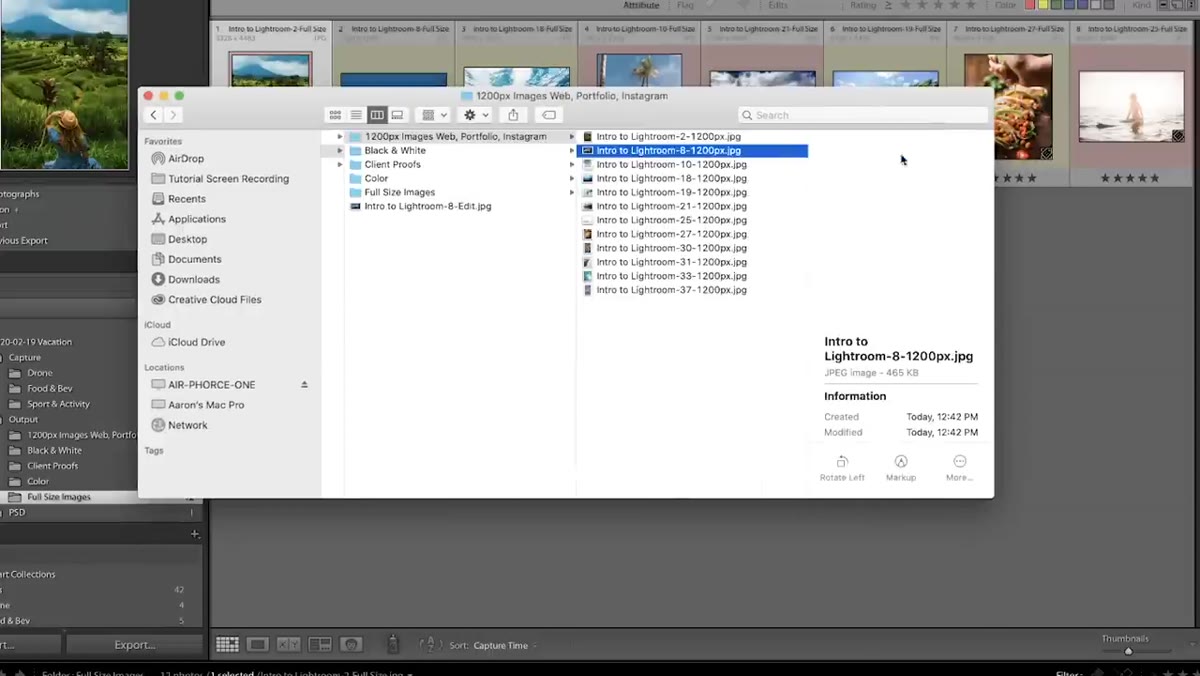 Library grid showing color-rated favorite images selected
Before you even open the export dialog, you need to know what you’re actually exporting. Aaron uses Lightroom’s Library Filter bar to surface only his picks. If you don’t see that bar across the top of your grid view, go to View and choose Show Filter Bar. From there, click the Attribute tab and filter by whatever color labels or star ratings you used to mark your favorites during culling.
Once your filtered images are showing, hit Ctrl+A (or Command+A on a Mac) to select all of them. This is a small step that saves a big headache. Exporting your entire catalog by accident is a rite of passage nobody needs to repeat twice.
Step 2: Open the Export Dialog
 Export dialog box open with all settings visible
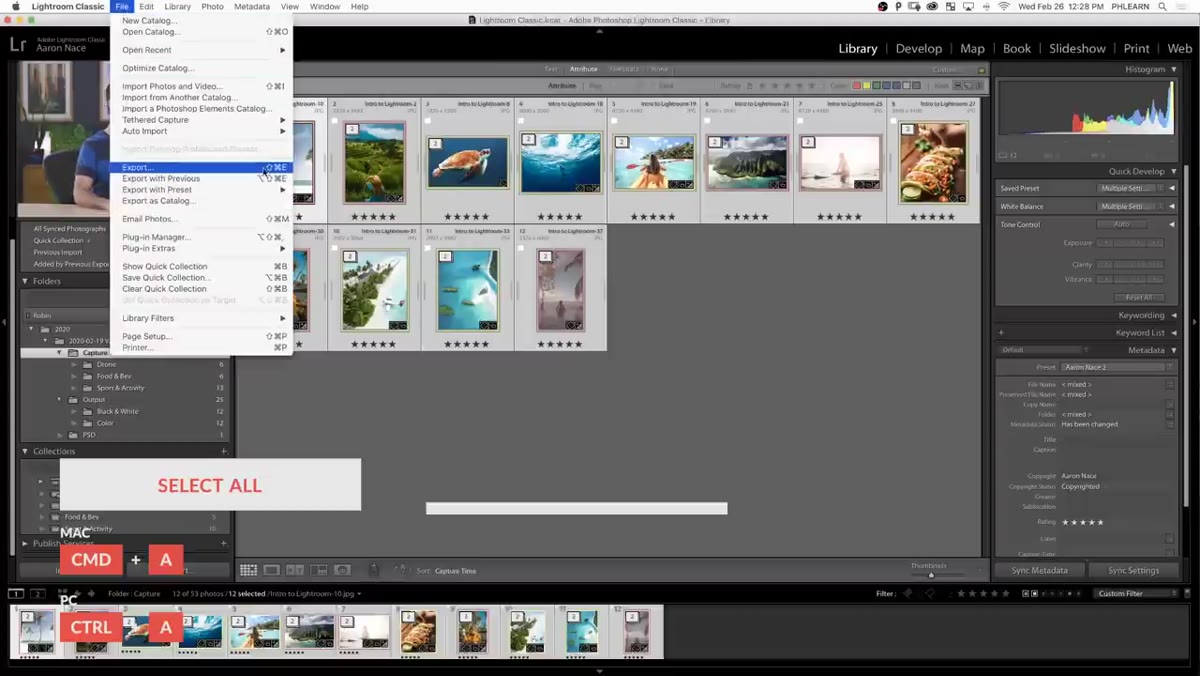
With your images selected, go to File and then Export. On a Mac you can also use Shift+Command+E. The Export dialog that opens is essentially a checklist of every decision Lightroom will make when it writes your final files. It looks dense, but Aaron walks through it section by section, and once you’ve built a couple of presets here, you’ll rarely have to think about it again.
The goal in this step is just to get the dialog open and resist the urge to click anything yet. Take a breath. There’s a logical order to these settings, and jumping ahead usually means missing something.
Step 3: Set Your Export Location
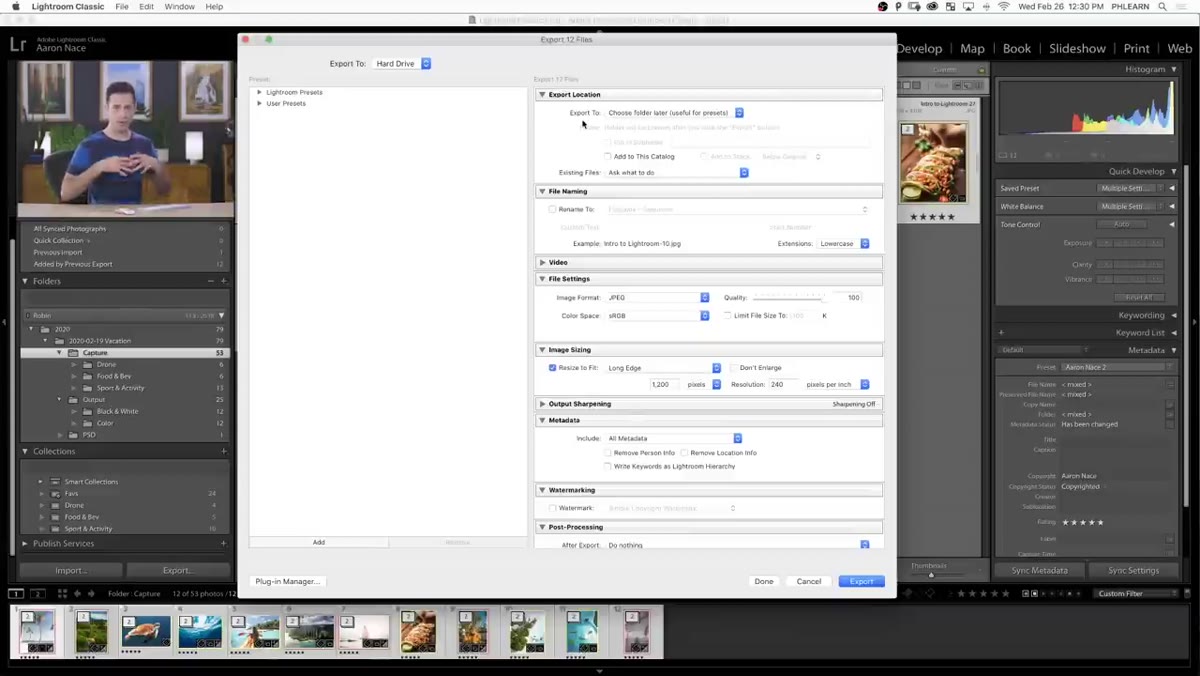 Export location dropdown showing “Choose folder later” option
The first section in the dialog handles where your exported files will land. Aaron’s preferred setting here is “Choose folder later,” which keeps the preset flexible so you can point it at different destinations depending on the job. If you’re always exporting to the same place, a specific folder works fine, but “Choose folder later” gives you more control without adding friction.
You’ll also see a checkbox to add the exported images back into your Lightroom catalog. Aaron recommends checking this. It means your finished JPEGs or TIFFs show up alongside your originals in the catalog, so you’re not hunting through Finder or File Explorer when a client asks for a re-send. If you skip this and later need to sync the files in, you can right-click a folder in the Folders panel and choose Synchronize Folder.
Step 4: Rename Your Files on Export
 Rename dialog showing filename template editor with custom suffix
This is the step most people skip and later regret. Aaron turns on the rename option in the export dialog and uses the template editor to build a naming structure that makes the files instantly readable outside of Lightroom. His approach: keep the original file name and append a descriptor like “full-size” at the end, so a file called “IMG_5204” becomes “IMG_5204-full-size.”
The template editor looks more complicated than it is. You’re just dragging tokens (things like original filename, date, sequence number) into a field and separating them with hyphens or underscores. The example preview at the bottom of the editor updates live, so you can see exactly what your files will be named before committing. Build a template once, save it, and reuse it. I have mine named after a Wilco track. No notes.
Step 5: Choose Your File Format and Quality Settings
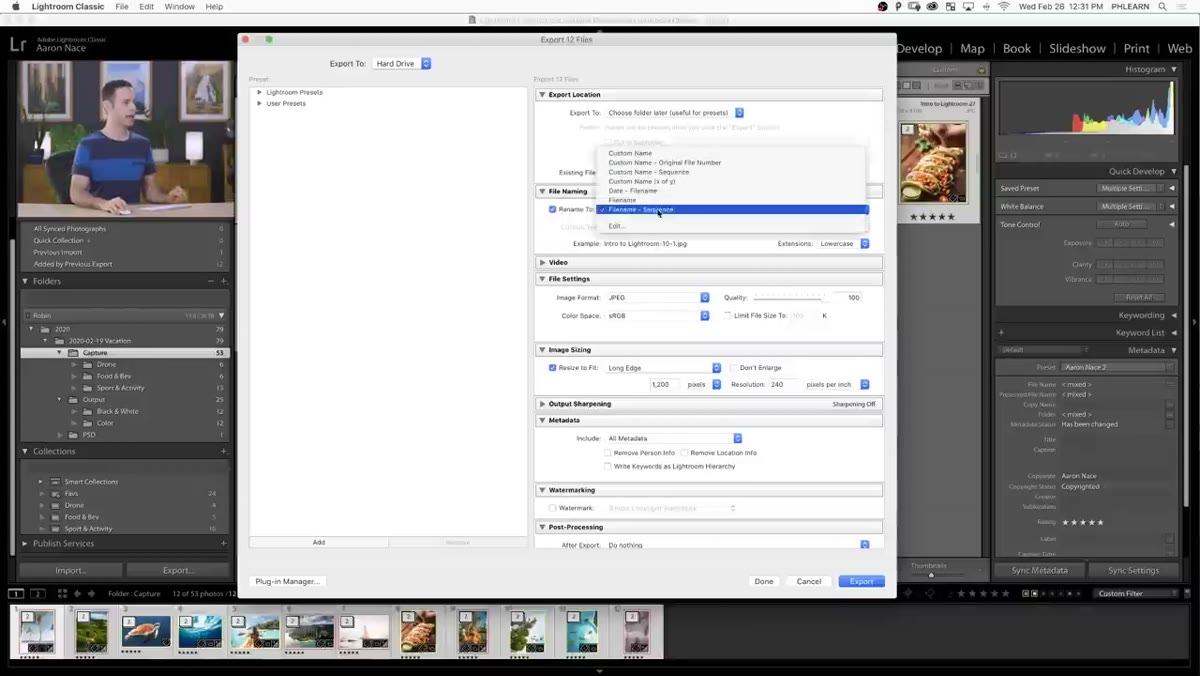 File Settings panel showing JPEG format and quality slider
This is where the export does its real work. For web delivery and client proofs, JPEG is the standard choice. Aaron sets quality to 100 for maximum-quality exports, which keeps file sizes larger but ensures nothing gets thrown away in compression. If you’re exporting specifically for web use where load speed matters, you can experiment with quality settings in the 80-90 range without visible degradation on most screens.
Color space is a setting that trips people up. For anything going on a screen, sRGB is correct. If you’re sending files to a print lab, check with them first, but sRGB is a safe default for the vast majority of exports.
Step 6: Build a Preset So You Never Set This Up Again
 Left panel of Export dialog showing Add preset button
Here’s the part of Aaron’s workflow I wish someone had shown me earlier. Once you have your export settings dialed in, you can save the entire configuration as a preset in the left panel of the Export dialog. Click Add at the bottom of the preset list, give it a name, and every setting you’ve chosen is locked in.
Aaron’s approach is to build a few distinct presets: one for full-size web delivery, one for watermarked client proofs, one for social. The next time you need to export, you click the preset, pick your destination folder, and you’re done. The whole thing takes about fifteen seconds instead of fifteen minutes of second-guessing.
My Caveat: Presets Are Only as Good as Your Review Habit
Export presets are genuinely one of the best quality-of-life tools in Lightroom Classic, but they can also auto-pilot you into bad habits. I learned this the hard way when I sent a client a full set of images in the wrong color space because I’d grabbed the wrong preset in a hurry.
My fix is a simple one: I keep a sticky note next to my monitor that lists the three questions I ask before every export. Right file format? Right color space? Right naming convention? It takes ten seconds and has saved me from embarrassing re-sends more than once. Presets are a shortcut, not a substitute for a final check.
The single most important thing this tutorial reinforced for me is that the export dialog is not where you make creative decisions. That work is already done. The export is a delivery mechanism, and treating it that way, by systematizing it with presets and consistent naming, frees up mental energy for the actual editing. Get your settings right once, save them, and stop making the same choices on every job.
Watch the full tutorial on YouTube to see Aaron walk through the full export dialog live, including how to add watermarks for client proof delivery.
Comments (5)
This is going in my reference folder. Incredibly useful.
Just subscribed. If the rest of your content is this good, I'm in.
Excellent tutorial. I'd add that from a lighting standpoint, this technique is incredibly versatile.
Would love to see a follow-up going deeper into this topic.
I've watched a dozen tutorials on this and yours is the clearest by far.
Leave a Comment