I have a folder problem. Not a hoarding problem, I want to be clear, just a folder problem. After years of shooting everything from Nashville band press shots to weekend road trips through the Cumberland Plateau, my Lightroom catalog has grown into something that requires genuine strategy to navigate. Searching by date works until it doesn’t. Collections help until you forget to add something. And scrolling the grid view at 2 a.m. trying to find that one portrait from 2019 is a fast path to a bad mood.
That’s exactly why I kept coming back to this CreativeLive tutorial covering two of Lightroom Classic’s most underused features: the Map module and facial recognition. Watch the full tutorial on YouTube - the instructor walks through both features with a real catalog containing over 200,000 images, which means you’re seeing these tools perform under actual working conditions, not a curated demo library of twenty perfect JPEGs.
These aren’t shiny gimmicks. Once you understand how location data and face tagging interact with the rest of Lightroom’s organization system, you start thinking about your catalog differently. Here’s how to put both features to work.
Step 1: Open the Map Module from the Library
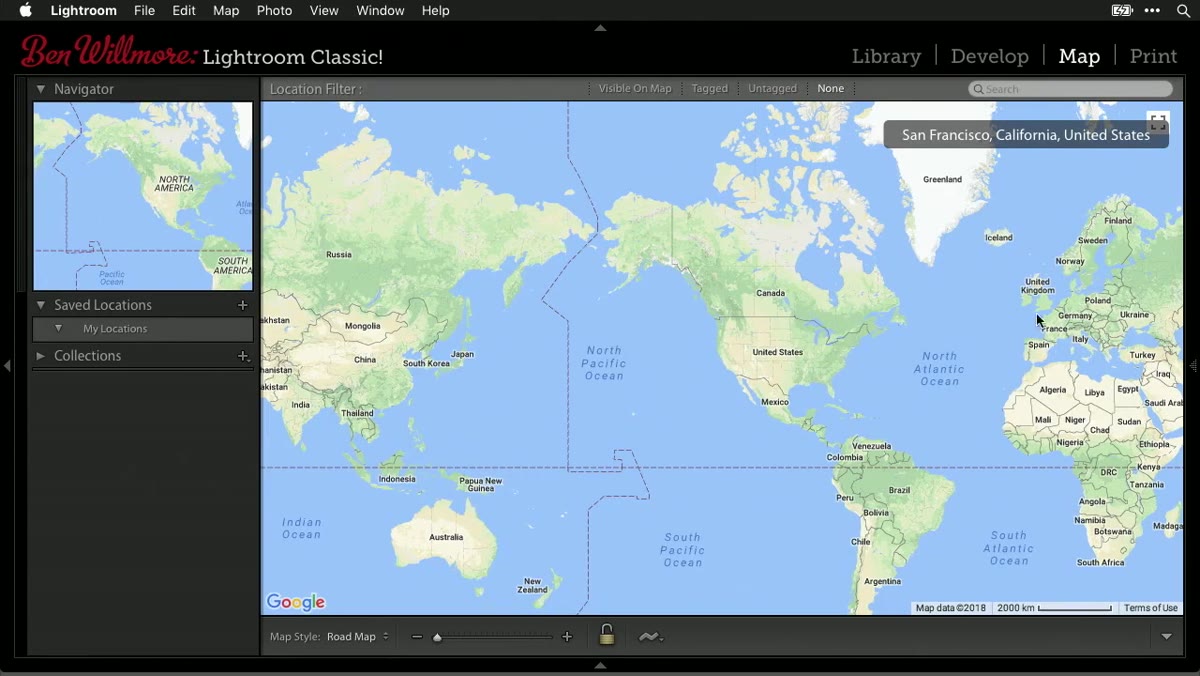 Clicking the Map module tab inside Lightroom Classic
From inside the Library module, click the Map tab in the module picker along the top of the screen. Lightroom will switch views and immediately start reading location metadata from your images. Watch the upper-left corner of the map area - you’ll see a “Loading Markers” indicator appear. This is normal, and the more images in your catalog, the longer it takes. On a catalog with 200,000 photos it takes a noticeable moment. Let it finish before clicking around.
Clicking the Map module tab inside Lightroom Classic
From inside the Library module, click the Map tab in the module picker along the top of the screen. Lightroom will switch views and immediately start reading location metadata from your images. Watch the upper-left corner of the map area - you’ll see a “Loading Markers” indicator appear. This is normal, and the more images in your catalog, the longer it takes. On a catalog with 200,000 photos it takes a noticeable moment. Let it finish before clicking around.
If you open the Map module and see nothing but an empty world map, don’t panic. It just means your images don’t yet have GPS data embedded. That’s a separate step, covered below.
Step 2: Read the Map Markers Correctly
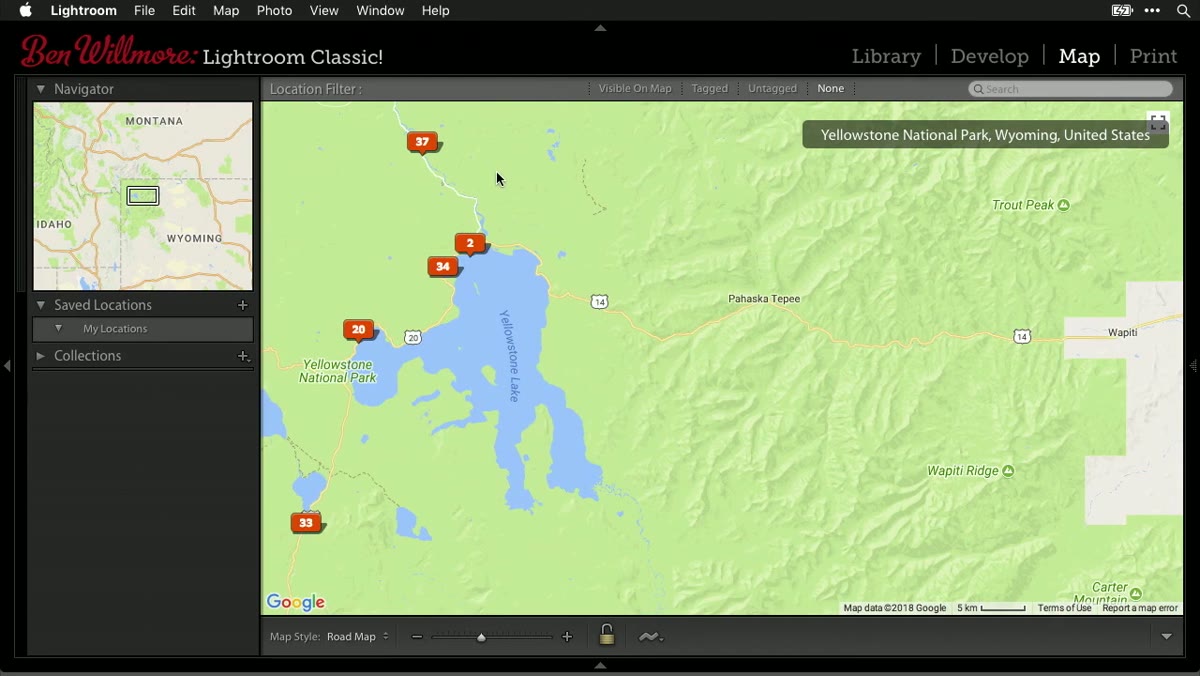
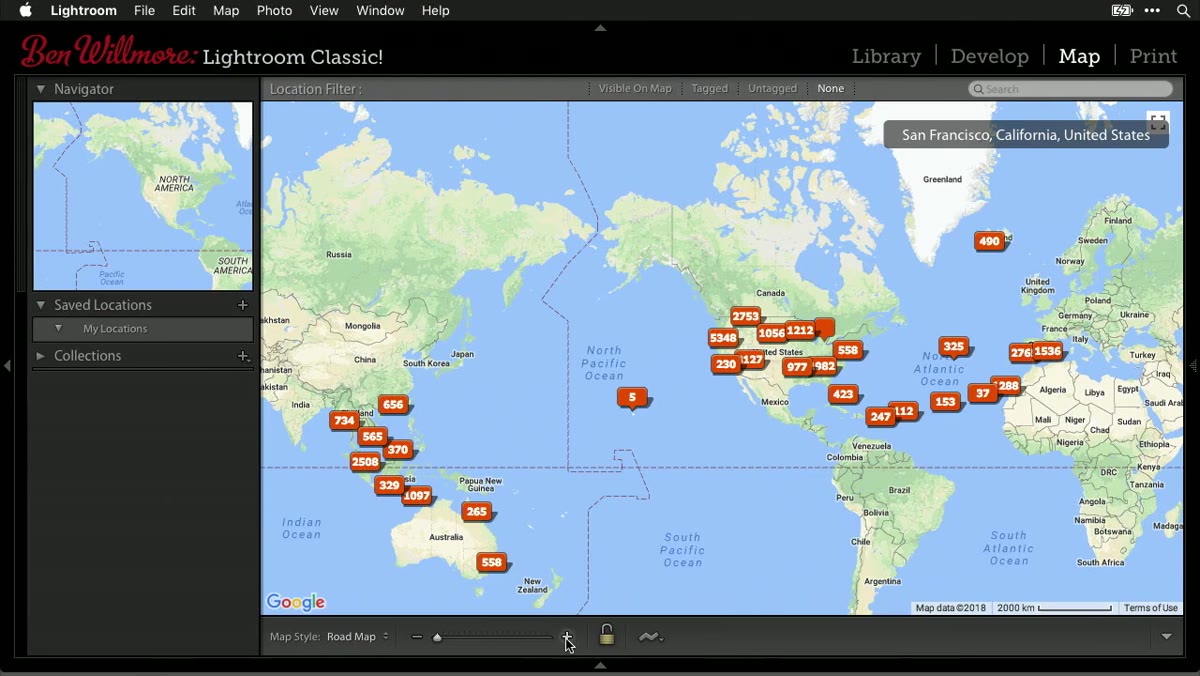 Map view showing clustered location markers with numbers inside them
This is the part most people get wrong on the first try. The map displays your photos as numbered markers, and those markers behave differently depending on one visual detail: whether the marker has a pointed tip at the bottom, like a location pin, or a flat bottom like a floating badge.
Map view showing clustered location markers with numbers inside them
This is the part most people get wrong on the first try. The map displays your photos as numbered markers, and those markers behave differently depending on one visual detail: whether the marker has a pointed tip at the bottom, like a location pin, or a flat bottom like a floating badge.
A flat-bottomed marker means the photos inside it are spread across a geographic area, and zooming in will split that cluster into smaller, more specific groupings. A pointed-tip marker means all those photos were taken at a single GPS coordinate - zooming in further won’t break it apart, because there’s nowhere more specific to go. Hover over any marker to preview the images inside it, see the capture date, and get basic exposure information without leaving the map.
Step 3: Zoom In to Explore Clusters
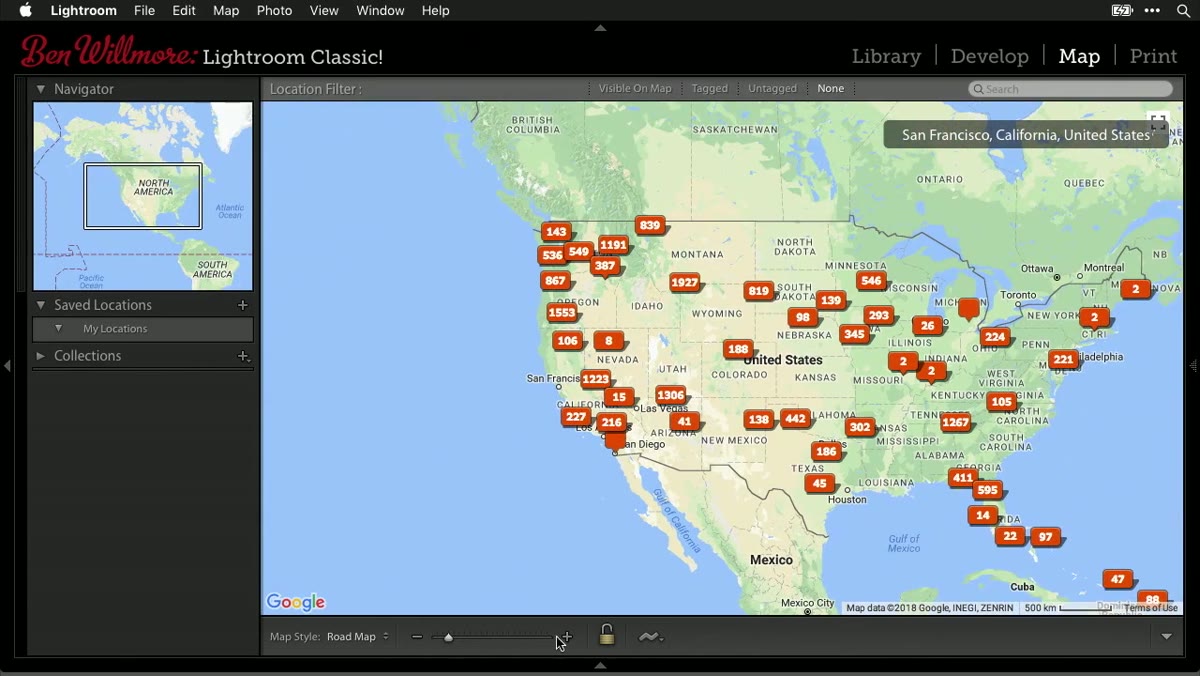 A large cluster splitting into multiple smaller markers after zooming in
Use the plus and minus controls near the lower-left corner of the map area to zoom in and out. As you zoom into a flat-bottomed cluster, watch it divide. What looked like 1,927 photos in one region might split into four distinct neighborhoods, then into individual blocks, then finally into pointed-tip pins representing single shooting locations.
A large cluster splitting into multiple smaller markers after zooming in
Use the plus and minus controls near the lower-left corner of the map area to zoom in and out. As you zoom into a flat-bottomed cluster, watch it divide. What looked like 1,927 photos in one region might split into four distinct neighborhoods, then into individual blocks, then finally into pointed-tip pins representing single shooting locations.
This zoom-to-explore approach is genuinely useful for rediscovering shoots you forgot about. I’ve zoomed into a region I thought I knew well and found a cluster of 30 images from a location I had completely blanked on. The map becomes a visual memory aid in a way that folder names just aren’t.
Step 4: Get Your Photos Onto the Map - GPS and Geotagging
 Instructor describing how location data gets attached to images
For your images to appear as markers at all, they need GPS coordinates embedded in their metadata. There are two main ways this happens. The first is automatic: if you shot on a smartphone or a camera with built-in GPS (or a connected GPS accessory), the coordinates are already baked into the file. Lightroom reads them on import and places those images on the map immediately.
Instructor describing how location data gets attached to images
For your images to appear as markers at all, they need GPS coordinates embedded in their metadata. There are two main ways this happens. The first is automatic: if you shot on a smartphone or a camera with built-in GPS (or a connected GPS accessory), the coordinates are already baked into the file. Lightroom reads them on import and places those images on the map immediately.
The second method is manual tagging directly inside Lightroom’s Map module. You can drag photos from the filmstrip at the bottom of the map view and drop them onto a specific location. You can also select images in the Library, navigate to the Map module, find the correct location, right-click on the map, and assign the coordinates to the selected images. It takes more effort, but it’s the right move for older archives shot before GPS was standard.
Step 5: Enable Facial Recognition in the People View
 Instructor introducing the facial recognition and People view features
Inside the Library module, look for the face icon at the bottom-center of the screen, below the grid. Clicking it switches you into People view, which is where Lightroom’s facial recognition lives. The first time you activate it on a large catalog, Lightroom will ask whether you want it to scan all photos or only those you’re currently browsing. For a big library, starting with a filtered selection is a smart move - it keeps the process from running for hours on images you don’t need identified.
Instructor introducing the facial recognition and People view features
Inside the Library module, look for the face icon at the bottom-center of the screen, below the grid. Clicking it switches you into People view, which is where Lightroom’s facial recognition lives. The first time you activate it on a large catalog, Lightroom will ask whether you want it to scan all photos or only those you’re currently browsing. For a big library, starting with a filtered selection is a smart move - it keeps the process from running for hours on images you don’t need identified.
Once scanning is active, Lightroom groups faces it recognizes as likely matches and surfaces them as stacks in the People view. Your job is to confirm or correct those suggestions. Click a face stack, type the person’s name, and Lightroom adds that name as a keyword tied to every confirmed image of that person.
Step 6: Confirm, Correct, and Name Faces
 Facial recognition grouping faces and prompting for name input
Lightroom presents unconfirmed faces in a “Similar” section, showing you its best guesses grouped together. You’ll see thumbnails of faces it thinks belong together. If the grouping is correct, confirm the name and Lightroom applies it across the batch. If it made an error, reject the incorrect matches and they’ll be re-queued for review.
Facial recognition grouping faces and prompting for name input
Lightroom presents unconfirmed faces in a “Similar” section, showing you its best guesses grouped together. You’ll see thumbnails of faces it thinks belong together. If the grouping is correct, confirm the name and Lightroom applies it across the batch. If it made an error, reject the incorrect matches and they’ll be re-queued for review.
The more you confirm, the more accurate the system becomes within your catalog. It’s not learning globally, just locally within your library. After a few solid confirmation sessions, Lightroom gets noticeably better at grouping the same people across different shoots, lighting conditions, and focal lengths.
A Note on GPS Privacy and Shared Files
One thing the tutorial doesn’t cover that comes up constantly in my own workflow: GPS metadata travels with your files when you export. If you’re delivering images to a client, sharing to social media, or sending proofs, that location data goes along for the ride unless you strip it. In Lightroom’s Export dialog, under the Metadata section, you can choose to exclude GPS data. For portraits especially, where the location might be someone’s home, this is worth making a habit.
The same applies to face keyword data. Those names are written into the file’s metadata on export, depending on your settings. Check your export preset and decide deliberately whether that information should leave your catalog.
The biggest shift these tools create isn’t organizational, it’s psychological. When you can see your entire body of work on a map and call up every photo of a specific person with a keyword search, the catalog stops feeling like an archive and starts feeling like a living record of your work. That’s worth the setup time.
Watch the full tutorial on YouTube to see both features demonstrated on a real, large-scale catalog - the scale alone makes it worth your time.
Comments (2)
This is going in my reference folder. Incredibly useful.
Great breakdown. The step-by-step approach really helps.
Leave a Comment