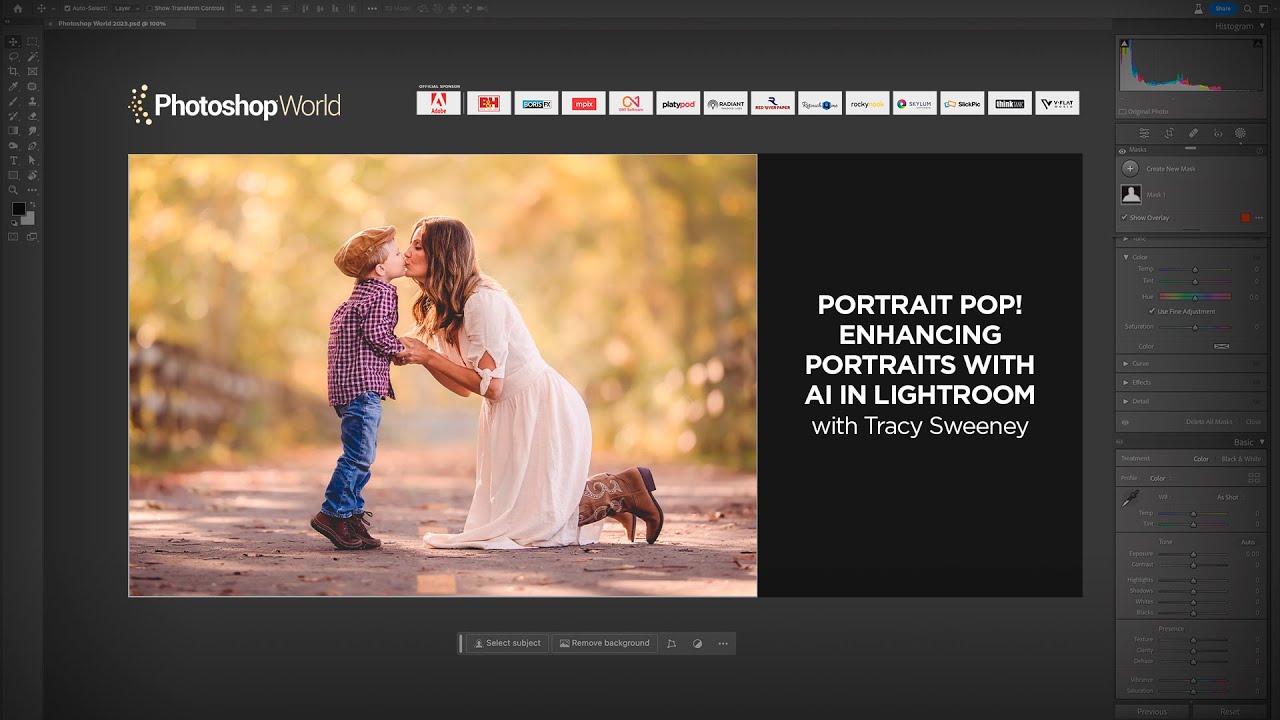
Here’s a situation I keep running into: a photographer hands me a portrait that’s technically fine but emotionally flat. The exposure is reasonable, the subject is sharp, and yet something about it just sits there. Nine times out of ten, the problem isn’t the shot itself. It’s that every adjustment made in post was applied globally, nudging everything the same direction when different parts of the image needed completely different treatment. The sky needed pulling down, the skin needed lifting, the eyes needed their own attention. Treating them all as one was the mistake.
In this KelbyOne tutorial, portrait photographer Tracy Sweeney, owner of Elan Studio in Bristol, Rhode Island, walks through exactly how to fix that problem using Lightroom Classic’s AI-powered masking tools. Watch the full tutorial on YouTube. She’s working with a high school senior portrait shot at sunset on a beach, 85mm Canon RF at f/1.2, ISO 640, exposed for the subject’s skin, which left the sky completely blown out. It’s a realistic starting point, the kind of raw file that lands in a working photographer’s queue every single week.
What she demonstrates is not a bag of tricks. It’s a disciplined, selective approach to AI masking that keeps adjustments surgical rather than broad. I picked up several things I’m folding directly into my own workflow.
Step 1: Open the Masking Panel in Lightroom Classic
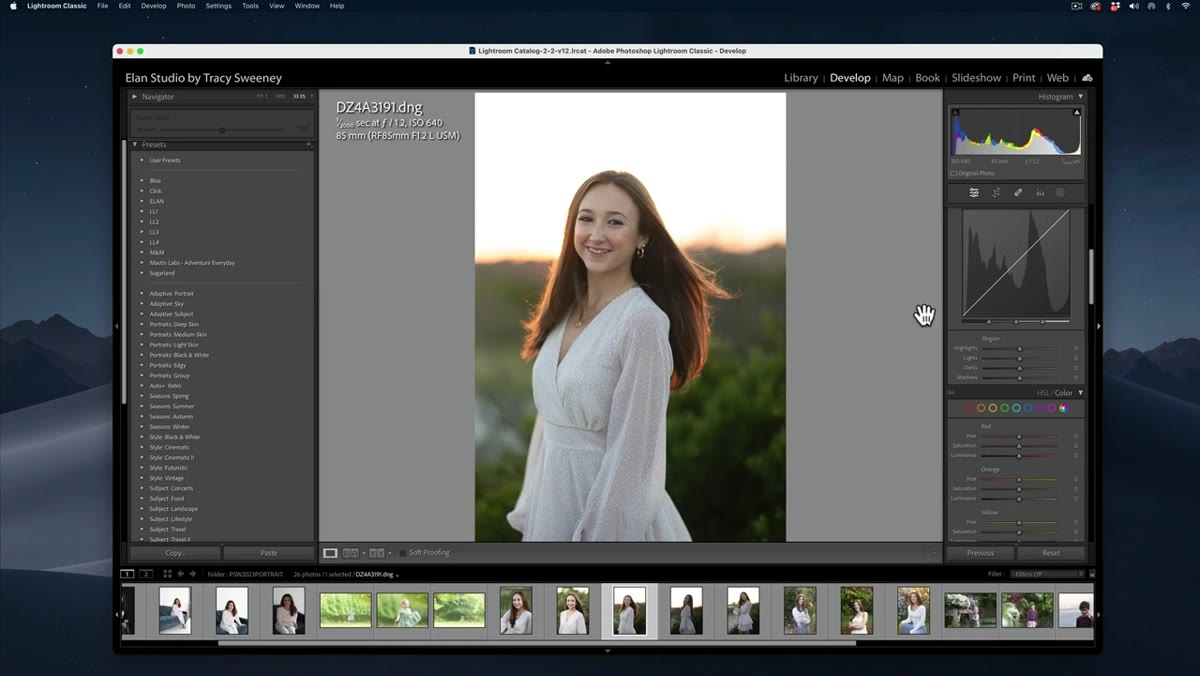 Lightroom masking panel icon being clicked to reveal options
Start in Lightroom Classic’s Develop module and locate the masking icon in the tool strip, just below the histogram. It looks like a small circle with a dotted edge. Click it and the masking panel opens, revealing a list of options. If Lightroom detects a person in the frame, you’ll immediately see a “People” toggle appear, with individual subjects identified and labeled. This detection happens fast, often within a couple of seconds, and it’s one of those features that still impresses me every time it works cleanly.
Step 2: Select a Specific Person, Not the Entire Frame
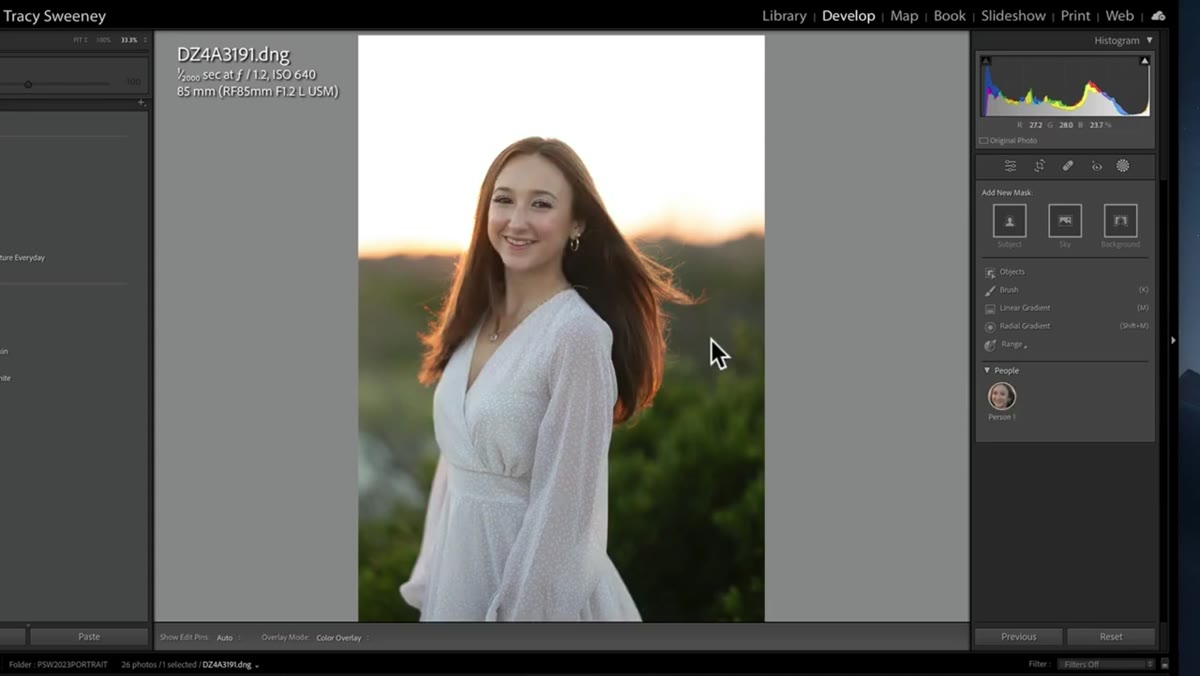 Person 1 selected in the AI people masking panel
Once the People mask options appear, click on the detected subject, labeled here as Person 1. This is where things get genuinely useful. Rather than giving you a single mask for the whole person, Lightroom breaks the subject down into component parts: facial skin, body skin, hair, eyebrows, eyes, lips, teeth, and more. This is the difference between a sledgehammer and a scalpel. Selecting “Entire Person” is fine for broad moves like a slight exposure bump across the whole subject, but Sweeney skips that immediately because she wants control at the feature level.
Step 3: Choose Only the Facial Features You Actually Need to Adjust
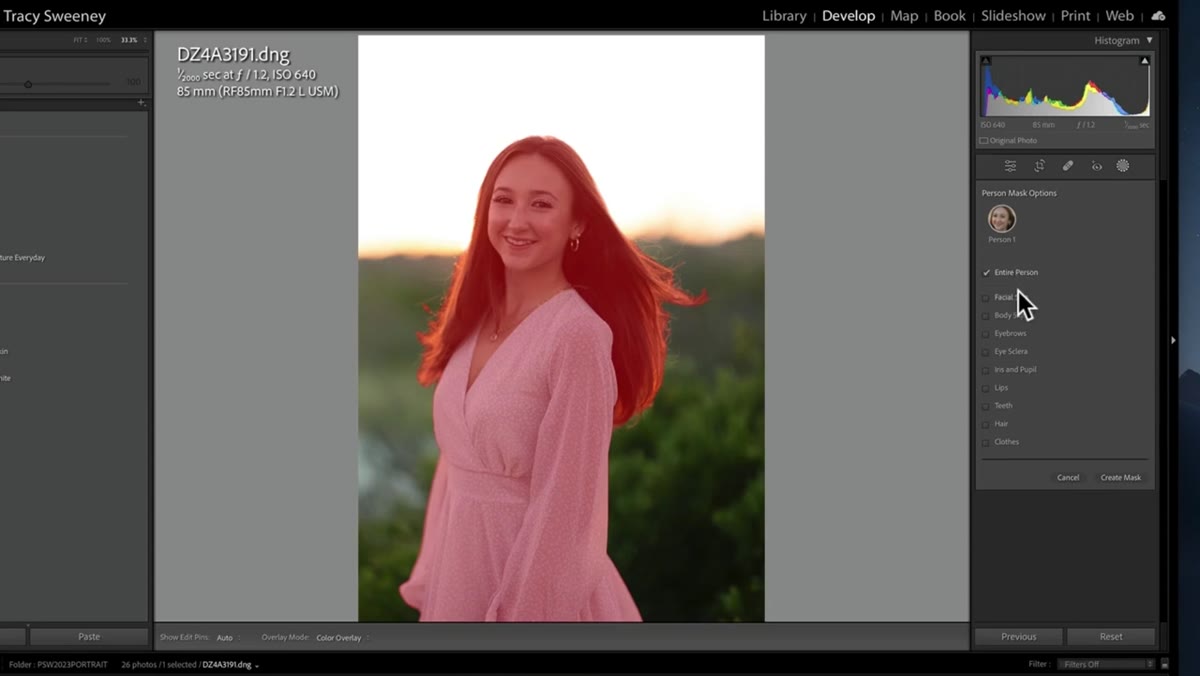 Facial skin and specific features being selected from the mask submenu
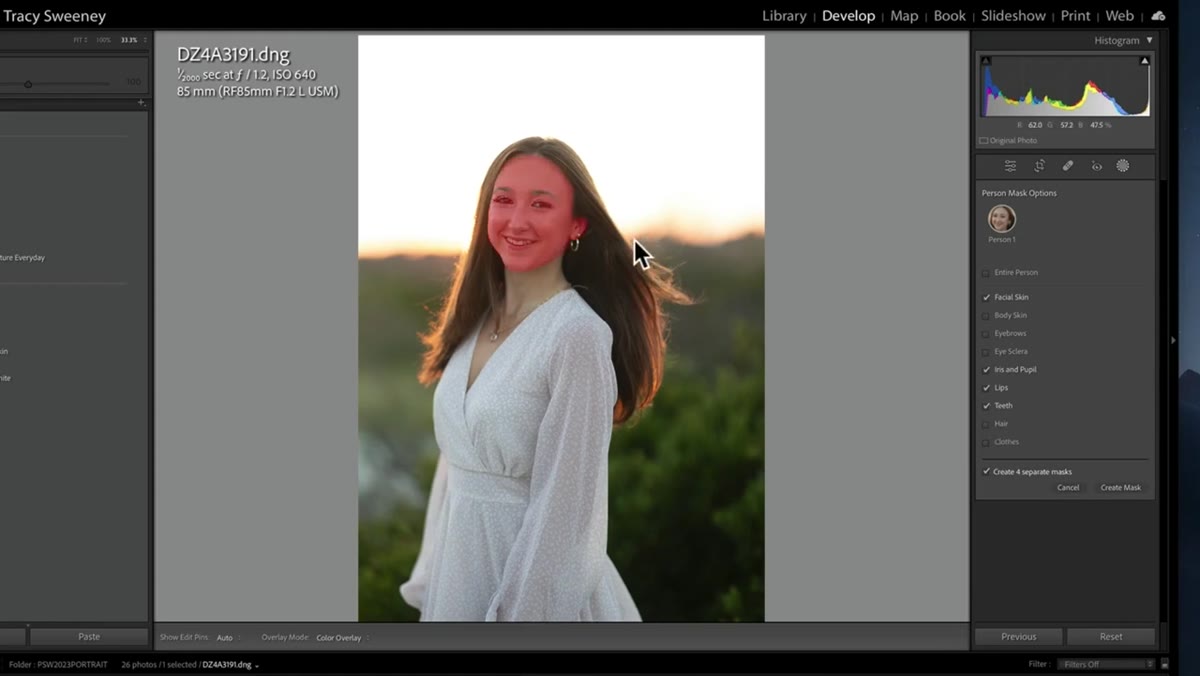
Here’s where photographers often get it wrong: they select everything available because it feels thorough. Sweeney does the opposite. She picks only the features she has a reason to touch. In this case, she selects facial skin and skips body skin because there are no tan lines or texture issues she needs to address there. She skips the eye sclera because the whites are already clean. She selects iris and pupil, lips, and teeth, all features where targeted adjustments will actually make a visible difference in the final image.
Leaving unused masks out of the stack keeps your edit readable when you come back to it later. I’ve inherited edits from other photographers where every AI mask option was selected but most of them had zero adjustments applied. It’s noise. Only mask what you’re going to move.
Step 4: Handle Hair Separately, and Know When Photoshop Is the Better Tool
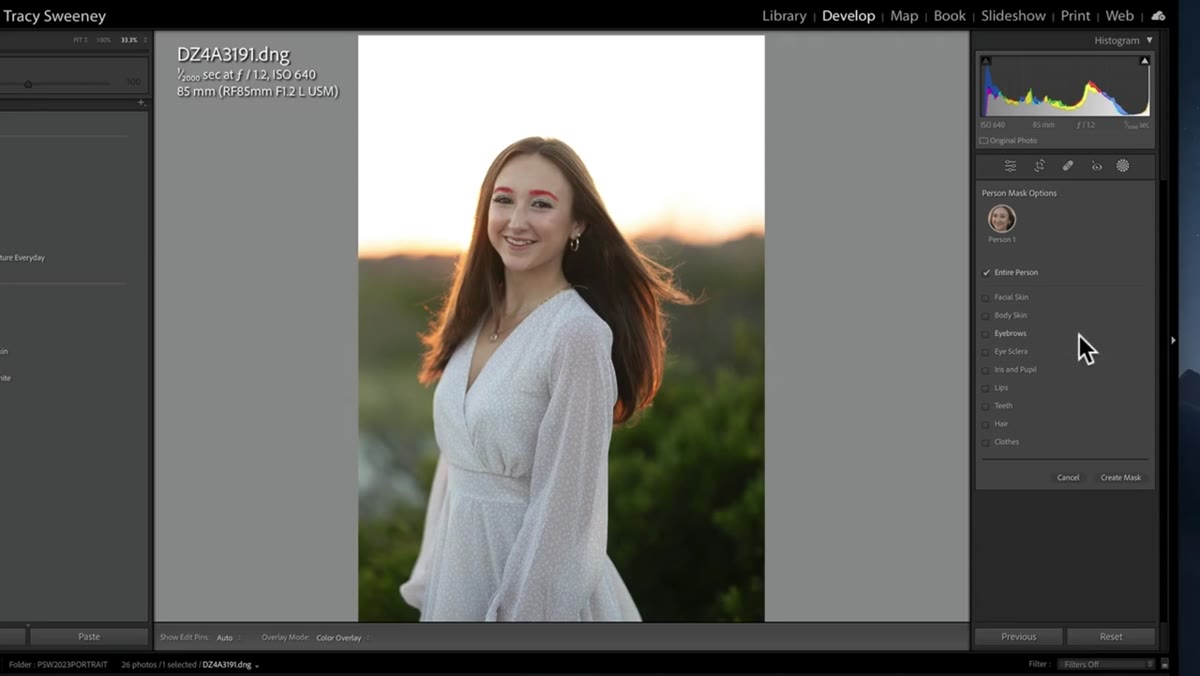
 Hair option being deliberately skipped in the mask selection list
Sweeney deliberately leaves hair out of her Lightroom mask selections, and her reasoning is worth noting. The subject has windblown hair, and that level of edge complexity is better handled in Photoshop than in Lightroom’s masking engine. This isn’t a criticism of Lightroom. It’s an honest assessment of which tool fits which problem.
Knowing when to stay in Lightroom and when to hand off to Photoshop is a workflow decision that saves real time. If you try to force Lightroom to handle complex, wispy hair edges against a bright sky, you’ll spend more time fighting the mask than refining it. Flag it, finish what Lightroom does well, and move on.
Step 5: Build Masks That Target the Problem, Then Apply Adjustments
 Mask overlay shown on subject’s face confirming accurate selection
With the right features selected, Lightroom generates the masks and displays them as a red overlay on the image. Take a moment here to zoom in and confirm the selection is accurate, especially around the edges of the face and near the hairline. AI masking has gotten remarkably good, but it’s still worth checking before you start adjusting exposure or color, because a selection that clips the jaw or bleeds into the background will create obvious artifacts.
Once you’ve confirmed the mask is clean, you apply adjustments only to that selected region. Brightening the facial skin without touching the already-blown sky. Enhancing the iris color without affecting the skin tone around the eyes. This is what makes the portrait feel edited with intention rather than just processed.
What I’d Add: Layer Your Masks, Don’t Stack Your Regrets
The technique Sweeney demonstrates works beautifully as shown, but I’d push it one step further for anyone editing a full session of portraits. After you’ve built your feature-specific masks, use Lightroom’s mask intersection tool to subtract problem areas. If the AI facial skin mask is grabbing a bit of a highlight on the forehead that you want to protect, intersect it with a luminance range mask to exclude the brightest tones. It takes thirty extra seconds and prevents the kind of subtle halos that look fine at 50% zoom and terrible when the client zooms in on her cheekbone.
I also keep a naming system for my masks the same way I name my presets after songs. When I’m building a portrait mask stack, each mask gets labeled for what it does: “Skin - lift shadows,” “Eyes - enhance iris,” “Teeth - subtle brighten.” When you open that file six months later, you’ll thank yourself.
The single most useful thing in this tutorial is the mindset shift: AI masking is not about selecting everything Lightroom can find. It’s about selecting only what you have a specific reason to adjust, and leaving everything else alone. That restraint is what separates edits that look refined from edits that look processed.
Watch the full walkthrough, including how Sweeney handles the blown-out sky and moves the edit into Photoshop for the hair work, right here: Watch the full tutorial on YouTube.
Comments (2)
Would love to see a follow-up going deeper into this topic.
This should be required reading for anyone starting out.
Leave a Comment