There’s a specific kind of editing frustration that I’ve felt probably a thousand times. You’re painting a local adjustment across a large area of a photo, moving fast, and then you hit an edge. Maybe it’s the rim of a coffee cup, the shoulder of a jacket, a hard line between sky and building. Suddenly you have two bad options: slow everything down by turning on Auto Mask and deal with the lag, or keep painting fast and accept that you’ll bleed color or exposure onto something you didn’t want to touch. For years, I picked whichever felt less annoying in the moment.
Then I came across this Scott Kelby tutorial where he covers a shortcut that a viewer named “Call Me Bob” tipped him off to. Watch the full tutorial on YouTube – it’s short, but the technique is genuinely one of those things that changes how you actually move through an edit. Kelby admits he either never knew it or had completely forgotten it, which made me feel better about the years I spent not knowing it either.
The whole thing comes down to one key. Instead of toggling Auto Mask on and off from the panel every time you get close to an edge, you can hold a single modifier key to activate it temporarily, right in the middle of a brushstroke. Here’s how the whole workflow breaks down.
Step 1: Open the Adjustment Brush and Set Your Effect
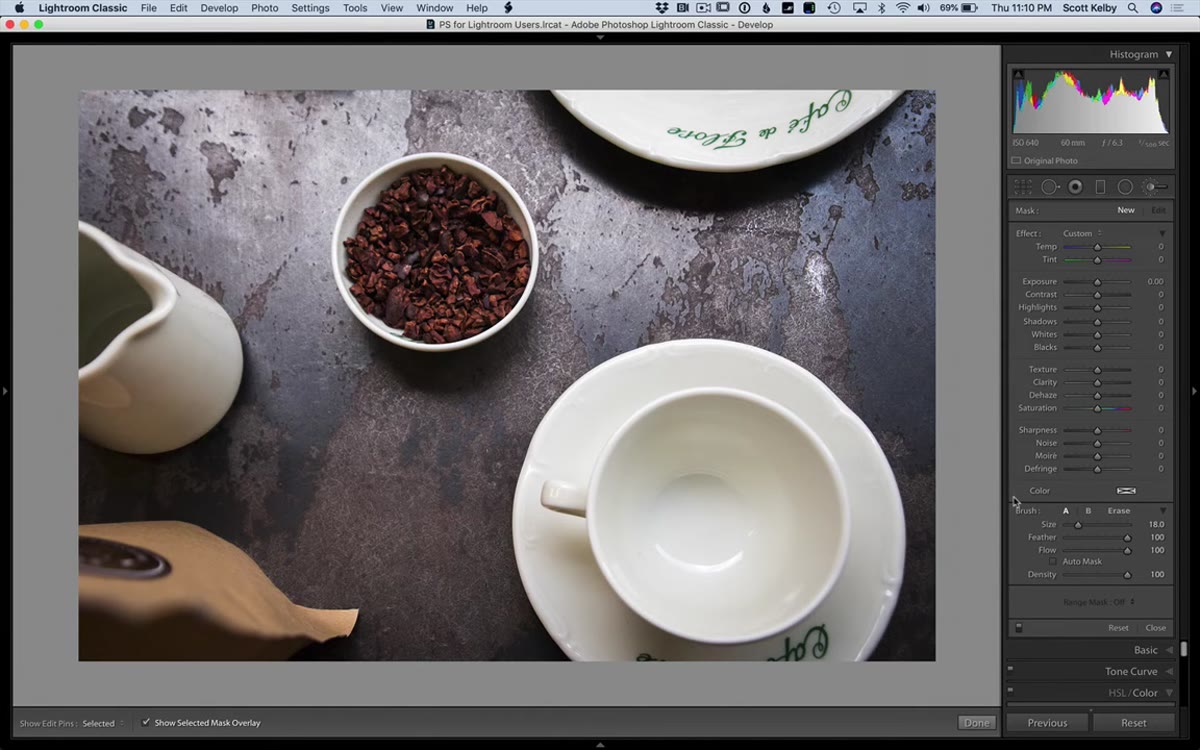 Adjustment brush panel open with exposure/darkening settings applied
Open the Adjustment Brush tool in Lightroom Classic (keyboard shortcut: K). Before you start painting, dial in whatever local adjustment you’re going for. In the tutorial, Kelby uses a darkening effect to demonstrate – pulling exposure down slightly so the painted area is visually distinct. Pick something with obvious visual impact so you can actually see what the mask is doing as you work.
Adjustment brush panel open with exposure/darkening settings applied
Open the Adjustment Brush tool in Lightroom Classic (keyboard shortcut: K). Before you start painting, dial in whatever local adjustment you’re going for. In the tutorial, Kelby uses a darkening effect to demonstrate – pulling exposure down slightly so the painted area is visually distinct. Pick something with obvious visual impact so you can actually see what the mask is doing as you work.
At this stage, don’t touch Auto Mask. Leave it off. The whole point of this shortcut is that you don’t need to pre-plan when you’ll need edge detection. You’ll call it up on demand.
Step 2: Turn On Show Selected Mask Overlay
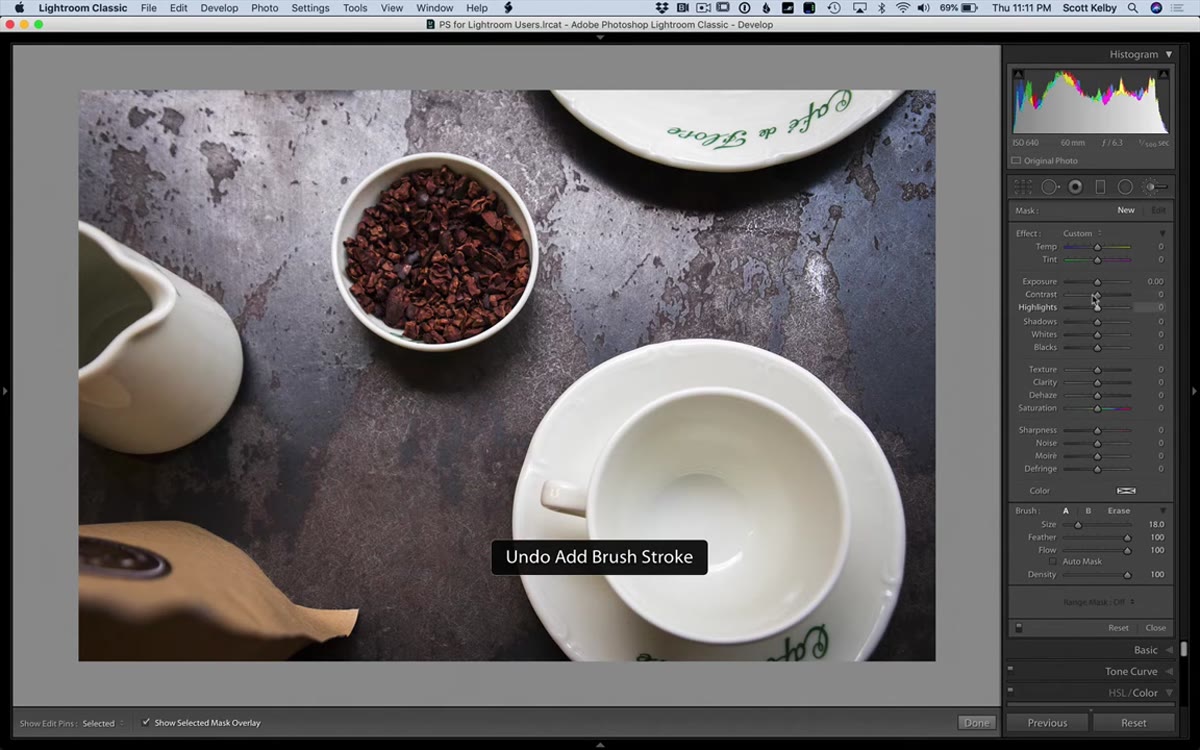 Red mask overlay visible on image showing painted area
Hit the “O” key to toggle the red mask overlay while you’re painting. This is non-negotiable when you’re learning a new masking technique – you need to see exactly where your brush is laying down the effect. Without the overlay, you’re flying blind, and you won’t be able to tell whether the shortcut is actually working at the edges.
Red mask overlay visible on image showing painted area
Hit the “O” key to toggle the red mask overlay while you’re painting. This is non-negotiable when you’re learning a new masking technique – you need to see exactly where your brush is laying down the effect. Without the overlay, you’re flying blind, and you won’t be able to tell whether the shortcut is actually working at the edges.
The red overlay shows every pixel your brush has touched. If it bleeds onto something it shouldn’t, you’ll see it immediately. Once you’re comfortable with the workflow, you can work without it, but for now, keep it on.
Step 3: Paint Freely Across the Open Areas
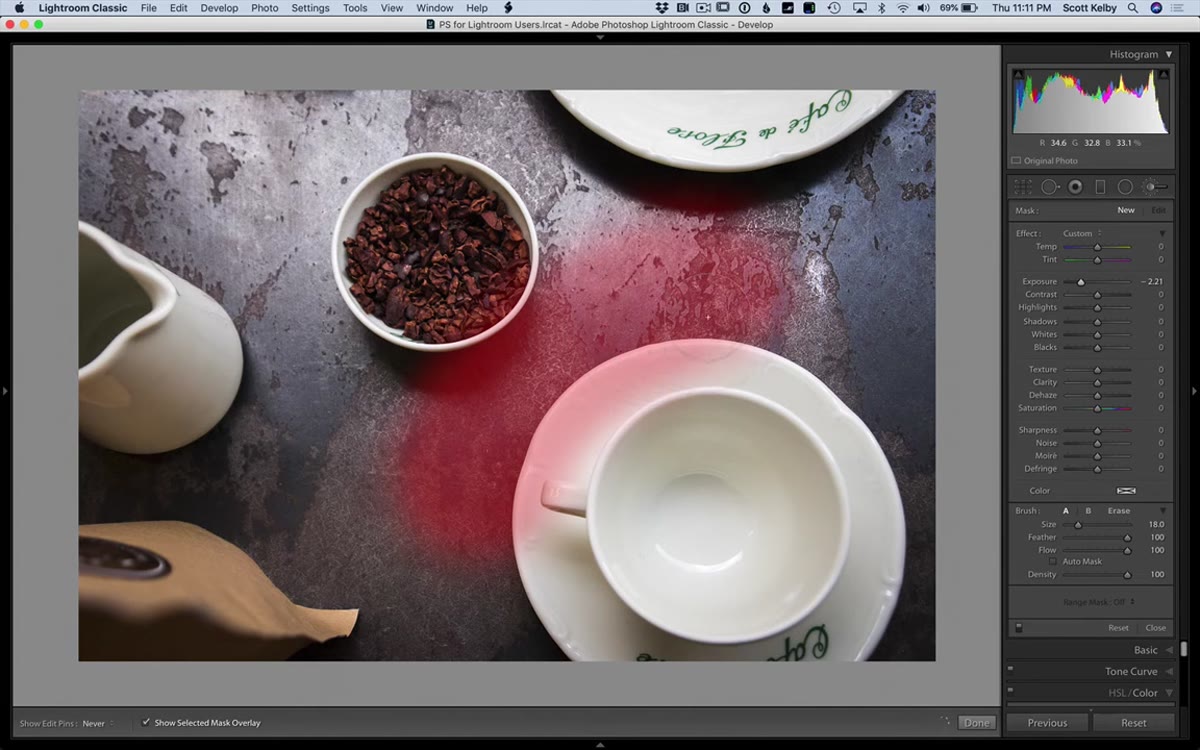 Brush painting over background area away from edges
With Auto Mask off, paint across the parts of your image that don’t require precise edge control. This is where the speed advantage of the regular brush actually matters. Auto Mask has always been a bit of a processing tax – it slows your brush down because Lightroom is doing edge-detection math on every stroke. For big open areas, you don’t need that overhead.
Brush painting over background area away from edges
With Auto Mask off, paint across the parts of your image that don’t require precise edge control. This is where the speed advantage of the regular brush actually matters. Auto Mask has always been a bit of a processing tax – it slows your brush down because Lightroom is doing edge-detection math on every stroke. For big open areas, you don’t need that overhead.
Paint fast, cover ground, and only slow down when you’re approaching something you need to protect. That’s the new mental model here: the brush has two modes, and you get to switch between them in real time.
Step 4: Hold Command (Mac) or Ctrl (Windows) at the Edges
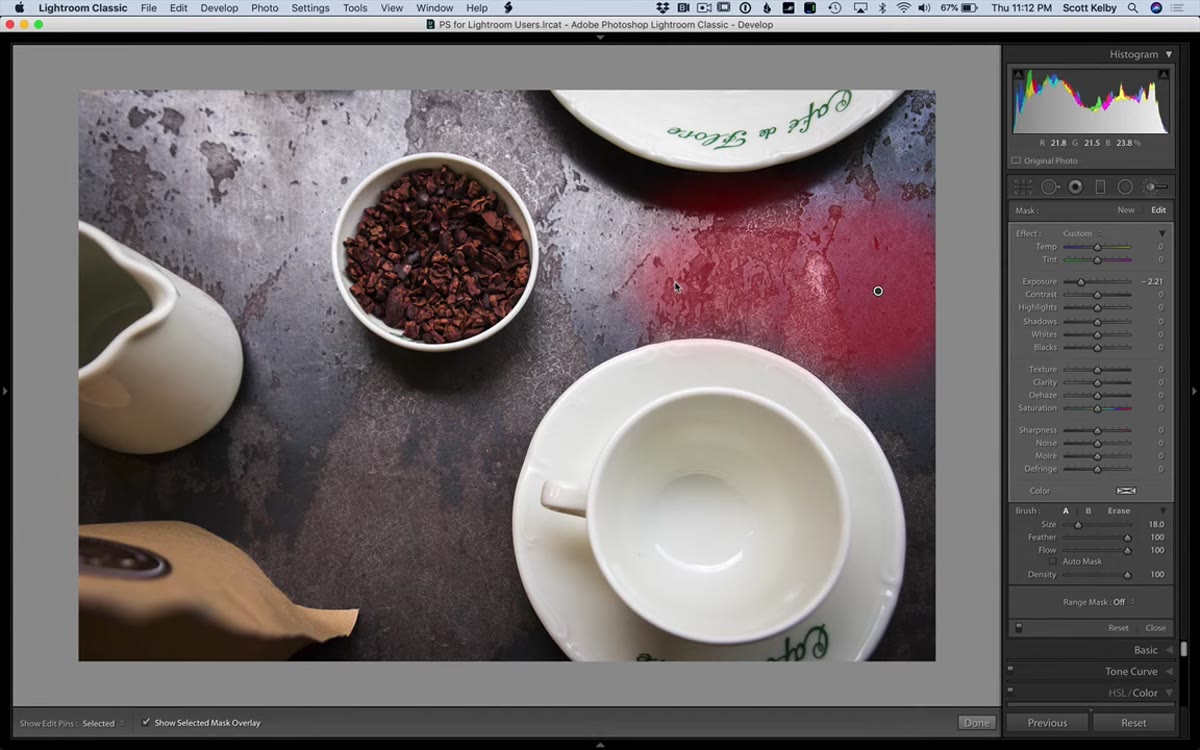 Brush painting near saucer edge with mask not bleeding over
Here’s the whole tip. When your brush gets close to an edge you want to protect, hold down the Command key on Mac or the Control key on Windows. Don’t click anything, don’t go to the panel. Just hold the key and keep painting.
Brush painting near saucer edge with mask not bleeding over
Here’s the whole tip. When your brush gets close to an edge you want to protect, hold down the Command key on Mac or the Control key on Windows. Don’t click anything, don’t go to the panel. Just hold the key and keep painting.
What happens is that Lightroom temporarily activates Auto Mask for as long as you hold the modifier. The center crosshair of your brush – the small plus sign – becomes the reference point for edge detection. As long as that crosshair stays on the side of the edge you want to affect, the brush will read the contrast boundary and avoid spilling onto the protected area. The moment you release the key, you’re back to the fast, unmasked brush.
Step 5: Watch the Center Crosshair, Not the Brush Edge
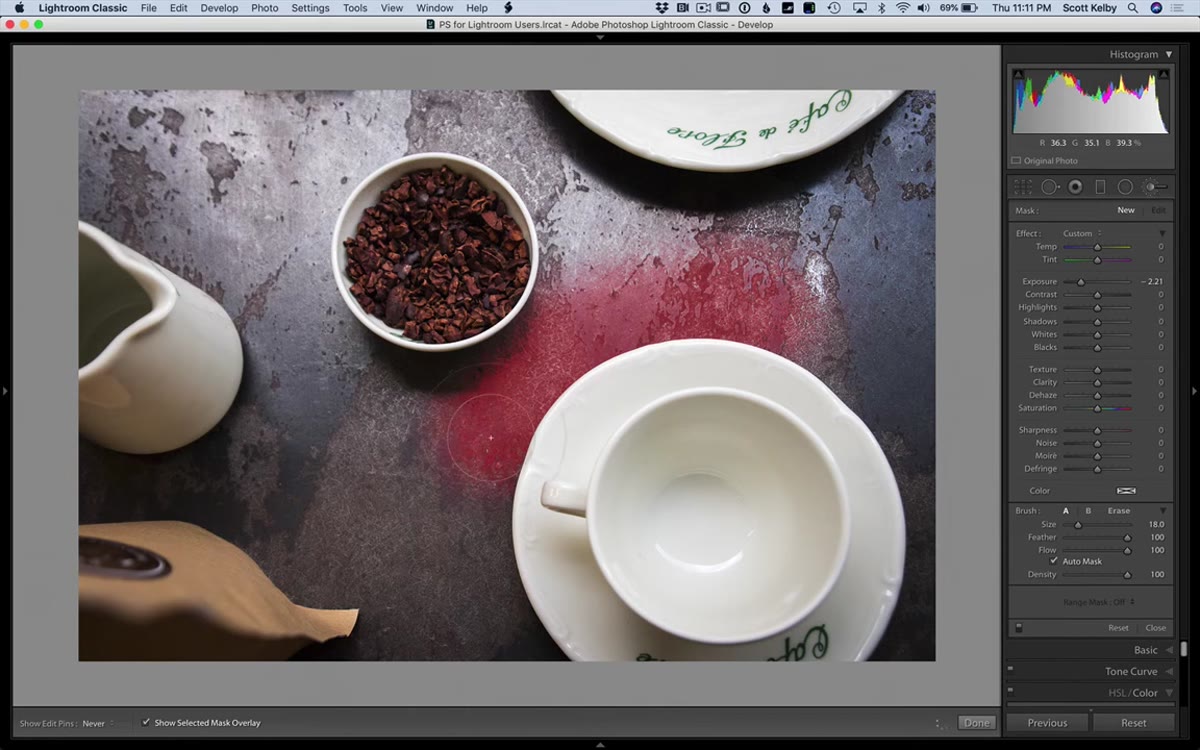 Closeup of brush with plus-sign crosshair near edge of saucer
This is the detail that makes the shortcut actually work in practice. The brush circle you see on screen is larger than the area that determines the mask edge. Auto Mask – whether you’re using it from the panel or triggering it with the shortcut – makes its edge decisions based on where that center crosshair sits, not the outer ring of the brush.
Closeup of brush with plus-sign crosshair near edge of saucer
This is the detail that makes the shortcut actually work in practice. The brush circle you see on screen is larger than the area that determines the mask edge. Auto Mask – whether you’re using it from the panel or triggering it with the shortcut – makes its edge decisions based on where that center crosshair sits, not the outer ring of the brush.
So you can let the brush visually overlap onto the area you’re protecting. As long as the crosshair is sitting on the correct side of the edge, the mask won’t cross it. This means you can paint confidently right up to a boundary without the paranoid, millimeter-at-a-time creeping that used to eat up so much time on detail work.
Step 6: Release the Key and Continue Painting
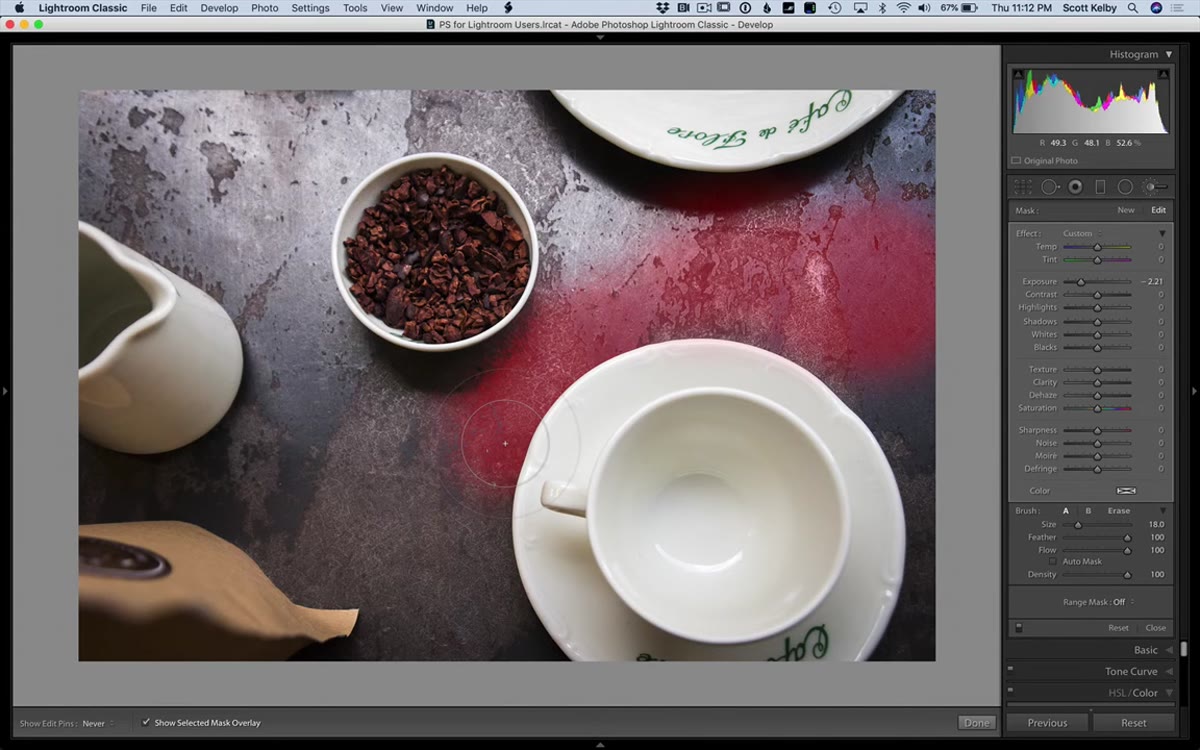 Continued painting across background after releasing key
Once you’re past the edge, release Command or Control and keep painting at full speed. The temporary Auto Mask deactivates instantly, and your brush goes back to its normal, fast behavior. No panel interaction, no workflow interruption.
Continued painting across background after releasing key
Once you’re past the edge, release Command or Control and keep painting at full speed. The temporary Auto Mask deactivates instantly, and your brush goes back to its normal, fast behavior. No panel interaction, no workflow interruption.
This is the actual power of the shortcut: it’s not just that you can activate Auto Mask on demand, it’s that you can toggle it in the middle of a single editing session without breaking your momentum. Edge, release, open area, edge, release. Once it’s in your muscle memory, it becomes completely intuitive.
One Thing I’d Add From My Own Experience
Here’s a caveat worth knowing before you rely on this heavily: Auto Mask’s edge detection is only as good as the contrast at the edge you’re working with. On a photo with a sharp, high-contrast boundary – a dark object against a bright background – the shortcut works almost perfectly. On a softer edge, like hair against a gradient sky or a slightly out-of-focus foreground element, the detection gets murkier and you may still see some bleed.
In those cases, I’ll still reach for the full masking toolkit – subject selection, luminance range masks, or a combination. But for the kind of everyday precision work that comes up constantly, like protecting a product from a background adjustment, or keeping a face out of a vignette, this shortcut handles it cleanly and fast. I’ve started using it without thinking, which is the sign of a shortcut that actually belongs in your workflow.
The single most important thing to take away here: you don’t have to choose between a fast brush and a precise brush. Hold Command on Mac or Ctrl on Windows while using the Adjustment Brush, and you get edge-detection exactly when you need it, without touching the panel at all. It’s one of those techniques that sounds minor until you use it on a real edit, and then you wonder how you worked without it.
Watch the full tutorial on YouTube – Kelby demonstrates the whole thing in a few minutes, and seeing the red mask overlay in action while he works near the edges makes the crosshair behavior especially clear.
Comments (5)
This is the kind of content that keeps me coming back.
Love how you break down complex stuff into manageable steps.
Couldn't agree more. I've seen this make a huge difference in photography work specifically.
The before and after really sells it. Incredible difference.
I keep coming back to this article. It's that useful.
Leave a Comment