There’s a specific kind of frustration that comes from trying to select a subject standing against a dark background. The Quick Selection tool fumbles around the edges, the contrast isn’t there for it to grab onto, and you end up with a selection that looks like it was cut out with safety scissors. I’ve been there more times than I’d like to admit, including on some early band press shots where the lighting was, let’s say, “creative” in all the wrong ways.
Watch the full tutorial on YouTube
In this KelbyOne tutorial, Corey Barker shares a fast, smart workaround that completely reframes how you approach dark-background extractions. The core idea is deceptively simple: temporarily overbrighten the image using an adjustment layer so the Quick Selection tool can actually see what it’s working with. It sounds almost too obvious once you hear it, but it’s one of those techniques that makes you immediately wonder why you weren’t already doing it. Here’s the full breakdown.
Step 1: Open Your Image and Assess the Background
 Dark-background portrait opened in Photoshop workspace
Start with your subject photo where the background is dark and the edge contrast is low. This technique is specifically designed for situations where your subject and the background are close in luminosity at the edges, which is the scenario where the Quick Selection tool typically struggles most. Before you touch any selection tools, just look at the image and identify where the problem edges are. For a figure shot, that usually means the hairline, shoulders, and any place where clothing meets the dark background.
Dark-background portrait opened in Photoshop workspace
Start with your subject photo where the background is dark and the edge contrast is low. This technique is specifically designed for situations where your subject and the background are close in luminosity at the edges, which is the scenario where the Quick Selection tool typically struggles most. Before you touch any selection tools, just look at the image and identify where the problem edges are. For a figure shot, that usually means the hairline, shoulders, and any place where clothing meets the dark background.
Step 2: Add a Levels Adjustment Layer
 Levels adjustment layer being added above the background layer
Here’s the key move: instead of adjusting the image itself, go to your Adjustments panel and add a Levels adjustment layer above your subject layer. Drag the white output slider aggressively to the left, or drag the midtone input slider hard to the left, until the image looks dramatically overexposed. We’re talking way beyond anything you’d ever actually use as a real edit. The goal is not a good-looking image. The goal is maximum edge visibility. You want those formerly murky borders between subject and background to become as obvious as possible so the selection tool has something real to grab onto.
Levels adjustment layer being added above the background layer
Here’s the key move: instead of adjusting the image itself, go to your Adjustments panel and add a Levels adjustment layer above your subject layer. Drag the white output slider aggressively to the left, or drag the midtone input slider hard to the left, until the image looks dramatically overexposed. We’re talking way beyond anything you’d ever actually use as a real edit. The goal is not a good-looking image. The goal is maximum edge visibility. You want those formerly murky borders between subject and background to become as obvious as possible so the selection tool has something real to grab onto.
Don’t merge this layer down. Don’t apply it. Just let it sit on top as a temporary visual aid. That distinction matters a lot, as you’ll see in a moment.
Step 3: Grab the Quick Selection Tool
 Quick Selection tool active, painting over brightened subject
With the Levels adjustment layer still sitting on top and the image looking comically bright, grab the Quick Selection tool from the toolbar (keyboard shortcut: W). Paint over your subject. Because the edges are now clearly defined by the artificial brightness boost, the tool can read the boundaries accurately and snap to them with much more precision than it would on the original dark image.
Quick Selection tool active, painting over brightened subject
With the Levels adjustment layer still sitting on top and the image looking comically bright, grab the Quick Selection tool from the toolbar (keyboard shortcut: W). Paint over your subject. Because the edges are now clearly defined by the artificial brightness boost, the tool can read the boundaries accurately and snap to them with much more precision than it would on the original dark image.
Work from the center of the subject outward. If the tool bleeds into areas you don’t want selected, hold Option (Mac) or Alt (PC) and paint those areas back out of the selection. For a figure with a gap between the arms and body, Option-click and drag through that interior space to cut it out of the selection cleanly.
Step 4: Stay Aware of Which Layer Is Active
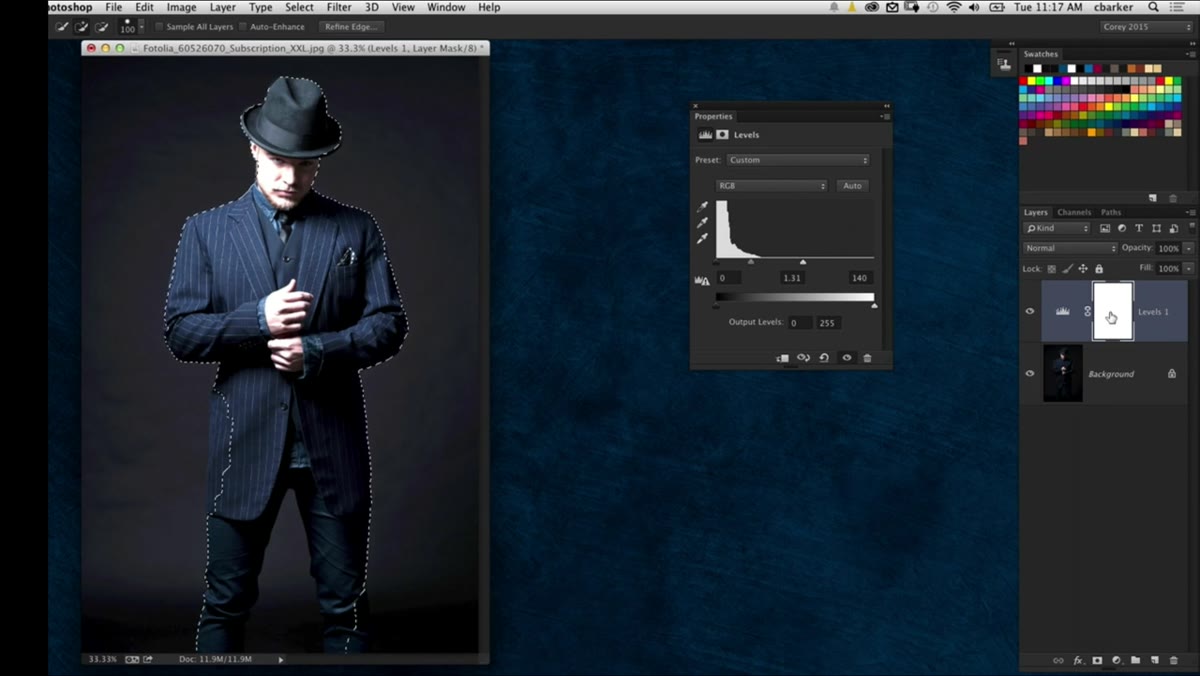 Refine Edge button grayed out because adjustment layer is selected
This is the step where things can go sideways, and Corey makes a point of demonstrating the failure mode so you don’t get blindsided by it. After you’ve painted your selection, you might instinctively click “Refine Edge” – and nothing will happen. The reason is that you’re still highlighted on the Levels adjustment layer in the Layers panel, not the actual subject layer.
Refine Edge button grayed out because adjustment layer is selected
This is the step where things can go sideways, and Corey makes a point of demonstrating the failure mode so you don’t get blindsided by it. After you’ve painted your selection, you might instinctively click “Refine Edge” – and nothing will happen. The reason is that you’re still highlighted on the Levels adjustment layer in the Layers panel, not the actual subject layer.
Before you move to Refine Edge, click directly on your subject layer in the Layers panel to make it the active layer. The selection you’ve already painted stays intact. Only the active layer changes. It’s a small thing, but if you skip it, Photoshop won’t know what pixel data to refine the edge against, and the button either grays out or gives you useless results.
Step 5: Switch to Your Subject Layer and Run Refine Edge
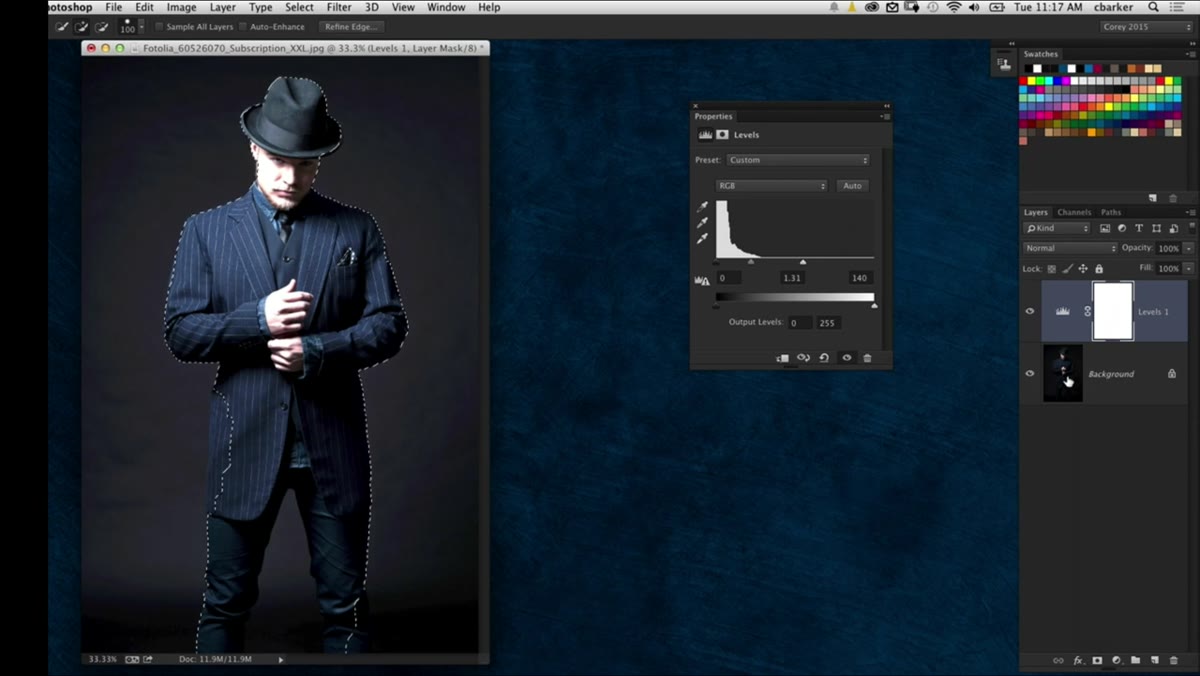 Subject layer selected in panel, Refine Edge dialog opening
Once your actual subject layer is active, click Refine Edge (or “Select and Mask” depending on your version of Photoshop). The dialog will open with your existing selection loaded. From here you can use the Refine Edge brush to recover hair detail, smooth jagged edges, and handle any semi-transparent fringe areas. The selection you built in the previous steps gives Refine Edge a solid starting point, which means it has to do far less guesswork than if you’d handed it a rough selection made on the dark original.
Subject layer selected in panel, Refine Edge dialog opening
Once your actual subject layer is active, click Refine Edge (or “Select and Mask” depending on your version of Photoshop). The dialog will open with your existing selection loaded. From here you can use the Refine Edge brush to recover hair detail, smooth jagged edges, and handle any semi-transparent fringe areas. The selection you built in the previous steps gives Refine Edge a solid starting point, which means it has to do far less guesswork than if you’d handed it a rough selection made on the dark original.
When you’re done refining, output to a Layer Mask. Delete or turn off the Levels adjustment layer since it has done its job. What you’re left with is a clean extraction built on an artificially brightened working view but applied to the actual pixel data underneath.
What I’d Add From My Own Experience
The technique Corey demonstrates works brilliantly for mid-to-bright subjects on dark backgrounds. Where I’ve found it needs a small modification is with subjects that are themselves quite dark, like someone in a black jacket against a near-black wall. In those cases, brightening everything uniformly doesn’t always create enough differential contrast. My workaround is to pair the Levels adjustment with a Hue/Saturation layer that cranks the saturation way up. If there’s any color in your subject’s clothing or skin, pumping the saturation helps the Quick Selection tool distinguish subject from background even when the brightness values are close. Stack both adjustment layers, make your selection, then ditch them both before running Refine Edge. Two throwaway layers instead of one, but the same principle.
I also keep this approach in mind when I’m prepping compositing work. A clean mask pulled this way, before any color grading, saves so much pain later when you’re trying to blend a subject into a new background in Lightroom or Photoshop.
The single most important thing to take from this whole process is that your adjustment layers don’t have to be permanent edits. They can be temporary scaffolding. Lightroom and Photoshop both let you be non-destructive, and that principle extends to using adjustments as visual aids during masking, not just as final image corrections. Once that clicks, a lot of other workarounds open up.
Watch the full tutorial on YouTube to see Corey walk through this live, including the white design technique that inspired the whole segment.
Comments
Leave a Comment