There’s a conversation I’ve had more times than I can count, usually in the comments section of a tutorial or in a DM from someone who’s genuinely frustrated. It goes something like this: “I opened my RAW file in Photoshop, used the Camera Raw filter, and the autofocus points feature was grayed out. Is my camera not supported?” The answer isn’t about the camera. It’s about a fundamental misunderstanding of what a RAW file actually is once it crosses the border from Lightroom into Photoshop. Once I understood this, a lot of my own editing confusion cleared up instantly.
Watch the full tutorial on YouTube
In this Matt Kloskowski tutorial, Matt frames the whole thing as a public service announcement, and honestly that framing is exactly right. This isn’t an advanced technique. It’s foundational knowledge that quietly breaks workflows for photographers at every level, from beginners to people who’ve been shooting for years. The confusion is real, it’s common, and it’s completely understandable given how Photoshop presents the file to you. Let me walk you through what Matt covers and why it changes how you think about every round-trip edit you do.
Step 1: Confirm You’re Starting with a True RAW File in Lightroom Classic
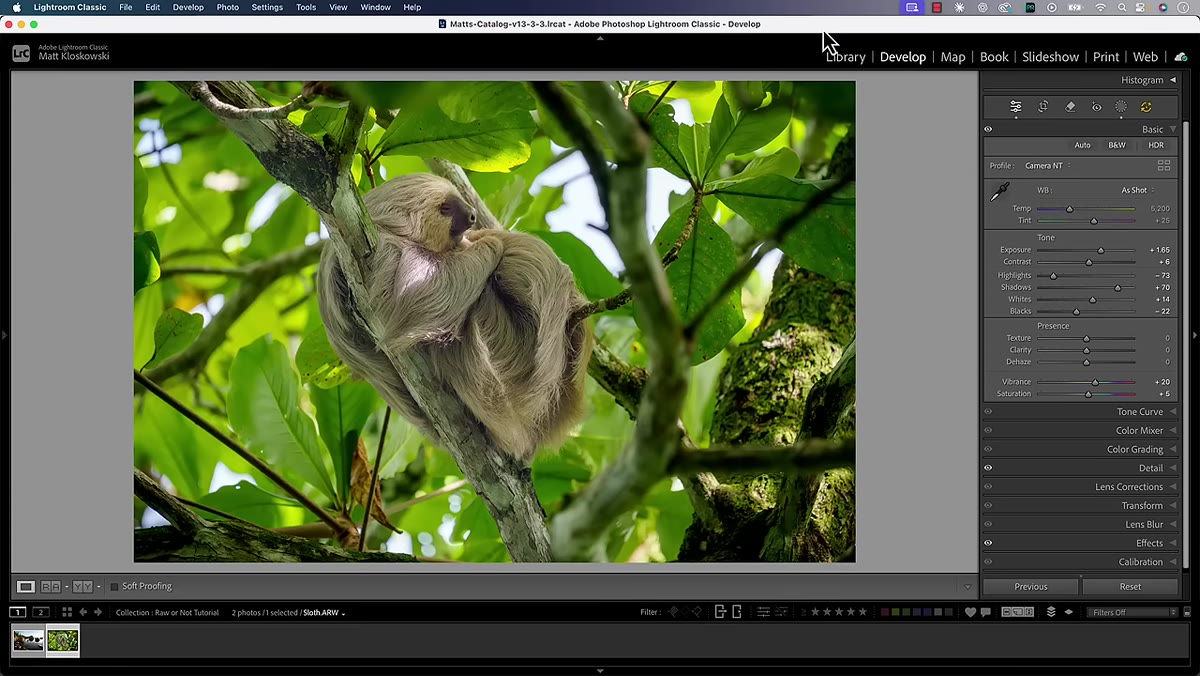 Lightroom Classic develop module showing Sony ARW file info at bottom
Before anything else, know what you’re actually working with. At the bottom of the Lightroom Classic interface, you can see the file type of whatever image you have selected. If it says .ARW, .CR3, .NEF, or another proprietary camera format, or if it’s a .DNG, you’re working with a true RAW file. If it says JPEG, TIFF, or PSD, you’re already working on a rendered file and the rest of this conversation doesn’t apply the same way. Matt is clear that this whole issue specifically concerns RAW and DNG files, so confirming your starting point matters.
Lightroom Classic develop module showing Sony ARW file info at bottom
Before anything else, know what you’re actually working with. At the bottom of the Lightroom Classic interface, you can see the file type of whatever image you have selected. If it says .ARW, .CR3, .NEF, or another proprietary camera format, or if it’s a .DNG, you’re working with a true RAW file. If it says JPEG, TIFF, or PSD, you’re already working on a rendered file and the rest of this conversation doesn’t apply the same way. Matt is clear that this whole issue specifically concerns RAW and DNG files, so confirming your starting point matters.
Step 2: Make Your Lightroom Edits Before Sending to Photoshop
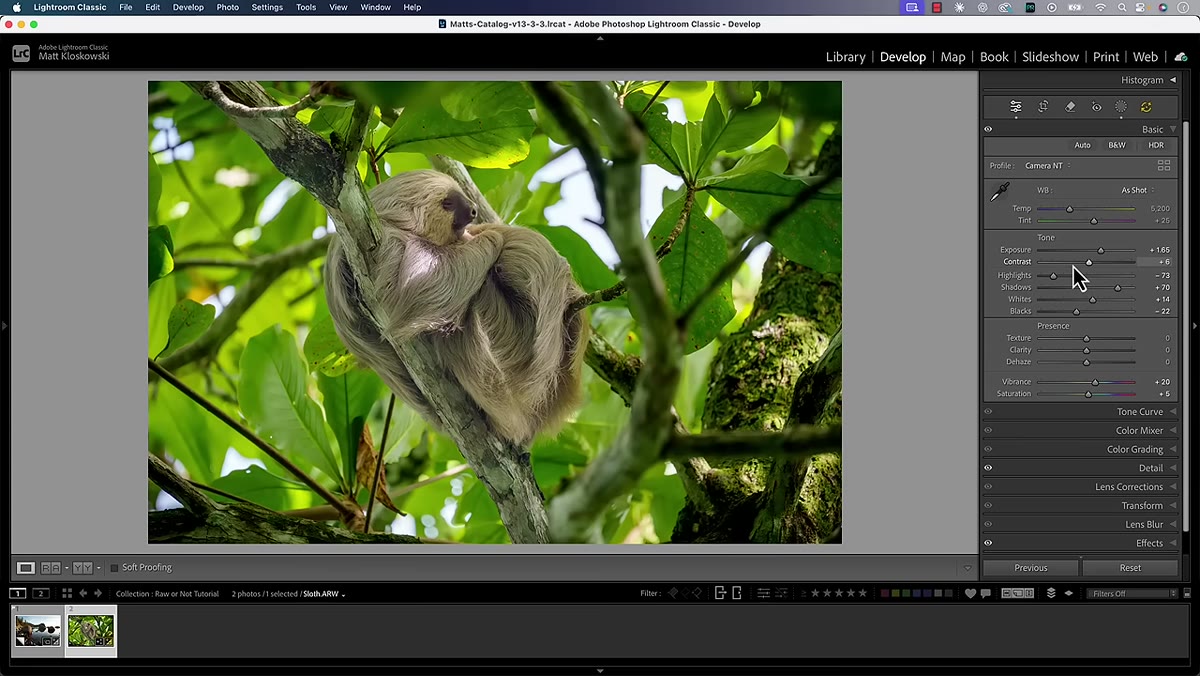 Before and after toggle showing darkened highlights on wildlife photo
Do your foundational adjustments in Lightroom first. Matt shows a simple example, pulling down highlights on a slightly overexposed image, but the principle extends to everything: exposure, white balance, tone curve, masking. This is where you want to do as much heavy lifting as possible, because these changes are happening on actual RAW data. The file hasn’t been baked yet. You have the full bit depth and the full range of information the sensor captured. This is your highest-quality editing environment, and you want to spend as much time here as makes sense for your image.
Before and after toggle showing darkened highlights on wildlife photo
Do your foundational adjustments in Lightroom first. Matt shows a simple example, pulling down highlights on a slightly overexposed image, but the principle extends to everything: exposure, white balance, tone curve, masking. This is where you want to do as much heavy lifting as possible, because these changes are happening on actual RAW data. The file hasn’t been baked yet. You have the full bit depth and the full range of information the sensor captured. This is your highest-quality editing environment, and you want to spend as much time here as makes sense for your image.
Step 3: Understand What Happens the Moment You Choose “Edit In Photoshop”
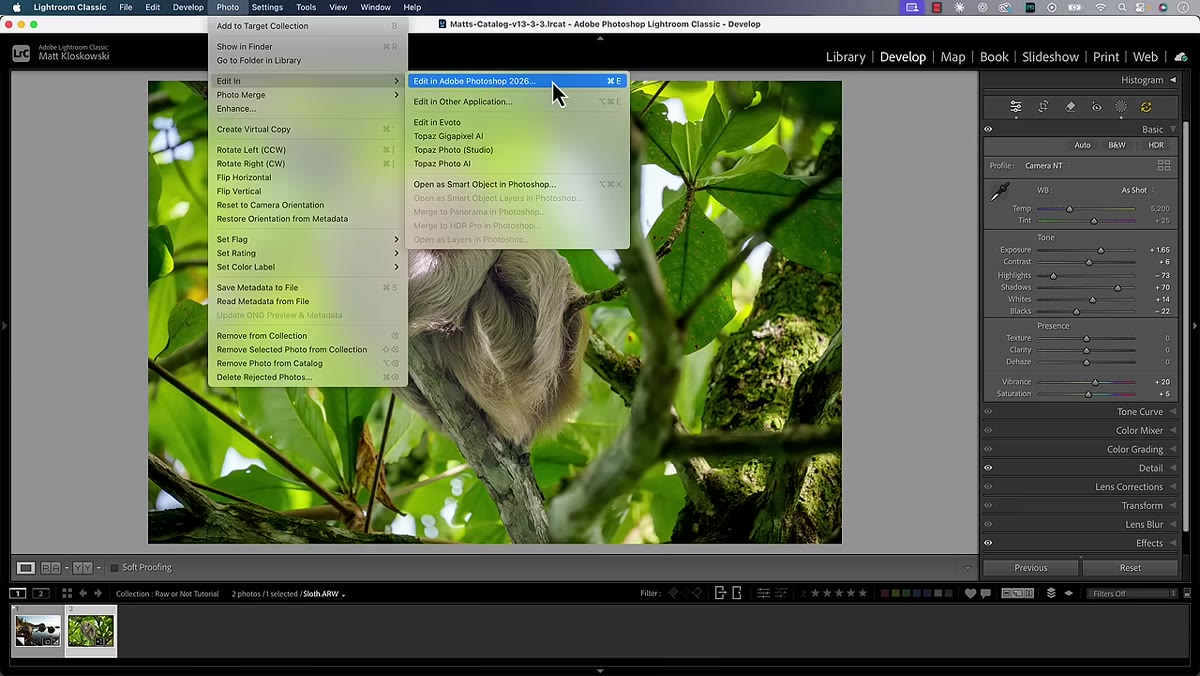 Lightroom Classic photo menu with Edit In Photoshop option highlighted
When you go to Photo, Edit In, Edit In Photoshop, Lightroom doesn’t send your RAW file to Photoshop. It creates a copy of the photo, rendered according to the external editing preferences you’ve set, and sends that copy. For RAW files, this happens automatically without a dialog box. Matt points out that you can check those preferences under Edit, Preferences, External Editing on a PC, but he’s also refreshingly honest that you don’t need to stress over the exact settings there. The important thing is that a conversion is happening, and after it does, your RAW file is no longer in play.
Lightroom Classic photo menu with Edit In Photoshop option highlighted
When you go to Photo, Edit In, Edit In Photoshop, Lightroom doesn’t send your RAW file to Photoshop. It creates a copy of the photo, rendered according to the external editing preferences you’ve set, and sends that copy. For RAW files, this happens automatically without a dialog box. Matt points out that you can check those preferences under Edit, Preferences, External Editing on a PC, but he’s also refreshingly honest that you don’t need to stress over the exact settings there. The important thing is that a conversion is happening, and after it does, your RAW file is no longer in play.
Step 4: Recognize That the .ARW Label in Photoshop Is Misleading
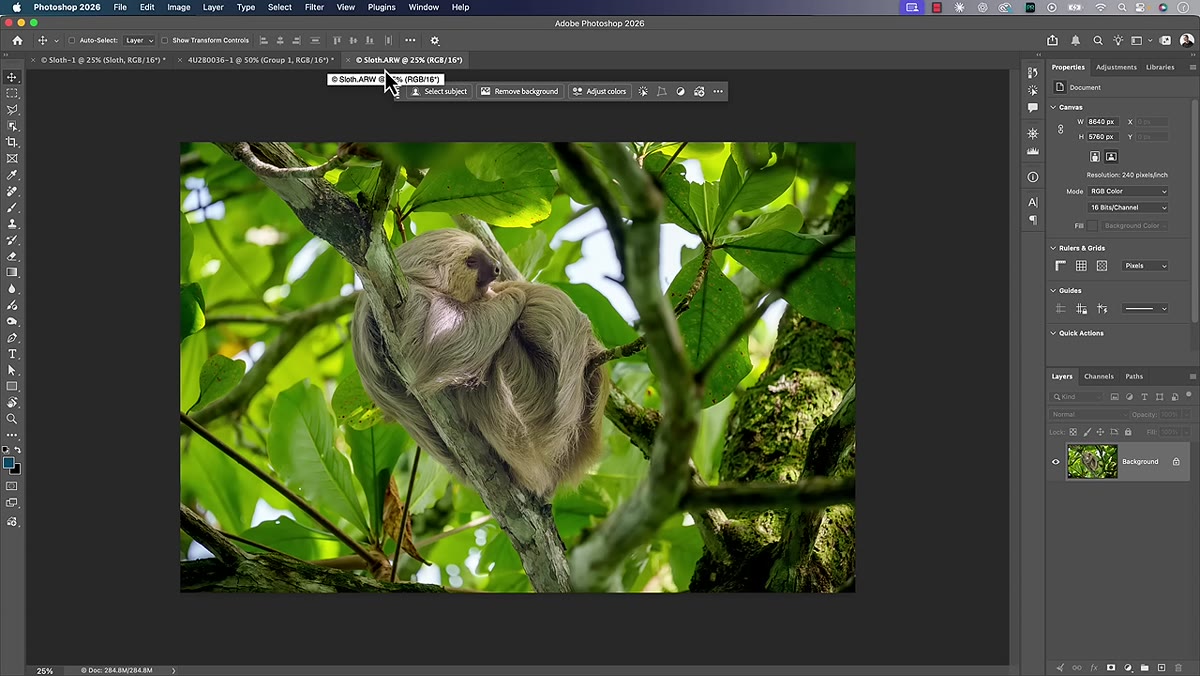 Photoshop interface showing ARW filename in tab with layers panel visible
This is the specific moment where people get tripped up, and it’s a completely reasonable place to be confused. Once the file opens in Photoshop, the tab at the top of the interface still shows the .ARW extension. Your brain reads that and thinks “RAW file.” But the layers panel is visible. The full Photoshop toolset is available. Those two things cannot coexist with a true RAW file. The presence of the Photoshop interface is your signal that the file has already been converted. The .ARW in the tab reflects the file name, not the current file state. It’s a naming convention that happens to create a false sense of security.
Photoshop interface showing ARW filename in tab with layers panel visible
This is the specific moment where people get tripped up, and it’s a completely reasonable place to be confused. Once the file opens in Photoshop, the tab at the top of the interface still shows the .ARW extension. Your brain reads that and thinks “RAW file.” But the layers panel is visible. The full Photoshop toolset is available. Those two things cannot coexist with a true RAW file. The presence of the Photoshop interface is your signal that the file has already been converted. The .ARW in the tab reflects the file name, not the current file state. It’s a naming convention that happens to create a false sense of security.
Step 5: Use the Camera Raw Filter Knowing Its Actual Limitations
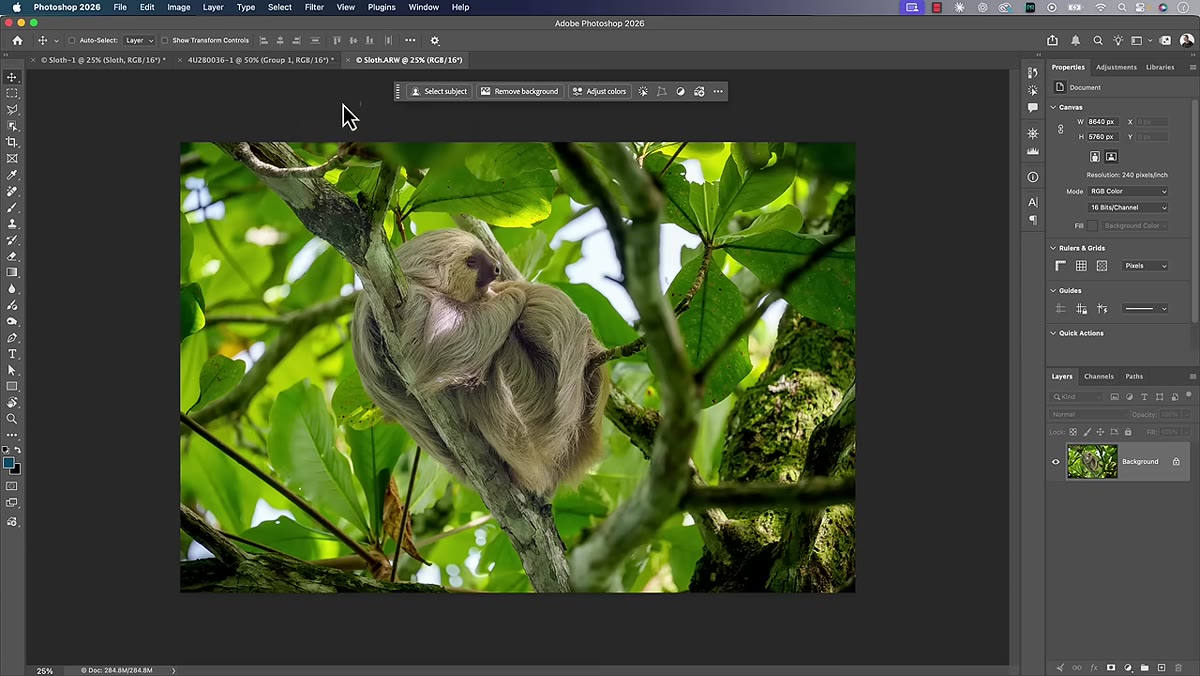 Filter menu open in Photoshop with Camera Raw Filter option visible
The Camera Raw filter inside Photoshop looks almost identical to Lightroom’s Develop module or standalone Adobe Camera Raw. The sliders are the same. The panels are the same. It feels like the same tool. But it’s operating on a rendered file, not raw data, which means certain features are simply unavailable. The most current example Matt walks through is the autofocus points overlay. Right-clicking inside the Camera Raw filter to access Show Autofocus Points shows the option grayed out, because that feature requires actual raw data to function. If you’ve ever hit a grayed-out feature in Camera Raw and blamed your camera, this is likely why.
Filter menu open in Photoshop with Camera Raw Filter option visible
The Camera Raw filter inside Photoshop looks almost identical to Lightroom’s Develop module or standalone Adobe Camera Raw. The sliders are the same. The panels are the same. It feels like the same tool. But it’s operating on a rendered file, not raw data, which means certain features are simply unavailable. The most current example Matt walks through is the autofocus points overlay. Right-clicking inside the Camera Raw filter to access Show Autofocus Points shows the option grayed out, because that feature requires actual raw data to function. If you’ve ever hit a grayed-out feature in Camera Raw and blamed your camera, this is likely why.
Step 6: Check Your Workflow If You’re Using Lightroom (Cloud) or Camera Raw
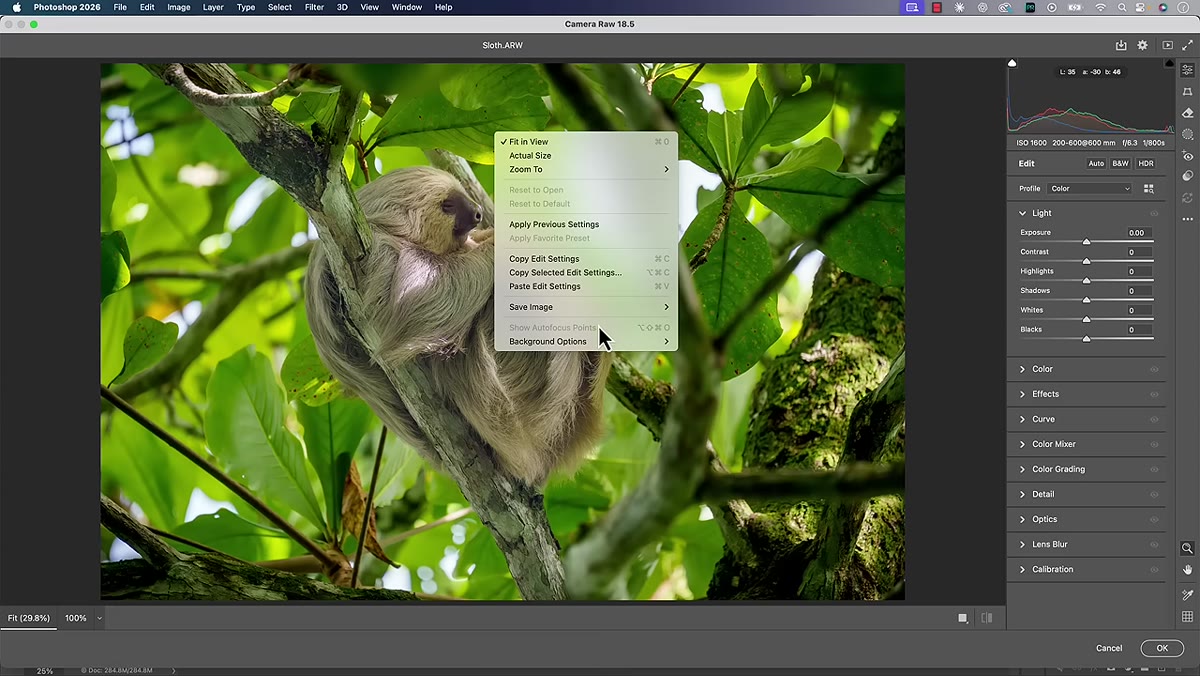 Autofocus points option grayed out in Camera Raw filter context menu
The same logic applies whether you’re using Lightroom Classic, the cloud-based Lightroom, or opening files directly in Adobe Camera Raw. The moment the file gets rendered and sent to Photoshop, it loses its RAW status. Matt notes he covers the Lightroom and Camera Raw variations in the full video. The core principle is identical across all three paths: RAW features are only available while the file is still in its native RAW state, before any rendering or copy conversion takes place.
Autofocus points option grayed out in Camera Raw filter context menu
The same logic applies whether you’re using Lightroom Classic, the cloud-based Lightroom, or opening files directly in Adobe Camera Raw. The moment the file gets rendered and sent to Photoshop, it loses its RAW status. Matt notes he covers the Lightroom and Camera Raw variations in the full video. The core principle is identical across all three paths: RAW features are only available while the file is still in its native RAW state, before any rendering or copy conversion takes place.
What This Means for Smart Object Workflows
I want to add something here that Matt gestures toward but doesn’t fully unpack in this segment, because it changes the picture a little. If you open a RAW file into Photoshop as a Smart Object, rather than a flat layer, you preserve a link back to the RAW data. Double-clicking that Smart Object layer opens it back in Camera Raw with full RAW-level editing capability, including features like autofocus points. This is the closest thing to a workaround for this limitation, but it comes with its own tradeoffs around file size and certain Photoshop operations that don’t play nicely with Smart Objects. My personal approach is to do everything I possibly can in Lightroom first, use Smart Objects when I know I’ll need to revisit RAW-level adjustments, and treat the Camera Raw filter inside Photoshop as a finishing tool rather than a primary editing environment.
The single most important takeaway here is this: the file tab extension does not tell you whether you’re working on RAW data. The interface does. Layers panel equals rendered file. No exceptions. Once that clicks, a lot of previously confusing behavior in Photoshop starts making perfect sense, and you’ll stop losing time hunting for features that were never going to be available in the first place.
Watch the full tutorial on YouTube to see Matt walk through this live with an actual wildlife photo, including the Lightroom and Camera Raw variations he covers toward the end.
Comments (5)
Tried this technique this morning. Game changer for real.
Finally someone explains this in a way that actually makes sense.
My workflow just got 10x faster. Not even kidding.
Tried this technique this morning. Game changer for real.
This is fantastic. I've been recommending this approach to my readers too.
Leave a Comment