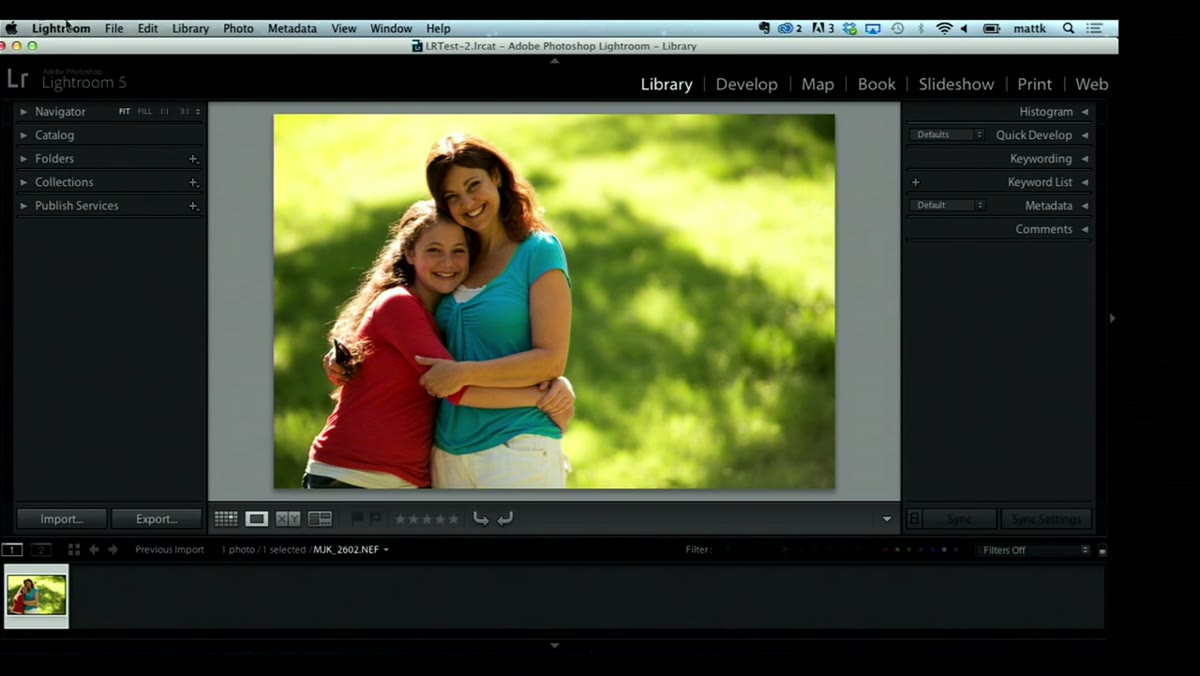
There’s a specific kind of frustration that comes from doing everything right inside Lightroom, sending a file to Photoshop, and watching the color shift the moment it opens. I’ve had that happen on client work more times than I’d like to admit, usually because I hadn’t thought carefully about the handoff settings that govern what Lightroom passes to Photoshop in the first place. Once I locked those settings down, the whole round-trip workflow clicked into place in a way it never had before.
In this KelbyOne tutorial from the Photoshop User TV series, host Matt Laskowski walks through the exact process of configuring Lightroom’s external editing preferences, doing a solid base edit in the Develop module, and then using a tool that was brand new in Lightroom 5 - the Radial Filter - to pull focus toward a subject before handing the file off to Photoshop. Watch the full tutorial on YouTube if you want to follow along with the original footage. What I want to do here is unpack each step with enough detail that you can follow it without a video running in another tab.
The workflow he demonstrates is not complicated, but it is deliberate. That’s the part most tutorials skip. So let’s go step by step.
Step 1: Open Lightroom’s External Editing Preferences
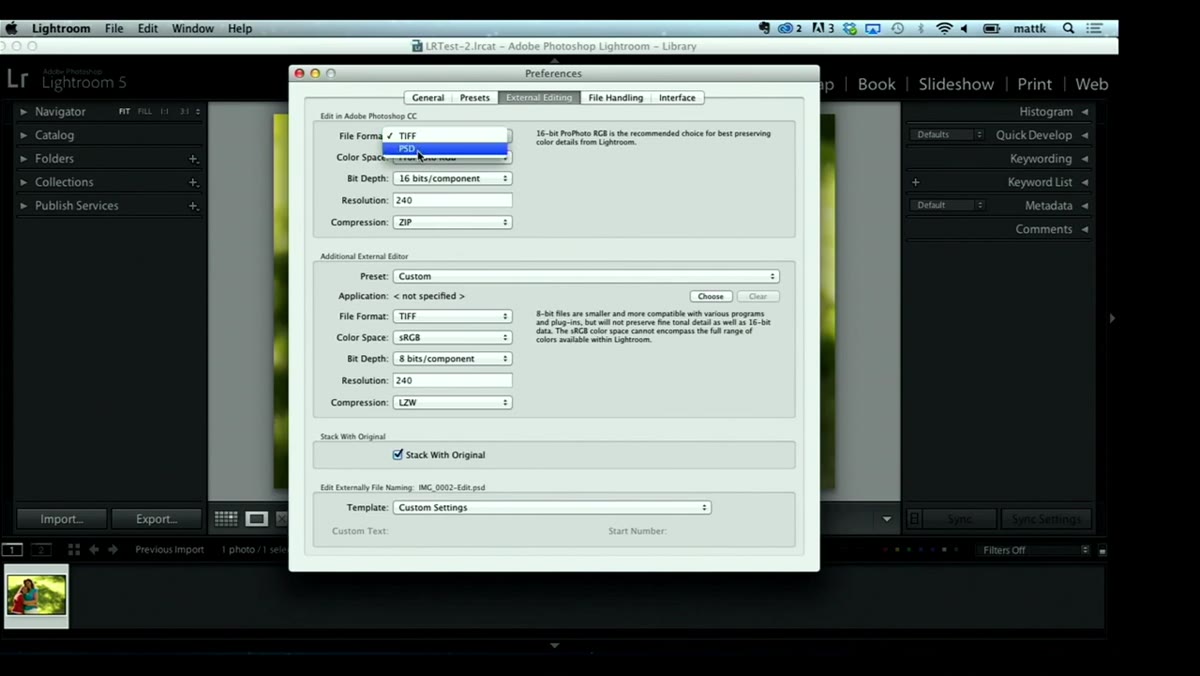
 Lightroom Preferences panel open to External Editing tab
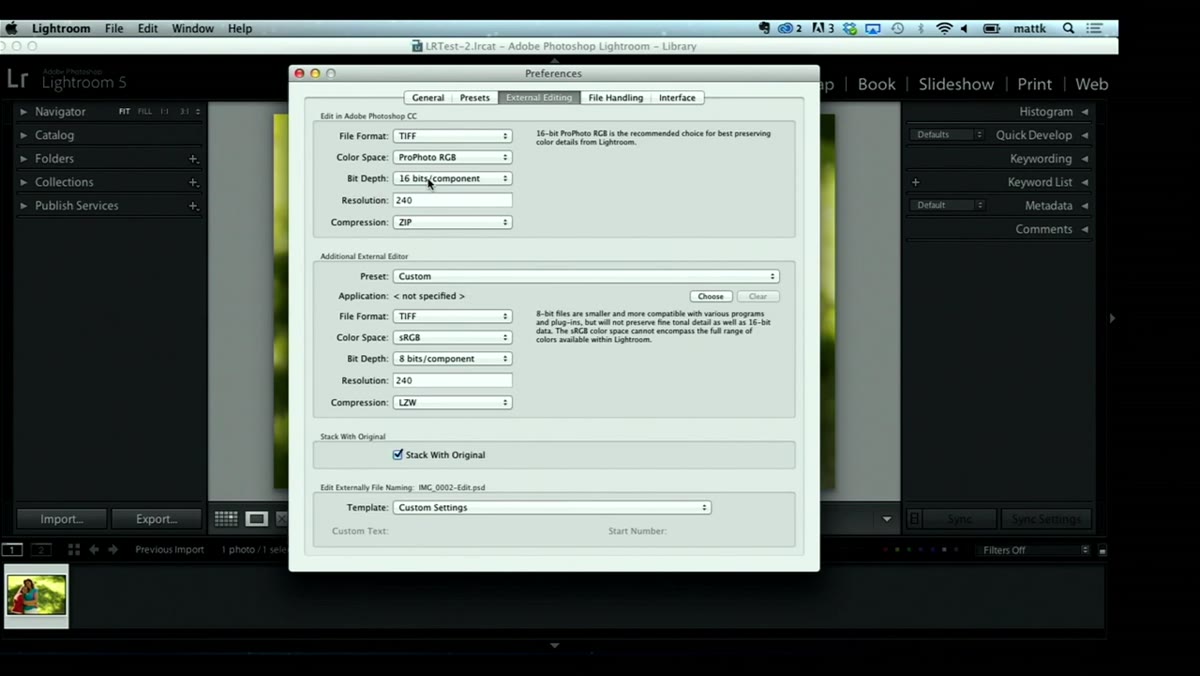
On a Mac, go to the Lightroom menu and choose Preferences. On a PC, it lives under the Edit menu. Once the panel opens, click the External Editing tab. This is where Lightroom decides what kind of file it hands off to Photoshop, and the default settings are actually pretty well considered - but you need to understand what each one does so you can make intentional choices rather than accidental ones.
Lightroom Preferences panel open to External Editing tab
On a Mac, go to the Lightroom menu and choose Preferences. On a PC, it lives under the Edit menu. Once the panel opens, click the External Editing tab. This is where Lightroom decides what kind of file it hands off to Photoshop, and the default settings are actually pretty well considered - but you need to understand what each one does so you can make intentional choices rather than accidental ones.
Step 2: Choose Your File Format (and Why TIFF Wins Here)
 External Editing file format dropdown showing TIFF selected
Lightroom gives you two format options for external editing: TIFF and PSD. PSD is Photoshop’s native format, so you might expect it to be the obvious pick. But Lightroom actively discourages it with a warning message about compatibility, and there’s a real reason behind that friction - TIFF handles layers and maintains quality without the occasional compatibility headaches PSD can introduce when files move between applications or get archived. The tutorial recommends leaving it on TIFF, and after years of round-tripping files, I do the same.
External Editing file format dropdown showing TIFF selected
Lightroom gives you two format options for external editing: TIFF and PSD. PSD is Photoshop’s native format, so you might expect it to be the obvious pick. But Lightroom actively discourages it with a warning message about compatibility, and there’s a real reason behind that friction - TIFF handles layers and maintains quality without the occasional compatibility headaches PSD can introduce when files move between applications or get archived. The tutorial recommends leaving it on TIFF, and after years of round-tripping files, I do the same.
Step 3: Set Color Space to ProPhoto RGB
 Color space dropdown with ProPhoto RGB selected in preferences
This one matters more than most people realize. ProPhoto RGB is the largest color space available in this dropdown, meaning it holds onto the most color information when Lightroom hands your file to Photoshop. Think of it like exporting at full resolution - you can always scale down later, but you can’t add data that was never there. If your final output is for the web, you’ll convert to sRGB at the end of your process. But you want to be working with the full range of color for as long as possible inside your editing chain.
Color space dropdown with ProPhoto RGB selected in preferences
This one matters more than most people realize. ProPhoto RGB is the largest color space available in this dropdown, meaning it holds onto the most color information when Lightroom hands your file to Photoshop. Think of it like exporting at full resolution - you can always scale down later, but you can’t add data that was never there. If your final output is for the web, you’ll convert to sRGB at the end of your process. But you want to be working with the full range of color for as long as possible inside your editing chain.
Step 4: Set Bit Depth to 16-Bit
 Bit depth option showing 16-bit selected in External Editing tab
The same logic applies to bit depth. A 16-bit file contains exponentially more tonal information than an 8-bit file, which means you have more room to push gradients, shadows, and highlights without banding or posterization appearing in your image. Start high. If a client or platform requires an 8-bit file, you convert it at export. You never want to be the person who edited an 8-bit file and then tried to recover detail in a sky that was never there to begin with. Resolution can stay at 240 ppi, and compression can stay on the zip default - neither of those needs your attention right now.
Bit depth option showing 16-bit selected in External Editing tab
The same logic applies to bit depth. A 16-bit file contains exponentially more tonal information than an 8-bit file, which means you have more room to push gradients, shadows, and highlights without banding or posterization appearing in your image. Start high. If a client or platform requires an 8-bit file, you convert it at export. You never want to be the person who edited an 8-bit file and then tried to recover detail in a sky that was never there to begin with. Resolution can stay at 240 ppi, and compression can stay on the zip default - neither of those needs your attention right now.
Step 5: Do Your Base Edit in the Develop Module First
 Develop module open with Highlights slider being pulled back
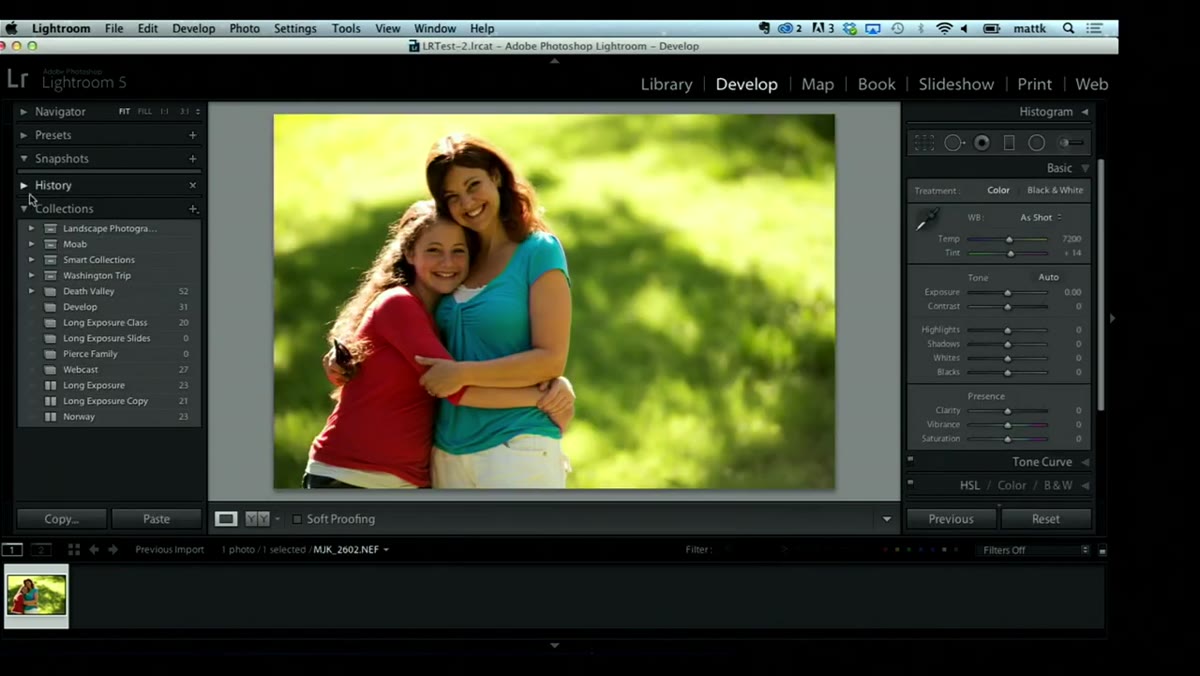
Before you ever send a file to Photoshop, do your foundational work in Lightroom. The tutorial demonstrates pulling highlights back to recover detail in bright areas, then using the Whites and Blacks sliders with a specific technique: hold Option on Mac (or Alt on PC) while dragging the Whites slider right until you just start to see small clipped areas appear, then do the same with Blacks dragging left. Those tiny clipped specks tell you that you’ve found the true white point and black point of the image without blowing anything out. After that, a nudge of Vibrance brings color saturation up in a way that’s more flattering to skin tones than the Saturation slider, which tends to be more aggressive and less selective.
Develop module open with Highlights slider being pulled back
Before you ever send a file to Photoshop, do your foundational work in Lightroom. The tutorial demonstrates pulling highlights back to recover detail in bright areas, then using the Whites and Blacks sliders with a specific technique: hold Option on Mac (or Alt on PC) while dragging the Whites slider right until you just start to see small clipped areas appear, then do the same with Blacks dragging left. Those tiny clipped specks tell you that you’ve found the true white point and black point of the image without blowing anything out. After that, a nudge of Vibrance brings color saturation up in a way that’s more flattering to skin tones than the Saturation slider, which tends to be more aggressive and less selective.
Step 6: Use the Radial Filter to Create a Natural Spotlight Effect
 Radial Filter drawn over subjects with exposure pulled down outside
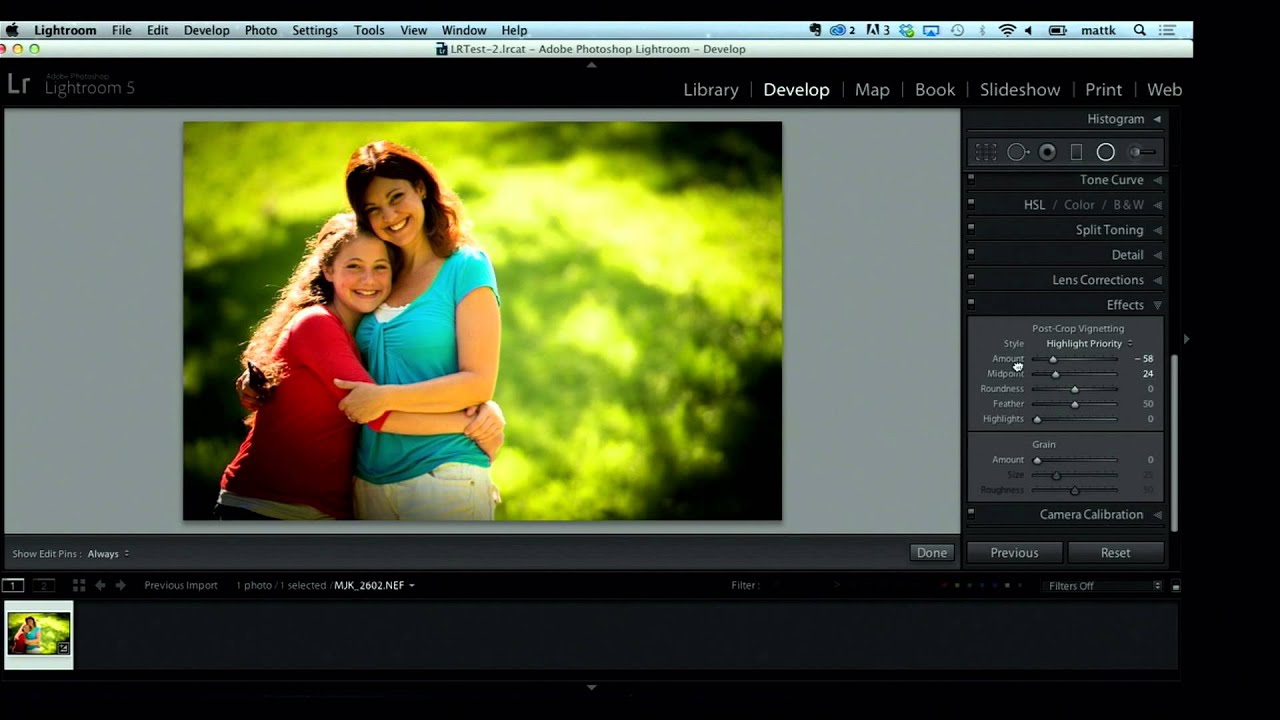
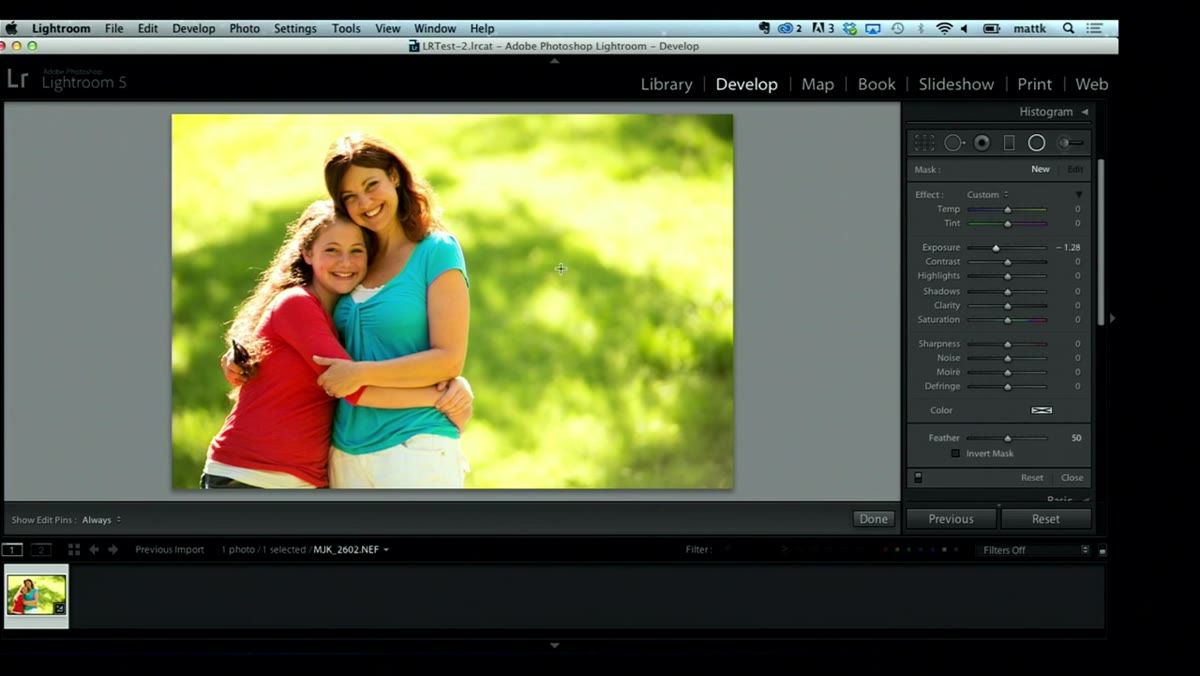
This is the step that earns its place in the workflow. Lightroom’s vignette tool darkens from the corners inward, which works fine for landscapes but starts to clip hair and faces when your subject is centered in the frame. The Radial Filter solves this by letting you draw an oval around your actual subject and apply exposure adjustments outside that oval - meaning the center stays bright and the edges fall off naturally. Drag the exposure down slightly outside the filter, invert the mask so the darkening happens outside your drawn shape, and feather the edge so the transition looks like light rather than a gradient. It reads as a subtle spotlight effect that draws the eye without looking manipulated.
Radial Filter drawn over subjects with exposure pulled down outside
This is the step that earns its place in the workflow. Lightroom’s vignette tool darkens from the corners inward, which works fine for landscapes but starts to clip hair and faces when your subject is centered in the frame. The Radial Filter solves this by letting you draw an oval around your actual subject and apply exposure adjustments outside that oval - meaning the center stays bright and the edges fall off naturally. Drag the exposure down slightly outside the filter, invert the mask so the darkening happens outside your drawn shape, and feather the edge so the transition looks like light rather than a gradient. It reads as a subtle spotlight effect that draws the eye without looking manipulated.
A Note on When to Actually Send It to Photoshop
I’ve found that the biggest mistake people make with this workflow is sending files to Photoshop too early. Lightroom handles a huge percentage of what most portrait and editorial work requires: exposure, color, local adjustments, noise reduction, lens corrections. The round-trip to Photoshop should be reserved for things Lightroom genuinely can’t do - content-aware fills, complex compositing, layer-based retouching, or frequency separation skin work. When I’m editing press shots or event work, I try to finish 90% of the image in Lightroom before I ever right-click and choose “Edit In Photoshop.” The cleaner your Lightroom edit, the less time you waste fixing things in Photoshop that could have been handled faster in the Develop module.
The single biggest takeaway from this tutorial is that the Lightroom-to-Photoshop handoff is not automatic. The settings in that External Editing preferences panel are a deliberate choice about how much information you want to carry into Photoshop, and most people have never looked at them. Get those right - TIFF, ProPhoto RGB, 16-bit - and the rest of the workflow becomes a lot more predictable. Finish your foundational edit in Lightroom, use the Radial Filter to shape light before you export, and only bring Photoshop in when you genuinely need it.
Watch the full tutorial on YouTube to see Matt walk through the actual image and demonstrate how these adjustments layer together in real time.
Comments (5)
My workflow just got 10x faster. Not even kidding.
Clear and practical. No fluff. Appreciate that.
Finally someone explains this in a way that actually makes sense.
I've been looking for exactly this kind of tutorial. Perfect timing.
Couldn't agree more. I've seen this make a huge difference in retouching work specifically.
Leave a Comment