
There is one workflow problem that used to wreck me every time I came home from a trip. My phone camera roll is a disaster of food photos, screenshots, and actual keepers all jumbled together. My Sony files are sitting on a card. And somewhere between those two worlds is a batch of photos I genuinely care about, waiting to get lost or forgotten. For a while my solution was “deal with it later,” which, as any photographer knows, is code for “never deal with it.”
What changed things was building a proper mobile-to-desktop bridge inside Lightroom, and Watch the full tutorial on YouTube from Matt Kloskowski breaks this down better than anything else I’ve seen. Using an Iceland trip as a working example, he walks through how to create synced collections on your phone, pull in your picks, and have everything appear on your desktop almost instantly. It is one of those workflows that sounds like it should be complicated but turns out to be embarrassingly simple once someone just shows you the steps.
The core idea is this: Lightroom Mobile is not just a dumbed-down editing app you use when your laptop is not nearby. It is a genuine sync engine, and if you treat it like one from the moment you land at your destination, you will return home with an organized, editable library instead of a pile of chaos.
Step 1: Create a Trip Collection in Lightroom Mobile
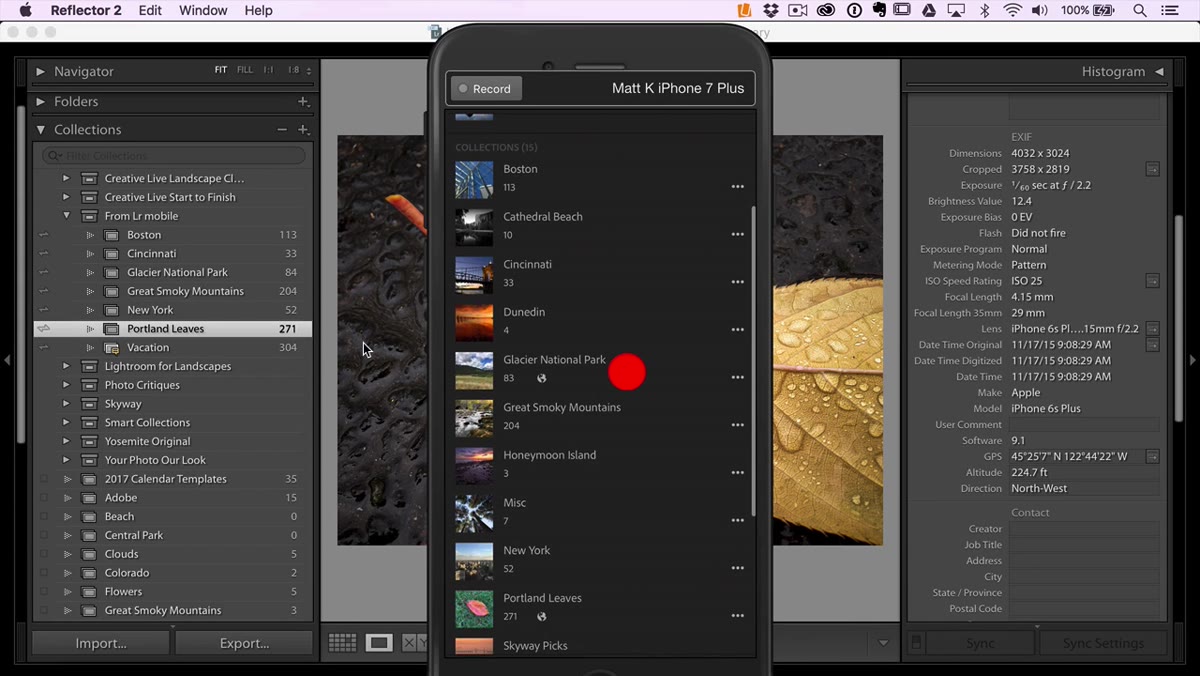 Creating a new collection named Iceland in Lightroom Mobile
The first thing to do before you shoot a single frame, or at least before you land back home, is create a dedicated collection for your trip inside Lightroom Mobile. Tap the plus icon in the top right of the Collections panel and give it a name that means something to you. “Iceland,” “Japan 2024,” “Joshua Tree March” — whatever gets you back to these photos fast.
Creating a new collection named Iceland in Lightroom Mobile
The first thing to do before you shoot a single frame, or at least before you land back home, is create a dedicated collection for your trip inside Lightroom Mobile. Tap the plus icon in the top right of the Collections panel and give it a name that means something to you. “Iceland,” “Japan 2024,” “Joshua Tree March” — whatever gets you back to these photos fast.
Here is the part that still impresses me every time: that collection immediately shows up in the Lightroom Mobile section on your desktop. Not after a long sync, not after you manually push anything. It just appears with zero photos in it, ready to receive your work. The collection is your anchor point for the entire trip.
Step 2: Understand Your Three Import Options
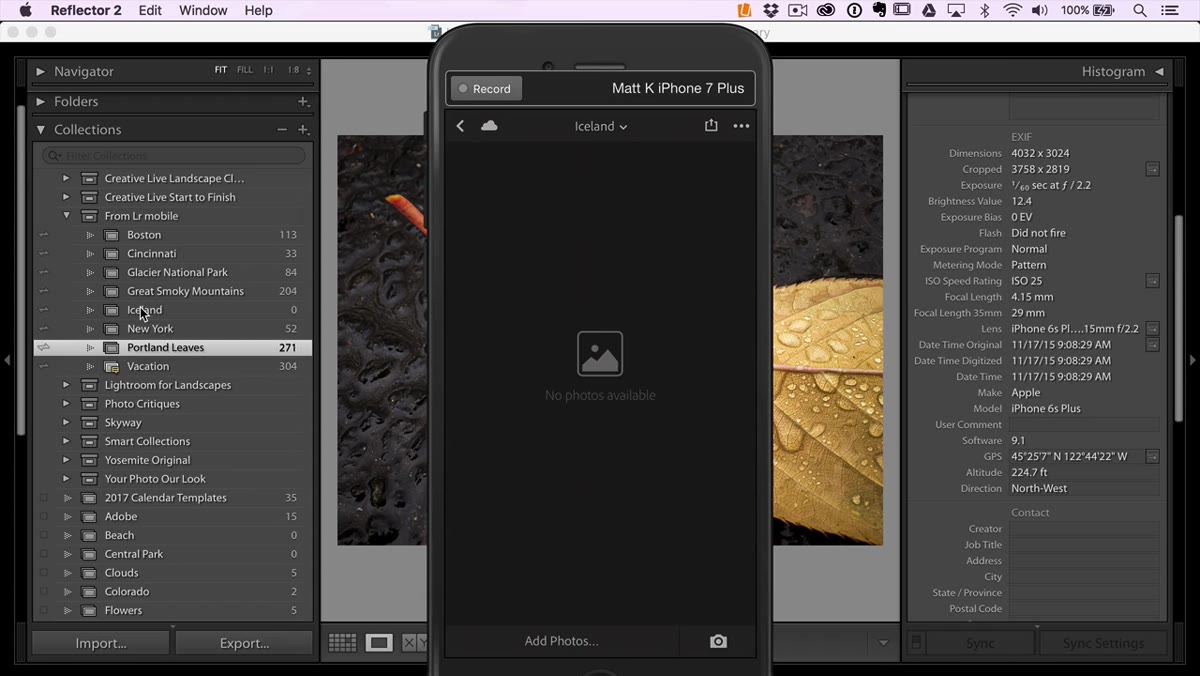 Add photos option visible at the bottom of the Iceland collection
Once your collection exists, Lightroom Mobile gives you three ways to get photos into it, and each one serves a different shooting situation. First, you can tap directly into the collection and use the Lightroom Mobile camera to shoot straight into it. I rarely do this because I prefer the native iPhone camera for quick captures, but if you are doing a focused mobile-only shoot it is a clean option.
Add photos option visible at the bottom of the Iceland collection
Once your collection exists, Lightroom Mobile gives you three ways to get photos into it, and each one serves a different shooting situation. First, you can tap directly into the collection and use the Lightroom Mobile camera to shoot straight into it. I rarely do this because I prefer the native iPhone camera for quick captures, but if you are doing a focused mobile-only shoot it is a clean option.
Second, if your photos are already sitting in your iPhone camera roll, you can use the “Add Photos” option at the bottom of the collection view to pull them in directly. Third, and this is the one that covers most real-world scenarios, you can access everything you have ever shot inside Lightroom Mobile through the Lightroom Photos section and move picks into your collection from there. That third option is where the real workflow lives.
Step 3: Navigate to Lightroom Photos and Locate Your Trip
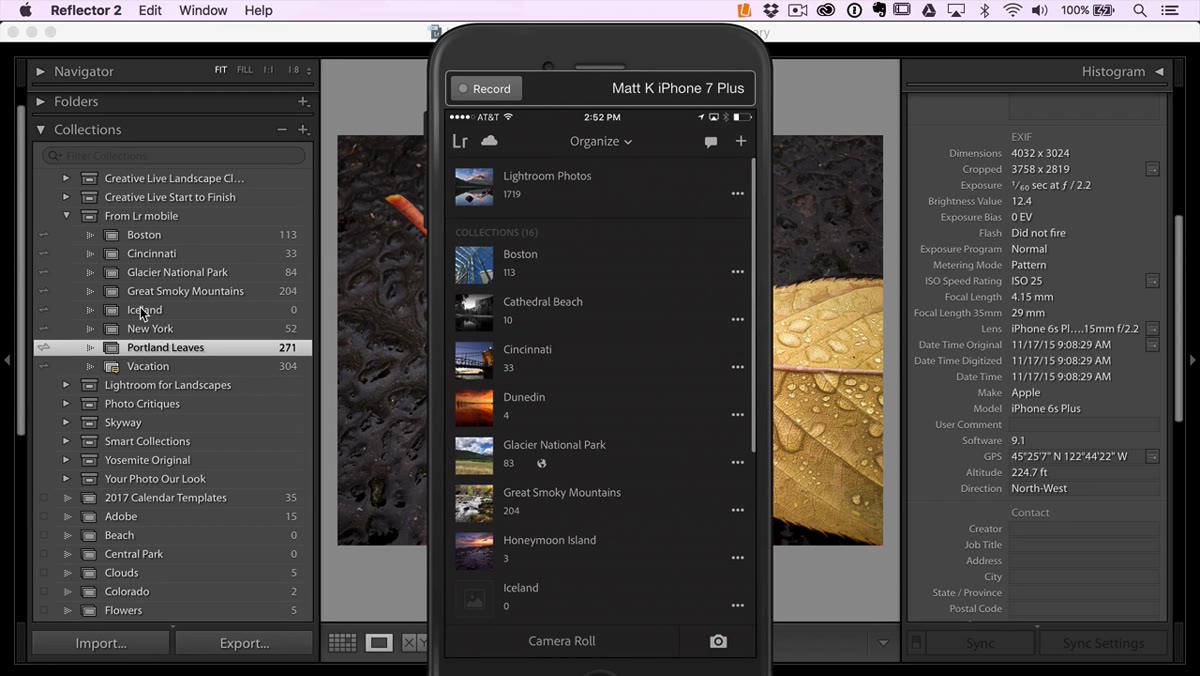 Scrolling through Lightroom Photos to find Iceland images
Tap into Lightroom Photos from the main screen. This shows you every photo currently living inside Lightroom Mobile, organized chronologically. Scroll down to find the photos from your trip. If you have been shooting over a long period of time or across multiple trips, this list gets long, which is exactly why creating the collection first gives you a destination to sort into.
Scrolling through Lightroom Photos to find Iceland images
Tap into Lightroom Photos from the main screen. This shows you every photo currently living inside Lightroom Mobile, organized chronologically. Scroll down to find the photos from your trip. If you have been shooting over a long period of time or across multiple trips, this list gets long, which is exactly why creating the collection first gives you a destination to sort into.
This section is also where any preflagging or rating work you did during the trip pays off. If you took a few minutes each night in your hotel room to flag your favorites, you are not starting from scratch here.
Step 4: Filter Down to Your Flagged Picks
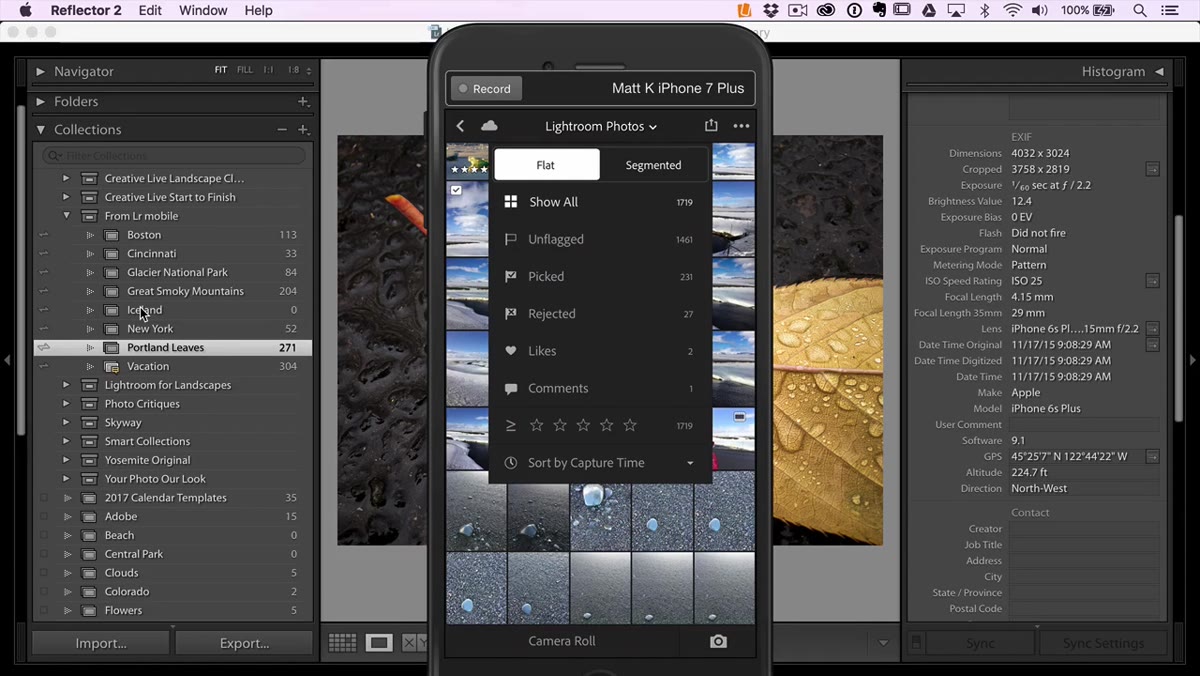 Filter activated showing only picked photos from Iceland
Tap the filter option at the top center of the screen and set it to show only your flagged picks. The entire view collapses down to just your best frames from the trip, stripping away the blurry tests, the accidentals, and the “I’ll decide later” shots that clog every camera roll.
Filter activated showing only picked photos from Iceland
Tap the filter option at the top center of the screen and set it to show only your flagged picks. The entire view collapses down to just your best frames from the trip, stripping away the blurry tests, the accidentals, and the “I’ll decide later” shots that clog every camera roll.
This is the step most people skip, and skipping it means you spend twenty minutes manually cherry-picking instead of thirty seconds swiping. Even rough flags made on your phone the night of a shoot are enough to make this filter genuinely useful. If you have not flagged anything yet, this is a good reminder to build that habit for your next trip.
Step 5: Select and Copy Photos Into Your Collection
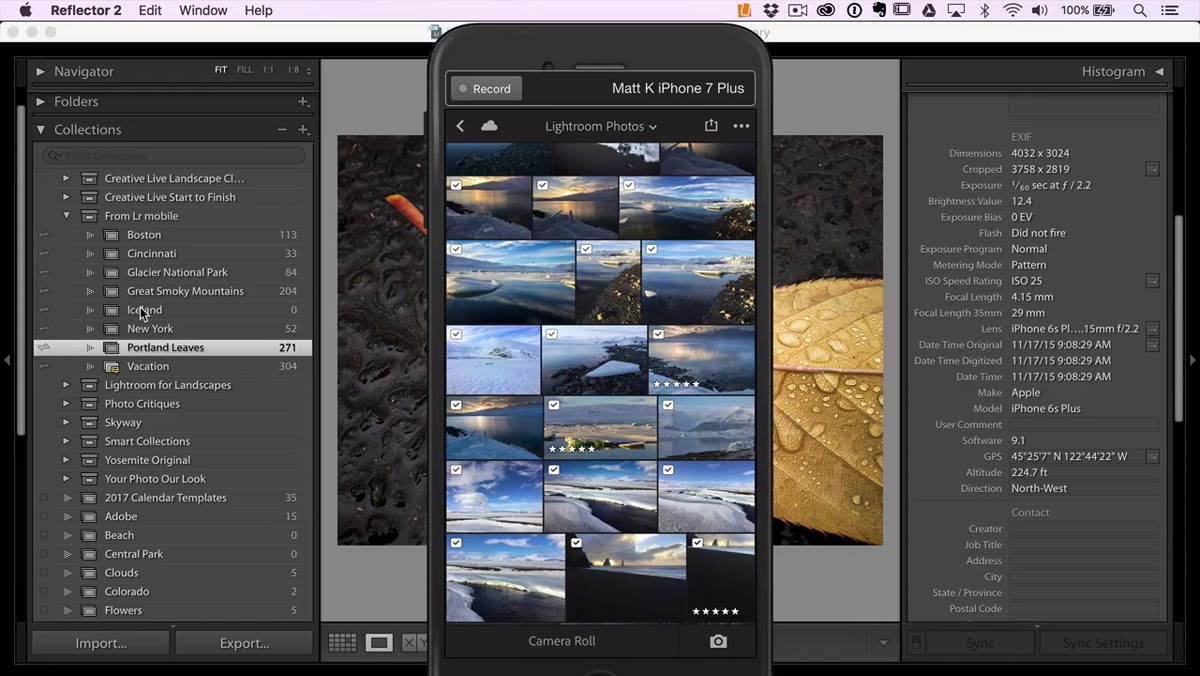 Swipe-selecting multiple photos with checkboxes appearing
Tap the three dots in the top right corner and choose “Copy To.” Now you need to select the photos you want to move. The fastest method here is swipe-select: put your finger down on the first image and paint across the screen like you are highlighting text. Checkboxes appear on each photo as you drag across them, and you can cover a lot of ground quickly without tapping one image at a time.
Swipe-selecting multiple photos with checkboxes appearing
Tap the three dots in the top right corner and choose “Copy To.” Now you need to select the photos you want to move. The fastest method here is swipe-select: put your finger down on the first image and paint across the screen like you are highlighting text. Checkboxes appear on each photo as you drag across them, and you can cover a lot of ground quickly without tapping one image at a time.
Once you have your selection made, tap the arrow in the top right to choose your destination and point it at the collection you created in Step 1. Your picks land in the Iceland collection, that collection is already synced to your desktop, and just like that you are ready to actually edit without digging through a mess.
My Take: Do the Flagging During the Trip, Not After
This workflow is fast when you arrive home. It is even faster when you have done even a little organization on the road. I keep Lightroom Mobile open on my phone every evening and spend maybe ten minutes flagging the shots I actually like from that day. It takes roughly the same amount of time as scrolling through Instagram, and it means the filter in Step 4 does meaningful work instead of showing me everything.
If you shoot with a dedicated camera alongside your phone, the collections you build here become the organizational backbone for when you import your RAW files on the desktop too. You can build matching collections, cross-reference what you shot on each device, and build a complete picture of the trip without rebuilding your filing system from scratch.
The biggest takeaway from this tutorial is that Lightroom Mobile is most powerful when you treat it as infrastructure, not just an editing app. Creating collections before or during the trip, flagging as you go, and using the sync between mobile and desktop as a real tool rather than a gimmick turns your phone into a legitimate part of your professional workflow.
Watch the full tutorial on YouTube to see Matt walk through each of these steps in real time with his Iceland photos as a live example.
Comments (1)
Never thought of approaching it this way. Really creative.
Leave a Comment