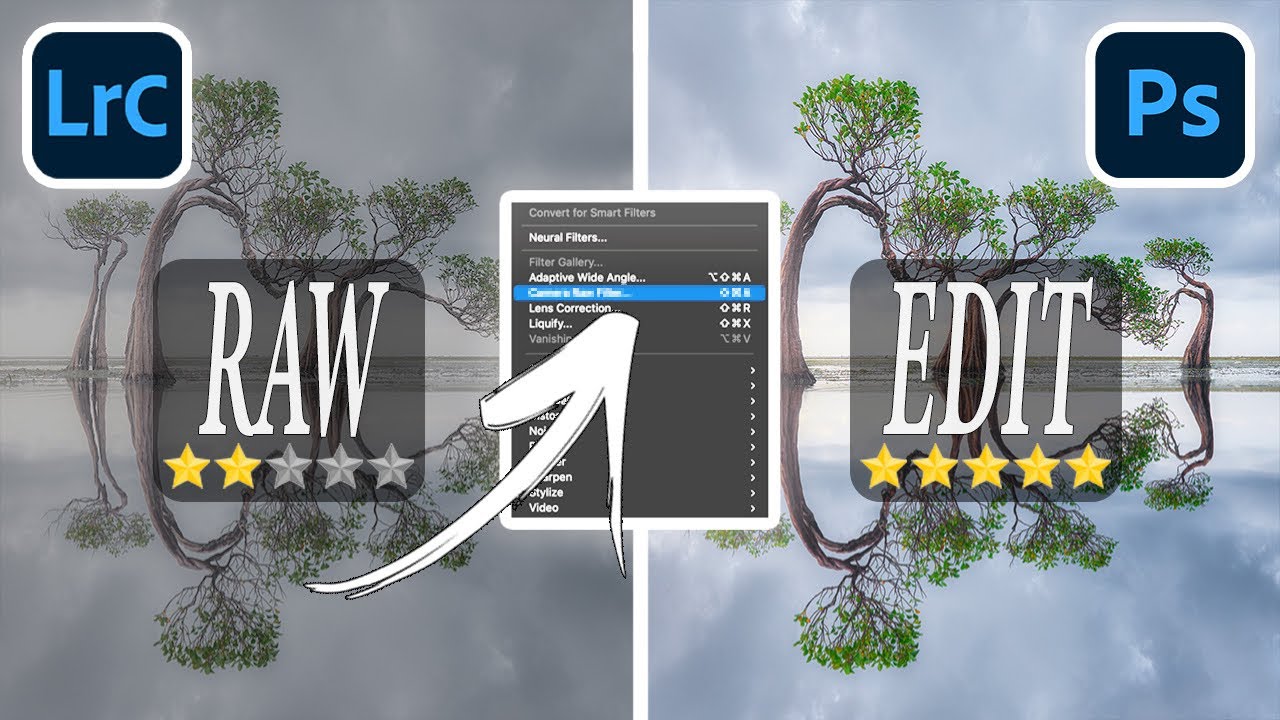
I’ll be honest with you: for a long time, I was a Photoshop avoider. I build presets for a living, I live inside Lightroom’s Develop module, and every time I opened Photoshop it felt like walking into someone else’s kitchen and not knowing where anything was. I’d close it within five minutes and tell myself Lightroom was “enough.” It was a cope. And if you’ve ever done the same thing, this breakdown is for you.
In this Mark Denney tutorial, Watch the full tutorial on YouTube, Mark does something I genuinely appreciate: he skips the Photoshop history lesson and the fifteen-minute interface tour and gets straight to the one piece of information that makes the whole program feel less like a threat. The core idea is that Lightroom and Photoshop are not separate worlds. They’re connected by a workflow that most beginners never stumble across on their own, and once you see it, you can’t unsee it.
What changes when you understand this workflow isn’t just your editing. It’s your confidence. I kept thinking about the photographers I hear from who feel like they’ve hit a ceiling in Lightroom. This is the door they didn’t know was there.
Step 1: Start in Lightroom’s Develop Module
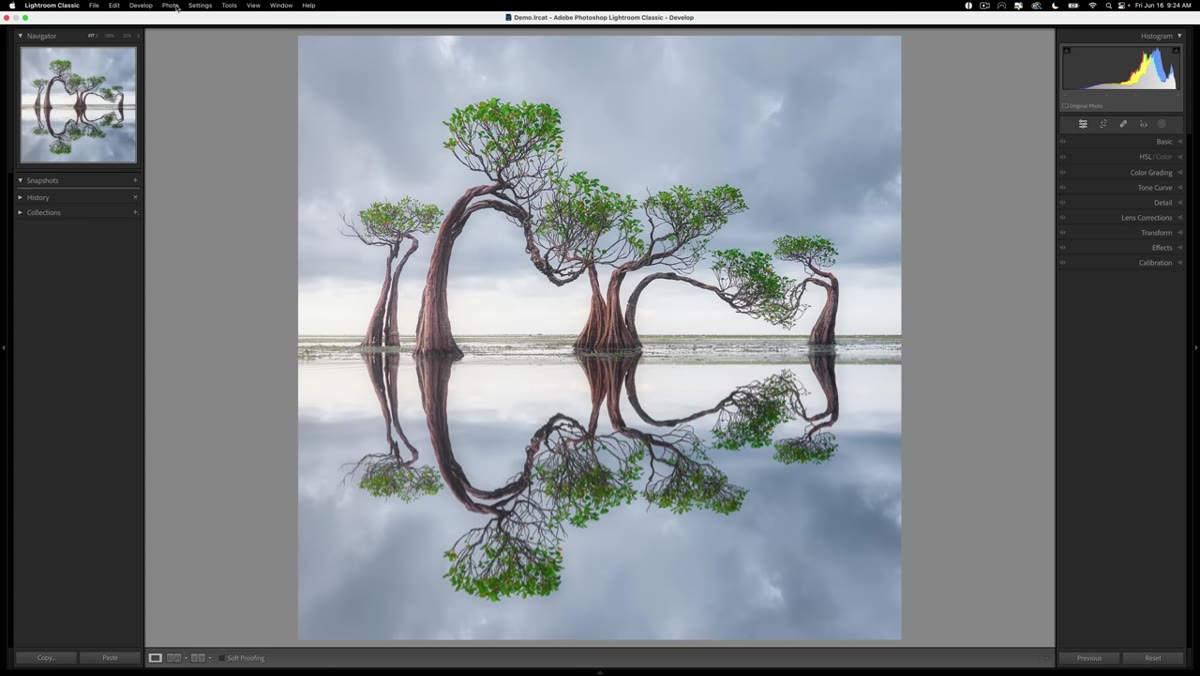 Lightroom Develop module open with an Indonesia landscape photo
Do your foundational work in Lightroom first. Exposure, white balance, basic tone corrections, lens corrections, any masking you’ve already built into your workflow. Mark’s example image is a landscape from Indonesia that’s already been through his full Lightroom treatment. The point here is that you are not abandoning your Lightroom edits when you go to Photoshop. That matters a lot, and it’s the key misunderstanding that keeps people from making the jump.
Lightroom Develop module open with an Indonesia landscape photo
Do your foundational work in Lightroom first. Exposure, white balance, basic tone corrections, lens corrections, any masking you’ve already built into your workflow. Mark’s example image is a landscape from Indonesia that’s already been through his full Lightroom treatment. The point here is that you are not abandoning your Lightroom edits when you go to Photoshop. That matters a lot, and it’s the key misunderstanding that keeps people from making the jump.
Step 2: Send the Image to Photoshop Through the Photo Menu
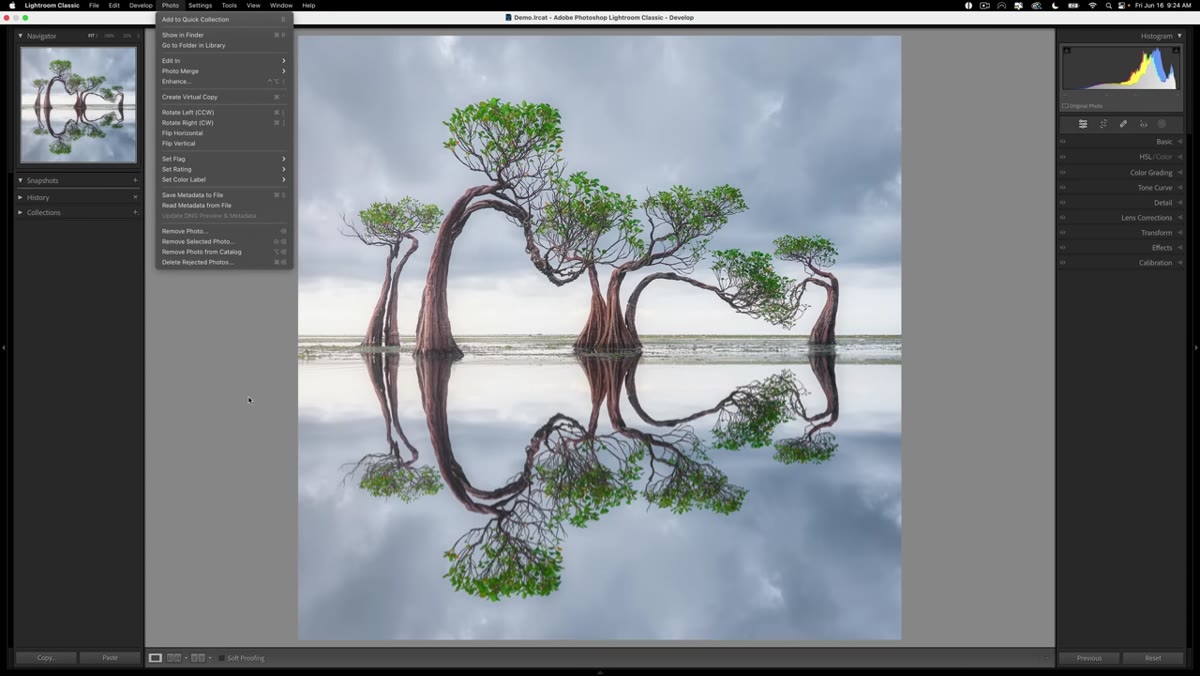 Lightroom Photo menu open, “Edit In” option highlighted
Go to Photo in the top menu bar, hover over “Edit In,” and select your version of Photoshop. When the dialog box appears, choose “Edit a Copy with Lightroom Adjustments.” This is the option that does all the heavy lifting. It bakes your Lightroom edits into the file that gets sent to Photoshop, so nothing you built in Lightroom gets thrown away. Give it a few seconds to open – Photoshop is loading a full copy of your image with all your adjustments already applied.
Lightroom Photo menu open, “Edit In” option highlighted
Go to Photo in the top menu bar, hover over “Edit In,” and select your version of Photoshop. When the dialog box appears, choose “Edit a Copy with Lightroom Adjustments.” This is the option that does all the heavy lifting. It bakes your Lightroom edits into the file that gets sent to Photoshop, so nothing you built in Lightroom gets thrown away. Give it a few seconds to open – Photoshop is loading a full copy of your image with all your adjustments already applied.
Step 3: Set Your Workspace to Photography
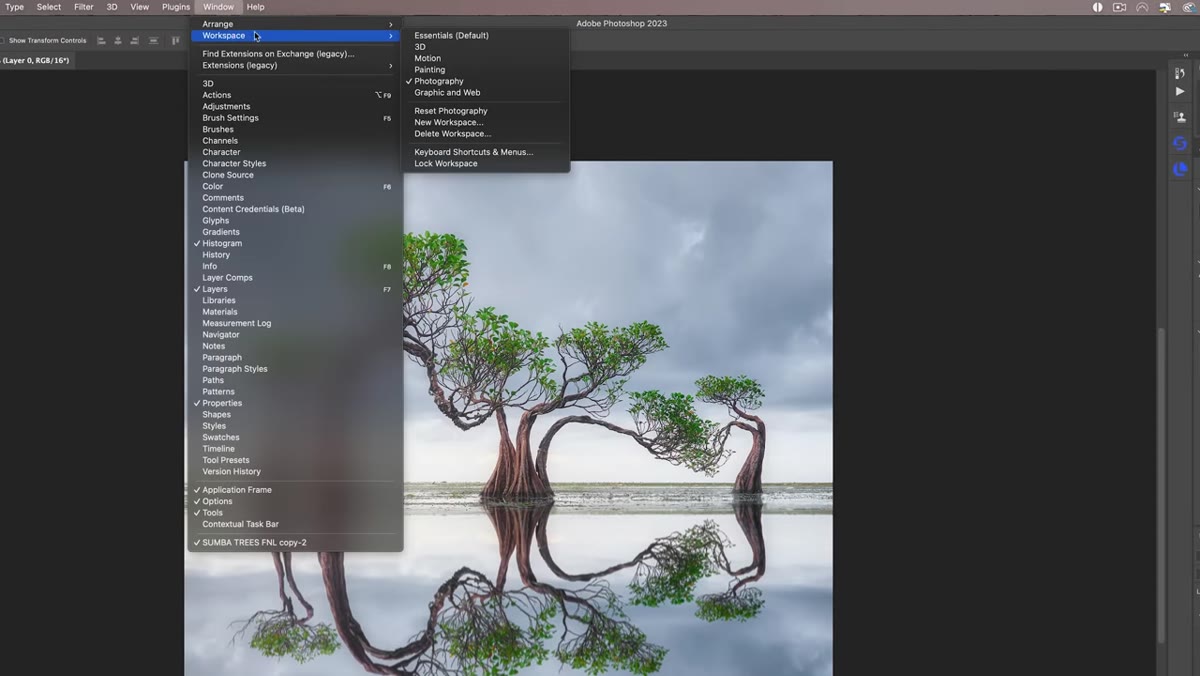 Photoshop Window menu open, Workspace submenu showing “Photography” selected
When Photoshop opens, if the interface looks unfamiliar or cluttered, go to Window, then Workspace, and select “Photography.” This layout is specifically arranged for photographers rather than designers or illustrators, so the panels you actually need are visible and the ones you don’t need are out of the way. The left toolbar holds your individual tools. The top bar updates to show options specific to whatever tool you’ve selected. And the bottom-right panel is where the layers live, which is where the real work happens.
Photoshop Window menu open, Workspace submenu showing “Photography” selected
When Photoshop opens, if the interface looks unfamiliar or cluttered, go to Window, then Workspace, and select “Photography.” This layout is specifically arranged for photographers rather than designers or illustrators, so the panels you actually need are visible and the ones you don’t need are out of the way. The left toolbar holds your individual tools. The top bar updates to show options specific to whatever tool you’ve selected. And the bottom-right panel is where the layers live, which is where the real work happens.
Step 4: Orient Yourself to the Layers Panel
 Layers panel showing background photo layer in Photoshop
The Layers panel is the thing that makes most Lightroom users feel like they’ve landed on a different planet. Mark’s explanation here is the clearest I’ve heard it put: your photograph sits as the background layer at the bottom, and everything you add sits on top of it. Think of it like stacking sheets of transparent acetate over a print. Each sheet can hold its own adjustment, and you can toggle any of them on or off without touching the original image underneath. The background layer – your photo – stays protected.
Layers panel showing background photo layer in Photoshop
The Layers panel is the thing that makes most Lightroom users feel like they’ve landed on a different planet. Mark’s explanation here is the clearest I’ve heard it put: your photograph sits as the background layer at the bottom, and everything you add sits on top of it. Think of it like stacking sheets of transparent acetate over a print. Each sheet can hold its own adjustment, and you can toggle any of them on or off without touching the original image underneath. The background layer – your photo – stays protected.
Step 5: Add an Adjustment Layer
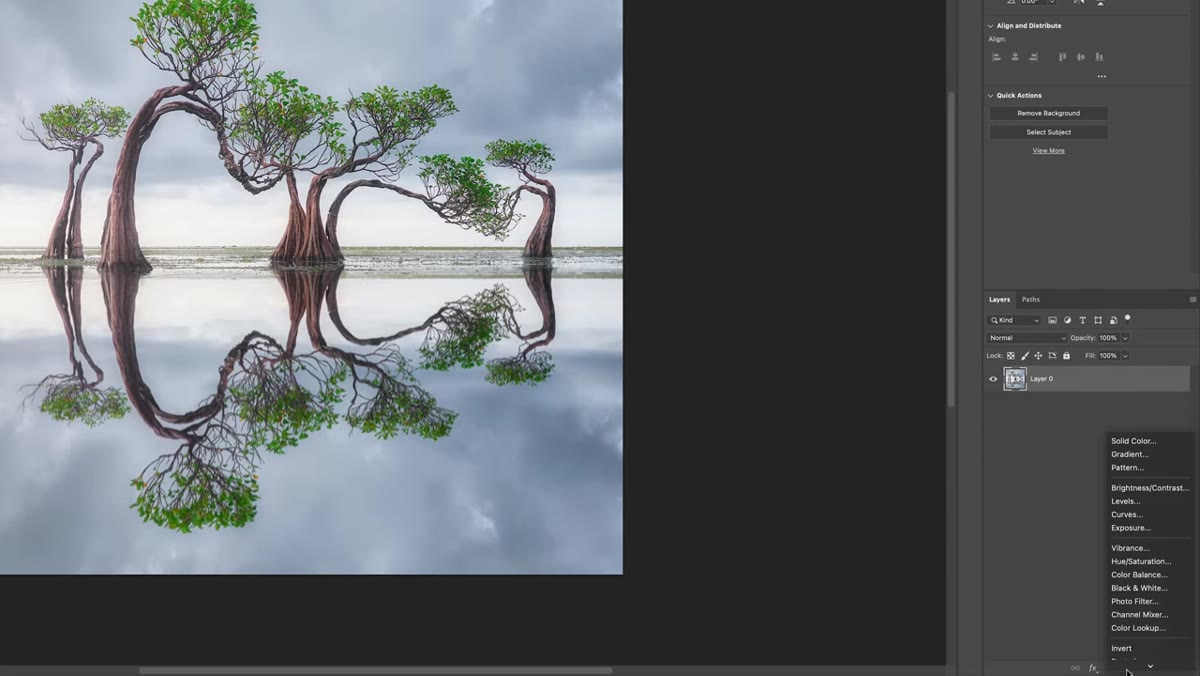 Adjustment layer menu open, Brightness/Contrast option being selected
Click the small circle icon at the bottom of the Layers panel (it looks like a half-filled circle) to open the adjustment layer menu. Select “Brightness/Contrast” from the list. A new layer will appear above your background layer in the panel, and a properties window will open showing sliders for brightness and contrast. Notice that you haven’t touched the original photo at all. The adjustment exists on its own layer, completely separate from your image data.
Adjustment layer menu open, Brightness/Contrast option being selected
Click the small circle icon at the bottom of the Layers panel (it looks like a half-filled circle) to open the adjustment layer menu. Select “Brightness/Contrast” from the list. A new layer will appear above your background layer in the panel, and a properties window will open showing sliders for brightness and contrast. Notice that you haven’t touched the original photo at all. The adjustment exists on its own layer, completely separate from your image data.
Step 6: Make Your Adjustment and Use the Eyeball to Compare
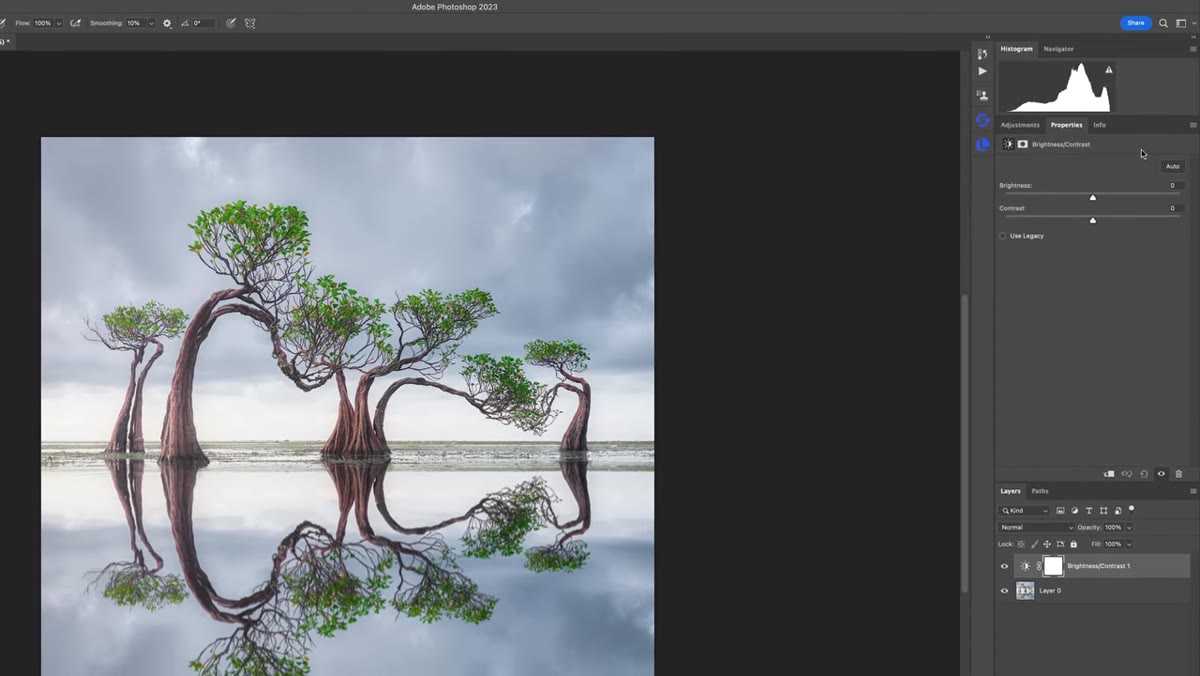 Brightness/Contrast properties panel open with sliders adjusted
Use the Brightness and Contrast sliders to make your correction. Mark brings the brightness down slightly on his Indonesia shot because the histogram is showing the image is running a little hot. He also pulls the contrast back a touch. Once you’ve made the adjustment, look at the small eyeball icon to the left of the layer in the Layers panel. Click it to hide the adjustment layer and see your image without it. Click it again to bring it back. This before/after toggle is the same concept as turning a panel adjustment on and off in Lightroom, just in a slightly different place.
Brightness/Contrast properties panel open with sliders adjusted
Use the Brightness and Contrast sliders to make your correction. Mark brings the brightness down slightly on his Indonesia shot because the histogram is showing the image is running a little hot. He also pulls the contrast back a touch. Once you’ve made the adjustment, look at the small eyeball icon to the left of the layer in the Layers panel. Click it to hide the adjustment layer and see your image without it. Click it again to bring it back. This before/after toggle is the same concept as turning a panel adjustment on and off in Lightroom, just in a slightly different place.
What I’d Add: Don’t Stop at One Adjustment Layer
This is where the tutorial opens a much bigger door than it might initially seem. Once you understand that each adjustment lives on its own layer, you can stack them. Add a Curves layer on top of your Brightness/Contrast layer. Add a Hue/Saturation layer above that. Each one is non-destructive, each one has its own eyeball toggle, and you can go back and modify any of them at any point without starting over.
In my own workflow, I’ll often send an image to Photoshop specifically to run a Curves adjustment for color grading work that Lightroom’s tone curve doesn’t handle quite as precisely. The RGB channel options in Photoshop’s Curves give you individual control over red, green, and blue values in a way that feels more surgical than anything in Lightroom’s HSL panel. If you shoot portraits or moody landscapes and you’re chasing a specific color grade, that’s the next thing to explore once you’re comfortable with the layer concept Mark walks through here.
The single most important thing to take away from this tutorial is the “Edit a Copy with Lightroom Adjustments” option. That one setting is what makes Photoshop feel like an extension of your existing Lightroom workflow instead of a complete replacement for it. You are not choosing between the two programs. You are using them together, and Lightroom still does everything it was already doing for you.
Mark Denney teaches this in a way that actually sticks. Watch the full tutorial on YouTube to see the whole thing in motion, especially the layer stacking he gets into later in the video. If you’ve been treating Photoshop like a program that was built for someone else, this one is worth the watch.
Comments
Leave a Comment