Every January I do the same thing: I spend way too long organizing my preset folders, rethinking my export settings, and completely forgetting the one administrative task that actually matters legally. I blow past the new year and import hundreds of photos before I realize my copyright metadata still reads the previous year. It’s not a disaster, but it’s also not nothing. Copyright information embedded in your files is your first line of defense if an image gets scraped, stolen, or published without permission. Getting the year wrong is a small mistake that looks unprofessional if anyone pulls up your file info.
I came across a short, no-fluff tutorial from Matt Kloskowski that addresses exactly this. In this Matt Kloskowski tutorial, he walks through the fastest way to update your metadata preset in Lightroom so every photo you import this year gets tagged with the correct copyright information automatically. The whole thing takes about five minutes, and once you build the habit, it becomes as routine as changing the calendar on the wall. Watch the full tutorial on YouTube if you want to follow along with the video, or use this written walkthrough to move at your own pace.
Here is the full process, broken into steps you can follow without leaving Lightroom.
Step 1: Navigate to the Import Dialog
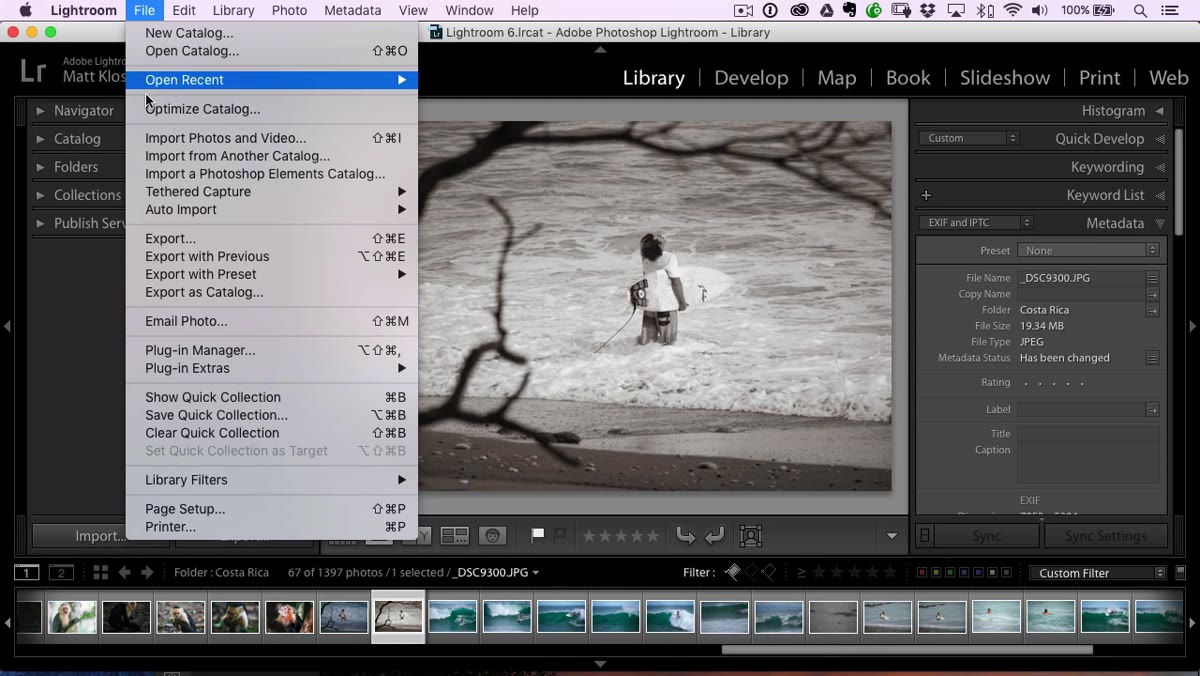
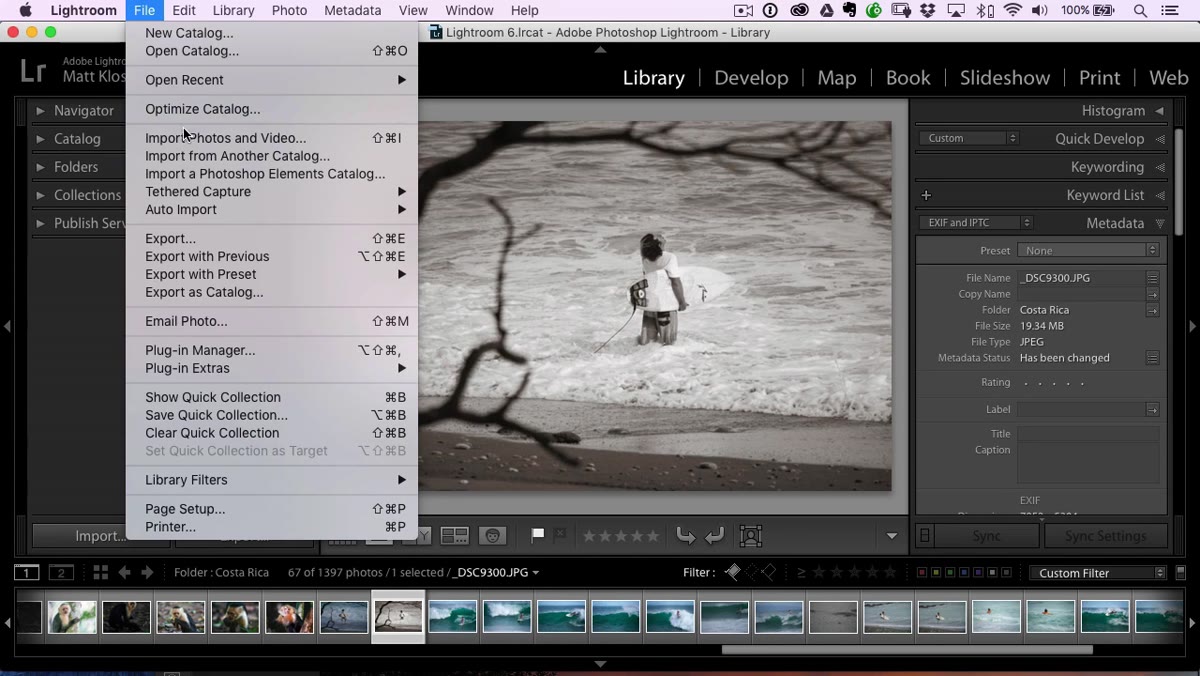 File menu open, Import option highlighted
Open Lightroom and go to File, then Import. This is where most photographers first encounter metadata presets, tucked into the right-hand panel under the “Apply During Import” section. You will see a dropdown labeled “Metadata.” If you set one up last year, it is probably sitting there with last year’s date in the name. This is the preset you need to update or replace.
File menu open, Import option highlighted
Open Lightroom and go to File, then Import. This is where most photographers first encounter metadata presets, tucked into the right-hand panel under the “Apply During Import” section. You will see a dropdown labeled “Metadata.” If you set one up last year, it is probably sitting there with last year’s date in the name. This is the preset you need to update or replace.
Even if you have never created a metadata preset before, this is the right moment to start. Applying metadata at the import stage means you never have to think about it again on a per-photo basis. It is the Lightroom equivalent of printing your name on your homework before you hand it in.
Step 2: Find Your Metadata Panel in the Library Module
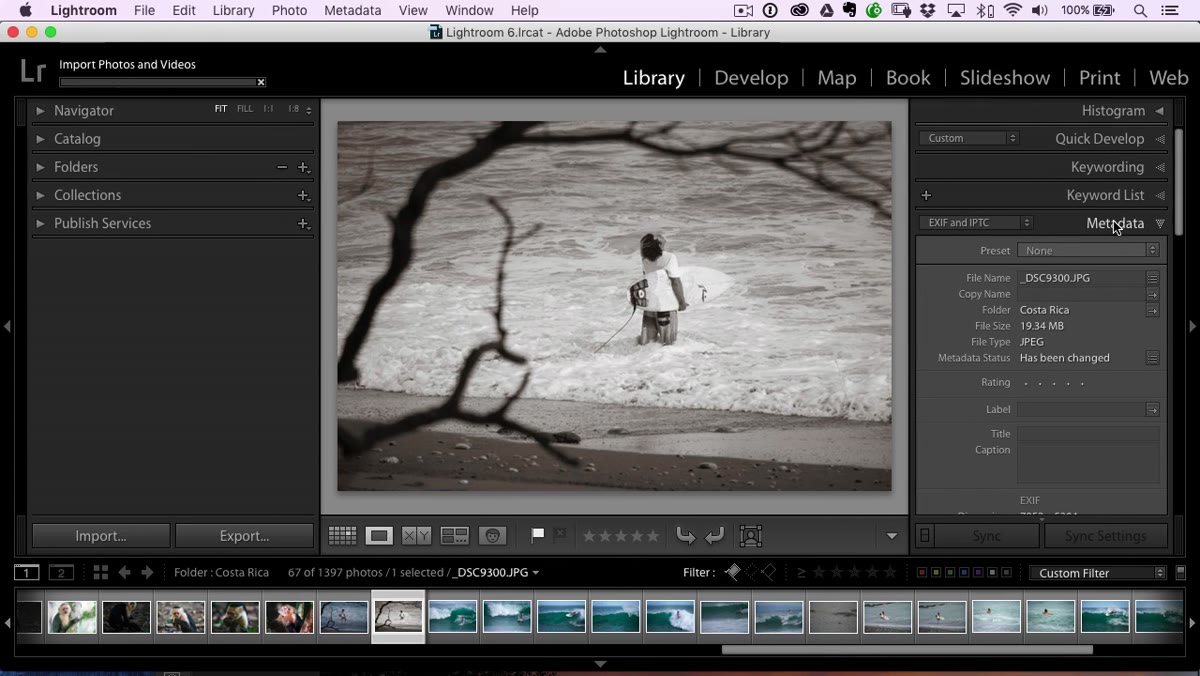 Library module metadata panel scrolled into view
You do not actually have to stay in the Import dialog to manage your presets. Cancel out of the Import window and head to the Library module. Scroll down the right-hand panel until you see the Metadata section. It is further down than most people expect, sitting below the histogram and the Quick Develop panel.
Library module metadata panel scrolled into view
You do not actually have to stay in the Import dialog to manage your presets. Cancel out of the Import window and head to the Library module. Scroll down the right-hand panel until you see the Metadata section. It is further down than most people expect, sitting below the histogram and the Quick Develop panel.
At the top of the Metadata panel you will see the same preset dropdown that lives inside the Import dialog. They pull from the same list. This is useful to know because it means you can inspect, edit, and create metadata presets directly from the Library module without importing a test photo every time you want to check your work.
Step 3: Edit Your Existing Preset or Start a New One
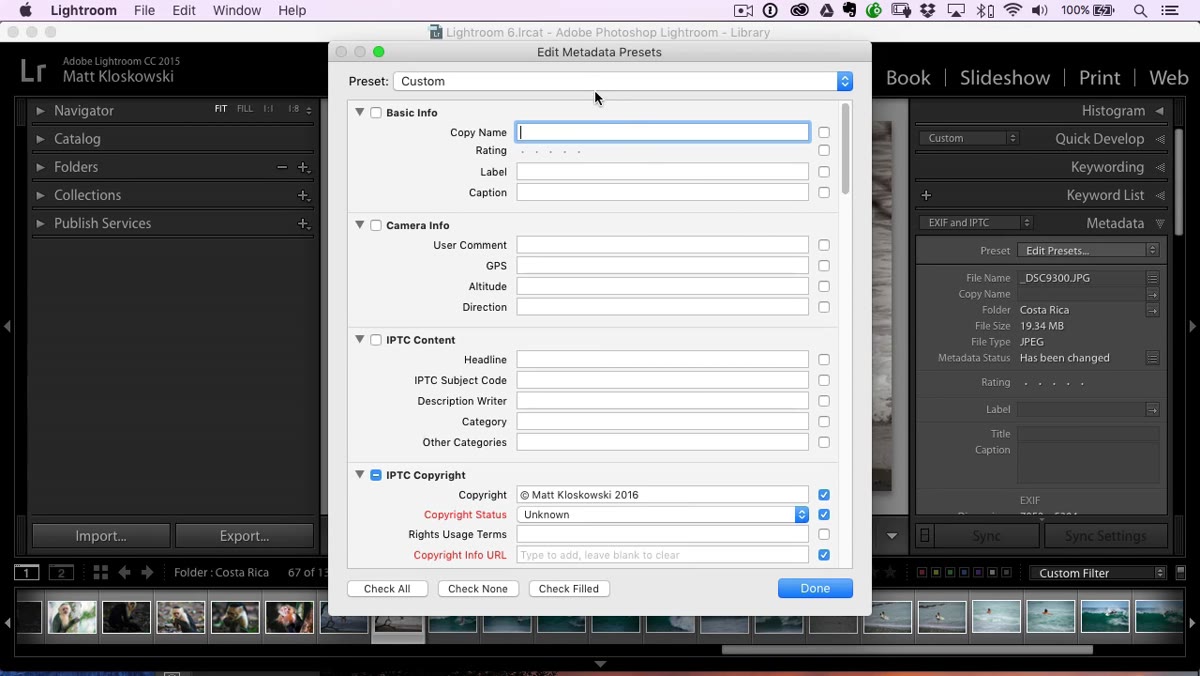 Metadata preset dropdown open, Edit Presets option visible
Click the preset dropdown and choose “Edit Presets.” If you have a preset from last year, it will open with all your previous information still populated. You can update the year directly here without rebuilding everything from scratch. If you are starting fresh, choose “New Preset” from the same dropdown and you will get a blank form.
Metadata preset dropdown open, Edit Presets option visible
Click the preset dropdown and choose “Edit Presets.” If you have a preset from last year, it will open with all your previous information still populated. You can update the year directly here without rebuilding everything from scratch. If you are starting fresh, choose “New Preset” from the same dropdown and you will get a blank form.
The form includes fields for creator name, address, city, state, website, and more. Fill in what is relevant to your business. At minimum, add your name and website. These fields travel with the file and can help someone track you down if they want to license an image legitimately.
Step 4: Enter the Correct Copyright Symbol and Year
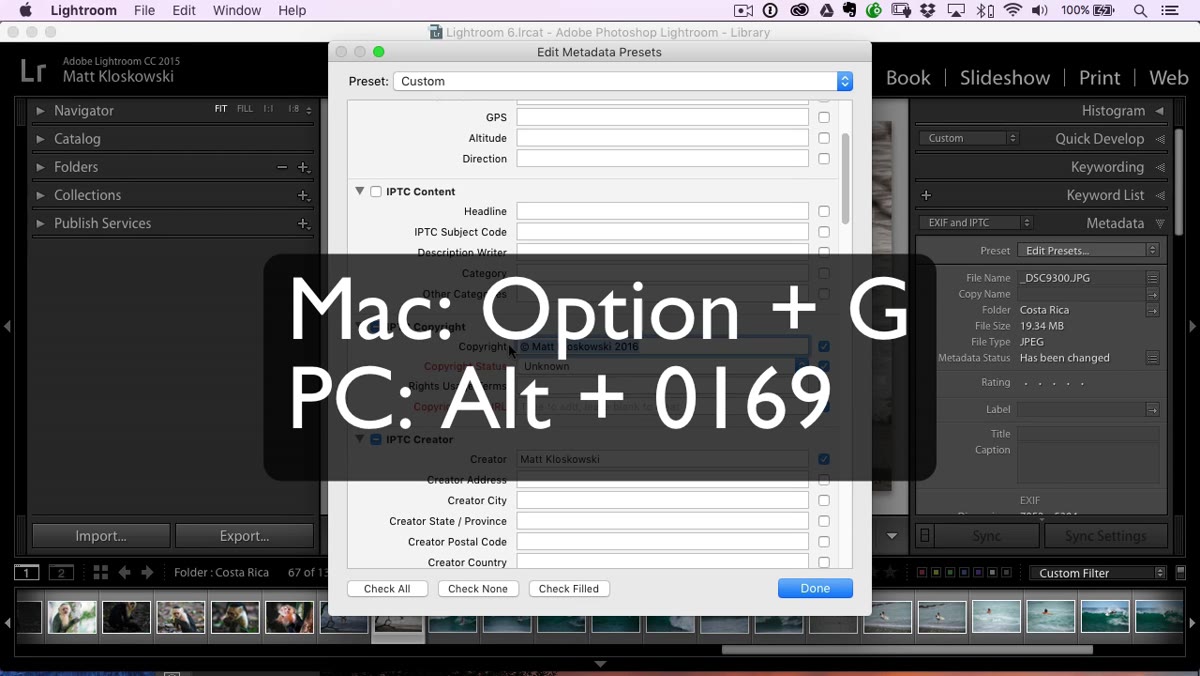 Copyright field being filled in with symbol and year
The copyright field is the most important one here. You need the actual copyright symbol, not just the word “copyright.” On a Mac, the shortcut is Option + G. On a Windows machine, the key combination is a little more obscure, so if you can’t remember it off the top of your head, a quick Google search for “copyright symbol Windows shortcut” will give you three or four reliable methods in under a minute.
Copyright field being filled in with symbol and year
The copyright field is the most important one here. You need the actual copyright symbol, not just the word “copyright.” On a Mac, the shortcut is Option + G. On a Windows machine, the key combination is a little more obscure, so if you can’t remember it off the top of your head, a quick Google search for “copyright symbol Windows shortcut” will give you three or four reliable methods in under a minute.
After the symbol, type the current year, a space, and your full name or business name. So the field should read something like: copyright symbol, 2025, Your Name. Then set the Copyright Status dropdown to “Copyrighted.” If you have a terms-of-use or licensing page on your website, paste that URL into the Copyright Info URL field. It gives anyone who finds the file a clear next step if they want to use your work legally.
Step 5: Save the Preset with a New Name
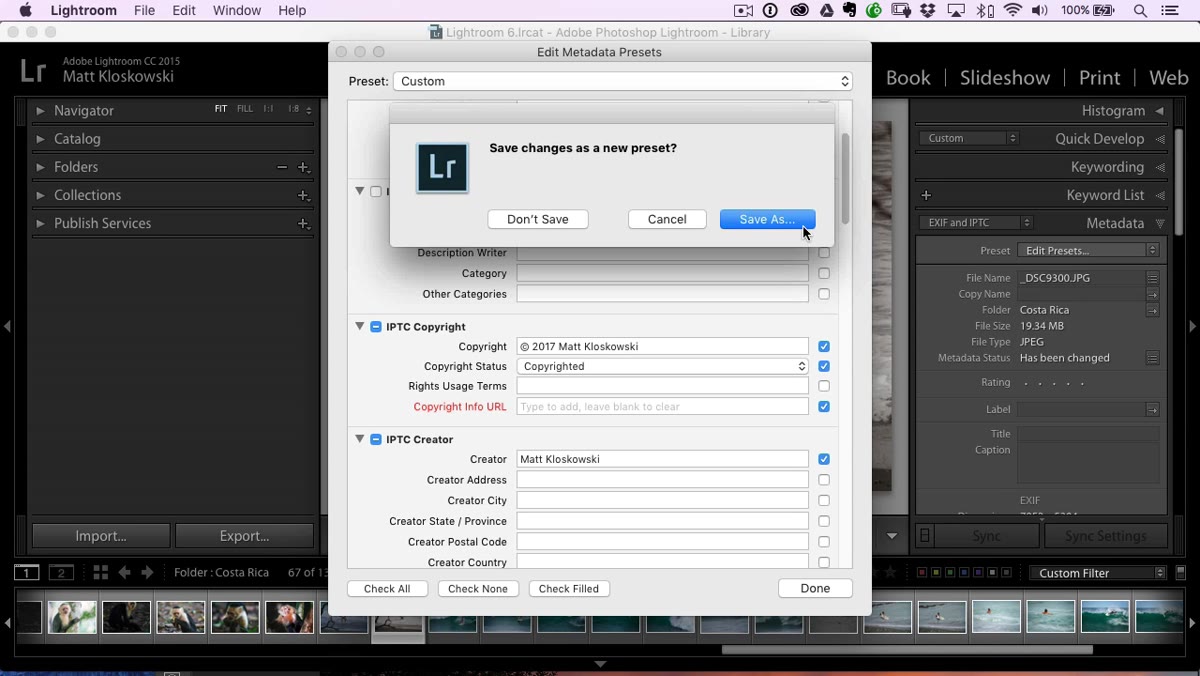 Save As dialog with new preset name being typed
When you click Done, Lightroom will ask whether you want to save the changes to the existing preset or save them as a new preset. I recommend saving as new every year. It keeps a clean record and makes it easier to track when a photo was imported if you ever need to dig back into your archive.
Save As dialog with new preset name being typed
When you click Done, Lightroom will ask whether you want to save the changes to the existing preset or save them as a new preset. I recommend saving as new every year. It keeps a clean record and makes it easier to track when a photo was imported if you ever need to dig back into your archive.
Name it something simple and year-specific. Matt uses his first name plus the year, which works well if you are the only person on the machine. I name mine after whatever song I’m obsessing over when I set it up each January, which means my presets folder reads like a weird playlist, but at least I remember when I made them. Pick whatever naming convention you will actually recognize six months from now.
Step 6: Confirm the Preset Appears in the Import Dialog
 Import dialog right panel showing newly saved preset in dropdown
Before you import your first real batch of photos for the year, open the Import dialog one more time and check the Metadata dropdown. Your new preset should appear in the list. Select it, and from that point forward every photo you bring into Lightroom will carry your current copyright information baked into its metadata automatically.
Import dialog right panel showing newly saved preset in dropdown
Before you import your first real batch of photos for the year, open the Import dialog one more time and check the Metadata dropdown. Your new preset should appear in the list. Select it, and from that point forward every photo you bring into Lightroom will carry your current copyright information baked into its metadata automatically.
This takes thirty seconds to verify and saves you from discovering in March that you forgot to update the preset and have three months of wrongly dated files to fix.
A Note on Going Further With Metadata Presets
Most photographers set up a copyright preset and stop there, but metadata presets can carry a lot more useful information. I keep a second preset for client work that includes my contact email and a usage rights statement in the instructions field. Some photographers create location-specific presets with their city and country pre-filled for travel work. The structure is the same as what Matt walks through above. Once you understand how the preset editor works, you can layer in as much or as little as your workflow needs.
The key habit is simply checking the preset at the start of each new year the same way you would check your camera’s date and time settings after swapping a battery. It is a thirty-second task that quietly does a lot of work over twelve months.
Copyright protection is not glamorous, but embedding accurate metadata is one of the simplest and most durable things you can do to document your ownership of an image from the moment it enters your catalog. The technique Matt covers here takes less time to execute than it took you to read this walkthrough. Make it part of your January routine and you will not have to think about it again until next year. Watch the full tutorial on YouTube to see the exact clicks in real time.
Comments (1)
I tried this on a client project yesterday and the results were way better than expected.
Leave a Comment