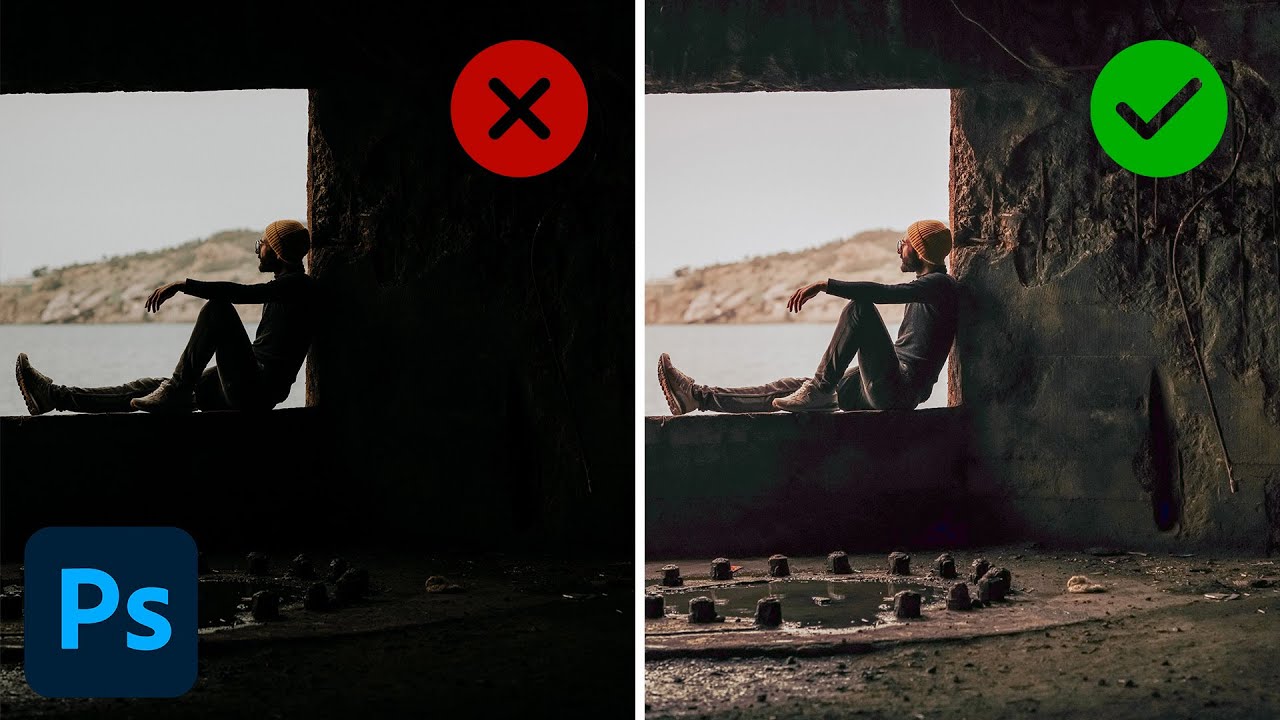
There’s a specific kind of frustration that comes from bouncing between Lightroom and Photoshop mid-edit. You’ve done your exposure work, your color grading, your shadow recovery, and then you jump into Photoshop for a retouch. Suddenly you’re in a completely different environment, reaching for adjustment layers and Curves panels, trying to recreate what you just had two clicks ago. It’s not impossible. It’s just annoying enough that a lot of people stay in one app longer than they should, or avoid the other one entirely.
That’s why this tutorial from Aaron Nace over at PHLEARN genuinely changed how I work. Watch the full tutorial on YouTube before or after reading this, depending on how you learn. The core idea is simple but easy to miss: Adobe Camera Raw, the engine running underneath Lightroom, is also sitting inside Photoshop right now, fully accessible, with every slider you already know. You’re not learning something new. You’re finding a room in a house you already live in.
The example Aaron works through is an underexposed interior shot with a figure near a window. It’s a classic recovery challenge, the kind of image where lifting the shadows reveals noise, color casts, and all the sins that high ISO and bad light commit together. It’s a perfect teaching image because fixing it requires almost every tool in the panel.
Step 1: Unlock the Background Layer and Convert to Smart Object
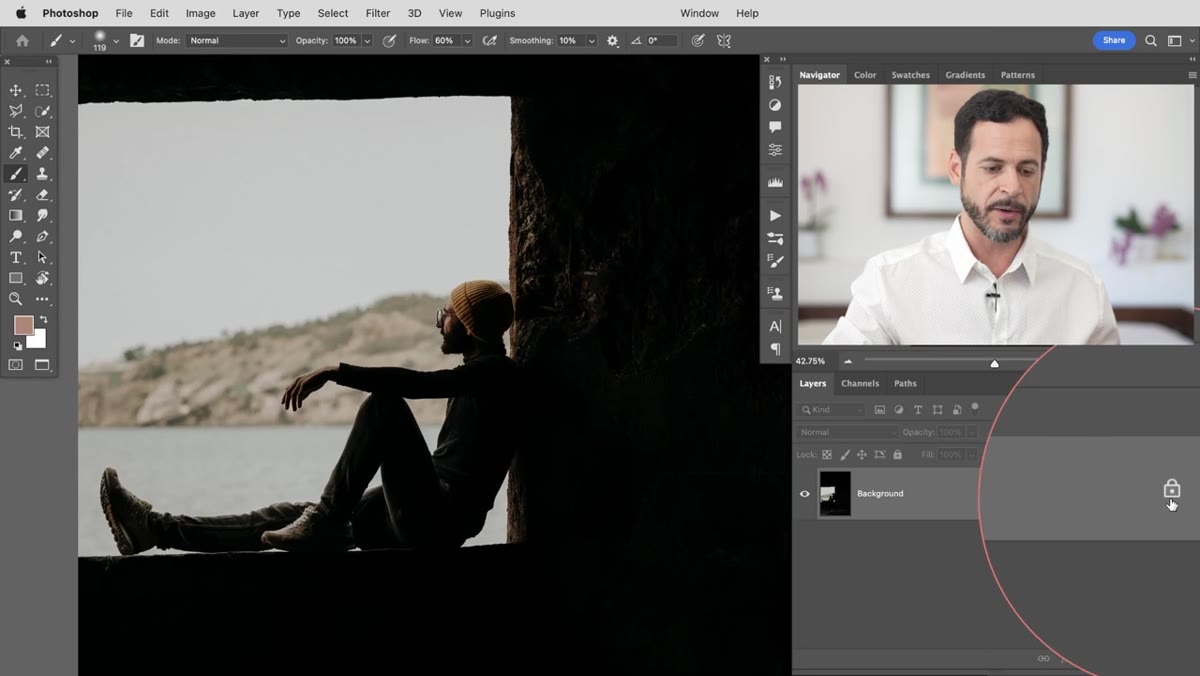 Photoshop layers panel showing locked background layer
Before you touch anything in Camera Raw, do this first: double-click the locked background layer in the Layers panel to convert it into a regular editable layer. Then right-click it and choose “Convert to Smart Object.” That second step is the one people skip, and it matters more than the first. When your layer is a Smart Object, the Camera Raw filter you apply becomes non-destructive. You can reopen it, adjust sliders, and change your mind tomorrow. Without it, you’re committing to every decision the moment you click OK.
Step 2: Open Adobe Camera Raw as a Filter
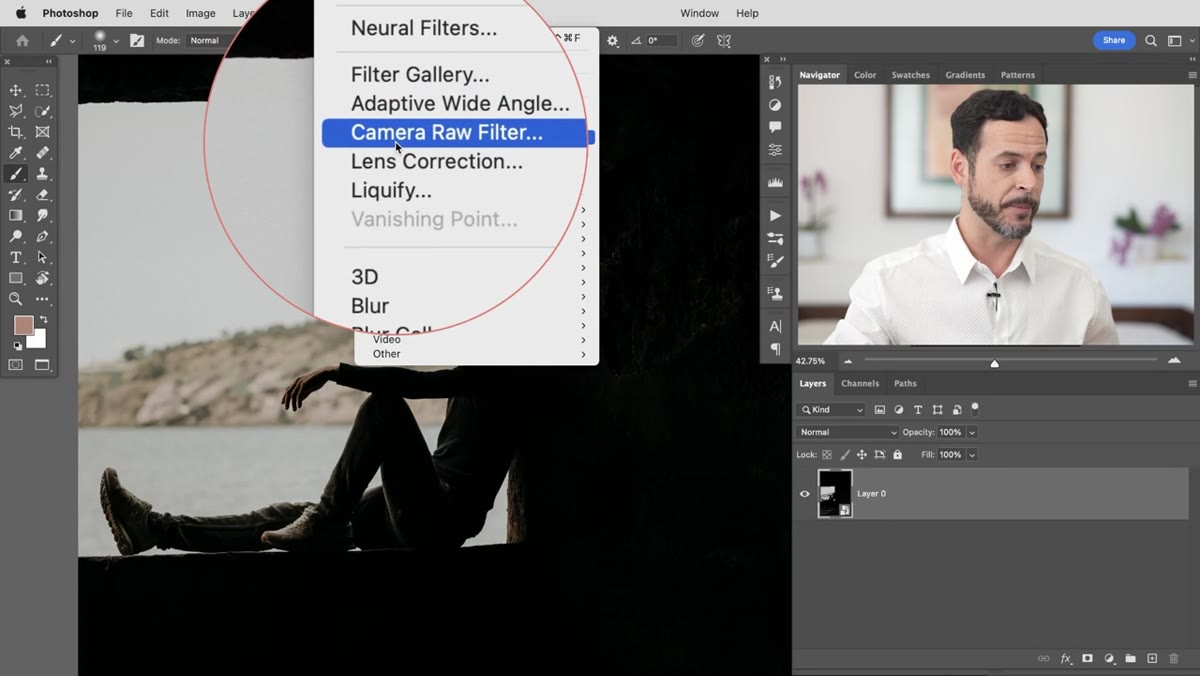 Photoshop Filter menu open, Camera Raw Filter highlighted
Go to Filter at the top of the screen and scroll down to “Camera Raw Filter.” That’s it. A full-screen dialog opens and if you have any time in Lightroom, you’ll feel immediately at home. The Basic panel, the tone sliders, the color wheels, the noise reduction, all of it is here. The layout is close enough that muscle memory from Lightroom transfers almost completely. The main difference is workflow context: in Photoshop, this is a filter applied to a layer, which means it plays nicely with masks, blending modes, and everything else in your composite stack.
Step 3: Recover Exposure and Pull Back Highlights
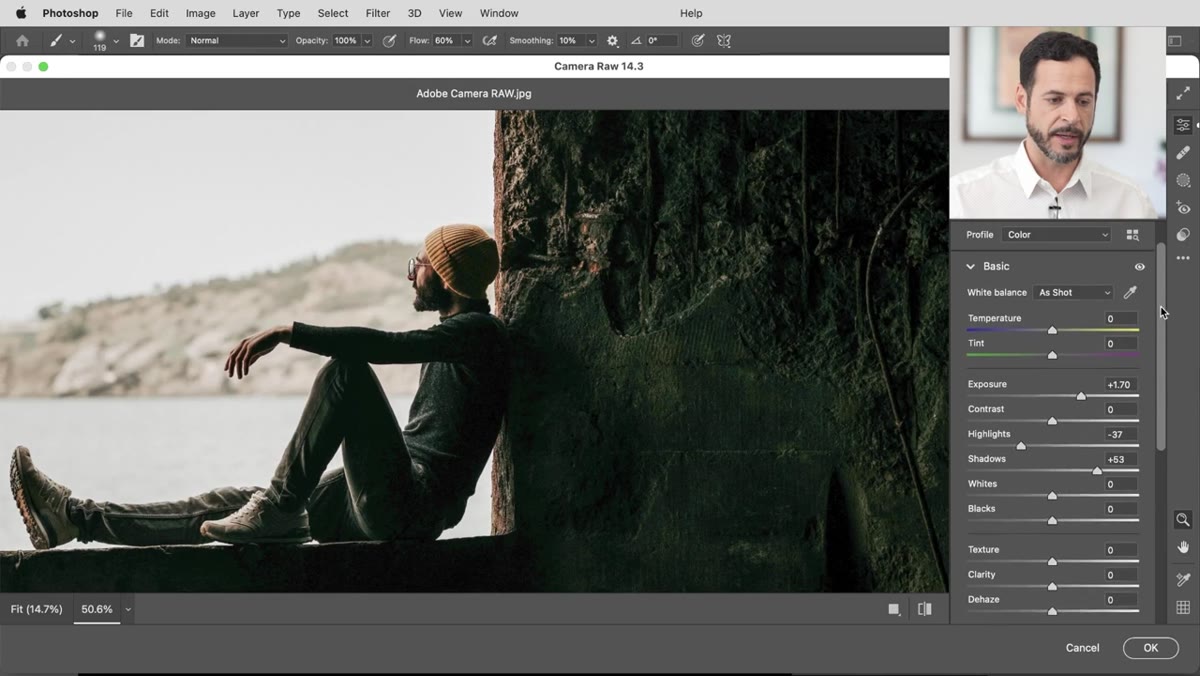
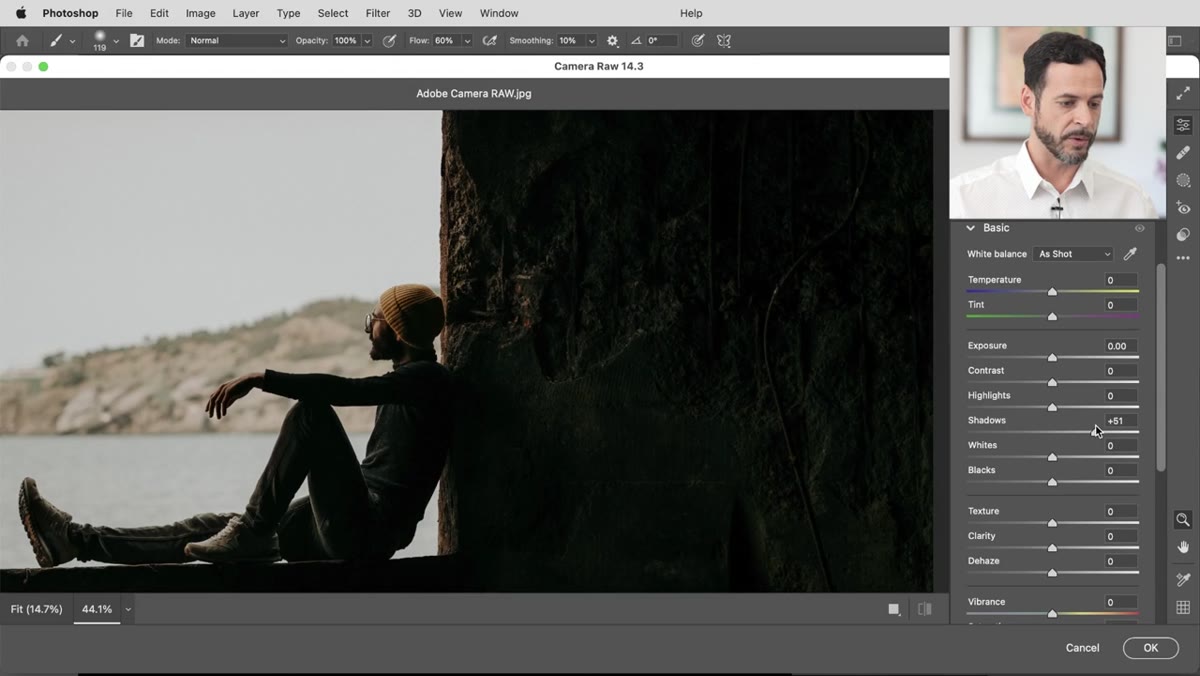 Basic panel sliders being adjusted for exposure and highlights
Start with Exposure and Shadows. For an underexposed image, you’ll likely need to push Exposure up meaningfully, not just nudge it. Aaron pushes it far enough that real detail starts emerging from the dark areas of the frame. The trade-off is that any areas that were already well-lit become too bright. That’s where the Highlights slider comes in. Pull it down to rein in the brightest parts of the image while keeping the midtones and shadows where you just moved them. These two sliders working in opposite directions is one of the most fundamental moves in raw editing, and Camera Raw handles it identically to Lightroom.
Step 4: Fix Color Casts Using the Color Mixer
 Color grading panel showing shadow tint slider being dragged toward magenta
Here’s where the edit gets interesting. When you aggressively lift the shadows on an underexposed image, you often uncover a color cast that was hiding in the dark. In this case, it’s a greenish tint in the shadows, which is common with certain camera sensors and high ISO settings. The fix lives in the color grading section of the panel, the same place as the Lightroom color wheels. Navigate to the Shadows wheel and drag the hue toward magenta, since magenta sits opposite green on the color wheel. The two cancel each other out. It’s not a heavy-handed fix, it’s just physics. Drag until the shadows read as neutral, then use the eye icon to toggle the correction on and off to confirm you’re not overcorrecting.
Step 5: Add Warmth or Cool Tones to Highlights and Midtones
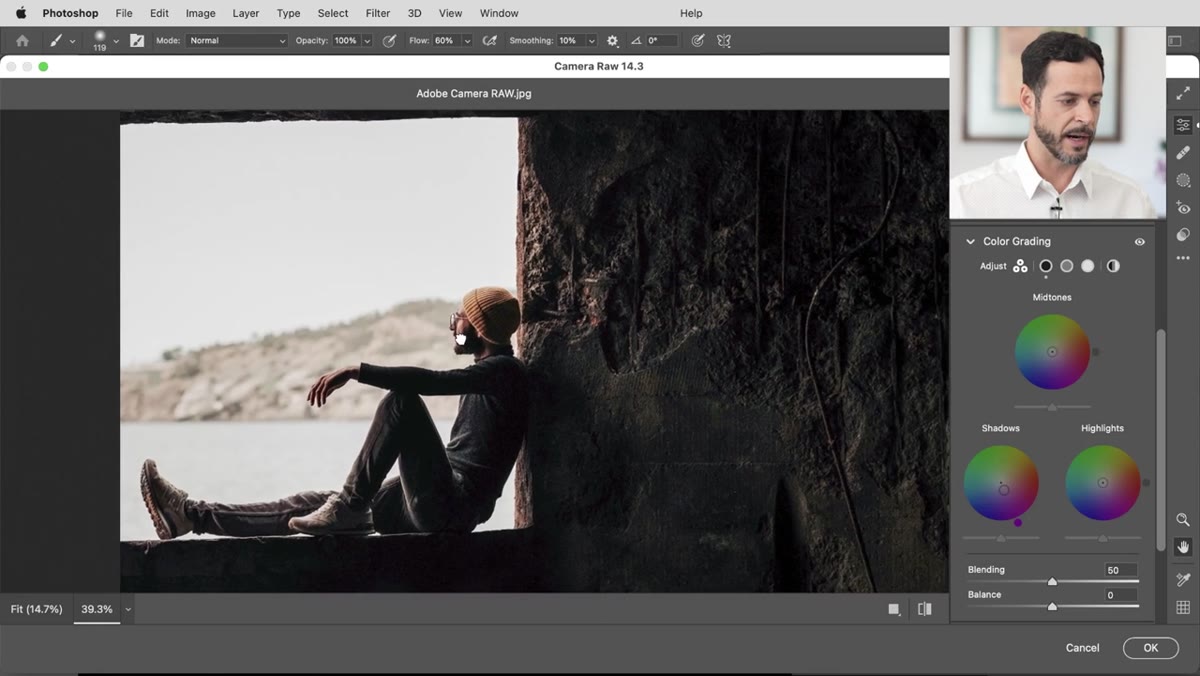 Highlights and midtones color wheels being adjusted in the color grading panel
With the shadows corrected, you have full creative control over the highlights and midtones. This is where grading starts to feel like grading instead of just fixing. Aaron keeps the highlights cool on this particular image, which suits the window light and the overall mood. For the midtones, he shifts slightly toward orange, which adds a subtle warmth that keeps the image from feeling clinical. The key with these wheels is restraint. A small move on the midtone wheel affects a huge portion of the image. I’ve found that the edits that look best tend to be the ones where I had to zoom in to see what I actually did.
Step 6: Apply Noise Reduction
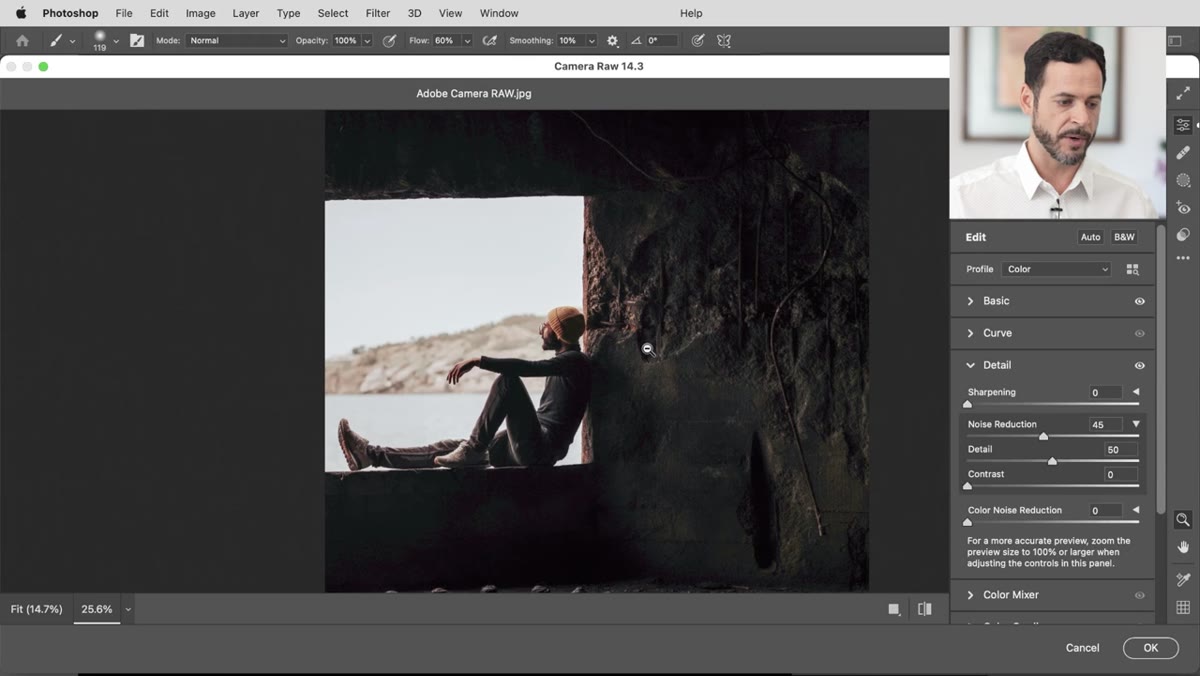 Noise reduction panel showing luminance and color noise sliders
Shadow recovery and noise are inseparable. When you lift underexposed areas, you amplify digital noise, particularly in color. In the Detail panel, there are separate sliders for Luminance noise and Color noise. Toggle the noise reduction off and back on to see what it’s actually doing to your image. Color noise reduction is often the more impactful of the two for recovered shadows, since green and magenta speckle tends to be visually distracting in a way that luminance grain sometimes isn’t. Increase the Color noise reduction slider until the speckle settles down, being careful not to push so far that you lose micro-contrast in skin tones or textured surfaces.
One Thing I’d Add From My Own Workflow
The tutorial covers the essential path through Camera Raw and covers it well. What Aaron doesn’t go into, because it’s outside the scope of a single video, is using this as the base layer in a composite. Where Camera Raw inside Photoshop really earns its place is when you need to do localized adjustments on top of a Camera Raw edit. Because the filter is applied to a Smart Object layer, you can mask the Smart Filter itself. That means you can run a strong shadow recovery pass, then mask it so it only affects the lower half of the frame, leaving the sky untouched. This is something Lightroom can do with masking tools, but Photoshop gives you far more precision when the mask needs to follow a complex edge.
The single most important thing this tutorial showed me: the tool you already know how to use is already inside the tool you’re already using. Camera Raw in Photoshop isn’t a workaround or a lesser version of Lightroom’s panel. It’s the same engine. If you’ve spent time learning those sliders, that knowledge is fully transferable. You just have to know where the door is.
Watch the full tutorial on YouTube and work through it with your own raw file. The techniques stick much faster when your hands are moving.
Comments (5)
Applied this to my portfolio shots and the improvement is noticeable.
Tried this technique this morning. Game changer for real.
Couldn't agree more. I've seen this make a huge difference in landscape work specifically.
This is going in my reference folder. Incredibly useful.
Clear and practical. No fluff. Appreciate that.
Leave a Comment