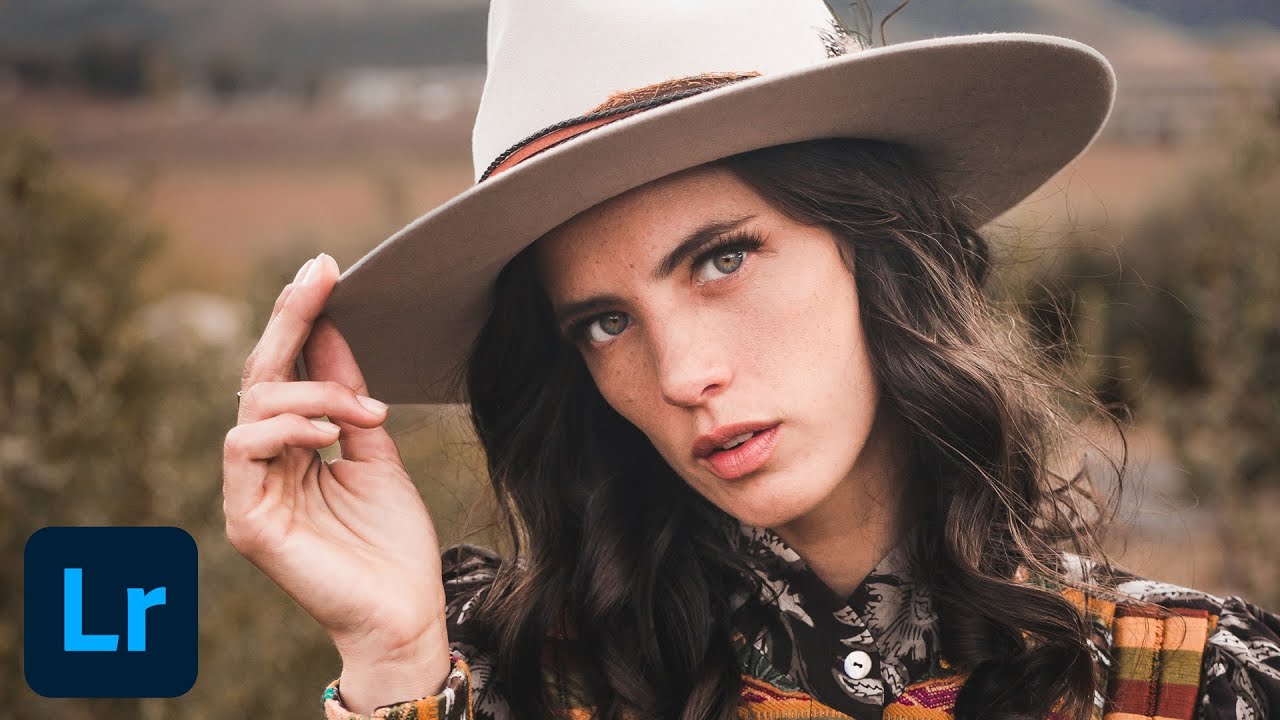
One problem that used to send me into Photoshop almost every single shoot was this: the subject looks great but the background is flat, or the background has beautiful color and the subject is overexposed. Treating them as one image and dragging sliders around never actually solves it. You end up compromising both. For a long time, the clean solution meant round-tripping to Photoshop, painting masks by hand, and praying your selection held up at 100%. It worked, but it cost time I didn’t always have.
That workflow is now completely avoidable inside Lightroom. In this Aaron Nace (PHLEARN) tutorial, Watch the full tutorial on YouTube, Aaron walks through using Lightroom’s AI-powered Select Subject masking tool to isolate the subject and background so you can grade each one independently. The whole thing takes maybe ten minutes once you know the flow. I’ve folded this into my own portrait editing process and it’s genuinely changed how fast I can get a shot to a place I’m happy with.
What follows is a step-by-step breakdown so you can follow along without needing to pause and rewind.
Step 1: Open the Masking Panel
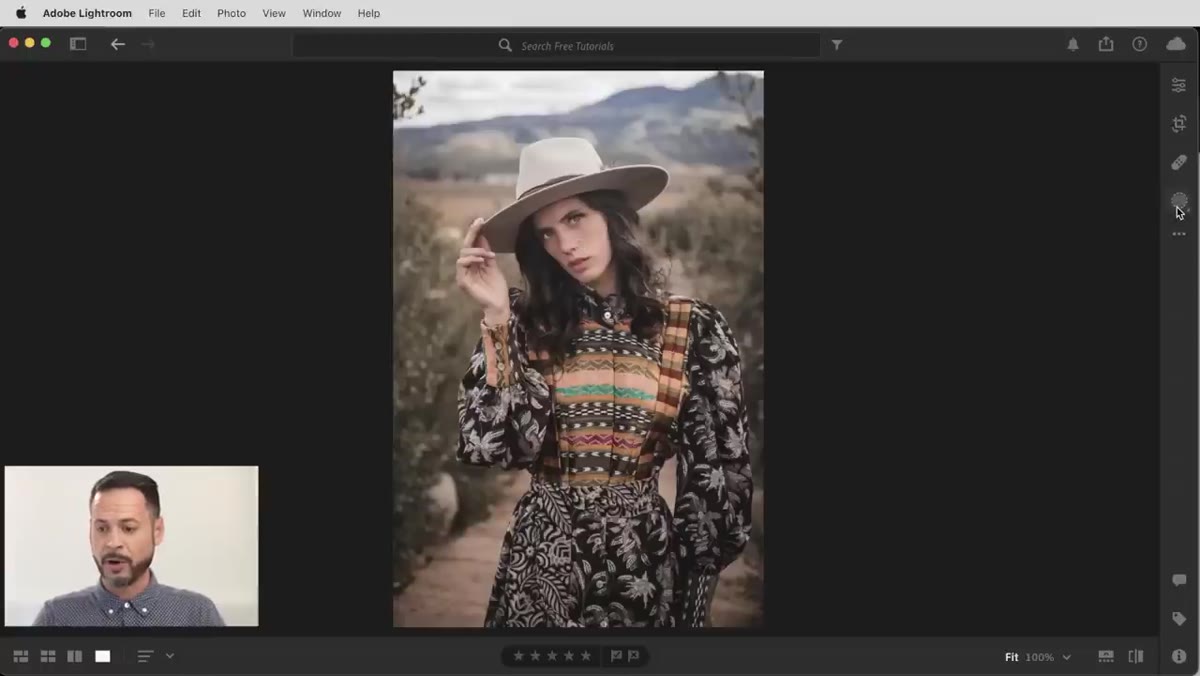 Masking icon highlighted in Lightroom’s right toolbar
Press M on your keyboard or click the masking icon in the toolbar on the right side of the Develop module. This opens the masking dialog, which is where Lightroom houses all of its selection tools. You’ll see options including Select Subject, Select Sky, brushes, and gradients. For portrait work, Select Subject is the one you want.
Masking icon highlighted in Lightroom’s right toolbar
Press M on your keyboard or click the masking icon in the toolbar on the right side of the Develop module. This opens the masking dialog, which is where Lightroom houses all of its selection tools. You’ll see options including Select Subject, Select Sky, brushes, and gradients. For portrait work, Select Subject is the one you want.
This panel is worth spending five minutes exploring even outside of this specific technique. Lightroom has quietly built a powerful selection ecosystem here, and most people only use a fraction of it.
Step 2: Use Select Subject to Build Your Initial Mask
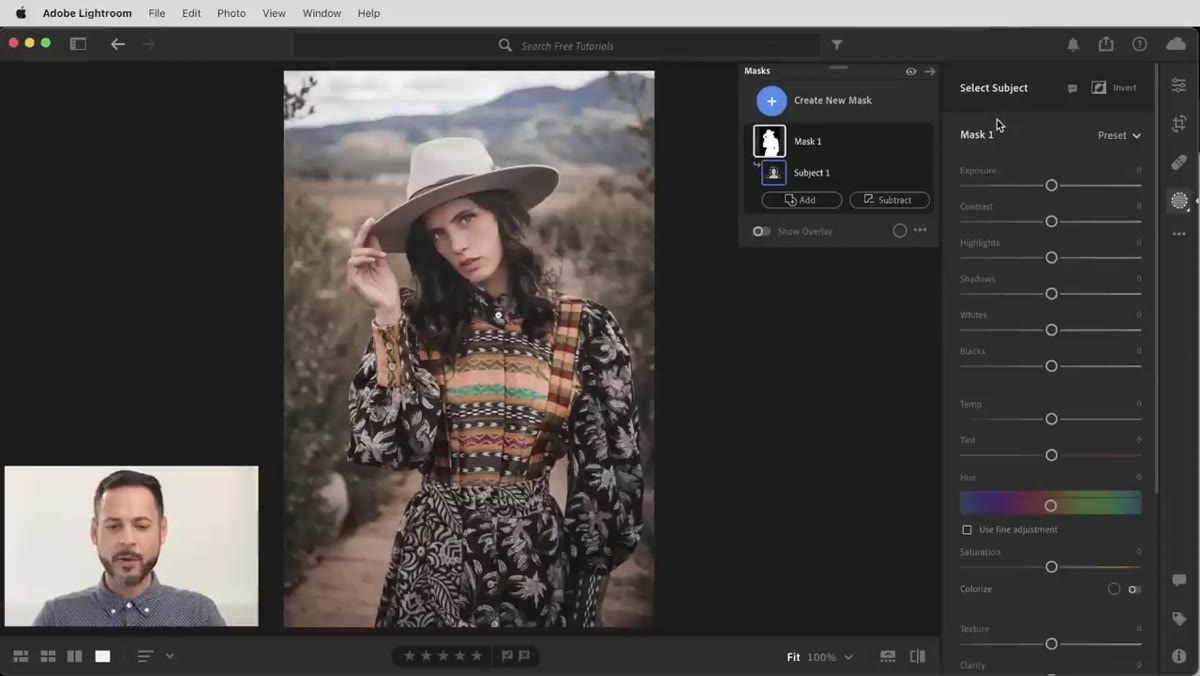 AI subject selection overlay covering the portrait subject
Click “Select Subject” and let the AI do its work. Lightroom’s subject detection has gotten remarkably accurate over the last couple of versions, especially for human subjects against reasonably distinct backgrounds. You’ll see a colored overlay appear on the image showing exactly what’s been selected. Check the edges around hair and shoulders carefully since that’s where the selection can sometimes soften too much.
AI subject selection overlay covering the portrait subject
Click “Select Subject” and let the AI do its work. Lightroom’s subject detection has gotten remarkably accurate over the last couple of versions, especially for human subjects against reasonably distinct backgrounds. You’ll see a colored overlay appear on the image showing exactly what’s been selected. Check the edges around hair and shoulders carefully since that’s where the selection can sometimes soften too much.
The mask preview at the bottom of the masking panel also shows you a grayscale thumbnail of the selection. White means selected, black means not. Use that thumbnail as a quick sanity check before you start editing.
Step 3: Invert the Selection to Target the Background First
 Invert button clicked, selection now covers background instead of subject
Here’s a workflow choice that makes a lot of sense: edit the background first while the subject is fully protected. To do that, click the Invert button that appears near the top of the mask options. One click flips the selection so everything except your subject is now active.
Invert button clicked, selection now covers background instead of subject
Here’s a workflow choice that makes a lot of sense: edit the background first while the subject is fully protected. To do that, click the Invert button that appears near the top of the mask options. One click flips the selection so everything except your subject is now active.
Why do the background first? Because background corrections tend to be more dramatic. You’re often pulling exposure, pushing saturation, shifting color temperature. Doing those moves while the subject is untouched means you can be aggressive without worrying about blowing out a face or muddying skin tones.
Step 4: Adjust the Background’s Exposure, Contrast, and Color
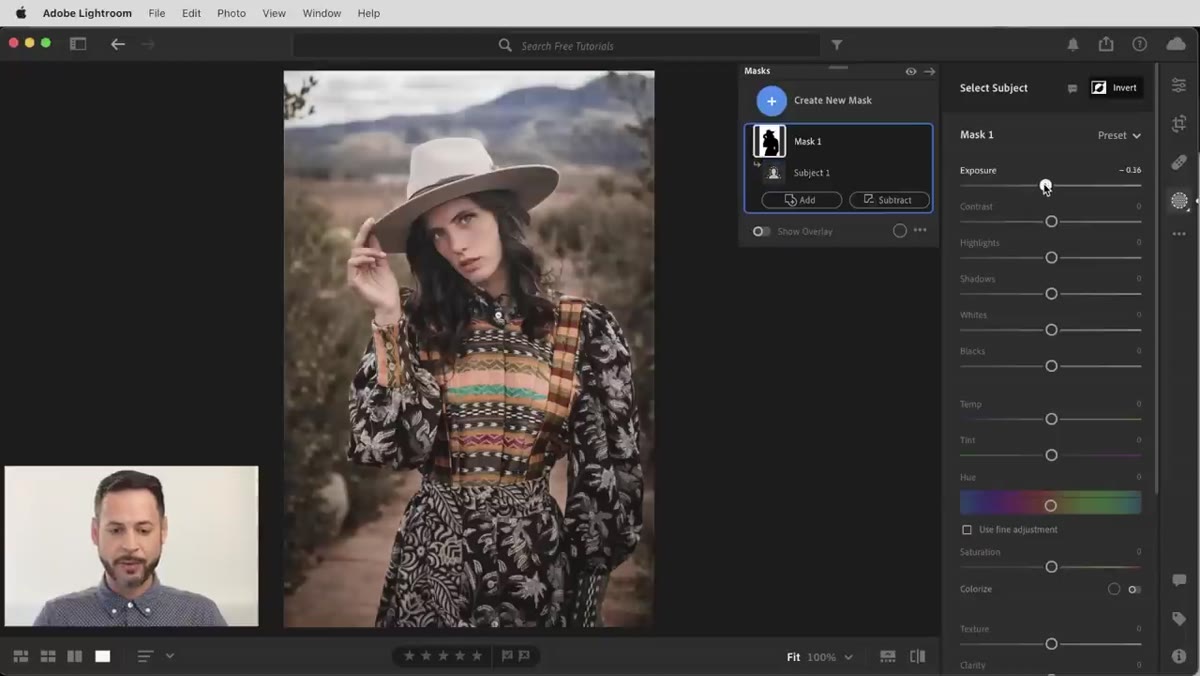 Lightroom sliders being adjusted while subject remains unaffected
With the inverted mask active, work through the basic panel sliders as you normally would, but know that every change is hitting only the background. Boost contrast to give a flat background some depth. Pull highlights down if the background is blown. Lift shadows to bring out texture in darker areas. Shift saturation if the colors look washed out.
Lightroom sliders being adjusted while subject remains unaffected
With the inverted mask active, work through the basic panel sliders as you normally would, but know that every change is hitting only the background. Boost contrast to give a flat background some depth. Pull highlights down if the background is blown. Lift shadows to bring out texture in darker areas. Shift saturation if the colors look washed out.
Aaron’s approach here is refreshingly practical: he doesn’t come in with a precise target value in mind. He pushes sliders until something looks right, then backs off a little. That’s not laziness, it’s good editing instinct. Non-destructive editing exists so you can experiment. Take advantage of that. Toggle the mask on and off with the switch at the top of the mask entry to compare before and after as you go.
Step 5: Create a Second Mask for the Subject
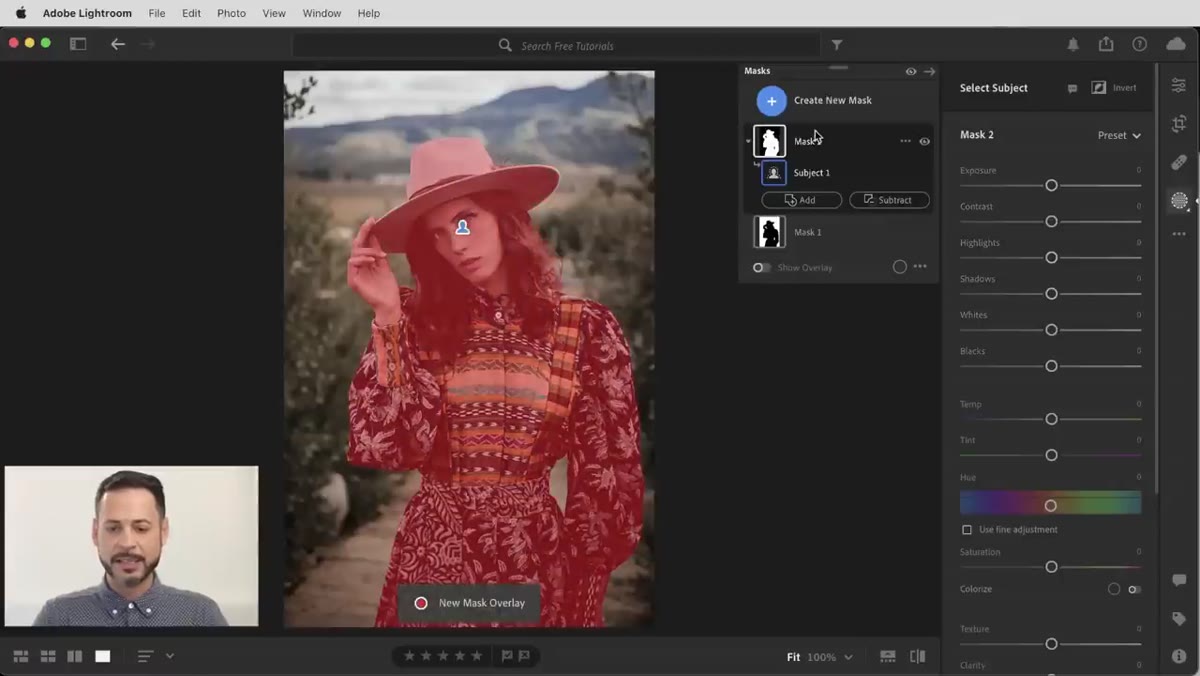 New mask created targeting only the portrait subject
Click “Create New Mask” and this time run Select Subject again, but leave the selection as-is without inverting. Now you have two separate masks stacked in the panel: one covering the background, one covering the subject. You can click between them at any point, and Lightroom loads the corresponding slider settings for whichever mask you’ve selected.
New mask created targeting only the portrait subject
Click “Create New Mask” and this time run Select Subject again, but leave the selection as-is without inverting. Now you have two separate masks stacked in the panel: one covering the background, one covering the subject. You can click between them at any point, and Lightroom loads the corresponding slider settings for whichever mask you’ve selected.
This is the part that feels almost too good to be true the first time you use it. Two completely independent sets of adjustments, both living inside the same Lightroom edit, both non-destructive, both synced to the cloud if you’re using Lightroom on mobile or iPad.
Step 6: Dial In the Subject’s Tone and Contrast Separately
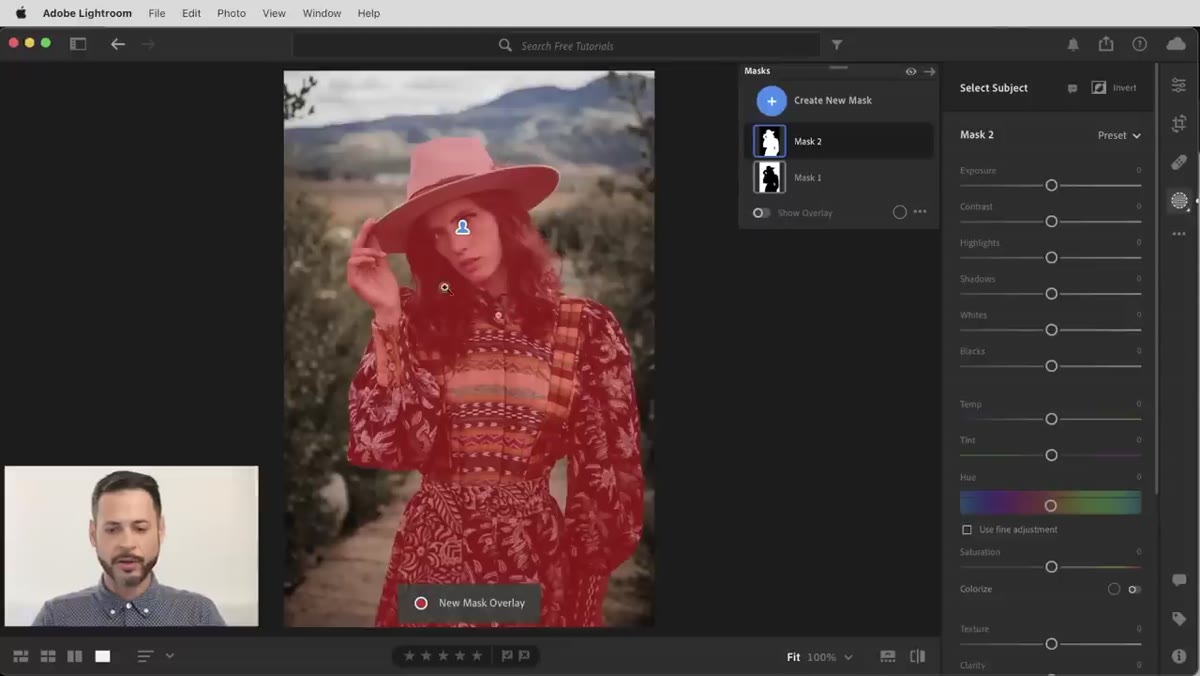 Contrast and highlights adjusted on subject mask only
With the subject mask selected, make the adjustments that serve the subject specifically. For portrait work, a modest contrast boost on the face adds dimension without looking heavy-handed. Pulling highlights down slightly and nudging shadows back up gives you a more balanced exposure across skin tones, especially if your subject was lit differently than the background.
Contrast and highlights adjusted on subject mask only
With the subject mask selected, make the adjustments that serve the subject specifically. For portrait work, a modest contrast boost on the face adds dimension without looking heavy-handed. Pulling highlights down slightly and nudging shadows back up gives you a more balanced exposure across skin tones, especially if your subject was lit differently than the background.
The key is moderation here. The background can handle bigger moves. The subject, particularly the face, responds better to subtle refinement.
Step 7: Subtract from a Mask to Refine What It Affects
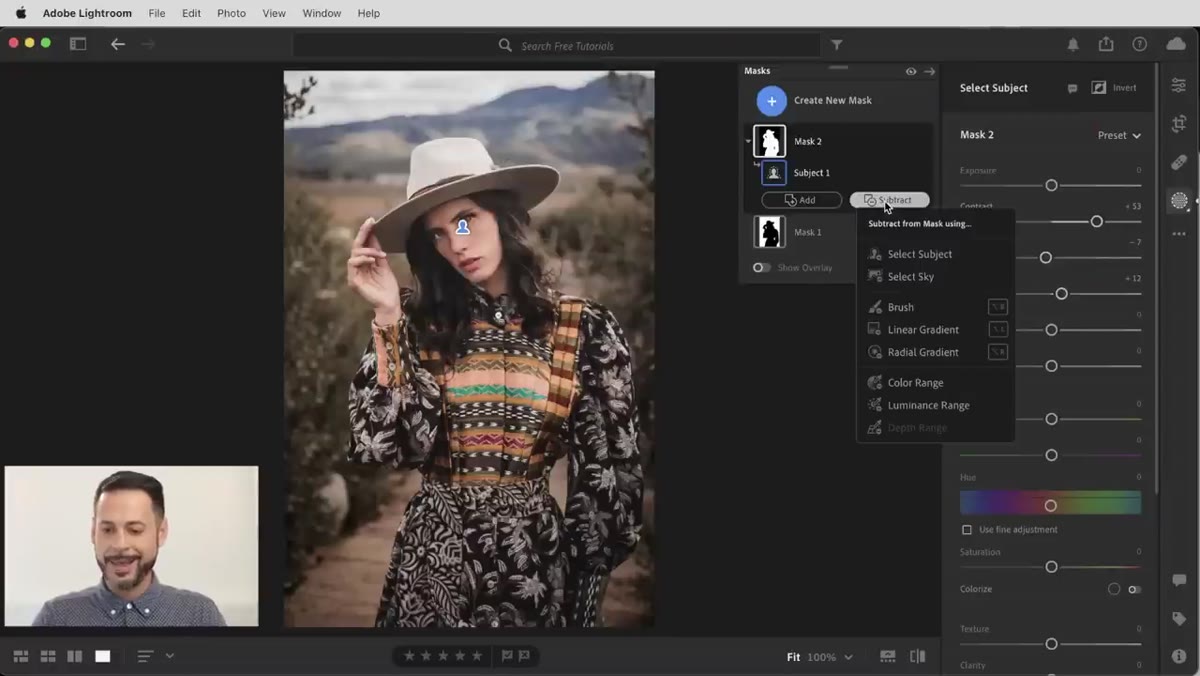 Subtract option selected with linear gradient being dragged up from bottom
Both masks support adding and subtracting regions using any of Lightroom’s selection tools. Click on a mask entry and choose “Subtract,” then pick a tool like a linear gradient or a brush. Aaron demonstrates subtracting a linear gradient from the subject mask to limit the effect to just the upper portion of the frame, essentially the face and shoulders, rather than the full figure.
Subtract option selected with linear gradient being dragged up from bottom
Both masks support adding and subtracting regions using any of Lightroom’s selection tools. Click on a mask entry and choose “Subtract,” then pick a tool like a linear gradient or a brush. Aaron demonstrates subtracting a linear gradient from the subject mask to limit the effect to just the upper portion of the frame, essentially the face and shoulders, rather than the full figure.
This level of control inside Lightroom used to require Photoshop and a significant time investment. Now it’s a drag gesture. The mask thumbnail updates in real time so you can see exactly what’s being removed from the selection before you commit to any settings.
One Thing I’d Add From My Own Experience
The Select Subject tool is excellent but not infallible. For shots where the subject’s clothing is close in tone to the background, or where there’s significant motion blur at the edges, the AI selection can bleed into areas you don’t want affected. My fix is to run Select Subject as the base, then use the Brush tool on “Subtract” mode to manually clean up any problem edges at 100% zoom. It adds two or three minutes to the process but keeps the result clean enough that you won’t catch any artifacts when the image goes to print or social.
Also worth noting: these masks sync across devices through the Adobe cloud, which means edits started on desktop show up on Lightroom mobile with all the masking intact. If you review work on a tablet, that’s genuinely useful.
The single biggest shift in thinking this technique requires is accepting that one image can have two completely different sets of tonal adjustments applied to different areas, and that Lightroom can manage that entirely on its own. No Photoshop. No layers. No exporting. The masking panel is the tool most Lightroom users underuse, and subject-background separation is the strongest argument for learning it properly.
Watch the full tutorial on YouTube and follow along with Aaron’s original walkthrough to see the technique in motion.
Comments (1)
Tried this technique this morning. Game changer for real.
Leave a Comment