Most of the photos sitting in my Lightroom catalog right now are not bad shots. They’re just unfinished ones. Images I took on a good day, with decent light, that came out of camera looking flat and got buried in a folder I keep telling myself I’ll get to. If you shoot on photo walks or street sessions, you know the feeling. You come home with 300 frames, cull them down to 40 worth keeping, and then stall out because the editing feels like starting from scratch on each one.
That’s exactly what Terry White addresses in this KelbyOne tutorial, filmed as a resource for Worldwide Photowalk 2018 participants. Watch the full tutorial on YouTube – it’s short, dense with practical technique, and worth seeing alongside this breakdown. Terry works through a real, unedited landscape photo and takes it from a rejected out-of-camera file to something genuinely worth sharing, using a workflow that translates to almost any outdoor image you’ve got collecting dust.
What I appreciate about his approach is the order of operations. He’s not jumping around the Develop module randomly. There’s logic here, and once you understand why each step comes when it does, you stop second-guessing yourself mid-edit.
Step 1: Apply a Lens Profile Correction First
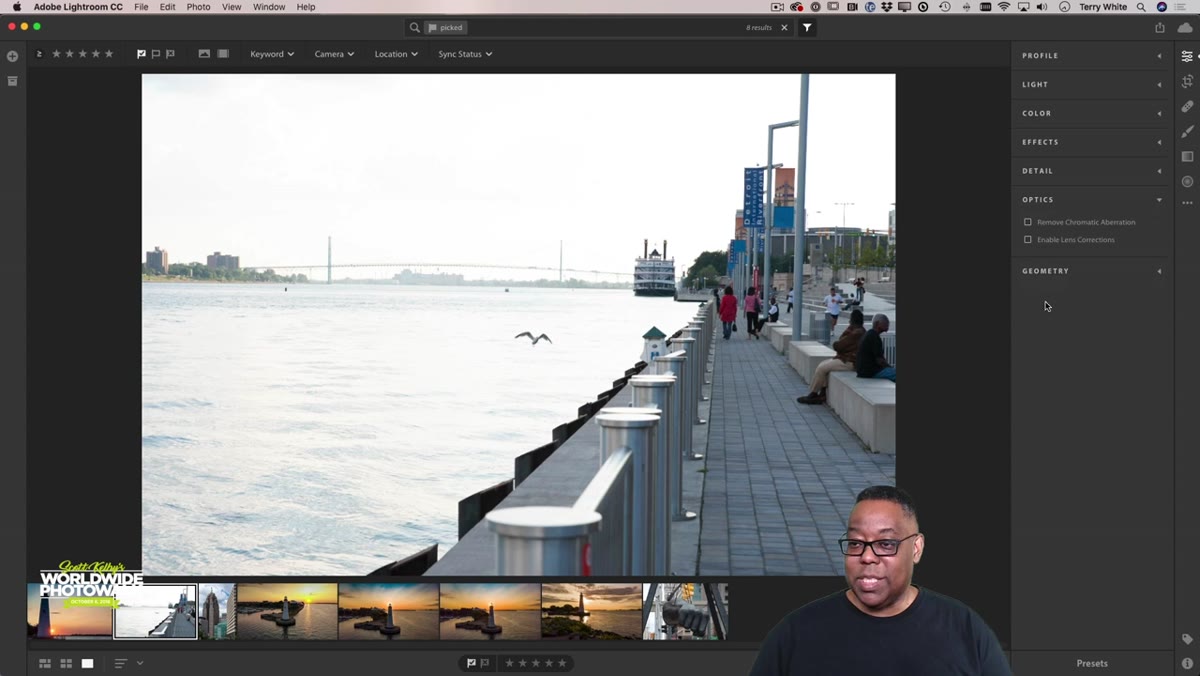 Optics panel open, Enable Profile Corrections checkbox being clicked
Before you touch exposure or color, go to the Optics panel (called “Lens Corrections” in Lightroom Classic) and enable the lens profile correction. This single checkbox tells Lightroom to compensate for the optical distortion your specific lens introduces, including barrel distortion, vignetting, and edge softness. Terry starts here every single time, and honestly, I’ve started doing the same. It’s the kind of fix that’s invisible when you do it and distracting when you don’t. A slightly bowed horizon or a pinched center can quietly undermine an otherwise strong image.
Optics panel open, Enable Profile Corrections checkbox being clicked
Before you touch exposure or color, go to the Optics panel (called “Lens Corrections” in Lightroom Classic) and enable the lens profile correction. This single checkbox tells Lightroom to compensate for the optical distortion your specific lens introduces, including barrel distortion, vignetting, and edge softness. Terry starts here every single time, and honestly, I’ve started doing the same. It’s the kind of fix that’s invisible when you do it and distracting when you don’t. A slightly bowed horizon or a pinched center can quietly undermine an otherwise strong image.
Lightroom usually detects your lens automatically from the EXIF data if you shot in RAW. If it doesn’t recognize the lens, you can search for it manually in the dropdown. Takes ten seconds, and you’ll never have to think about it again once it’s applied.
Step 2: Choose a Creative Profile Before You Touch the Sliders
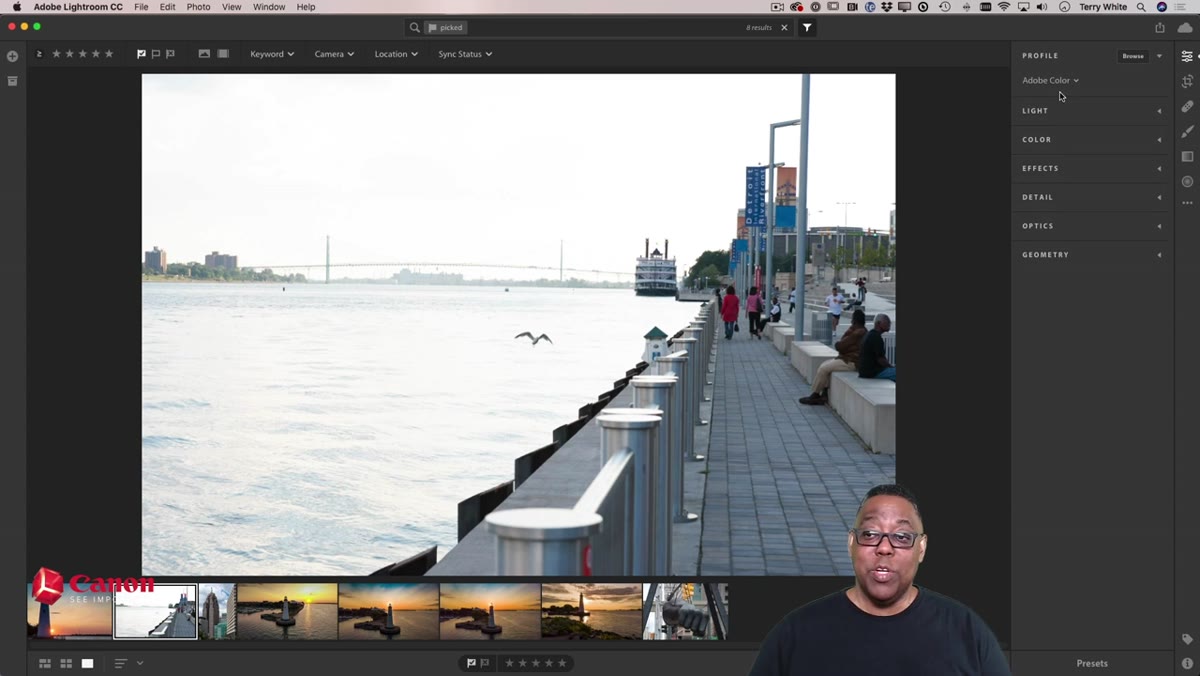 Profile Browser open, Vivid profile selected with landscape image visible
With lens correction done, Terry moves to the Profile Browser at the top of the Basic panel. This is different from presets. Profiles affect how the underlying RAW data is interpreted before any slider adjustments are made, which means they don’t fight with your later edits the way a heavy preset sometimes can.
Profile Browser open, Vivid profile selected with landscape image visible
With lens correction done, Terry moves to the Profile Browser at the top of the Basic panel. This is different from presets. Profiles affect how the underlying RAW data is interpreted before any slider adjustments are made, which means they don’t fight with your later edits the way a heavy preset sometimes can.
For landscape images, especially ones with both sky and people in the frame, Terry recommends the Vivid profile, part of Adobe’s Creative profile set. It lifts color saturation and micro-contrast in a way that feels more like what your eye actually saw than what the camera recorded. If Vivid feels like too much for your image, the Landscape profile is a more restrained starting point. Either way, pick your profile before you touch a single slider. Changing it afterward can shift your entire edit in unexpected ways.
Step 3: Use Adobe Sensei Auto as a Starting Point, Not a Finish Line
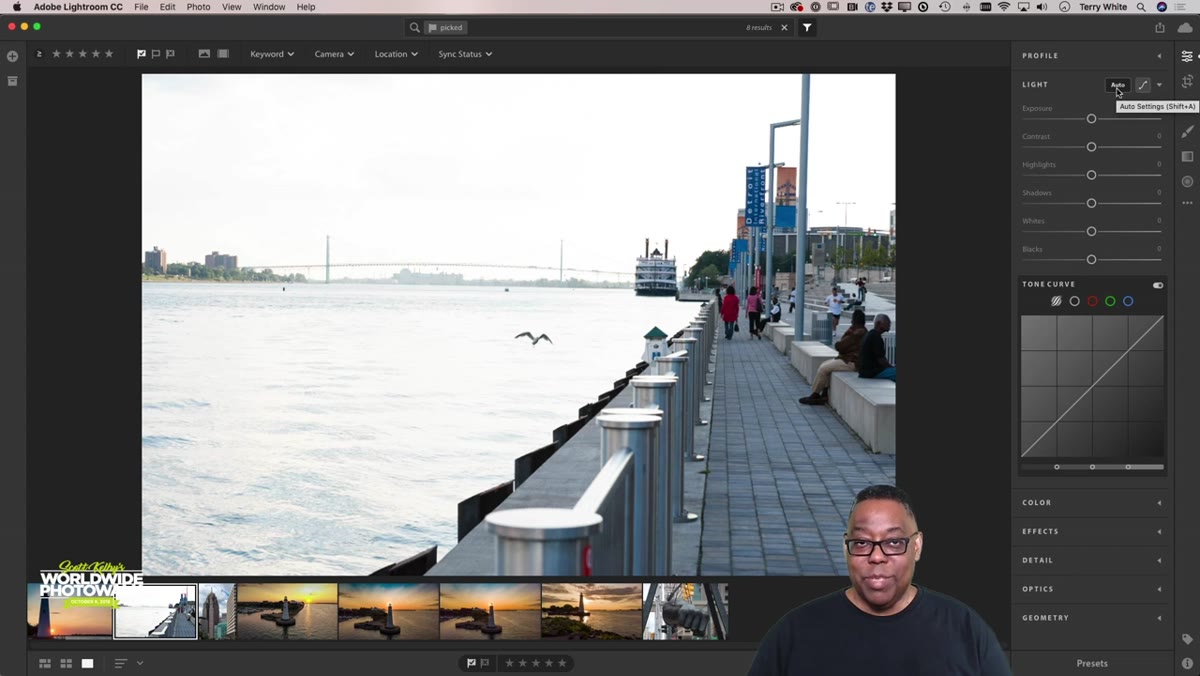 Auto button being clicked, Basic panel sliders jumping to new values
Once your profile is set, click the Auto button in the Basic panel. Terry is transparent about something a lot of tutorials skip: Auto is not the answer. It’s the beginning of the conversation. Adobe’s AI looks at your image, compares it to similar photographs in its training data, and makes a best-guess set of adjustments. For most outdoor images, it does a genuinely good job with exposure and shadow recovery.
Auto button being clicked, Basic panel sliders jumping to new values
Once your profile is set, click the Auto button in the Basic panel. Terry is transparent about something a lot of tutorials skip: Auto is not the answer. It’s the beginning of the conversation. Adobe’s AI looks at your image, compares it to similar photographs in its training data, and makes a best-guess set of adjustments. For most outdoor images, it does a genuinely good job with exposure and shadow recovery.
Where it tends to go wrong, at least in Terry’s experience and mine, is contrast. The Auto algorithm often pulls contrast down in a way that makes images feel a little washed and soft. After you click Auto, check the Contrast slider. If it dropped significantly, push it back up manually. Think of Auto as doing 70% of the heavy lifting so you’re not starting from zero, then you fine-tune from there. Shadows are another one to revisit after Auto runs. If the image still feels murky in the darker areas, give the Shadows slider a nudge upward.
Step 4: Straighten Your Horizon in the Crop Tool
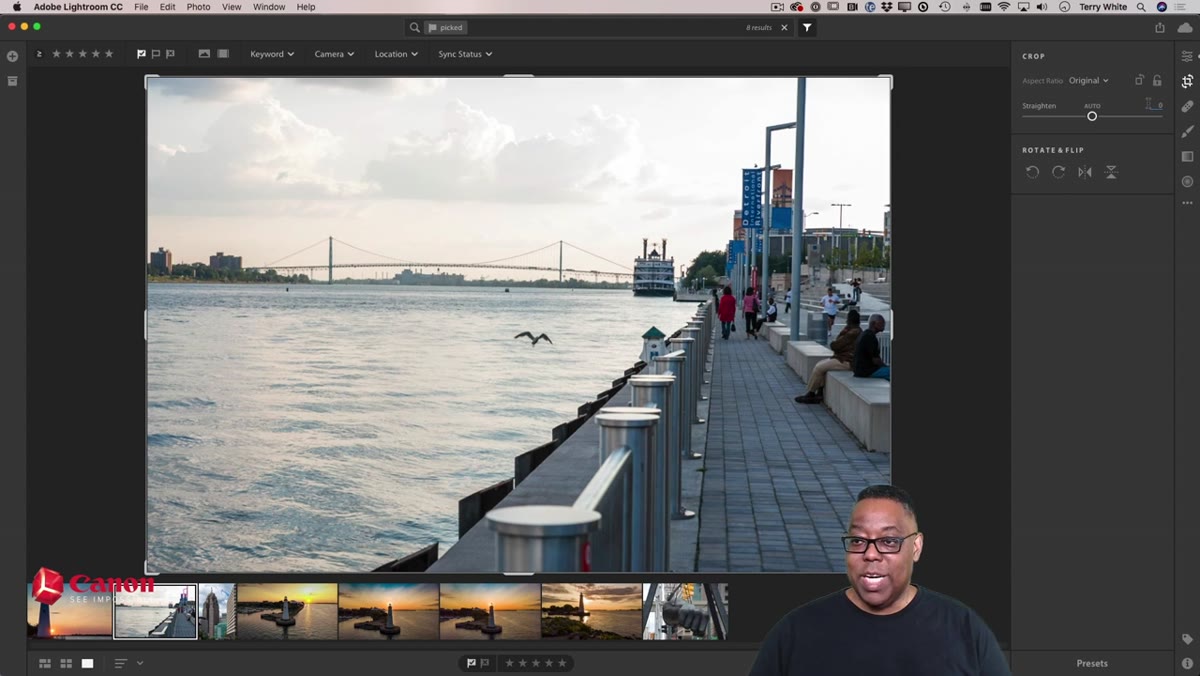 Crop overlay active, image being rotated slightly to level the horizon
Crooked horizons are one of those things that viewers feel even when they can’t name it. The image just looks slightly wrong, slightly unstable. Terry goes into the Crop tool (press R in both versions of Lightroom) and uses the auto-straighten feature, which analyzes the image for strong horizontal or vertical lines and rotates accordingly.
Crop overlay active, image being rotated slightly to level the horizon
Crooked horizons are one of those things that viewers feel even when they can’t name it. The image just looks slightly wrong, slightly unstable. Terry goes into the Crop tool (press R in both versions of Lightroom) and uses the auto-straighten feature, which analyzes the image for strong horizontal or vertical lines and rotates accordingly.
The key detail here: auto-straighten is a starting point, not gospel. If your image has a strong architectural reference, like Terry’s bridge, you can use that element to fine-tune the rotation manually. Drag the angle slider or click and drag directly on the canvas while the Crop overlay is active. Lock it in when the line you trust is perfectly level.
Step 5: Add Dehaze for Sky Drama and Atmospheric Depth
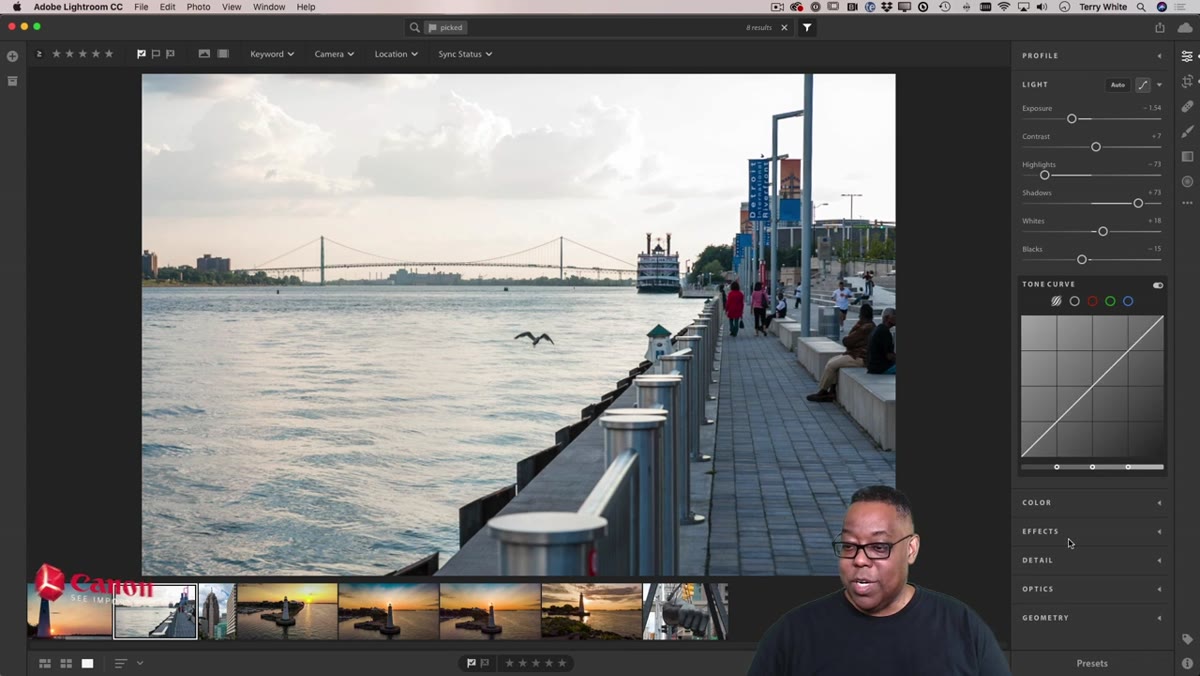 Effects panel open, Dehaze slider being pushed to the right
Dehaze lives in the Effects panel and it’s one of those tools that landscape photographers either overuse or forget completely. Terry applies a modest amount here to pull cloud detail back into a sky that had gone a little flat. Think of Dehaze not as a filter but as a contrast and saturation recovery tool specifically tuned for atmospheric haze, which is exactly the kind of softness that outdoor light creates.
Effects panel open, Dehaze slider being pushed to the right
Dehaze lives in the Effects panel and it’s one of those tools that landscape photographers either overuse or forget completely. Terry applies a modest amount here to pull cloud detail back into a sky that had gone a little flat. Think of Dehaze not as a filter but as a contrast and saturation recovery tool specifically tuned for atmospheric haze, which is exactly the kind of softness that outdoor light creates.
Go light on this one. A value in the 15-30 range usually gives you recovered depth without making the sky look artificially crunchy. Push it past 50 and you’ll start getting texture artifacts and color shifts that take longer to fix than the original problem.
Step 6: Crop Out Distracting Edge Elements
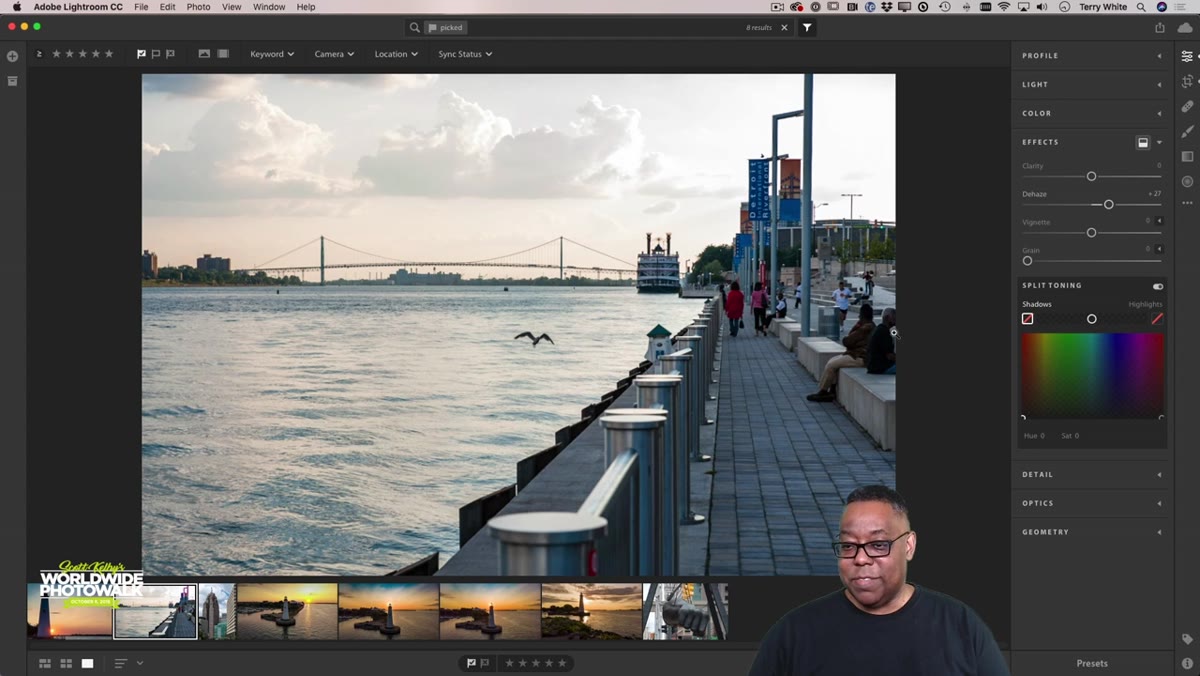 Crop tool repositioned to remove figure on the left edge of frame
Terry makes a point here that I think a lot of photographers resist: cropping out a distracting subject is not cheating. It’s editing. In his image, there’s a figure at the edge of the frame, partially cut off, facing away from everything else in the photo. He doesn’t spend time trying to heal or mask the person. He just reframes the crop to exclude them entirely.
Crop tool repositioned to remove figure on the left edge of frame
Terry makes a point here that I think a lot of photographers resist: cropping out a distracting subject is not cheating. It’s editing. In his image, there’s a figure at the edge of the frame, partially cut off, facing away from everything else in the photo. He doesn’t spend time trying to heal or mask the person. He just reframes the crop to exclude them entirely.
Ask yourself what the image is actually about, and then make sure the frame is centered on that thing. A tighter crop that focuses attention is almost always stronger than a wider crop that includes everything.
Step 7: Use the Adjustment Brush for Selective Exposure
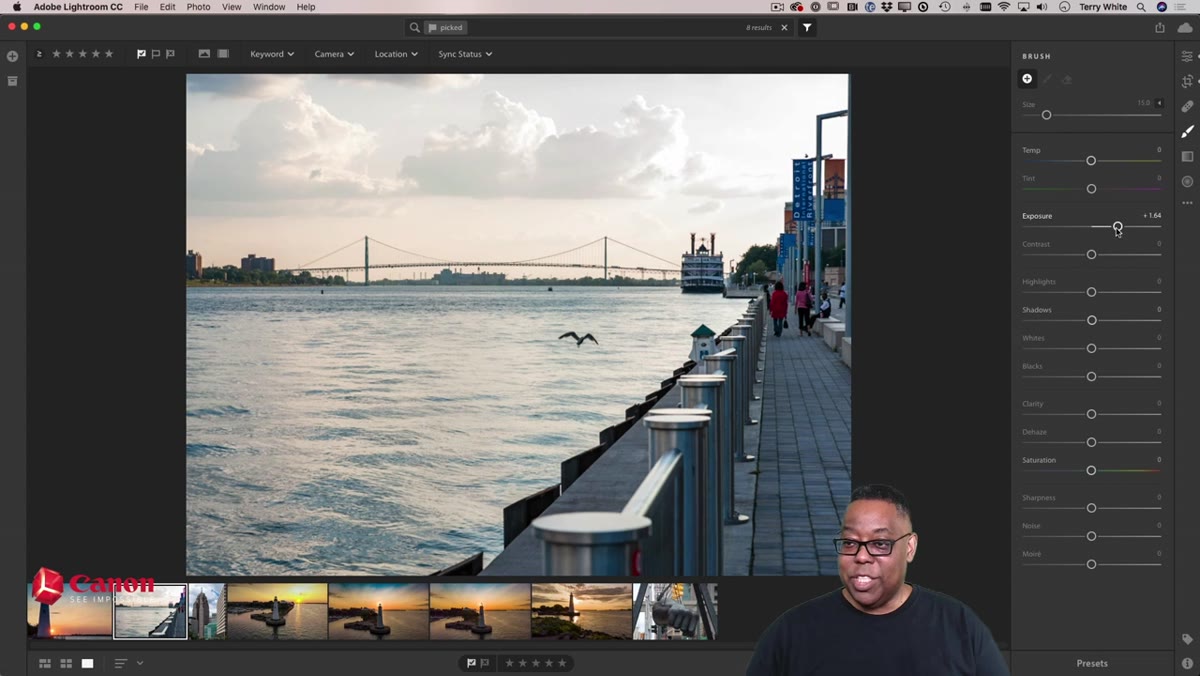 Adjustment Brush active, stroke being painted over darker area of image
The last major move in Terry’s workflow is a selective adjustment using the Adjustment Brush (press K). He sets the brush to a positive exposure value and paints it across areas of the image that are still too dark after the global corrections. What makes this powerful is that once you’ve painted the mask, you can adjust the exposure value up or down and the change only affects the painted area.
Adjustment Brush active, stroke being painted over darker area of image
The last major move in Terry’s workflow is a selective adjustment using the Adjustment Brush (press K). He sets the brush to a positive exposure value and paints it across areas of the image that are still too dark after the global corrections. What makes this powerful is that once you’ve painted the mask, you can adjust the exposure value up or down and the change only affects the painted area.
This is the step that separates a flat global edit from something that actually guides the viewer’s eye. Brighten the parts you want seen, leave the rest where it is. No complex masking required.
My Caveat: Name Your Selective Adjustments
One habit I’d add to Terry’s workflow, especially if you’re editing a large batch: rename your adjustment brush pins before you close out the file. Double-click the pin and give it a label like “foreground fill” or “sky hold.” It takes five seconds and saves you real confusion when you come back to an image three months later wondering why you painted a weird blob of exposure into the left corner.
I started doing this after I spent a good twenty minutes reverse-engineering my own edits on a file I needed to revise for a client. Don’t be me.
The real lesson Terry White is teaching here is editorial confidence. Every step in this workflow is about making a decision and moving forward, not fussing indefinitely. Apply the lens profile. Pick the profile. Let Auto do the grunt work, then override what you disagree with. Straighten the frame. Remove what doesn’t belong. Finish with selective light.
That’s a complete edit, and you can run through it in under ten minutes once it’s muscle memory.
Watch the full tutorial on YouTube to see Terry’s actual before and after, which is worth the five minutes on its own.
Comments
Leave a Comment