
There’s a specific kind of frustration that comes from using a tool every day and slowly realizing you’ve been ignoring half of it. I came to Lightroom the hard way. Our band needed press shots, nobody wanted to pay a photographer, and I ended up being the guy who figured out post-processing by necessity. For years, I was dragging sliders around with no system, no shortcuts, and no real understanding of what the software could actually do. It wasn’t until I started digging into tutorials from photographers who lived inside Lightroom that things clicked.
Peter McKinnon’s 10 Lightroom tips video is one of those rare tutorials that hits you with something useful every two minutes. Watch the full tutorial on YouTube and keep this breakdown open alongside it. What follows is my working walkthrough of the techniques he covers, written so you can actually follow along without pausing and rewinding every thirty seconds.
The tips below are pulled directly from the video in order. Some of these I already had in my workflow. A couple of them genuinely made me stop and wonder why nobody had told me sooner.
Step 1: Use Auto Tone as Your Starting Point
 Auto tone button highlighted in the Tone panel
If you are newer to Lightroom Classic CC, or if you are opening a batch of photos and just need a reasonable baseline to work from, the Auto Tone feature is something you should know about. Navigate to the Tone section of the Basic panel, look for the word “Auto” sitting just to the right of the “Tone” label, and click it. Adobe Sensei runs an AI-powered analysis of the image and makes initial adjustments across your exposure, highlights, shadows, and contrast.
Auto tone button highlighted in the Tone panel
If you are newer to Lightroom Classic CC, or if you are opening a batch of photos and just need a reasonable baseline to work from, the Auto Tone feature is something you should know about. Navigate to the Tone section of the Basic panel, look for the word “Auto” sitting just to the right of the “Tone” label, and click it. Adobe Sensei runs an AI-powered analysis of the image and makes initial adjustments across your exposure, highlights, shadows, and contrast.
The result is not a finished edit. What Auto Tone gives you is a starting position that is usually more balanced than a flat raw file. In my experience it tends to pull highlights back down and lift shadow detail, which is exactly where most raw files need help. From there you take over and push it in the direction you actually want. Think of it as the rough pencil sketch before you start painting.
Step 2: Reset Individual Sliders Without Touching the Others
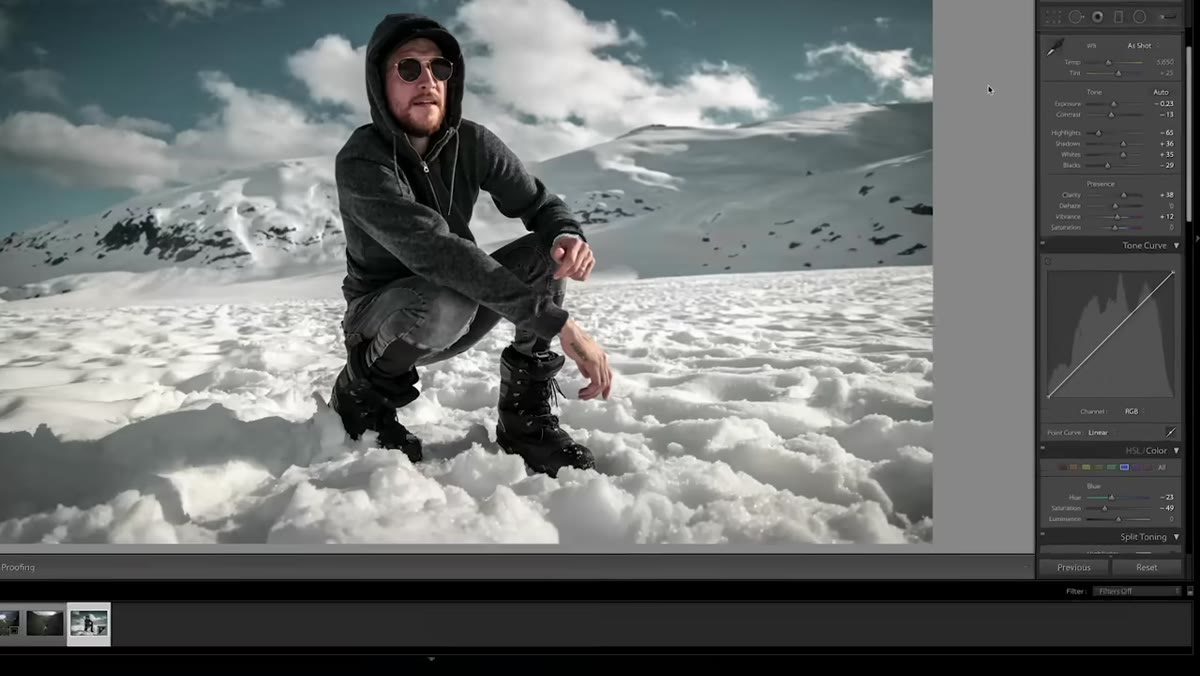 Double-clicking the Exposure label to reset it to zero
The reset button in the bottom right of Lightroom’s Develop module will wipe every single adjustment you’ve made and return the photo to its imported state. That is useful sometimes, but not when you’ve spent twenty minutes on a curve and just want to zero out one rogue slider. The solution is simple and fast: double-click the name of the slider, not the slider itself, and it jumps back to zero instantly.
Double-clicking the Exposure label to reset it to zero
The reset button in the bottom right of Lightroom’s Develop module will wipe every single adjustment you’ve made and return the photo to its imported state. That is useful sometimes, but not when you’ve spent twenty minutes on a curve and just want to zero out one rogue slider. The solution is simple and fast: double-click the name of the slider, not the slider itself, and it jumps back to zero instantly.
So if your Exposure is sitting at minus 1.4 and you want to start that one over, you double-click the word “Exposure” and it resets without touching your whites, your shadows, or anything else. This works across the panel. Run through your sliders after a messy edit session and clean up the ones that went sideways. It saves a lot of time compared to dragging things back to center by hand.
Step 3: Cycle Through Crop Grid Overlays
 Grid overlay options cycling while in crop mode
This one made me genuinely laugh when I first came across it because I had been cropping photos in Lightroom for years without knowing it existed. Open the crop tool by pressing R on your keyboard. You will see the default rule of thirds grid overlay on the image. Now press the letter O. Keep pressing it. Each press cycles you through a completely different compositional grid.
Grid overlay options cycling while in crop mode
This one made me genuinely laugh when I first came across it because I had been cropping photos in Lightroom for years without knowing it existed. Open the crop tool by pressing R on your keyboard. You will see the default rule of thirds grid overlay on the image. Now press the letter O. Keep pressing it. Each press cycles you through a completely different compositional grid.
Peter McKinnon calls out the diagonal grid with proportional lines as one of his favorites for visualizing dynamic composition across different frame sizes. There are grids built around the golden ratio, the Fibonacci spiral, and several others. These are not decorative, they are actual compositional references that help you decide where to place your horizon, your subject, and your negative space before you commit to the crop. If you have been eyeballing every crop by instinct, this is a fast way to add intention to that decision.
Step 4: Know When to Crop vs. When to Adjust
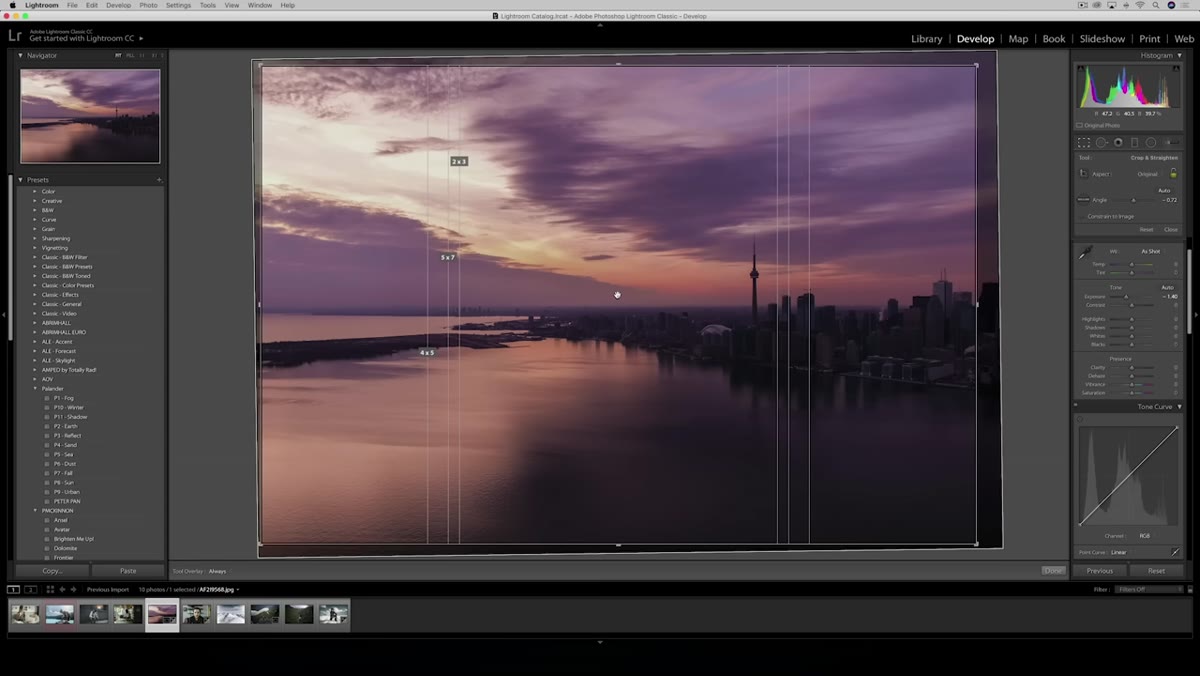 Crop overlay with dimensional grid lines visible
One thing McKinnon demonstrates that I think gets glossed over is the relationship between cropping and the rest of your edit. The crop tool is not just about trimming edges. Changing the crop changes the visual weight of every other adjustment you’ve made. A tighter crop on a portrait will make your vignette feel heavier. A wider crop on a landscape will expose areas where your graduated filter falls off awkwardly.
Crop overlay with dimensional grid lines visible
One thing McKinnon demonstrates that I think gets glossed over is the relationship between cropping and the rest of your edit. The crop tool is not just about trimming edges. Changing the crop changes the visual weight of every other adjustment you’ve made. A tighter crop on a portrait will make your vignette feel heavier. A wider crop on a landscape will expose areas where your graduated filter falls off awkwardly.
The practical takeaway is to make your crop decision early, before you finalize your tone and color work. This is the order I follow now, and it prevents a lot of re-editing. Use the grid overlays to make an intentional compositional call, lock in the crop, and then proceed with the rest of your adjustments knowing the frame is set.
What I’d Add From My Own Workflow
The tips in this video stack well together, and that is worth pointing out explicitly. Auto Tone into a double-click slider reset is a legitimate workflow loop. You let the AI take a pass, you look at what it did, and you reset any slider you disagree with and take it yourself. It sounds obvious once you hear it, but I went years just fighting Auto Tone’s choices by dragging against them instead of simply clearing them and starting clean.
The crop overlay cycling is the tip I have shared the most with other editors. I keep the golden spiral overlay active by default now. It doesn’t mean every photo gets cropped to match it, but having that reference visible while I work reminds me to think compositionally rather than just tidying up the edges. I named the preset I use on golden-hour portraits after a Wilco track, which has nothing to do with any of this, but it means I actually remember to reach for it.
The single most important idea across all of McKinnon’s tips is this: Lightroom Classic has more built into it than most people ever discover, and the gap between a slow workflow and a fast one usually comes down to a handful of shortcuts and tools that nobody thinks to mention. Double-click a slider name. Press O while cropping. Click Auto before you touch anything else.
These are small things. They add up fast.
Watch the full tutorial on YouTube to see all ten tips in action, including the ones further into the video that go deeper into curve adjustments and panel organization.
Comments
Leave a Comment