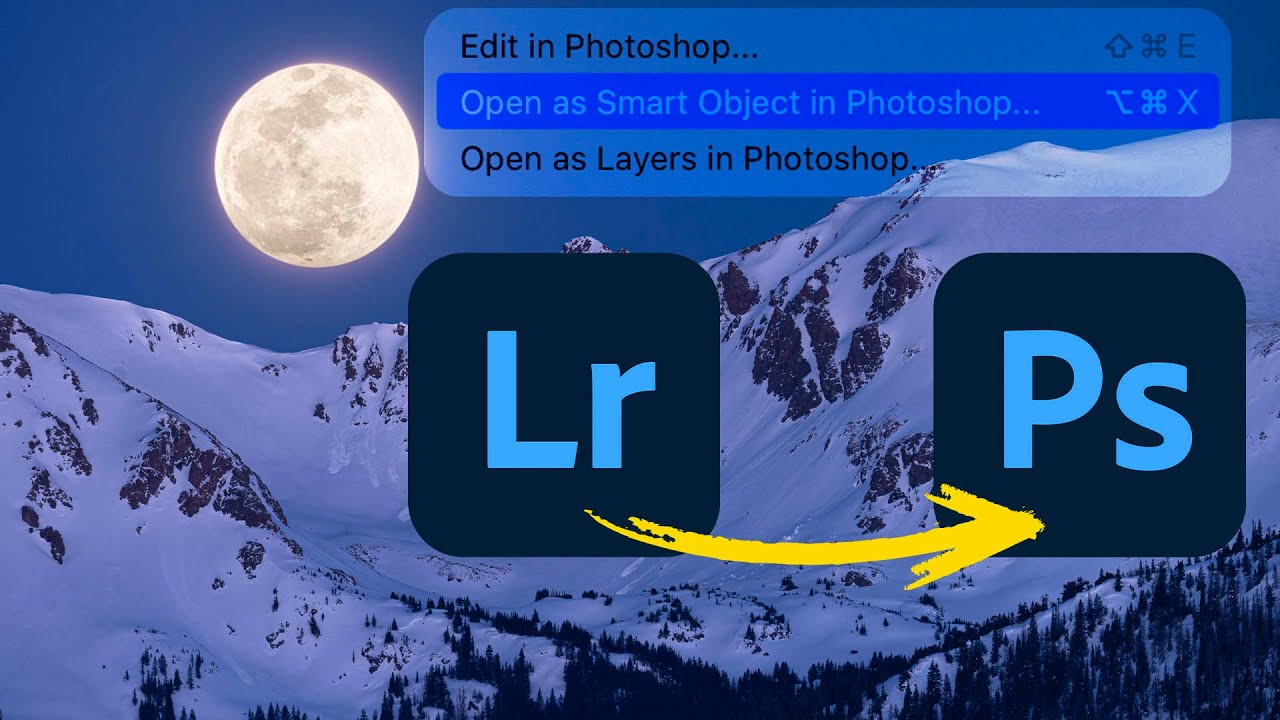
For a long time, switching from Lightroom (the cloud-based version, not Classic) to Photoshop felt like stepping off a moving train. You could get there, but you gave up a lot of control over what happened next. Specifically, the ability to send a photo to Photoshop as a smart object, open multiple layers, and move between Camera Raw and Photoshop without blowing up your whole editing session - those features just weren’t there. If you asked most working photographers why they stayed on Lightroom Classic, that gap was usually somewhere in their answer.
That gap just got a lot smaller. In this Matt Kloskowski tutorial (Watch the full tutorial on YouTube), he walks through what Adobe shipped recently and it’s genuinely useful. Matt made the jump from Classic to Lightroom about a year and a half ago, and his workflow thinking has always been practical rather than ideological, which is why I pay attention when he finds something worth covering.
I’ve been on Lightroom for about the same stretch of time. The catalog-free local browsing was the thing that got me, same as Matt. But I kept a Classic install around specifically for complex Photoshop compositing work. After watching this and spending a morning testing it myself, I think that safety net is finally ready to come down.
Step 1: Start Your Edit in Lightroom as Normal
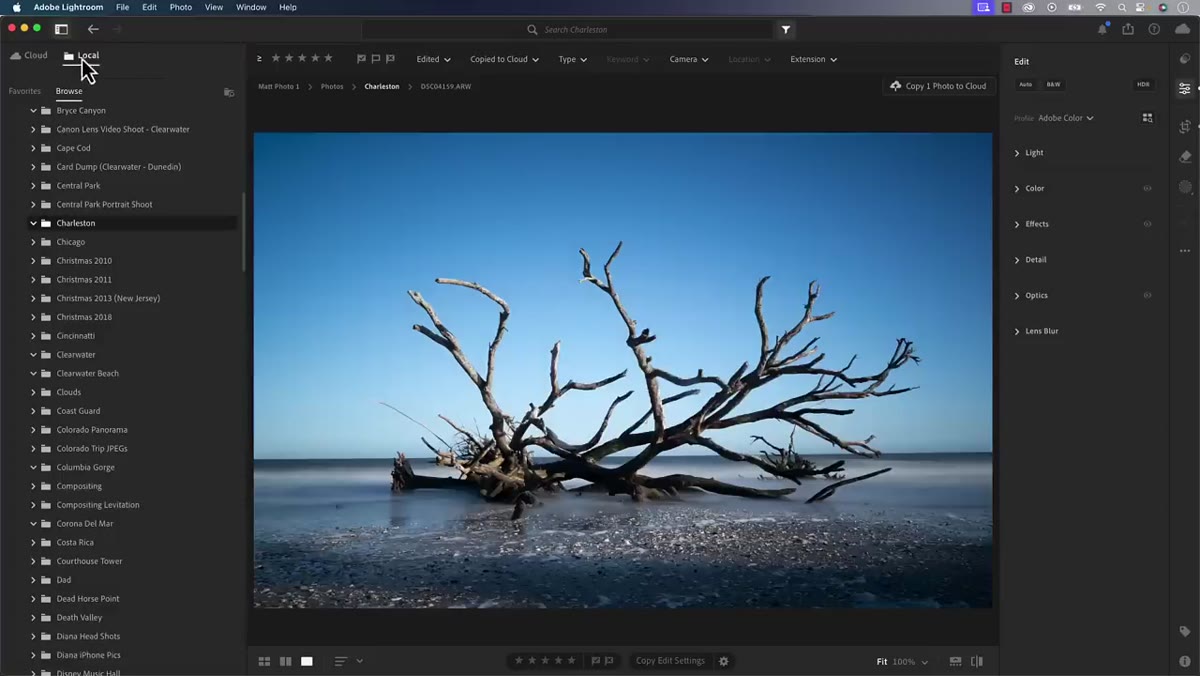 Lightroom local mode folder browsing panel open
Whether you’re in local mode (browsing folders directly on your drive) or working from cloud albums, the new features apply equally. Do your base Lightroom adjustments first - exposure, color grading, noise reduction, whatever the image needs before it goes anywhere near Photoshop. The logic here is the same as it’s always been: get the raw file looking as close to right as you can before you add the complexity of layers.
Lightroom local mode folder browsing panel open
Whether you’re in local mode (browsing folders directly on your drive) or working from cloud albums, the new features apply equally. Do your base Lightroom adjustments first - exposure, color grading, noise reduction, whatever the image needs before it goes anywhere near Photoshop. The logic here is the same as it’s always been: get the raw file looking as close to right as you can before you add the complexity of layers.
Don’t overthink this stage. You’re not committing to anything permanent. The whole point of what comes next is that you can come back and adjust the raw settings from inside Photoshop without starting over.
Step 2: Open as Smart Object in Photoshop
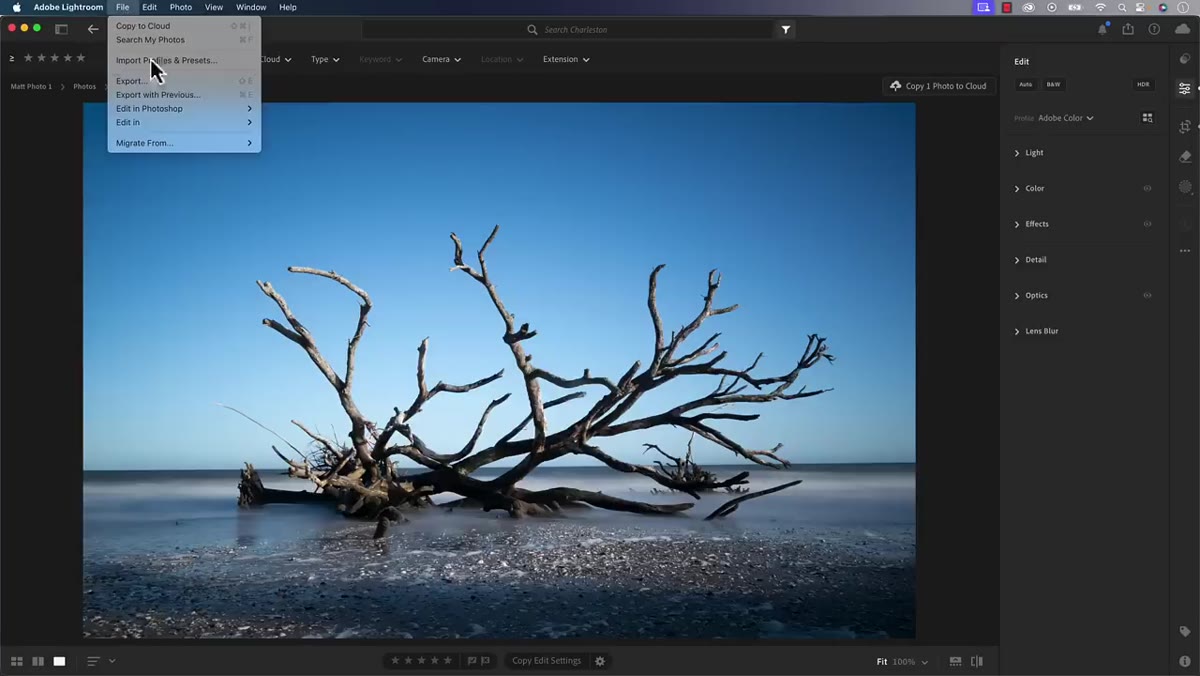 Edit in Photoshop menu showing Open as Smart Object option
Right-click the image (or use the Edit menu) and choose “Edit in Photoshop,” then select “Open as Smart Object.” This is the option that wasn’t available in Lightroom until very recently. When you send the file this way, Photoshop receives it as an embedded raw smart object rather than a flattened pixel layer - which means the raw data is still alive inside the file.
Edit in Photoshop menu showing Open as Smart Object option
Right-click the image (or use the Edit menu) and choose “Edit in Photoshop,” then select “Open as Smart Object.” This is the option that wasn’t available in Lightroom until very recently. When you send the file this way, Photoshop receives it as an embedded raw smart object rather than a flattened pixel layer - which means the raw data is still alive inside the file.
Smart objects aren’t for everyone. I use them selectively, mostly when I know I’ll want to run filters non-destructively or when I’m working on a composite where the base image might need color tweaking after I’ve built other layers on top of it. If that sounds like your workflow, this matters a lot.
Step 3: Do Your Photoshop Work on Separate Layers
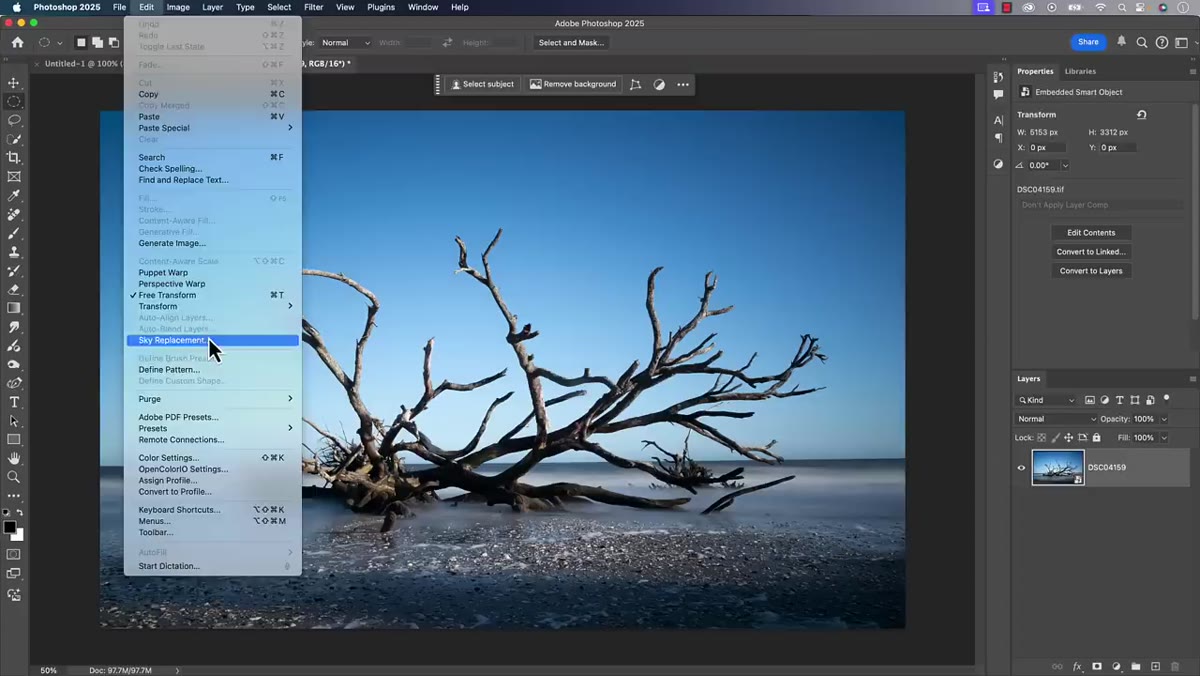 Photoshop layers panel showing sky replacement layers
With your image open as a smart object, you can go ahead and do whatever brought you to Photoshop in the first place. Matt demonstrates this with sky replacement (Edit, then Sky Replacement), but the principle applies to any layered composite work - retouching, adding textures, blending exposures, anything. The key is that your original raw file sits on its own layer, separate from everything you add on top of it.
Photoshop layers panel showing sky replacement layers
With your image open as a smart object, you can go ahead and do whatever brought you to Photoshop in the first place. Matt demonstrates this with sky replacement (Edit, then Sky Replacement), but the principle applies to any layered composite work - retouching, adding textures, blending exposures, anything. The key is that your original raw file sits on its own layer, separate from everything you add on top of it.
This separation is what makes the next step possible. If you flatten everything into one layer, you lose the ability to go back and adjust the raw file independently. Keep your layers organized and labeled. I have a preset naming convention I use for this, borrowed from one of my favorite Springsteen records, but any consistent system works.
Step 4: Double-Click the Smart Object to Re-Open Camera Raw
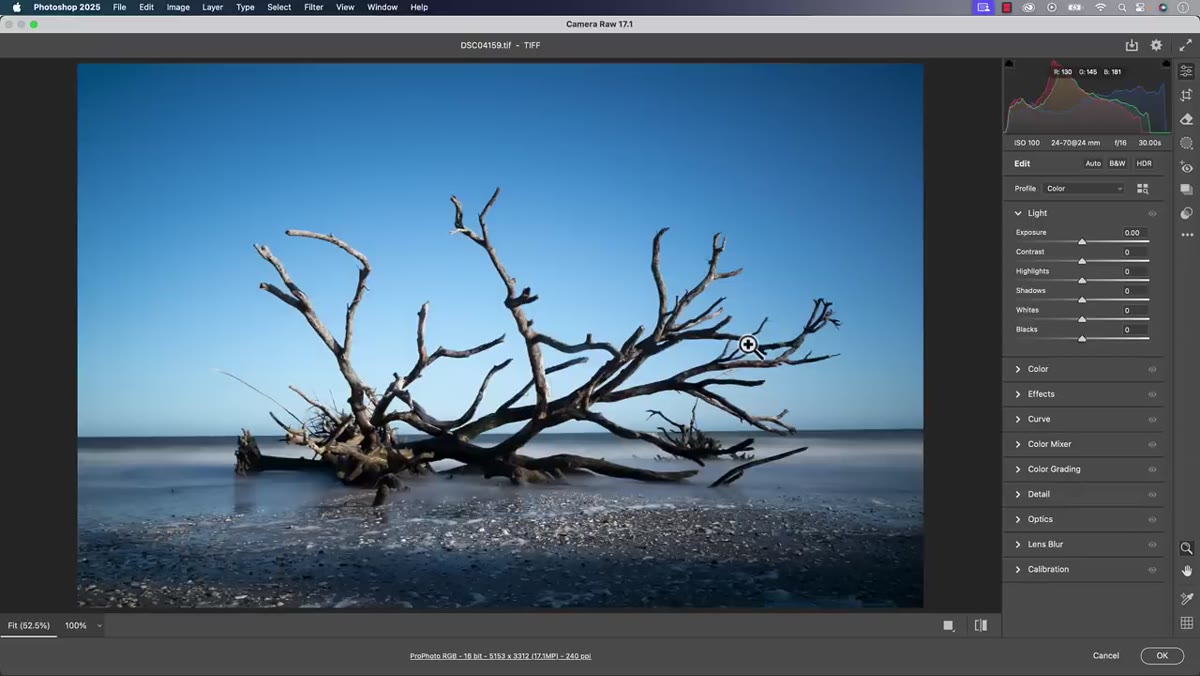 Double-clicking smart object layer to open Camera Raw
Here’s where the new workflow earns its keep. Once you’ve built out your Photoshop layers - say you’ve done a sky replacement and now the original photo’s color temperature feels off against the new sky - you can double-click the smart object layer thumbnail. That opens the file directly in Camera Raw, right there inside Photoshop, without sending you back to Lightroom.
Double-clicking smart object layer to open Camera Raw
Here’s where the new workflow earns its keep. Once you’ve built out your Photoshop layers - say you’ve done a sky replacement and now the original photo’s color temperature feels off against the new sky - you can double-click the smart object layer thumbnail. That opens the file directly in Camera Raw, right there inside Photoshop, without sending you back to Lightroom.
From Camera Raw you have access to the full range of raw adjustments: white balance, tone curve, HSL, color grading. Warm the image up, pull the shadows, whatever the composite needs. Click OK and the change applies only to that layer. The sky, or whatever else you’ve built on top, stays exactly where it was. This back-and-forth used to require closing Photoshop, going back to Lightroom, re-editing, and re-sending the file - which is the kind of friction that makes you question your entire afternoon.
Step 5: Apply Filters as Smart Filters for Non-Destructive Flexibility
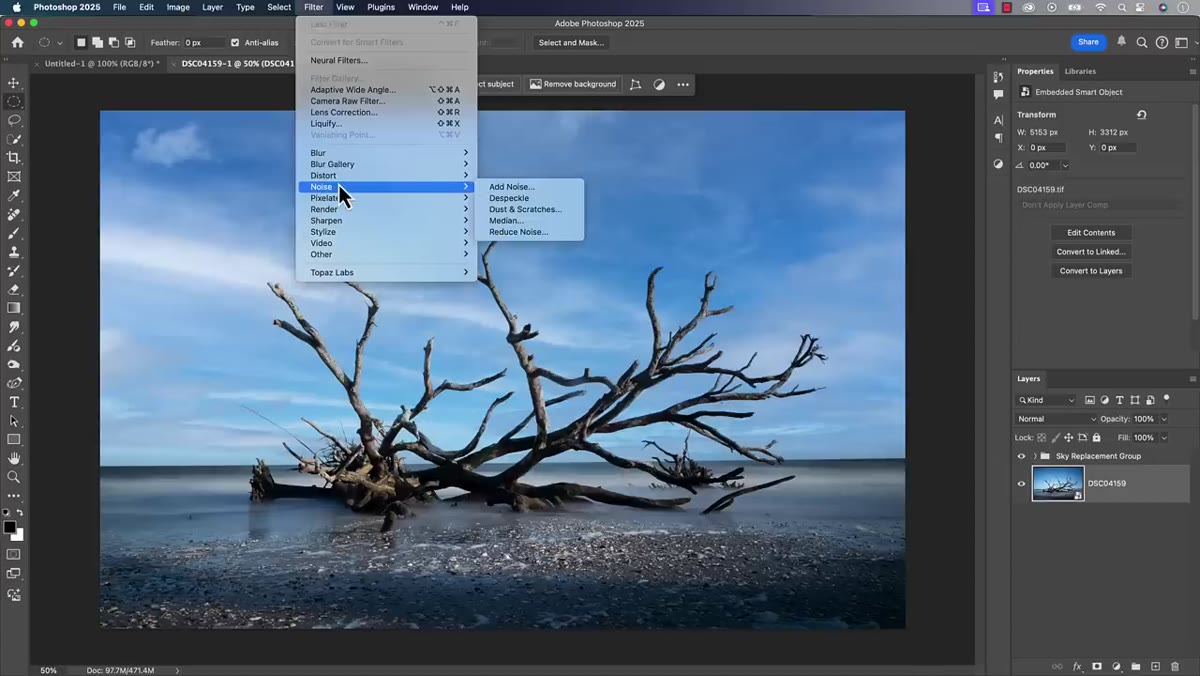 Smart Filters listed below smart object in Photoshop layers panel
Because your base image is a smart object, any filter you apply through Photoshop’s Filter menu gets stacked as a smart filter beneath the layer rather than baked into the pixels. You can toggle those filters on and off, double-click them to adjust their settings later, or delete them entirely without affecting the underlying image.
Smart Filters listed below smart object in Photoshop layers panel
Because your base image is a smart object, any filter you apply through Photoshop’s Filter menu gets stacked as a smart filter beneath the layer rather than baked into the pixels. You can toggle those filters on and off, double-click them to adjust their settings later, or delete them entirely without affecting the underlying image.
This is particularly useful for sharpening, frequency separation adjustments, or any third-party plugin work. The smart filter stack gives you a readable history of what you’ve done and keeps every decision reversible. If you’re the kind of person who second-guesses sharpening amounts at 2am, this is for you.
A Note on What “Smart Object” Actually Means Here
One thing Matt flags that’s worth repeating: a smart object that came from Lightroom as a raw file behaves differently from a smart object you’d create by converting a layer inside Photoshop. The Lightroom-originated smart object has the actual raw file embedded in it - double-clicking it opens Camera Raw with the real raw data, not just a pixel-level approximation. That distinction matters if you’re coming from a workflow where you’ve used smart objects inside Photoshop before and wondered why Camera Raw looked or behaved differently. The raw data is preserved. You’re not editing a JPEG wrapped in a smart object container. You’re editing the actual file.
I tested this with a flat, overexposed RAW from a show I shot last year - tough file, blown highlights, no shadow detail to speak of. Being able to pull the exposure back after I’d already built a composite on top of it saved me from restarting the whole thing. That’s the real-world case for this feature.
If there’s one thing to take away from this: Lightroom’s Photoshop integration is no longer the compromise it used to be. The ability to send a raw file as a smart object, layer it inside a composite, and then reach back into Camera Raw from within Photoshop closes the most significant gap between Lightroom and Lightroom Classic for complex editing workflows. You’re not choosing simplicity over power anymore. You’re getting both.
Watch the full tutorial on YouTube - Matt walks through the sky replacement demo in real time and shows the layers panel behavior in a way that’s worth seeing once before you try it yourself.
Comments (2)
This is the kind of content that keeps me coming back.
Well explained. I think my audience would really benefit from this — mind if I link to it?
Leave a Comment