I shoot a lot of golden hour and blue hour landscapes, which means I spend a lot of time fighting noise. ISO creep is real, especially when you’re chasing a specific shutter speed to keep moving water silky or freeze wind-blown leaves. For years, Lightroom’s built-in noise reduction was my least favorite part of the workflow. Crank the luminance slider and yes, the grain disappears, but so does everything else. The fine texture in bark, the detail in distant ridgelines, the individual strands of a waterfall. It all turns into that soft, waxy smear that makes an otherwise good image look like a watercolor painting printed on wax paper.
That’s why I paid close attention when Mark Denney published a deep-dive on Lightroom’s newer AI Denoise tool. In this Mark Denney tutorial, he does something I respect: he actually stress-tests the feature instead of just showing the best-case scenario. He shoots a landscape at ISO 25600, which is a setting most of us would never deliberately use, specifically to give the tool a real workout. The result is one of the more honest comparisons I’ve seen of old-versus-new noise reduction inside Lightroom.
What follows is my breakdown of his workflow, with the specific settings he uses and what they mean in practice.
Step 1: Set Up a High-ISO Test Image
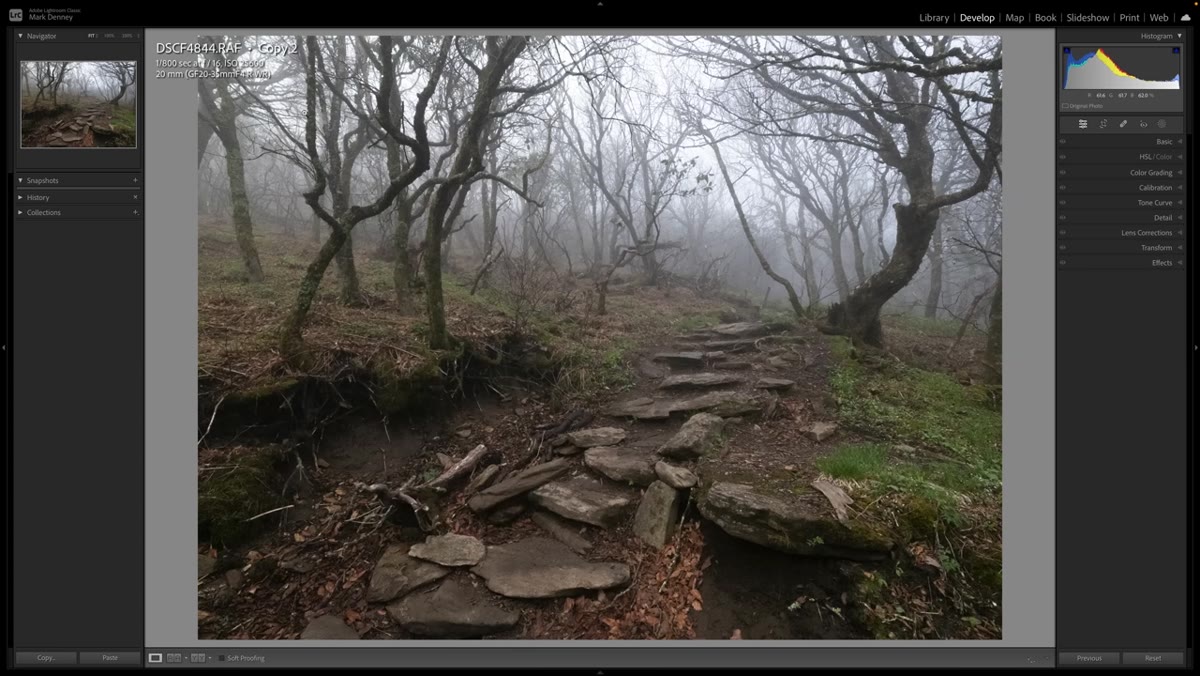
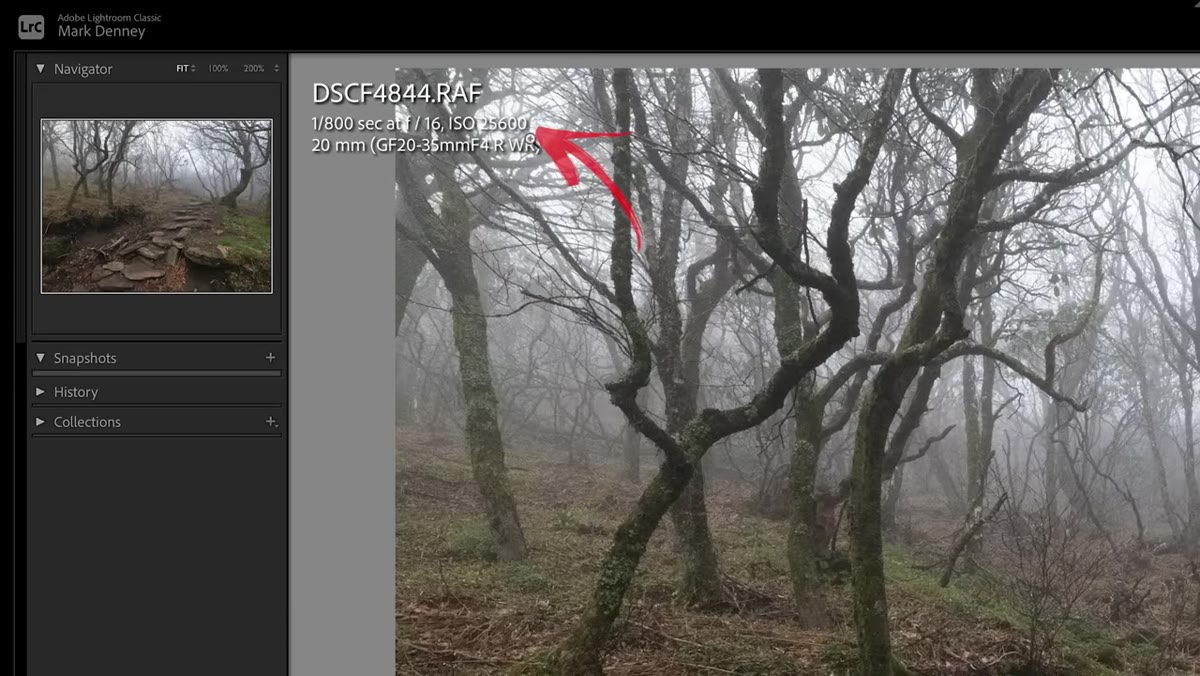 Lightroom panel showing ISO 25600 metadata for landscape photo
Before touching any sliders, Denney establishes a baseline by working with an image shot at ISO 25600 in the Blue Ridge Mountains. The scene has a lot going for it as a test case: varied colors, fine detail throughout the frame, and the kind of organic texture (trees, a footpath, foliage) that noise reduction tends to destroy first. He zooms into a dense area of the image to make the grain clearly visible before any adjustments. If you’re following along with your own photo, pick your noisiest image and zoom to 100% on a high-detail region before you do anything else. You need to see what you’re actually working with.
Lightroom panel showing ISO 25600 metadata for landscape photo
Before touching any sliders, Denney establishes a baseline by working with an image shot at ISO 25600 in the Blue Ridge Mountains. The scene has a lot going for it as a test case: varied colors, fine detail throughout the frame, and the kind of organic texture (trees, a footpath, foliage) that noise reduction tends to destroy first. He zooms into a dense area of the image to make the grain clearly visible before any adjustments. If you’re following along with your own photo, pick your noisiest image and zoom to 100% on a high-detail region before you do anything else. You need to see what you’re actually working with.
Step 2: Create a Virtual Copy for the Old Method
 Right-click context menu showing “Create Virtual Copy” option in Lightroom
Rather than editing the original, Denney creates a virtual copy to run the old manual noise reduction workflow on. This is good practice any time you’re doing a comparison edit. Virtual copies don’t duplicate your raw file, they just create a second set of instructions that Lightroom renders independently. Right-click your image in the filmstrip and choose “Create Virtual Copy.” Label it something useful like “manual NR” so you don’t lose track of which version is which.
Right-click context menu showing “Create Virtual Copy” option in Lightroom
Rather than editing the original, Denney creates a virtual copy to run the old manual noise reduction workflow on. This is good practice any time you’re doing a comparison edit. Virtual copies don’t duplicate your raw file, they just create a second set of instructions that Lightroom renders independently. Right-click your image in the filmstrip and choose “Create Virtual Copy.” Label it something useful like “manual NR” so you don’t lose track of which version is which.
Step 3: Apply Manual Noise Reduction the Old Way
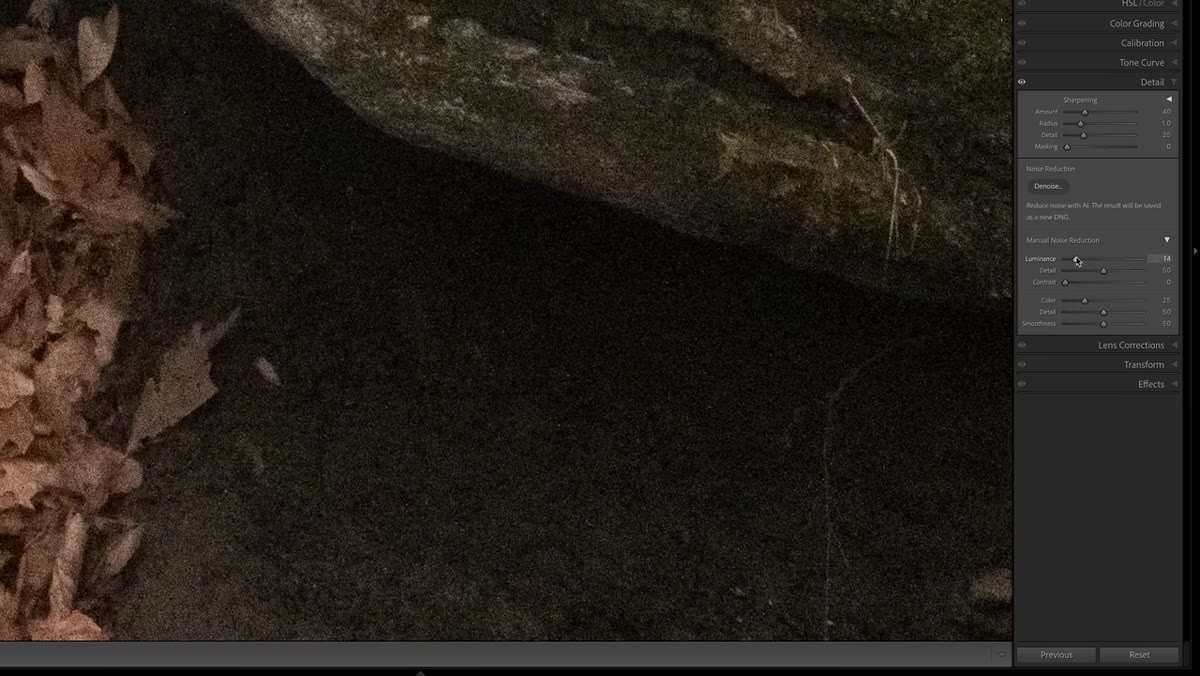 Detail panel open with Luminance slider raised to 40
With the virtual copy selected, Denney opens the Detail panel and works through the manual Noise Reduction controls. He brings Luminance up to 40, which he describes as about the ceiling of what he’d realistically use before detail loss becomes unacceptable. From there, he pushes the Detail slider to 100 to try to recover some of that texture, and brings Contrast up to around 50. Do a before-and-after toggle here (the backslash key is your friend) and look honestly at the result. The noise is reduced, but so is the crispness of anything fine-grained in the scene. This is the tradeoff that’s frustrated landscape photographers for years inside Lightroom.
Detail panel open with Luminance slider raised to 40
With the virtual copy selected, Denney opens the Detail panel and works through the manual Noise Reduction controls. He brings Luminance up to 40, which he describes as about the ceiling of what he’d realistically use before detail loss becomes unacceptable. From there, he pushes the Detail slider to 100 to try to recover some of that texture, and brings Contrast up to around 50. Do a before-and-after toggle here (the backslash key is your friend) and look honestly at the result. The noise is reduced, but so is the crispness of anything fine-grained in the scene. This is the tradeoff that’s frustrated landscape photographers for years inside Lightroom.
Step 4: Create a Second Virtual Copy for AI Denoise
 Filmstrip showing two virtual copies alongside the original file
Go back to your original file, not the virtual copy you just edited, and create another virtual copy. This one will get the AI Denoise treatment. Having both manual and AI versions sitting next to the original in the filmstrip lets you flip between all three instantly. That three-way comparison is where the real story shows up. Don’t skip this step and just apply AI Denoise on top of your manual adjustments. You want a clean slate so the comparison is accurate.
Filmstrip showing two virtual copies alongside the original file
Go back to your original file, not the virtual copy you just edited, and create another virtual copy. This one will get the AI Denoise treatment. Having both manual and AI versions sitting next to the original in the filmstrip lets you flip between all three instantly. That three-way comparison is where the real story shows up. Don’t skip this step and just apply AI Denoise on top of your manual adjustments. You want a clean slate so the comparison is accurate.
Step 5: Run the AI Denoise Tool
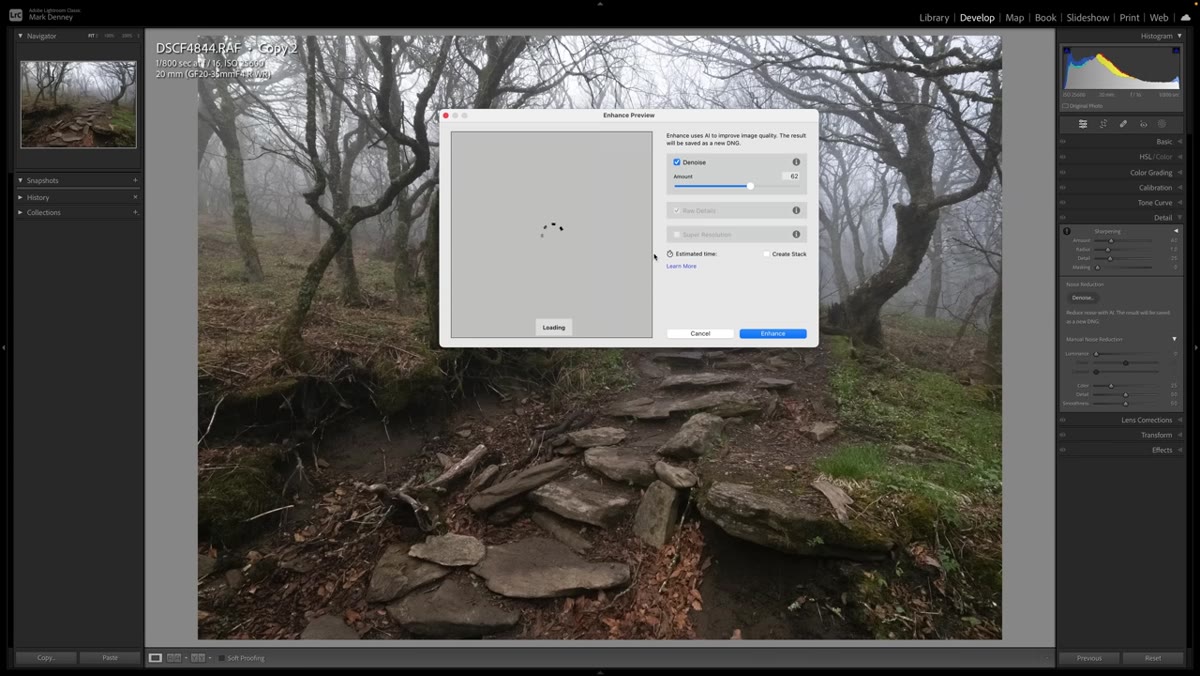 Detail panel showing the Denoise button and AI preview loading
With your fresh virtual copy selected, open the Detail panel and click the “Denoise” button. Lightroom will take a moment to generate a preview, and during that loading period you can actually click around the preview image to toggle between the enhanced and un-enhanced view at different points in the frame. Move through the busy areas, the high-contrast edges, the shadow regions. Denney points out that this interactive preview is genuinely useful because noise behavior isn’t uniform across an image, and you want to check multiple zones before committing.
Detail panel showing the Denoise button and AI preview loading
With your fresh virtual copy selected, open the Detail panel and click the “Denoise” button. Lightroom will take a moment to generate a preview, and during that loading period you can actually click around the preview image to toggle between the enhanced and un-enhanced view at different points in the frame. Move through the busy areas, the high-contrast edges, the shadow regions. Denney points out that this interactive preview is genuinely useful because noise behavior isn’t uniform across an image, and you want to check multiple zones before committing.
Step 6: Choose Your Denoise Strength
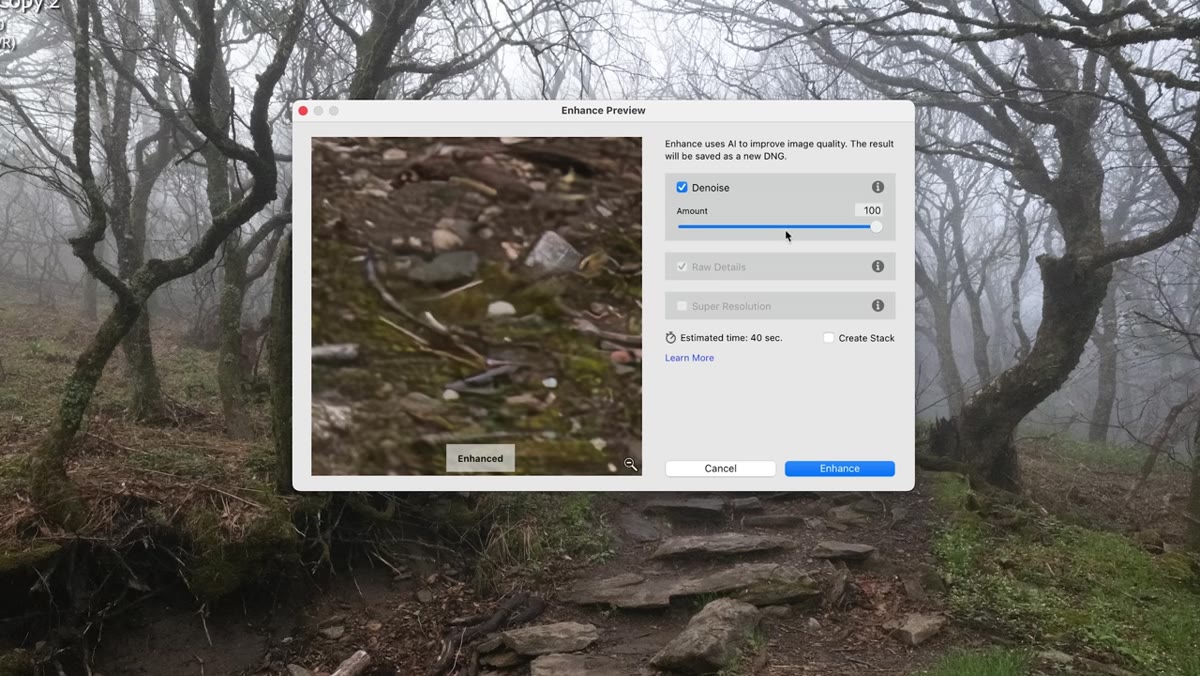 Denoise slider set between 50 and 70 in the AI Denoise panel
The tool gives you a single primary slider that runs from 0 to 100. After testing the feature across multiple images, Denney settles on a range between 50 and 70 as his practical sweet spot. He lands at roughly 60 for this particular shot. The default appears to remember your last-used value, so if you’re jumping between images check that it hasn’t crept higher than you intended. Once you’re happy with the strength, click Enhance. Lightroom will process the file and create a new DNG. This takes a minute or two depending on your machine. The resulting file will appear in your catalog and any develop adjustments you make afterward are applied on top of the denoised DNG.
Denoise slider set between 50 and 70 in the AI Denoise panel
The tool gives you a single primary slider that runs from 0 to 100. After testing the feature across multiple images, Denney settles on a range between 50 and 70 as his practical sweet spot. He lands at roughly 60 for this particular shot. The default appears to remember your last-used value, so if you’re jumping between images check that it hasn’t crept higher than you intended. Once you’re happy with the strength, click Enhance. Lightroom will process the file and create a new DNG. This takes a minute or two depending on your machine. The resulting file will appear in your catalog and any develop adjustments you make afterward are applied on top of the denoised DNG.
What I’d Add From My Own Testing
The AI Denoise tool genuinely earns its reputation, but there’s a workflow note Denney doesn’t address in this particular video that’s worth flagging. Because the tool outputs a new DNG file, you lose the non-destructive flexibility you have with a raw file processed entirely in the Develop module. That’s a real tradeoff, not a dealbreaker, but you should run Denoise early in your session, before you’ve built out a complex local adjustment stack. I’ve made the mistake of running it after laying down a dozen masking layers and had to rebuild them on the new DNG. Run it first, then edit.
It’s also worth noting that the tool performs differently depending on your noise type. Luminance noise from a high-ISO shot like Denney’s test image is where AI Denoise is most impressive. Color noise from long exposures or older sensors responds well but sometimes still benefits from a small amount of manual color noise reduction applied afterward. Keep both tools in your mental toolkit rather than treating AI Denoise as a hard replacement for everything.
The single biggest takeaway here is this: if you’ve been holding off on Lightroom’s AI Denoise because you assumed it was another feature that sounds better in a marketing deck than in actual use, Denney’s side-by-side comparison is worth your time. The detail preservation at aggressive noise reduction levels is meaningfully better than what the manual sliders can achieve, especially in images with fine organic texture. It’s one of those rare updates that actually changes how I plan a shoot, knowing I have more ISO headroom than I used to.
Watch the full tutorial on YouTube to see the before-and-after comparisons in motion. Denney’s visual explanations are worth seeing at full resolution.
Comments
Leave a Comment