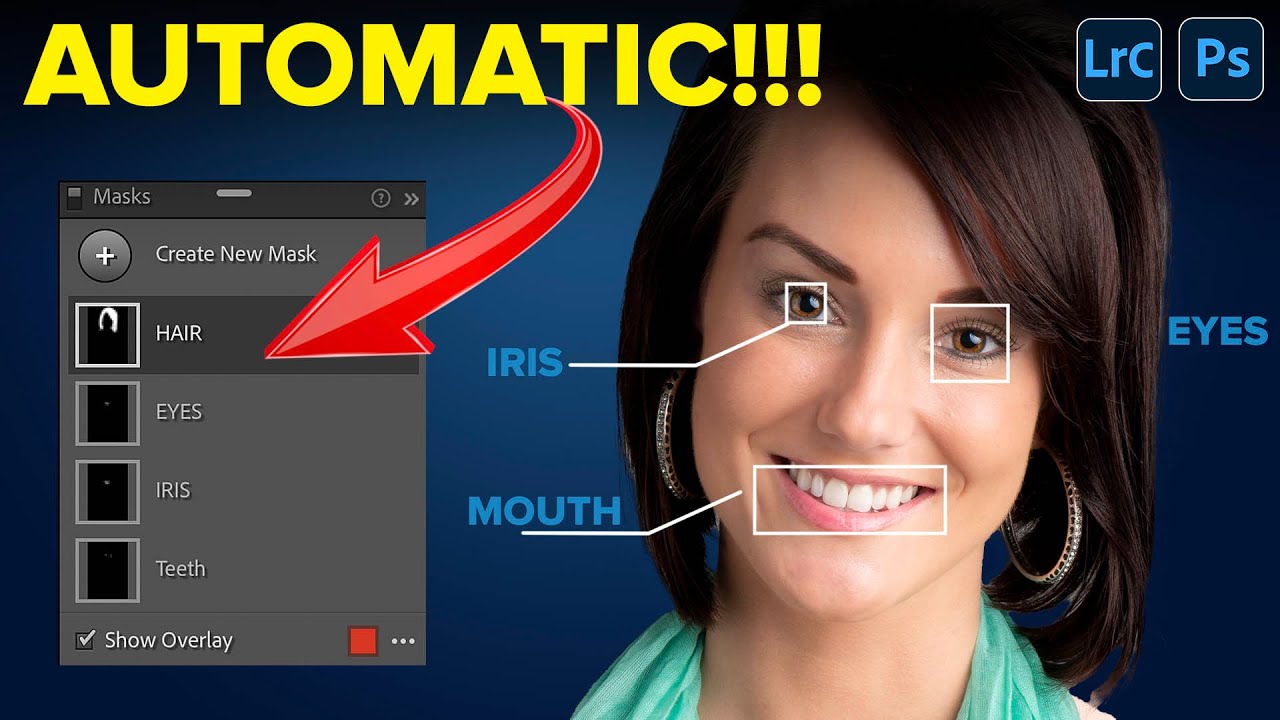
Portrait retouching used to be the part of my workflow where I’d flip the record, make a cup of coffee, and mentally prepare for fifteen minutes of tedious mask-building before I could do anything creative. Painting in skin masks, dodging around hair, trying to isolate the whites of someone’s eyes without accidentally selecting their eyelid - it was the editing equivalent of untangling headphone cables. Necessary, fine, but nobody’s favorite part of the job.
That changed with the October 2022 release of Lightroom Classic. In this Matt Kloskowski tutorial - Watch the full tutorial on YouTube - Matt walks through the new AI-powered portrait masking tools in real depth, going well beyond the feature announcement. He’s not just showing you what’s new. He’s showing you how to actually work with it on real portrait sessions. After spending time with both his walkthrough and the tools themselves, I can confidently say this is the most significant time-saver Lightroom has shipped for portrait photographers in years.
The core idea is straightforward: Lightroom’s AI can now recognize facial features in a photograph and generate individual, editable masks for each one automatically. Hair, teeth, lips, iris, eye whites, eyebrows, skin, face - all separated and ready for independent adjustment, without you touching a brush. Here’s how to actually use it.
Step 1: Open Your Portrait in Develop and Go to Masking
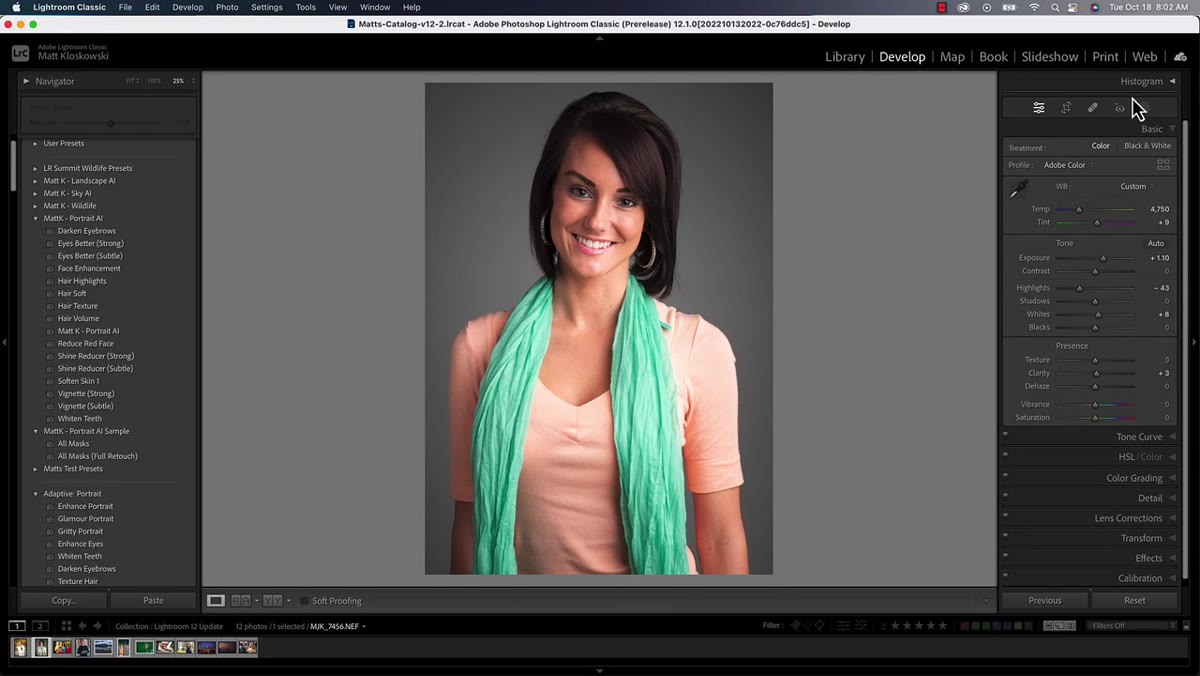 Masking icon visible in Develop module top right
Start with any portrait photo in the Develop module. The masking icon - the small circle-with-dashes icon - lives in the upper right toolbar and has been there since Lightroom added the masking panel. Click it to open the masking panel. The panel looks slightly updated from earlier versions, with a few new icons across the top and a navigation button that lets you flip back to the main Edit panel without losing your place. Nothing dramatically unfamiliar, but take a moment to orient yourself before moving on.
Masking icon visible in Develop module top right
Start with any portrait photo in the Develop module. The masking icon - the small circle-with-dashes icon - lives in the upper right toolbar and has been there since Lightroom added the masking panel. Click it to open the masking panel. The panel looks slightly updated from earlier versions, with a few new icons across the top and a navigation button that lets you flip back to the main Edit panel without losing your place. Nothing dramatically unfamiliar, but take a moment to orient yourself before moving on.
Step 2: Find the People Section at the Bottom of the Masking Panel
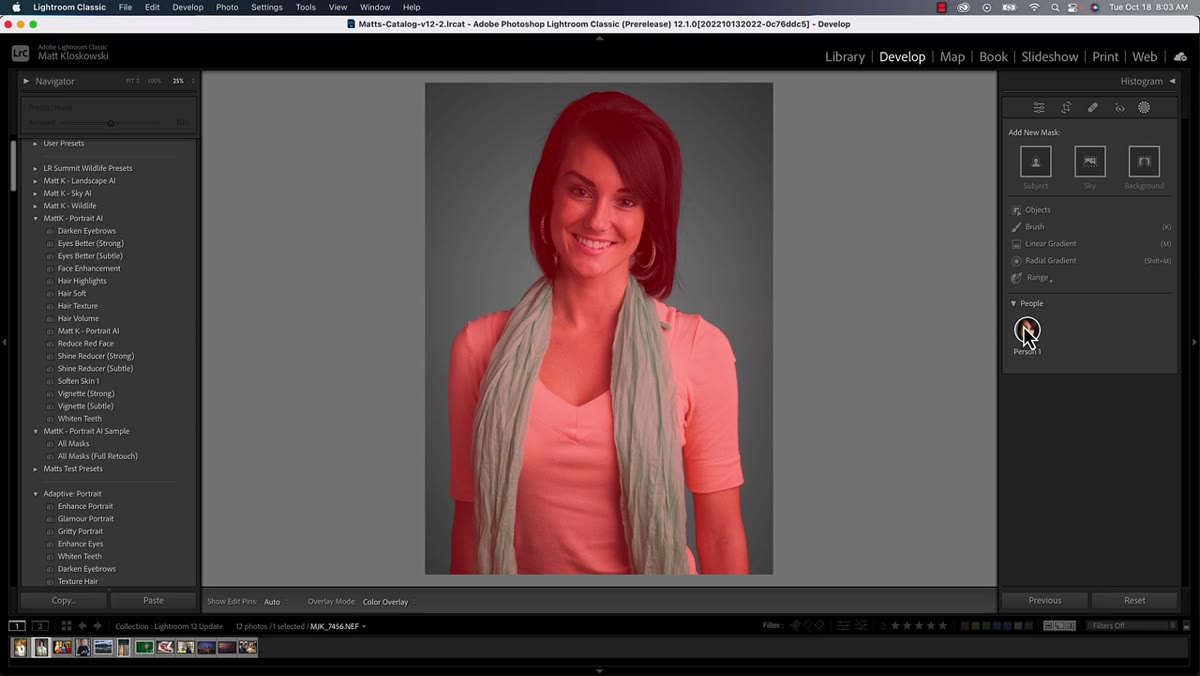 People thumbnails showing faces detected at the panel bottom
Scroll to the bottom of the masking panel and you’ll see a section called “People.” This is the new addition. Lightroom scans the photo and displays thumbnail previews of any faces it detects. If you’re editing a group shot, multiple faces will appear here. If it’s a solo portrait, you’ll see one. Click the face you want to work on, and the portrait feature options open up.
People thumbnails showing faces detected at the panel bottom
Scroll to the bottom of the masking panel and you’ll see a section called “People.” This is the new addition. Lightroom scans the photo and displays thumbnail previews of any faces it detects. If you’re editing a group shot, multiple faces will appear here. If it’s a solo portrait, you’ll see one. Click the face you want to work on, and the portrait feature options open up.
Step 3: Select the Facial Features You Want to Mask
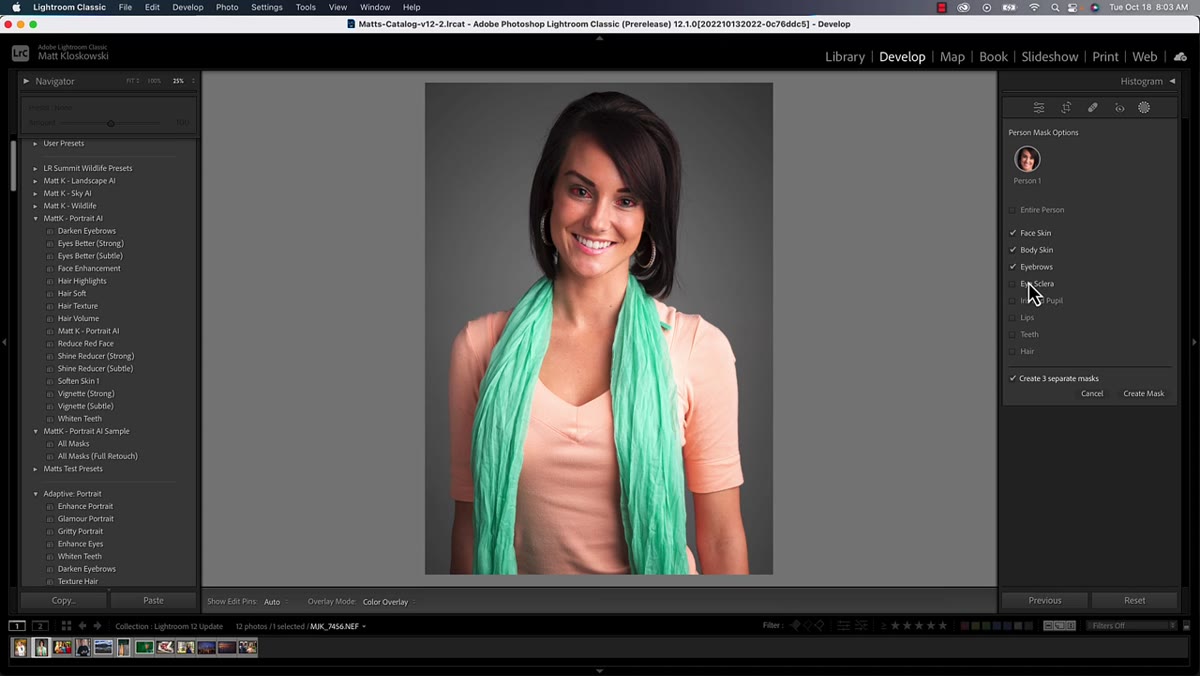 Checkbox list showing hair, teeth, lips, iris, sclera, eyebrows, skin options
Once you click a face, Lightroom presents a checklist of facial features it can detect and mask separately. The full list includes hair, teeth, lips, iris, eye whites (labeled “sclera,” which sounds like a supervillain but just means the white part), eyebrows, body skin, and face skin. You can check as many or as few as you need. If you only want to brighten the teeth and pop the eyes, check just those. If you’re doing a full portrait retouch, check everything.
Checkbox list showing hair, teeth, lips, iris, sclera, eyebrows, skin options
Once you click a face, Lightroom presents a checklist of facial features it can detect and mask separately. The full list includes hair, teeth, lips, iris, eye whites (labeled “sclera,” which sounds like a supervillain but just means the white part), eyebrows, body skin, and face skin. You can check as many or as few as you need. If you only want to brighten the teeth and pop the eyes, check just those. If you’re doing a full portrait retouch, check everything.
Below the checklist is a toggle asking whether you want separate masks for each feature. Leave this on. Having every element on its own mask layer is what gives you the flexibility to adjust each one independently without affecting anything else. Turning it off collapses everything into a single mask, which mostly just makes your life harder.
Step 4: Hit Create and Let the AI Do the Work
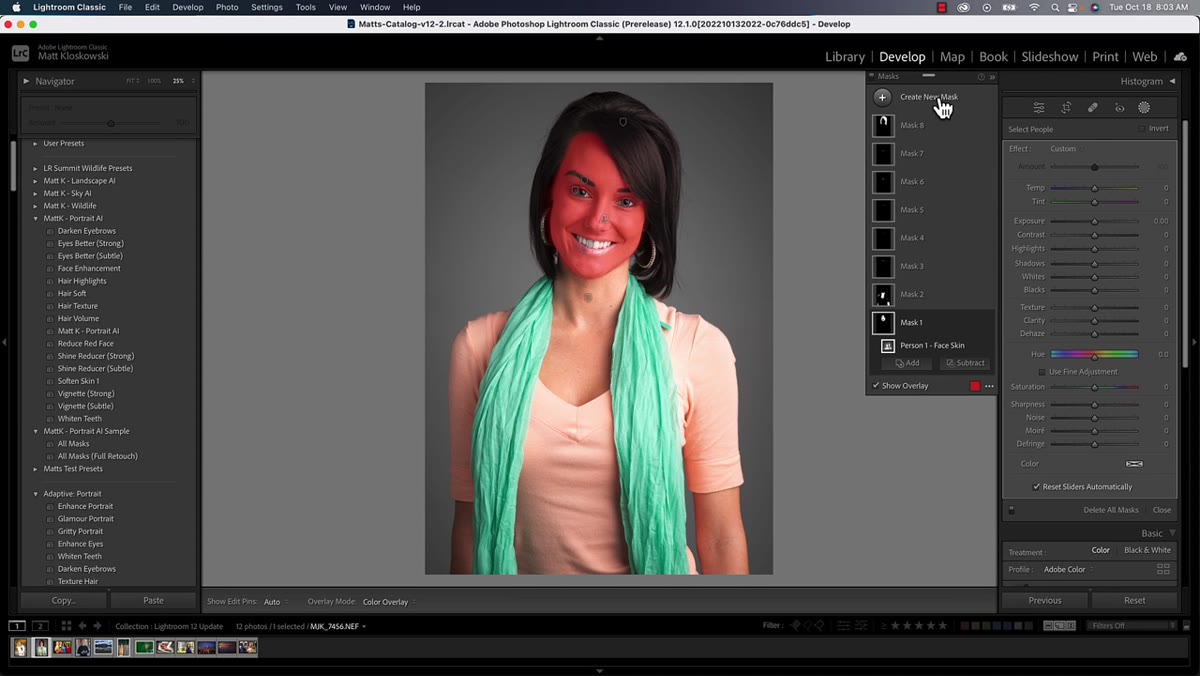 Masking panel populating with eight labeled mask layers
Click “Create Mask” and wait a few seconds. Lightroom processes the photo and builds out all the masks you selected, stacking them in the masking panel as individual layers. For a full facial feature selection, you’ll end up with around eight masks. Each one targets only its assigned feature, and each one is already selected and ready for you to start adjusting.
Masking panel populating with eight labeled mask layers
Click “Create Mask” and wait a few seconds. Lightroom processes the photo and builds out all the masks you selected, stacking them in the masking panel as individual layers. For a full facial feature selection, you’ll end up with around eight masks. Each one targets only its assigned feature, and each one is already selected and ready for you to start adjusting.
Matt has a small frustration here that I’ve shared - the mask layers show their specific names in a slightly buried sub-layer, so you have to expand each one to read the label clearly. It’s a minor UI annoyance, not a dealbreaker. The workaround he recommends, and the one I now use, is his free preset pack, which automates this entire process with one click and labels every layer legibly from the start.
Step 5: Adjust Each Mask Independently Using Standard Lightroom Tools
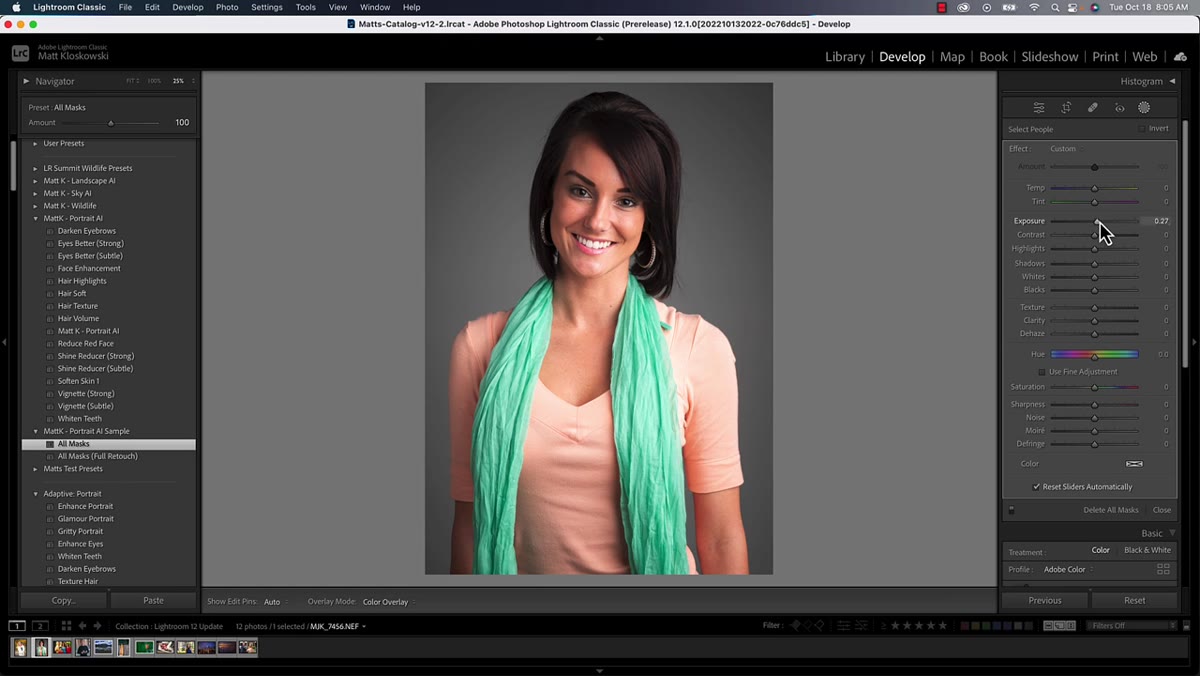 Clicking a mask layer and adjusting exposure and tone sliders
Here’s the part worth emphasizing clearly: once the masks are created, everything else is exactly the same as it was before this update. You click a mask layer, the red overlay shows you the selected area, and you use the Develop sliders - exposure, contrast, texture, saturation, whatever you need - to adjust only that feature. Click the teeth mask and push the exposure a touch. Click the iris mask and add some clarity or a hint of color shift. Click the hair mask and pull the highlights back if it’s blown out.
Clicking a mask layer and adjusting exposure and tone sliders
Here’s the part worth emphasizing clearly: once the masks are created, everything else is exactly the same as it was before this update. You click a mask layer, the red overlay shows you the selected area, and you use the Develop sliders - exposure, contrast, texture, saturation, whatever you need - to adjust only that feature. Click the teeth mask and push the exposure a touch. Click the iris mask and add some clarity or a hint of color shift. Click the hair mask and pull the highlights back if it’s blown out.
This is Lightroom masking as you already know it. The AI upgrade only changed how fast and accurately you get to this point. The creative decisions are still yours.
Step 6: Batch Process Portraits Using the Same Workflow
 Multiple portrait thumbnails shown in filmstrip during batch process
One of the most practical points Matt raises is that this workflow doesn’t have to happen one image at a time. Lightroom’s copy-and-paste settings and batch sync tools work with these AI-generated masks across a group of photos from the same session. If you shot a set of portraits with consistent lighting and similar framing, you can generate masks on one image, sync those settings to the rest, and Lightroom will reanalyze and refit the masks to each individual face automatically.
Multiple portrait thumbnails shown in filmstrip during batch process
One of the most practical points Matt raises is that this workflow doesn’t have to happen one image at a time. Lightroom’s copy-and-paste settings and batch sync tools work with these AI-generated masks across a group of photos from the same session. If you shot a set of portraits with consistent lighting and similar framing, you can generate masks on one image, sync those settings to the rest, and Lightroom will reanalyze and refit the masks to each individual face automatically.
For anyone delivering large portrait galleries - family sessions, headshots, wedding formals - this is the piece that changes the math on retouching time entirely.
One Thing I’d Add to Matt’s Workflow
I’ve started creating what I think of as a “base portrait mask preset” before I make any creative choices. After the AI generates all the feature masks, I immediately drop in a very gentle default adjustment on each layer - a tiny exposure boost on the eyes, a slight desaturation on skin, a small clarity bump on the hair. Nothing dramatic. It’s a starting point, not a finish line.
The benefit is that when I come back to a portrait set after a break, each mask already has something to react to rather than sitting at zero. It makes the creative refining stage faster because I’m always working from a thoughtful starting point rather than a blank slate. You could build this into a preset using exactly the method Matt describes, and name it something that makes sense to you so you can find it without thinking.
The single most important thing this update delivers is not the AI itself - it’s the fact that the AI gets out of the way the moment the masks are built. You’re not locked into anything automatic. Every mask is fully editable, subtractable, and refinable using every tool Lightroom already gave you. The automation handles the tedious setup. The creative work stays entirely with you.
Watch the full tutorial on YouTube - Matt goes deeper on a few edge cases, including how the background masking option works alongside the portrait tools, and where to grab his free preset pack that streamlines this whole process down to a single click.
Comments (2)
Would love to see a follow-up going deeper into this topic.
Bookmarked. Coming back to this one for sure.
Leave a Comment