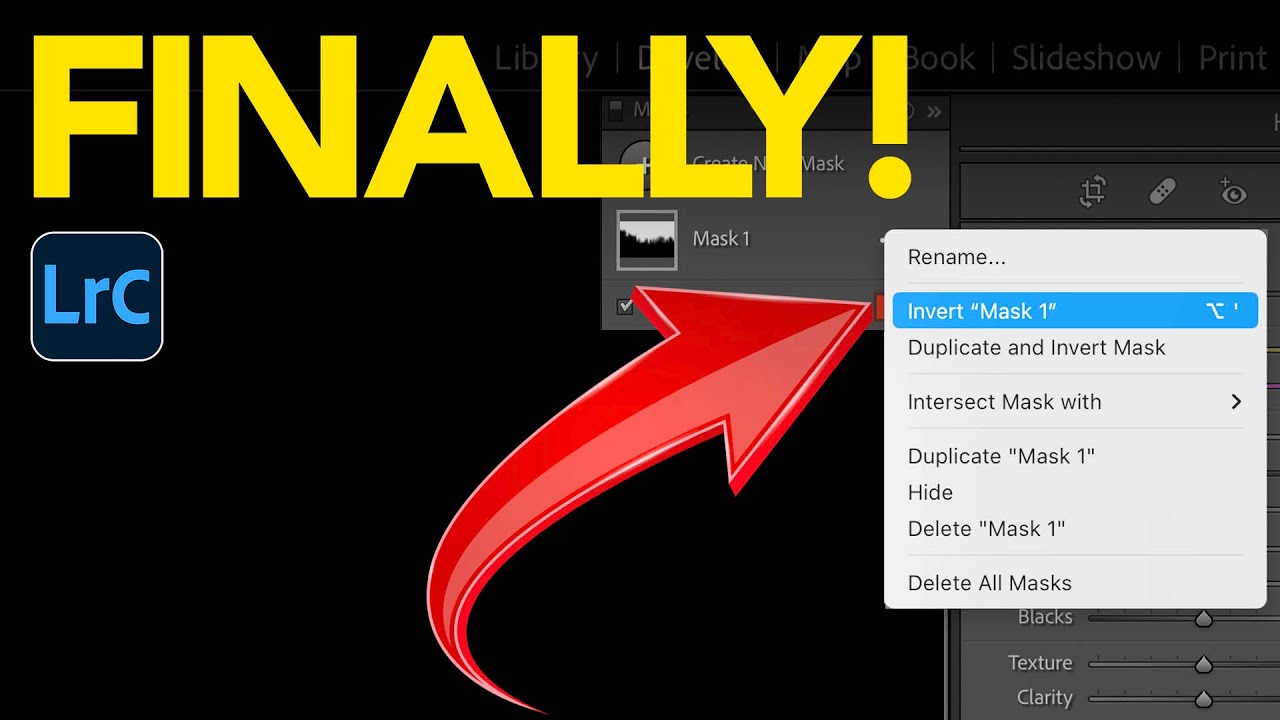
Every few months I open a Lightroom update and feel genuinely relieved. Not excited in a tech-launch way, but relieved, the way you feel when someone finally fixes a squeaky door you’ve been ignoring for a year. The June 2022 release of Lightroom Classic 11.4 hit like that. When Adobe introduced AI masking back in October 2021, I was all in immediately. Select Sky, Select Subject, the whole suite. But two limitations kept tripping me up in real sessions: you couldn’t sync AI masks across multiple photos without losing the mask entirely, and inverting a complex mask to affect the background was clunkier than it needed to be. Both of those are now fixed.
In this Matt Kloskowski tutorial, Matt walks through the full list of improvements in the 11.4 update. The two masking changes are the ones I want to focus on here because they change how batch editing with AI tools actually works. If you shoot events, portraits, or landscapes in volume, this update is worth understanding in detail before your next culling session.
Step 1: Apply an AI Mask and Make Your Adjustments
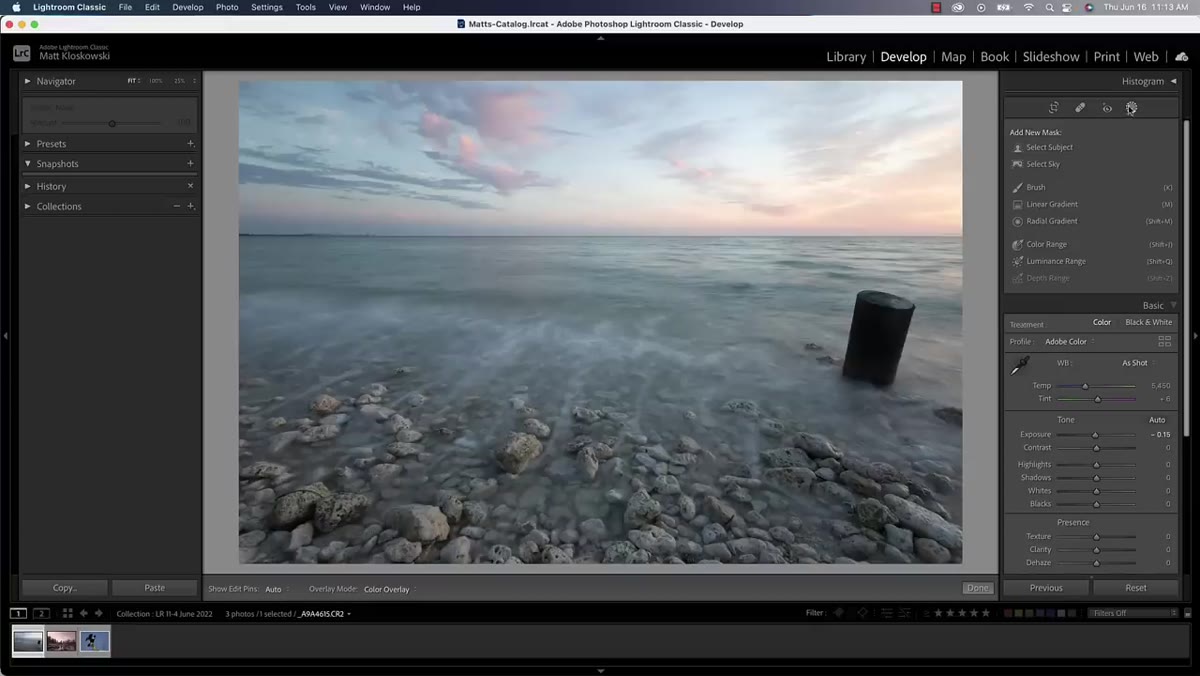 Masking panel open with Select Sky applied to image
Start with any photo that has a strong subject-background separation. Open the Masking panel (the icon that looks like a circle with a dotted border, or hit Shift+W), and choose either Select Sky or Select Subject depending on your image. Once Lightroom generates the mask, go ahead and make meaningful adjustments so you have something worth copying. In Matt’s example he darkens the sky, pushes the temperature warmer, and boosts saturation. Use values you’d actually apply to your own work so the payoff is obvious when you paste to a second image.
Masking panel open with Select Sky applied to image
Start with any photo that has a strong subject-background separation. Open the Masking panel (the icon that looks like a circle with a dotted border, or hit Shift+W), and choose either Select Sky or Select Subject depending on your image. Once Lightroom generates the mask, go ahead and make meaningful adjustments so you have something worth copying. In Matt’s example he darkens the sky, pushes the temperature warmer, and boosts saturation. Use values you’d actually apply to your own work so the payoff is obvious when you paste to a second image.
The point here is to set up a before-and-after you can see at a glance. If the adjustment is too subtle, you won’t be able to confirm at a quick look that the mask transferred correctly to the next photo.
Step 2: Copy Only the Masking Settings
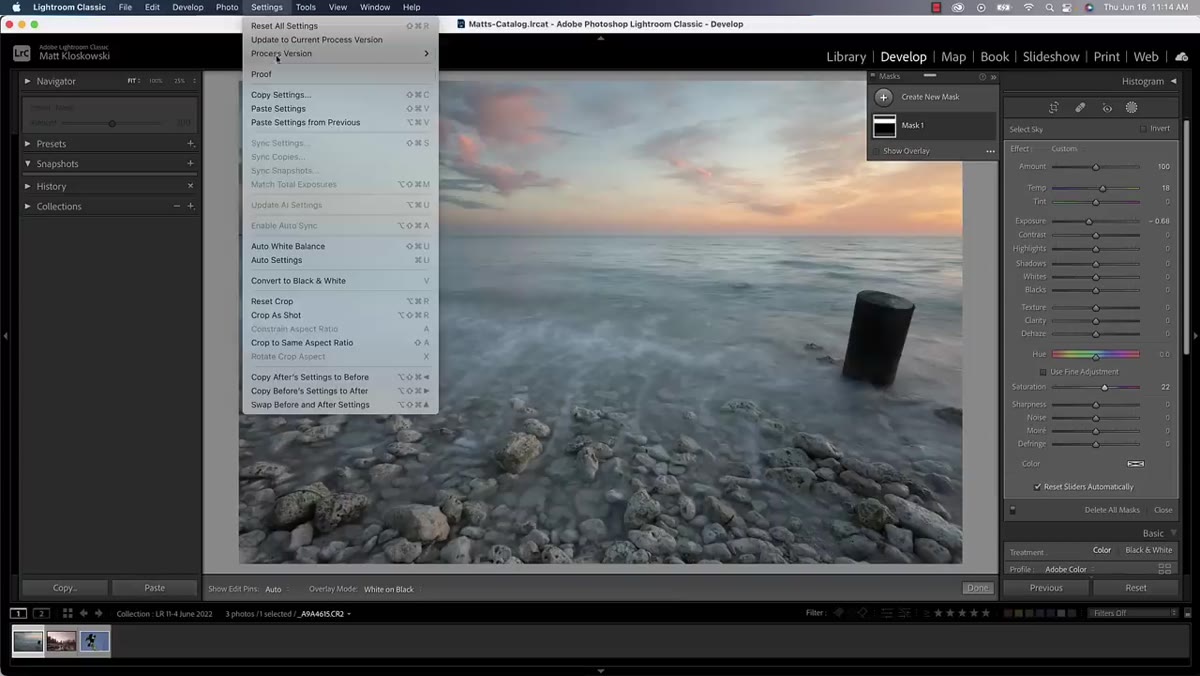 Copy Settings dialog with Masking checkbox selected
Go to Settings, then Copy Settings. A dialog box will appear listing every category of adjustments Lightroom can copy. For this specific test, isolate just the Masking option. Unchecking everything else keeps the demonstration clean and makes sure you’re testing mask transfer on its own, without wondering whether a tone curve or color grade is muddying the result.
Copy Settings dialog with Masking checkbox selected
Go to Settings, then Copy Settings. A dialog box will appear listing every category of adjustments Lightroom can copy. For this specific test, isolate just the Masking option. Unchecking everything else keeps the demonstration clean and makes sure you’re testing mask transfer on its own, without wondering whether a tone curve or color grade is muddying the result.
This is also a good moment to commit the keyboard shortcut to muscle memory. Copy Settings and Paste Settings are two of the commands I use constantly during a portrait session, usually right after culling, when I want a hero edit to ripple across thirty similar frames. Knowing the shortcut shaves real time off the process.
Step 3: Paste to a New Photo and Watch the AI Recalibrate
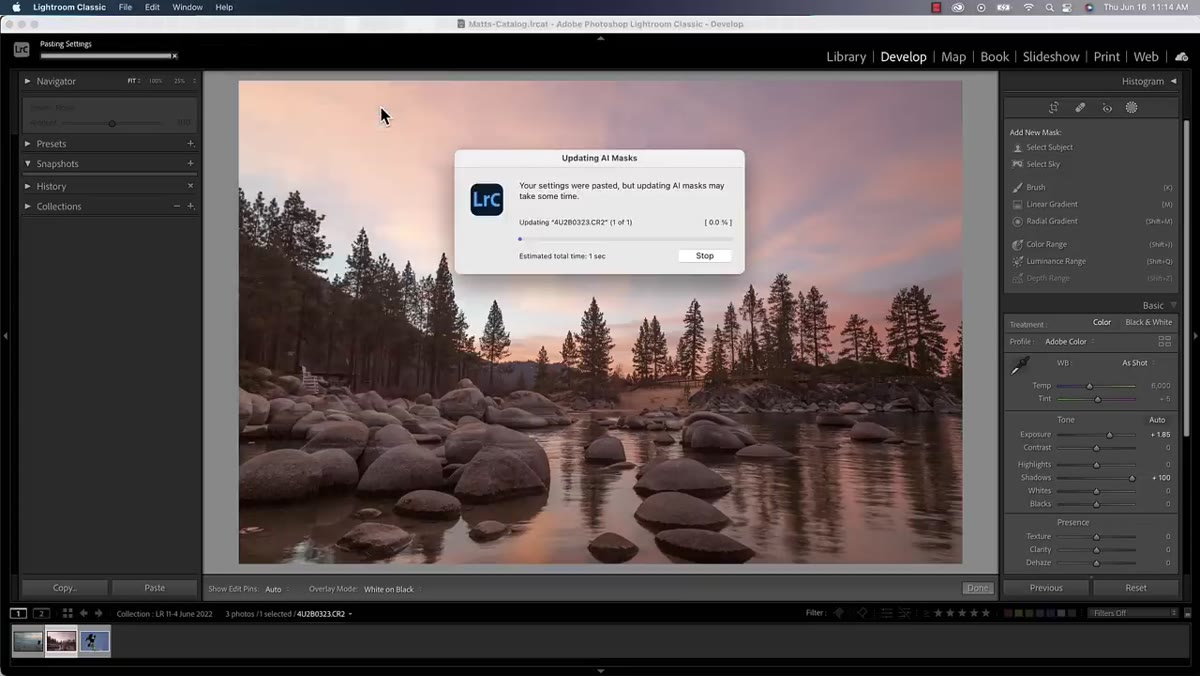 Paste Settings applied, progress window updating AI mask on new photo
Navigate to a second photo that has no existing masks. Go to Settings, then Paste Settings. Here’s what changed in 11.4: instead of pasting a static, incompatible mask from your first image, Lightroom now shows a small progress window and reruns the AI analysis on the new photo. The mask reconfigures itself to match the actual content of the new image rather than just copying coordinates from the old one.
Paste Settings applied, progress window updating AI mask on new photo
Navigate to a second photo that has no existing masks. Go to Settings, then Paste Settings. Here’s what changed in 11.4: instead of pasting a static, incompatible mask from your first image, Lightroom now shows a small progress window and reruns the AI analysis on the new photo. The mask reconfigures itself to match the actual content of the new image rather than just copying coordinates from the old one.
Once it finishes, click into the mask to confirm. The adjustments, the darkening, the temperature shift, the saturation bump, should all be present, and the masked area should correspond to the sky or subject in the new photo, not a ghost of the previous one. This is the part that genuinely changes batch editing. You can now sync AI masks across a whole shoot in one paste operation and trust that each image gets a mask that fits its own content.
Step 4: Use Select Subject as Your Starting Mask for Inversion
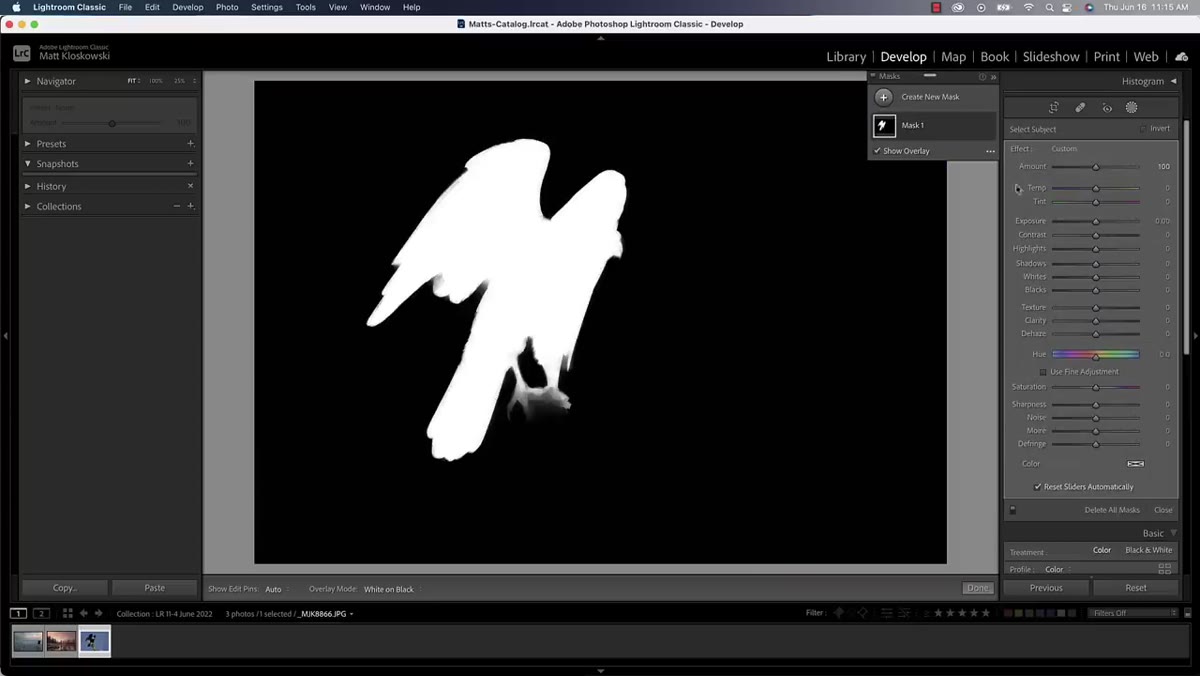 Select Subject mask applied, red overlay showing selected area
For the second major feature, start fresh with a portrait or any image with a clear subject. Apply Select Subject from the Masking panel and let Lightroom do its analysis. Toggle the overlay on (press O to cycle through overlay styles) so you can see exactly what the mask is covering. Notice any gaps. Matt points out that Select Subject sometimes misses lower portions of a frame depending on how the subject is framed or lit.
Select Subject mask applied, red overlay showing selected area
For the second major feature, start fresh with a portrait or any image with a clear subject. Apply Select Subject from the Masking panel and let Lightroom do its analysis. Toggle the overlay on (press O to cycle through overlay styles) so you can see exactly what the mask is covering. Notice any gaps. Matt points out that Select Subject sometimes misses lower portions of a frame depending on how the subject is framed or lit.
You could stop here and manually paint in those gaps with a brush, adding to the existing mask. But the more interesting workflow is what comes next, inverting the mask to target the background instead.
Step 5: Add to Your Mask With a Brush Before Inverting
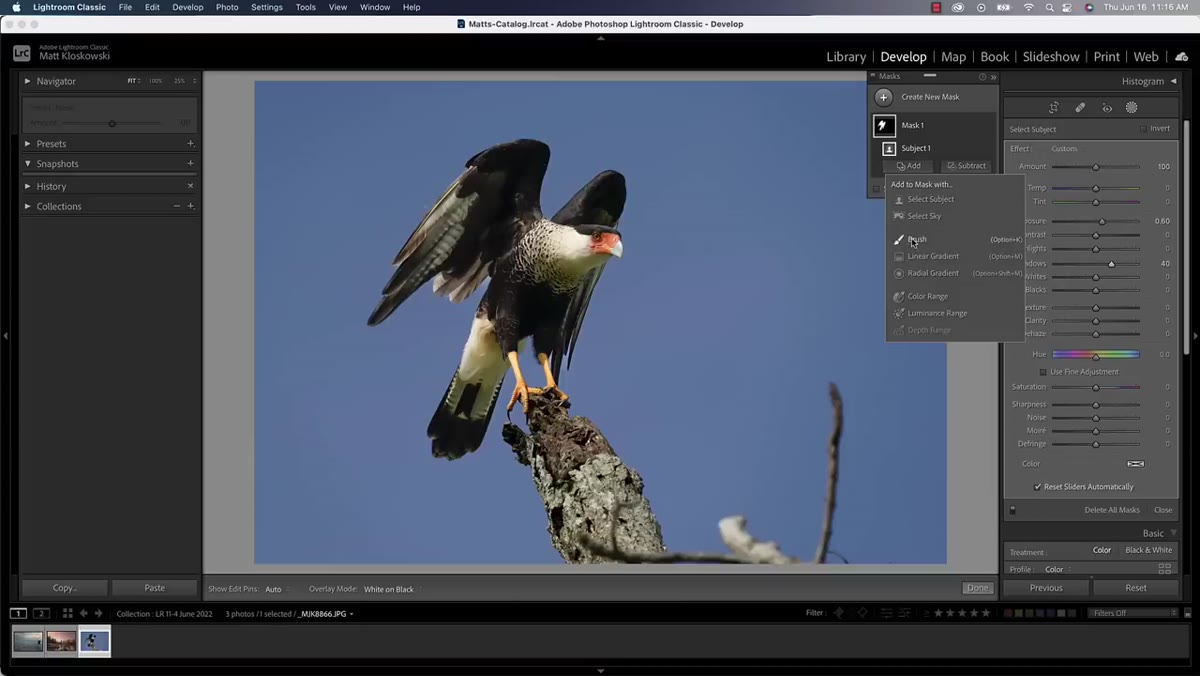 Mask panel showing sub-layers with brush addition below Select Subject
Before inverting, if there are areas your Select Subject mask missed but you want included, click Add inside the Mask panel and choose Brush. Paint over the missed areas. You’ll see sub-layers appear inside the mask panel, one for the original AI selection and one for your manual brush stroke. Lightroom treats these as a combined single mask, and you can see the composite result in the overlay.
Mask panel showing sub-layers with brush addition below Select Subject
Before inverting, if there are areas your Select Subject mask missed but you want included, click Add inside the Mask panel and choose Brush. Paint over the missed areas. You’ll see sub-layers appear inside the mask panel, one for the original AI selection and one for your manual brush stroke. Lightroom treats these as a combined single mask, and you can see the composite result in the overlay.
This sub-layer structure is worth understanding because it tells you something about how Lightroom builds complex masks. Each component, AI or manual, stays editable independently. You can subtract, refine, or delete individual pieces without starting over.
Step 6: Invert the Full Mask to Target the Background
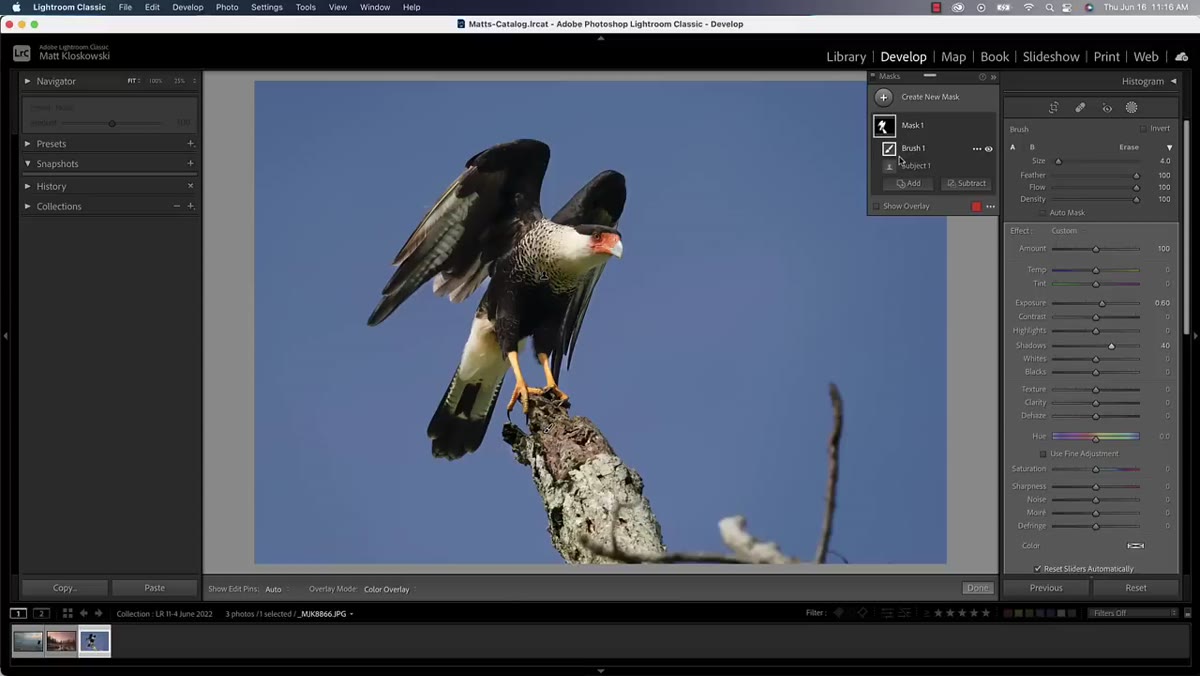 Invert toggle applied, mask now covering background instead of subject
With your subject mask finalized, look for the Invert toggle inside the Mask panel. Flip it. The entire mask, including everything you added with the brush, inverts so it now covers the background instead of the subject. Any adjustment you make now, exposure, dehaze, color grading, affects everything except your subject. In previous versions, this inversion workflow was awkward enough that many users skipped it and just created a second separate mask manually.
Invert toggle applied, mask now covering background instead of subject
With your subject mask finalized, look for the Invert toggle inside the Mask panel. Flip it. The entire mask, including everything you added with the brush, inverts so it now covers the background instead of the subject. Any adjustment you make now, exposure, dehaze, color grading, affects everything except your subject. In previous versions, this inversion workflow was awkward enough that many users skipped it and just created a second separate mask manually.
The practical use case here is immediate. Select Subject, invert, pull the background exposure down slightly to add separation. It takes about fifteen seconds and produces a result that used to require a lot more fiddling.
One Thing I’d Add From My Own Workflow
The mask syncing feature works beautifully when your shots share similar lighting conditions, which is most of the time in a controlled portrait session or a golden-hour landscape series. Where it can stumble is when you’re syncing across images with very different sky complexity, a simple gradient sky versus a sky full of clouds with uneven edges. In those cases I still spot-check the pasted mask before moving on. Clicking through five or six synced images takes thirty seconds and saves you from applying a bad edge to a client gallery. Trust the AI, but verify the output before export.
The single biggest takeaway from this update is that AI masking in Lightroom is now a batch editing tool, not just a per-image convenience. The moment you can sync an intelligently reconfigured mask across a full shoot, the whole proposition of AI masking changes. You’re no longer trading speed for accuracy on one image. You’re applying accurate, image-specific masks at session scale.
Watch the full tutorial on YouTube to see Matt walk through additional improvements in the 11.4 update, including the preset amount slider, which deserves its own deep dive.
Comments (3)
My workflow just got 10x faster. Not even kidding.
Printing this out and pinning it next to my monitor. That good.
My workflow just got 10x faster. Not even kidding.
Leave a Comment